morning make

April Morning Make 2022

Stack of papers coloured blue with cyanotype

April was an exploration of light, more than anything. Indeed, I’ve never paid this much attention to light, shadow, and sunshine before. It was an excellent practice in paying attention, in noticing.

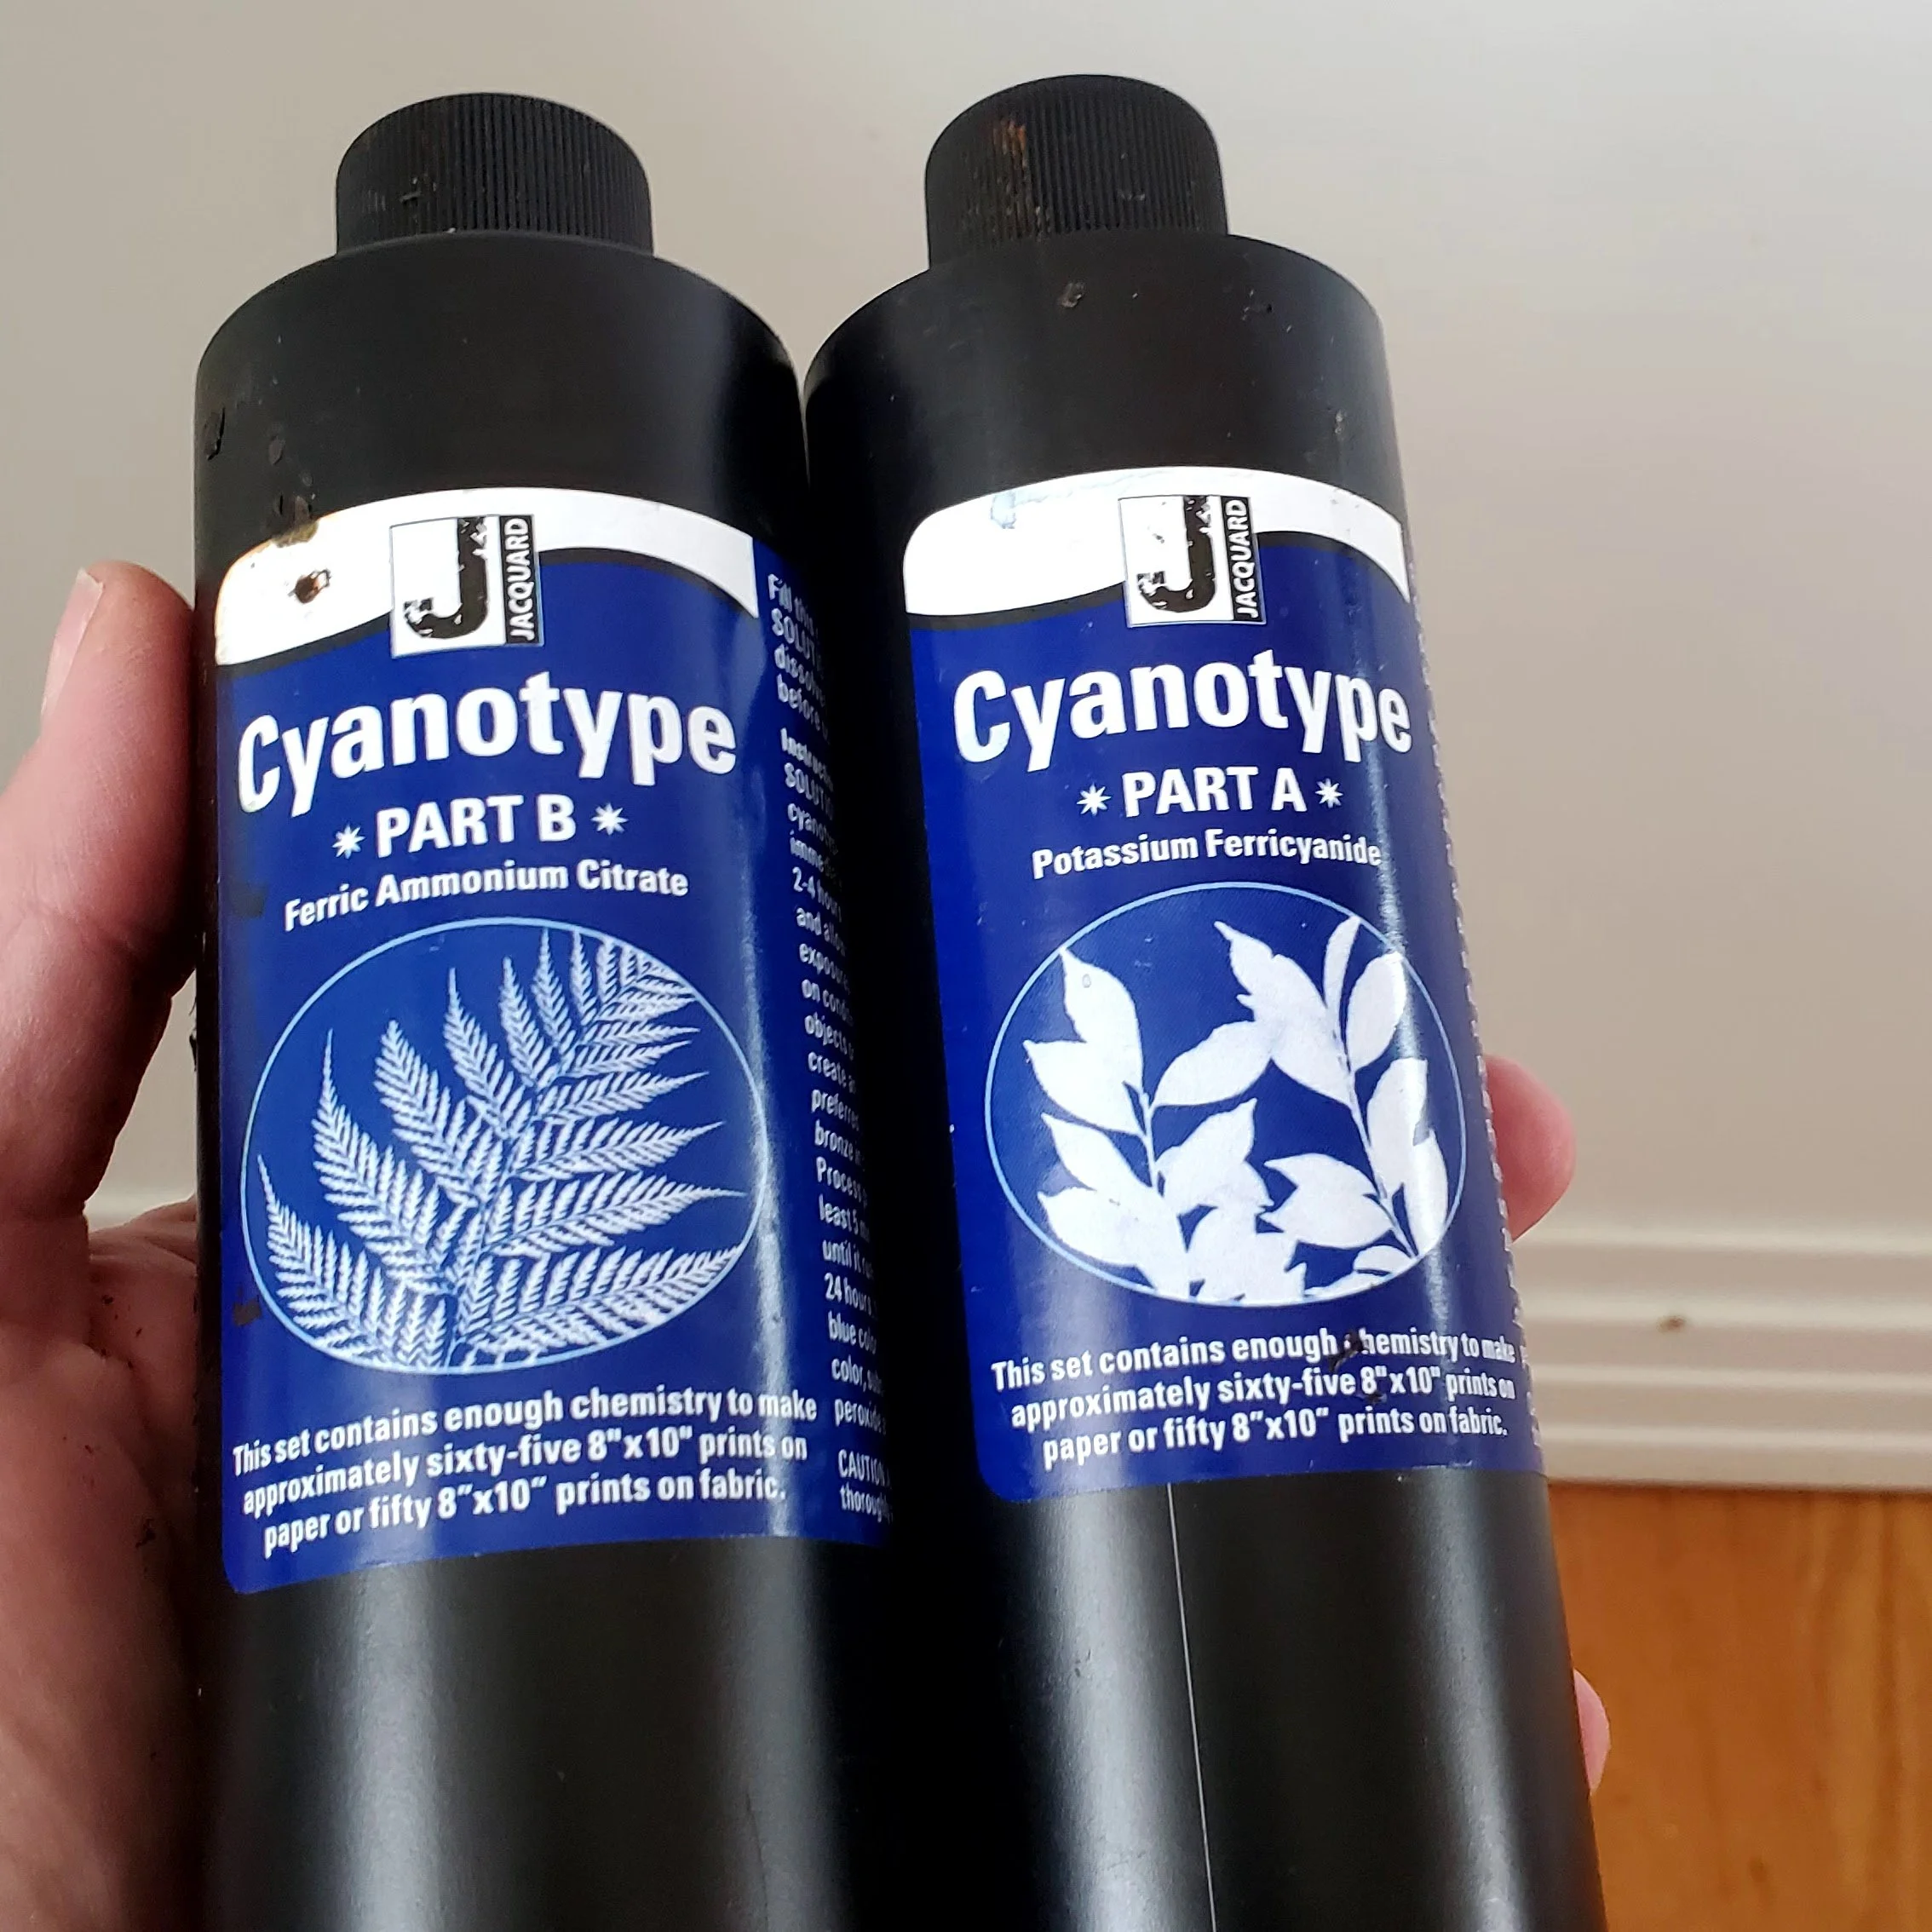
Cyanotype is a form of light exposure, like photo developing. You use chemicals on paper, fabric, or anything that can be coated (I saw someone do rocks and I want to try that!) It requires the interaction of the two chemicals: potassium ferricyanide and ferric ammonium citrate. You only really need to know that you need equal parts of each and to mix them together right before using. I picked up the set from my local art supply store.

Bottles of chemicals for making cyanotype prints

For the first half of the month I mixed the chemicals at night, painted the paper, and let them dry in a dark bathroom. Light exposure starts the process of creating the print, hence the windowless bathroom. For the second half of the month I played with wet exposure, meaning you paint the paper with the just mixed chemicals and go straight to the creation of the print. In the end, I couldn’t really tell the difference from the results.

To create the print you place an object on the treated paper and let light do its thing. Where the object is placed and in its shadow the outline remains while the rest of the paper gets exposed. Essentially, you are creating a negative image.

The beginnings of a cyanotype print with fabric trimmings and a mesh onion bag

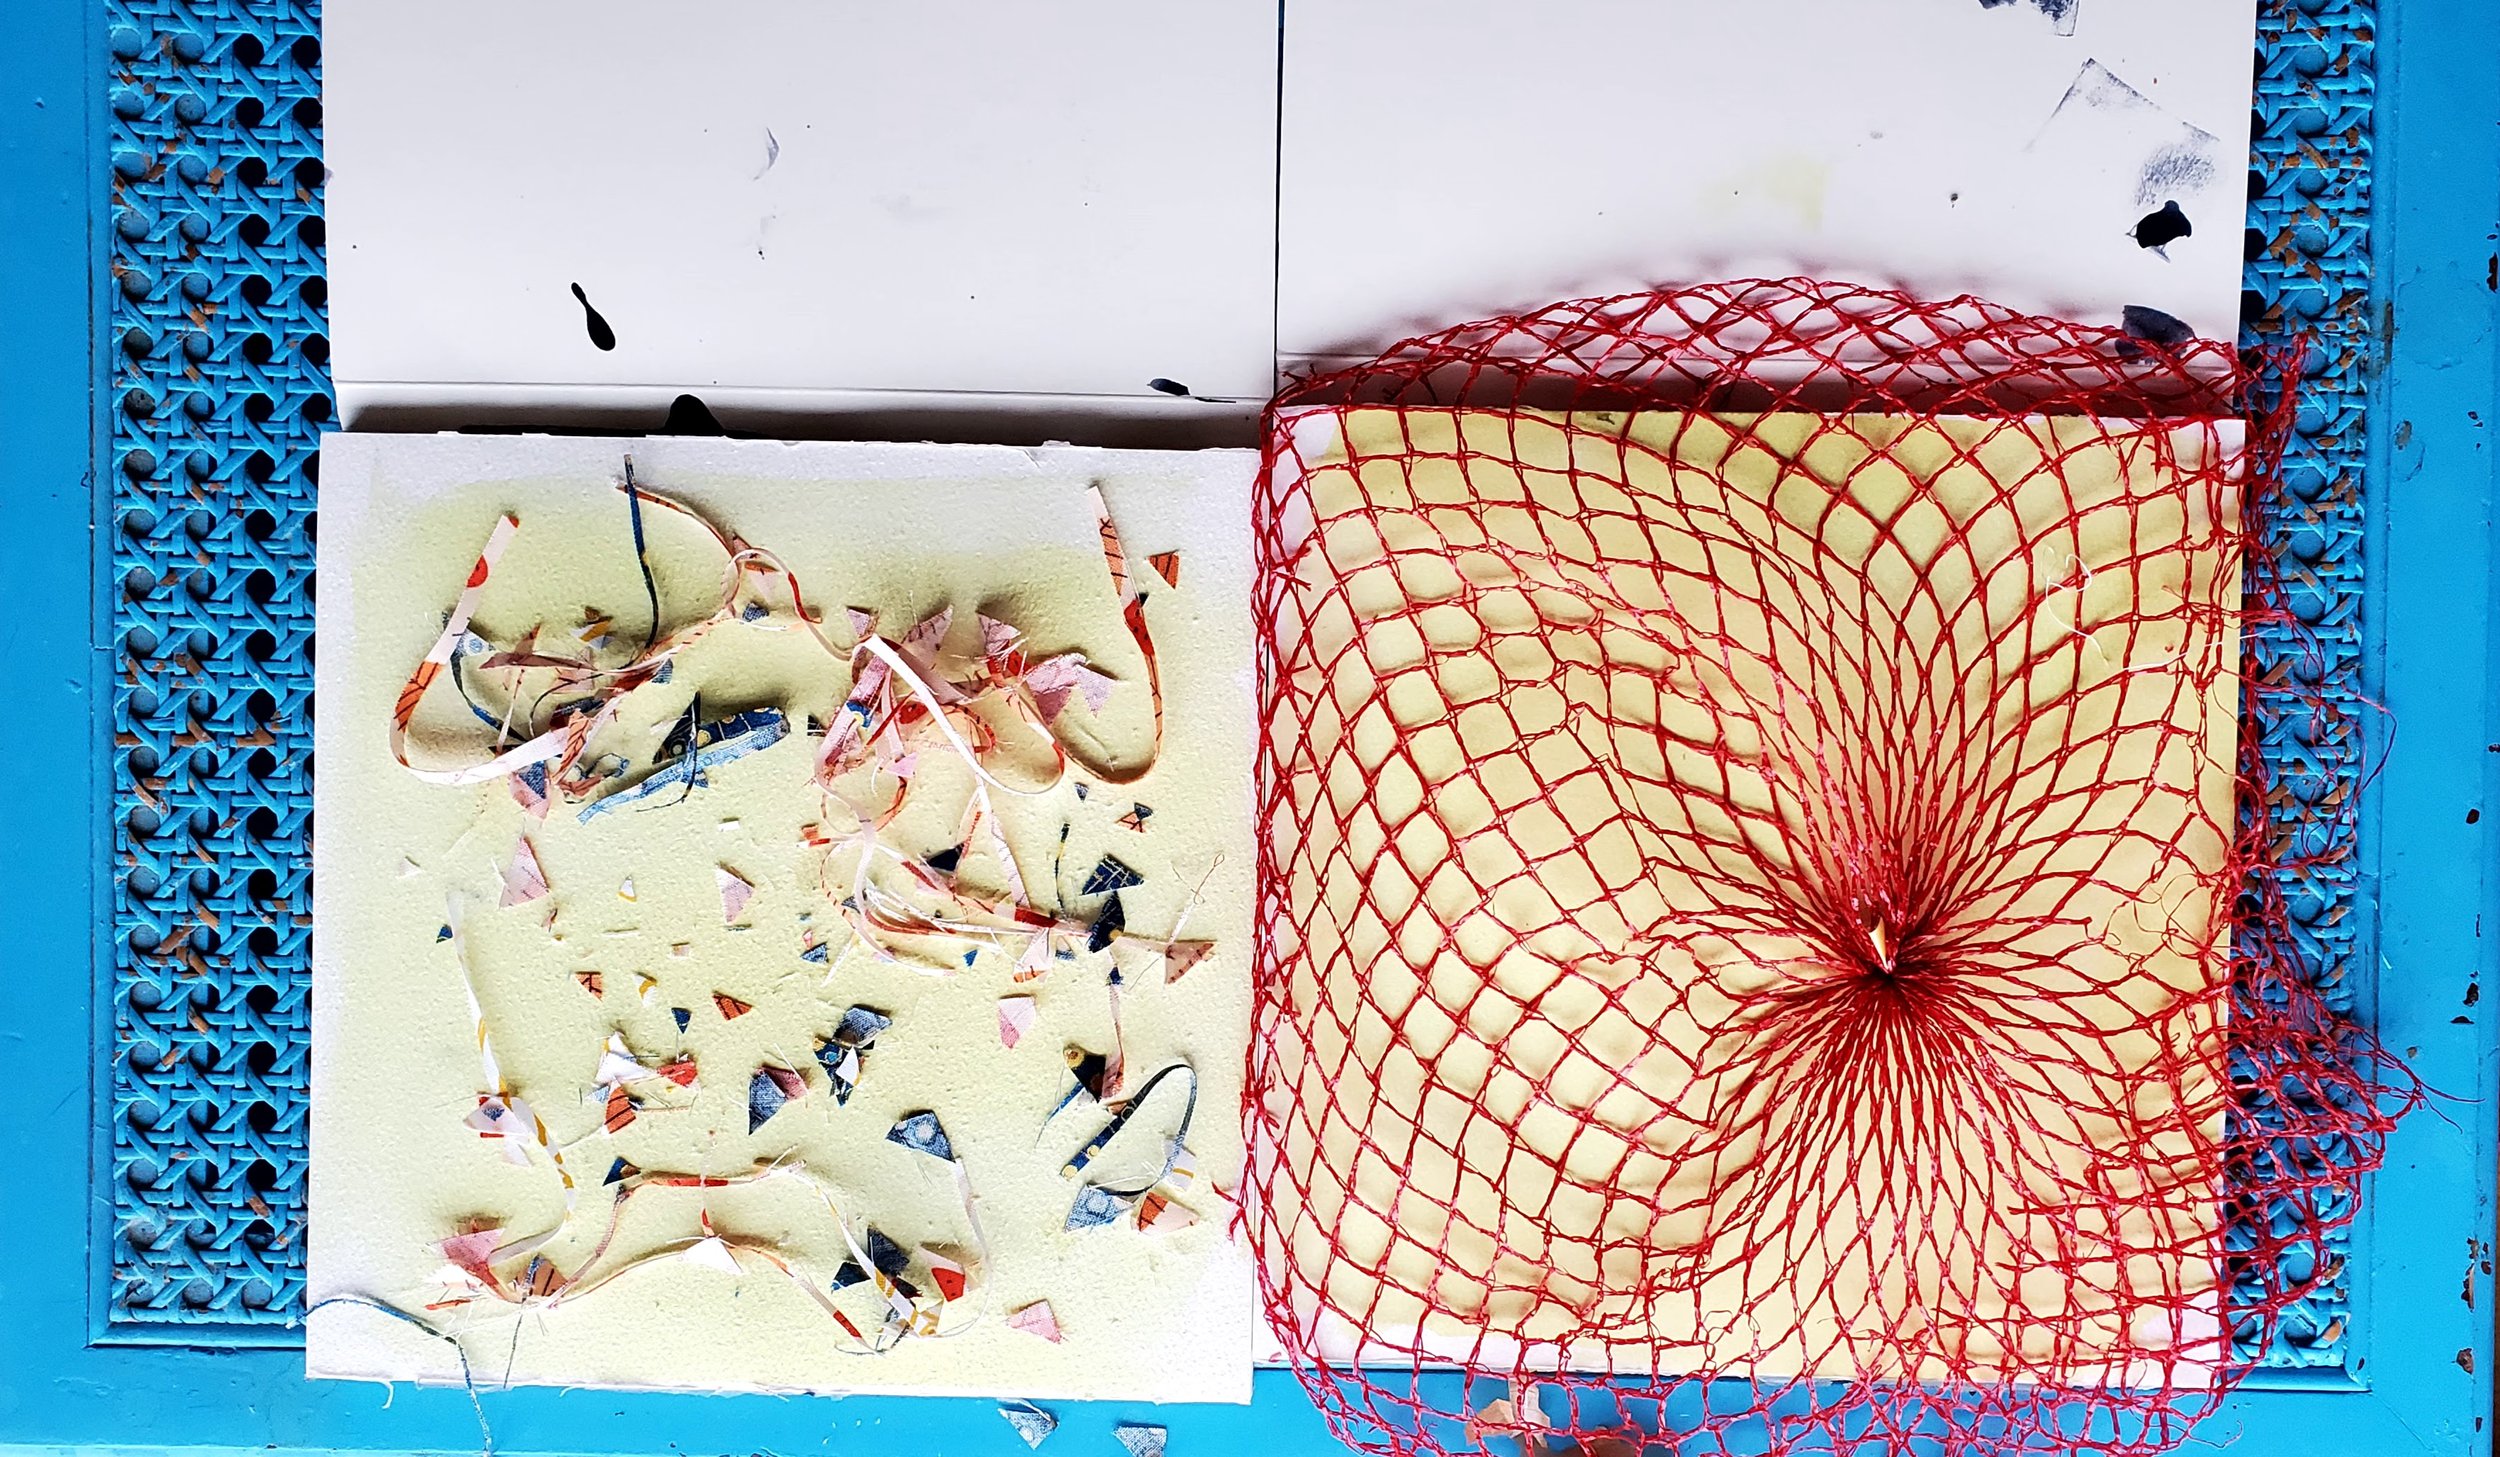
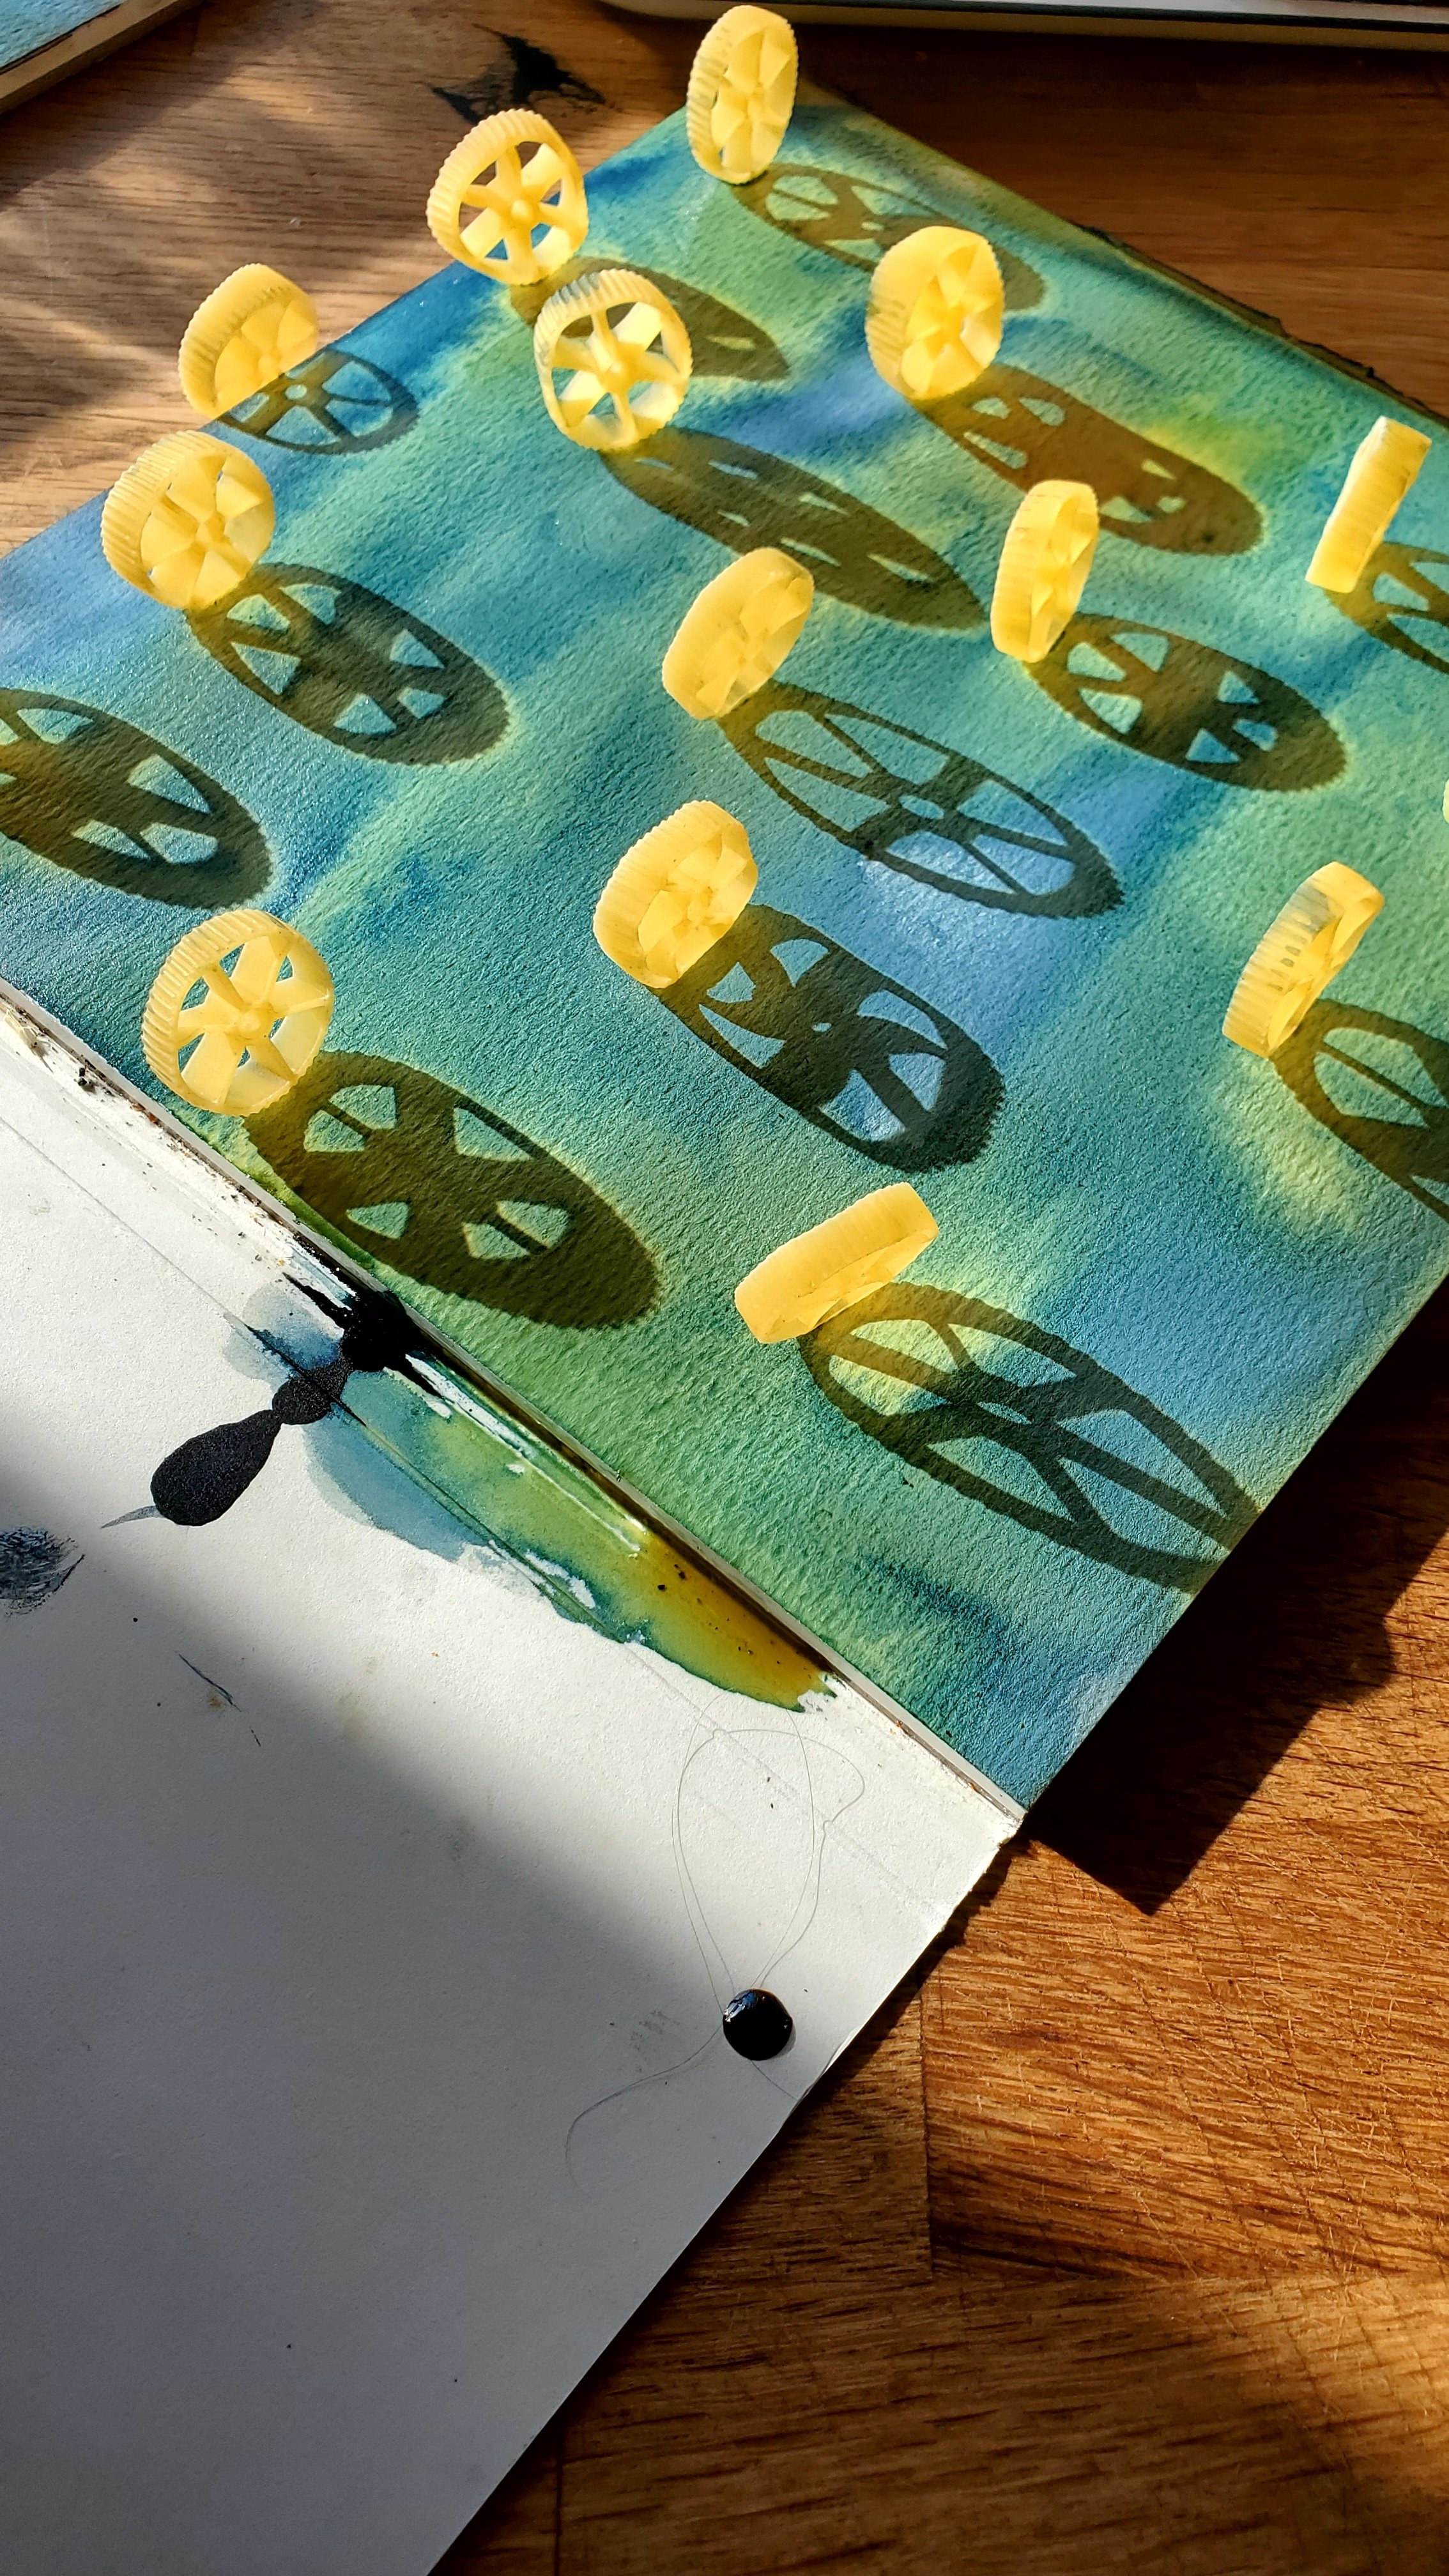
Where things get both exciting and frustrating is with the shadows. Not that sunny? An object with diffuse edges? You get a ‘blurrier’ print. Very sunny? You get shadows. Depending on the time of day and the level of sunniness, you can get very sharp images or long shadows. I found the exploration of these differences fascinating and learned to exploit them to create different things. Seeing as this is morning make and it was April in a northern location, I had a lot of shadows to play with and sometimes not a lot of light. It means I will probably play a bit more in the peak of a summer’s day.

Bouquet of dried plants and grasses again the Calgary skyline

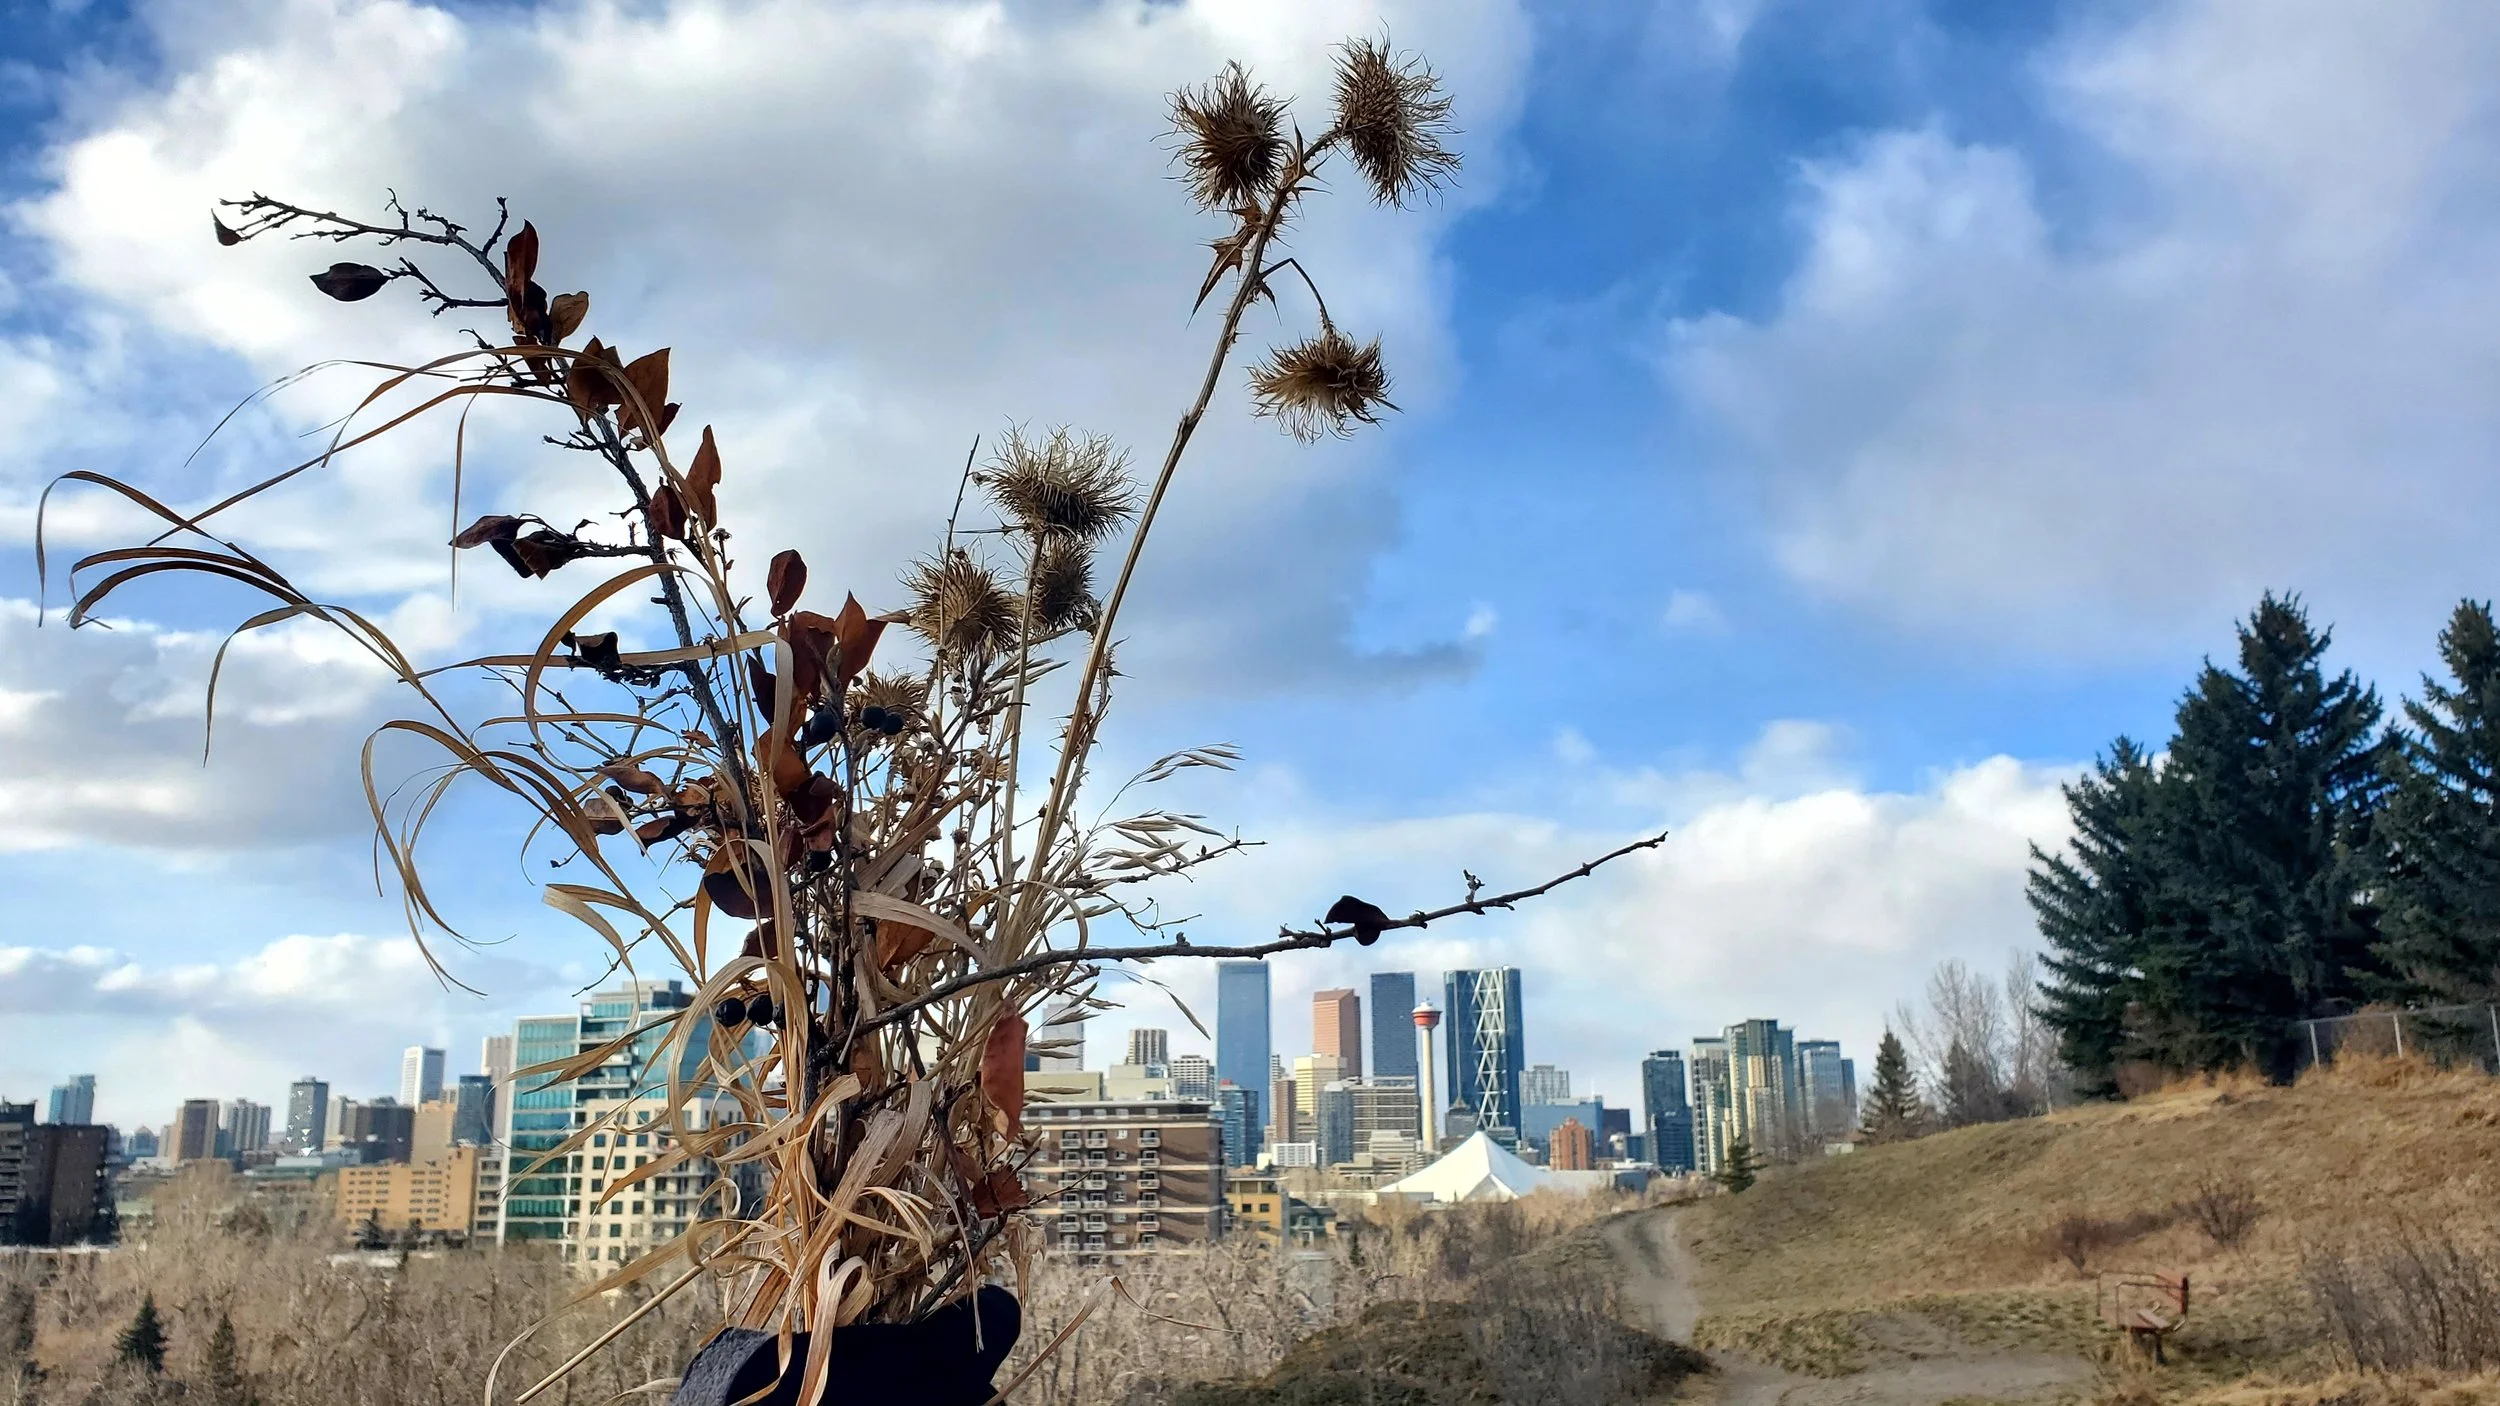
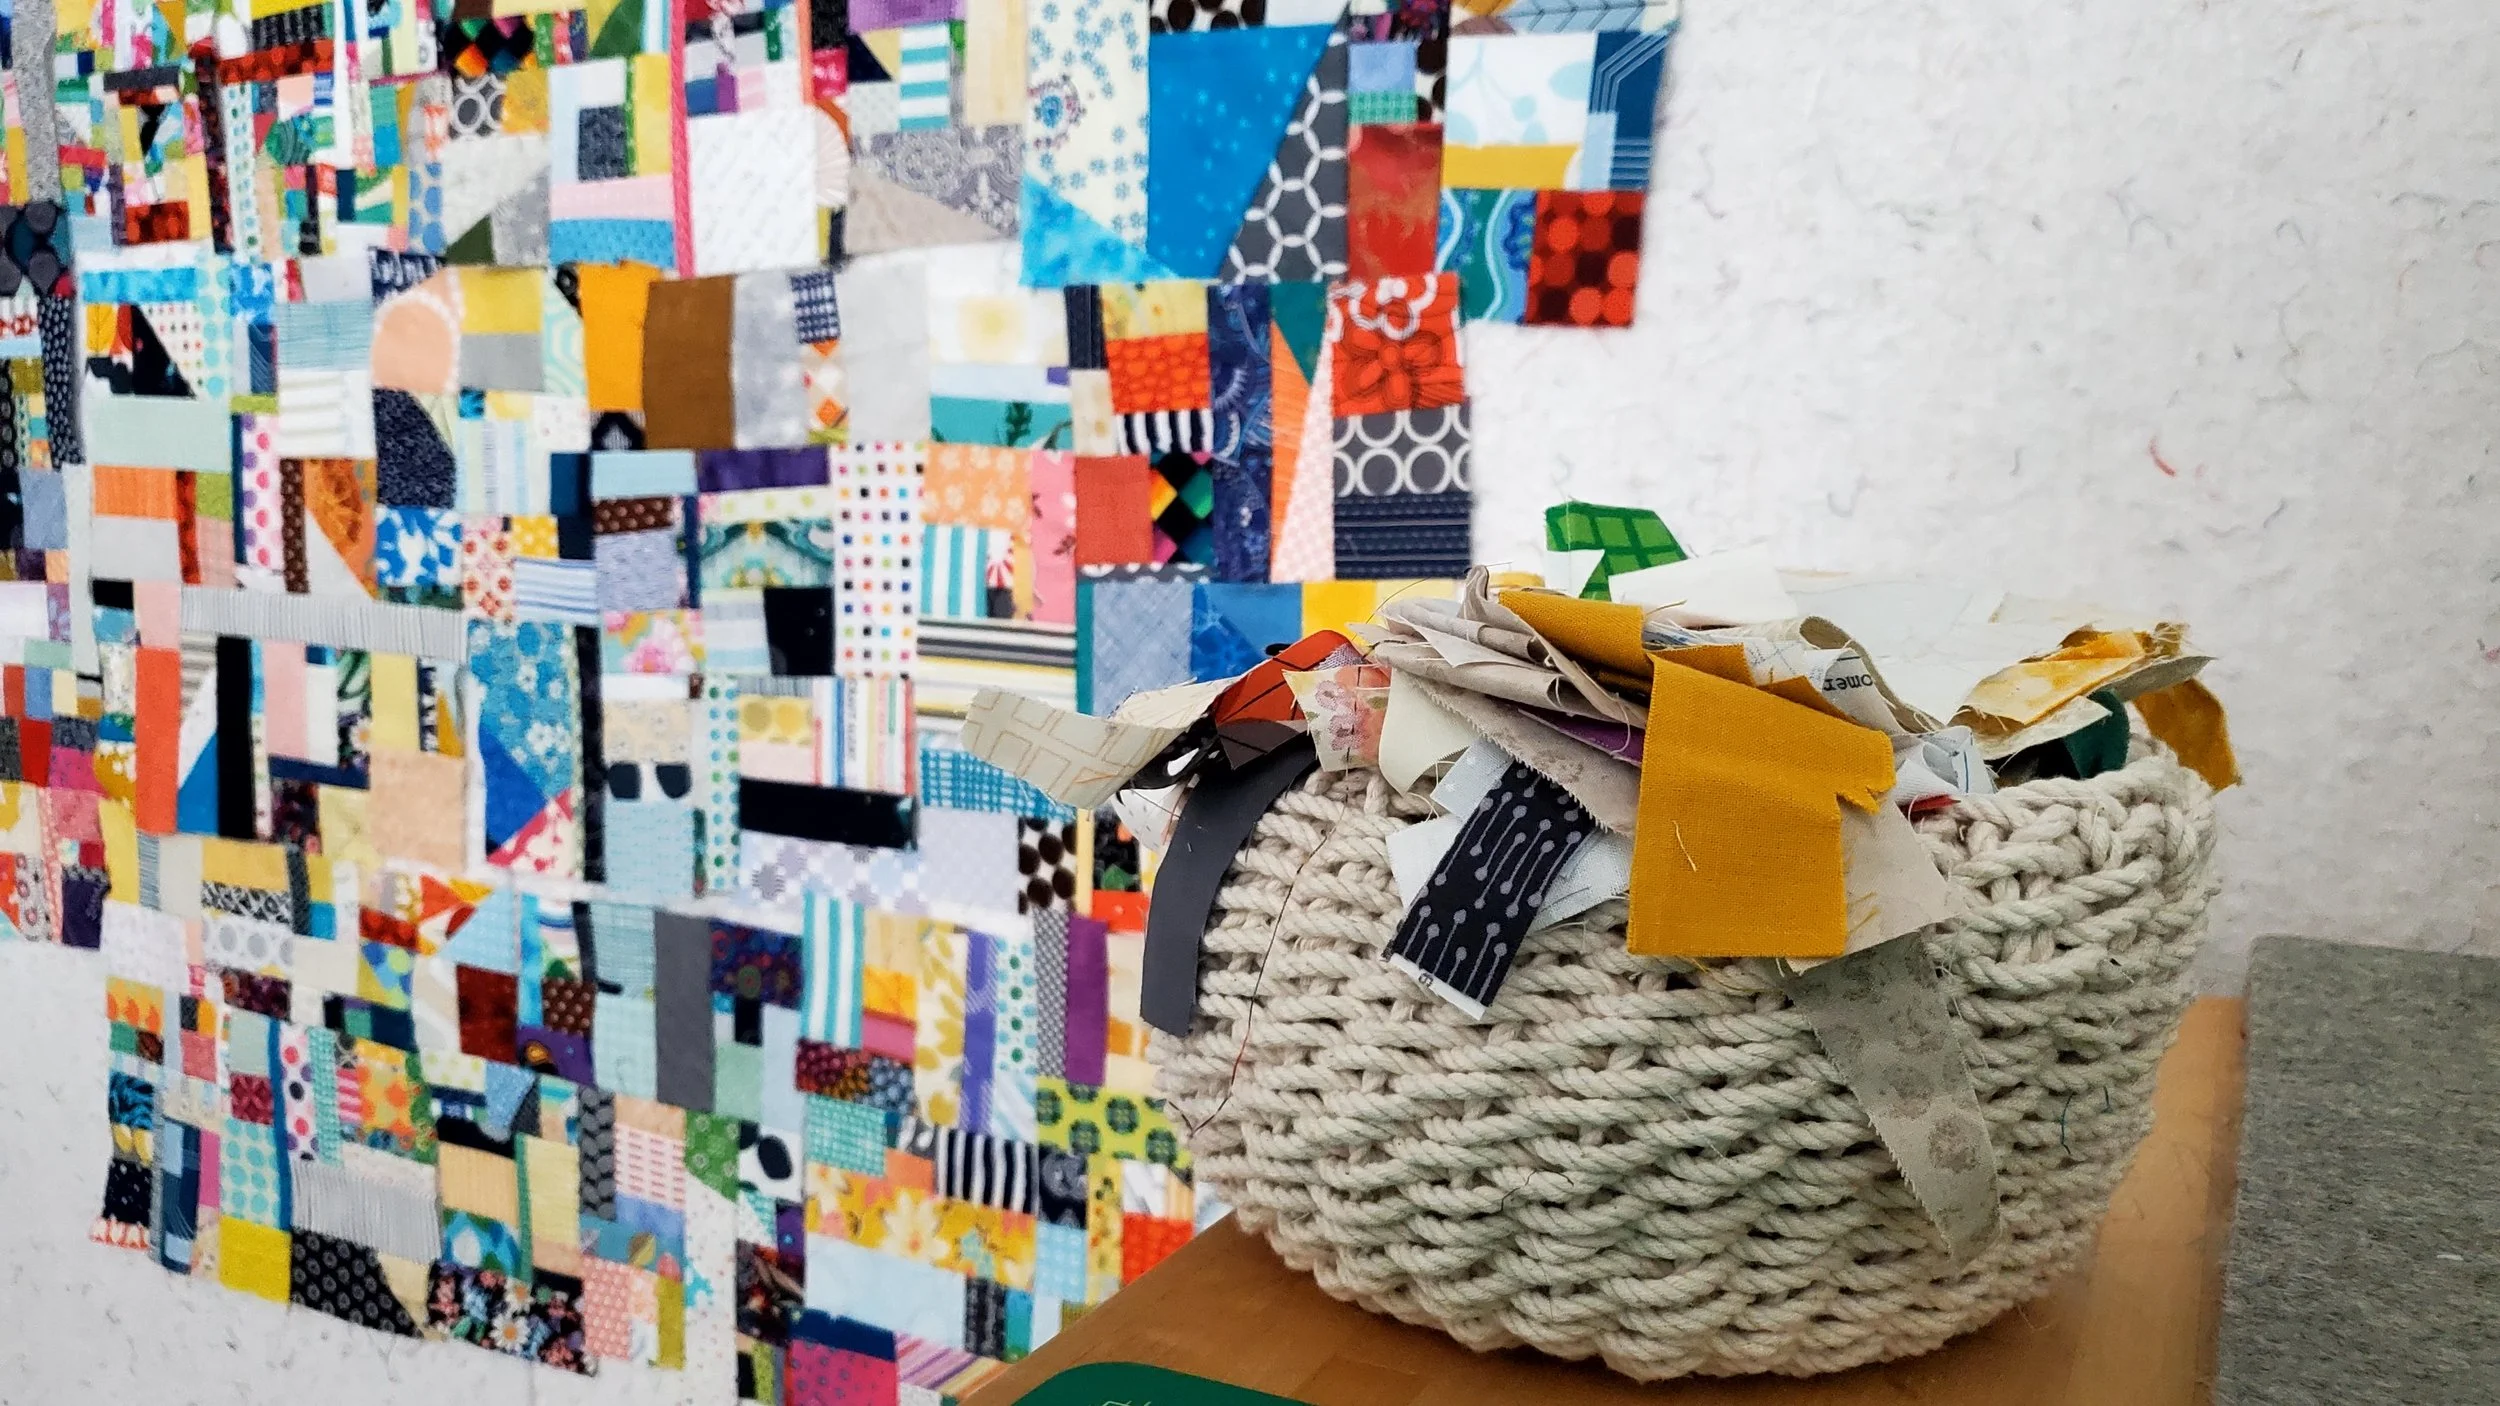
The other act of noticing this month was in looking for things to use to create the print. You see a lot of cyanotype prints exploring shape through living objects like plants and flowers. It was April in Calgary, not a lot of greenery! But weeds, grasses, and last year’s living plants provided fascinating textures to use. Going for walks I found myself nothing plants and sticks in new ways, or even discovering new to me plants. I never picked anything living and cut dead things, leaving roots in tact in case it was a perennial. I also explored the house for objects, using kitchen tools, jewelry, games, even garbage. If it can create a shadow it can create an exposure.

Four different cyanotype prints created from natural and household objects

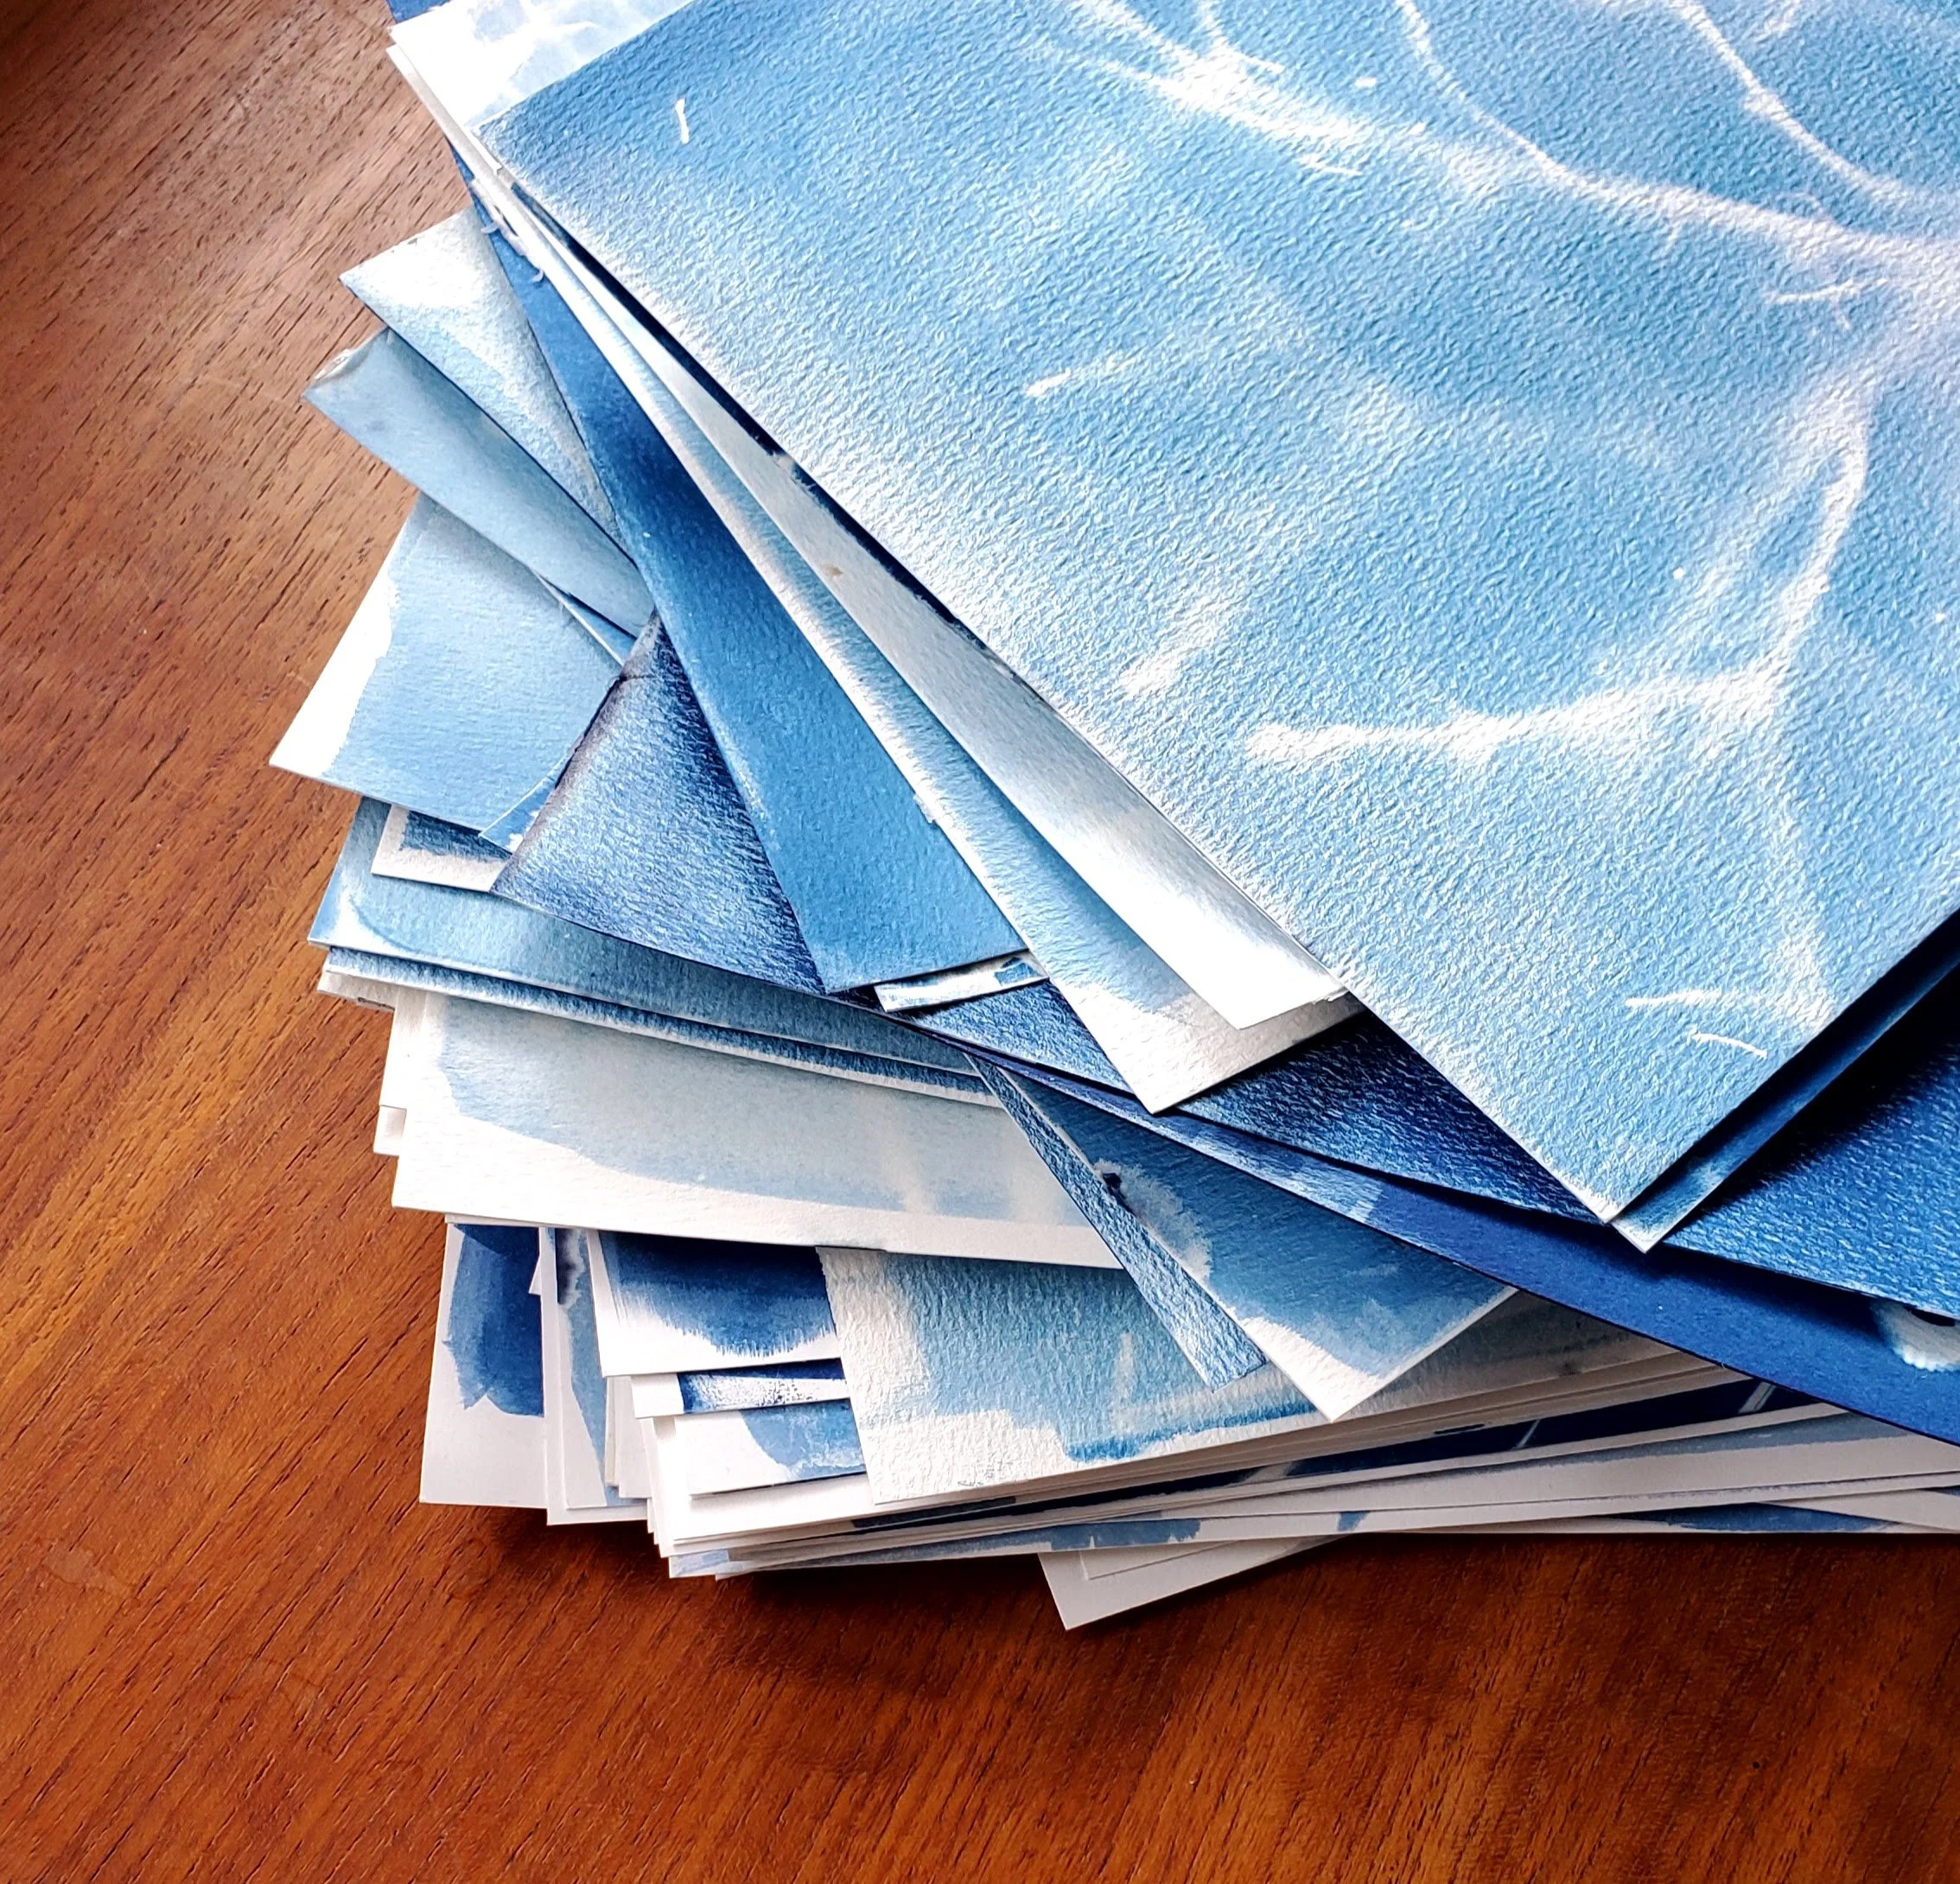
Each day I made 2 prints, so ended up the month with a lot of prints, some definitely better than others. Here are four of my favourites. From top left, in clockwise order. A necklace from Elinor Stenroos on dry. Shadows from slurpee cup and jar lids on dry. Cheerios on wet. Thistle on wet.

Some days I got the real dark, indigo blue colour typically associated with cyanotype, others it was quite pale. To be honest, I never really figured out what created the difference. it always felt like I was putting the same amount of the chemicals on the sheet. I suspect my proportions of the two agents varied, but I don’t really know. Length of exposure varied too, depending on the light conditions that day. I don’t think that effects the colour though, as I exposed almost all to the same colour before washing. (The chemicals look pale green when they go on then change colour as the exposure happens, usually showing done when a bronze or dark green.)

Yes, you can do this on fabric and that probably made a lot of sense for me, a quilter. However, I wanted to try the paper and besides, it’s not like I needed more fabric! That being said, I also don’t need 60, mostly mediocre, cyanotype prints. So I got a notion for a secondary art project.

Cyanotype prints cut apart and arranged in a churn dash quilt block

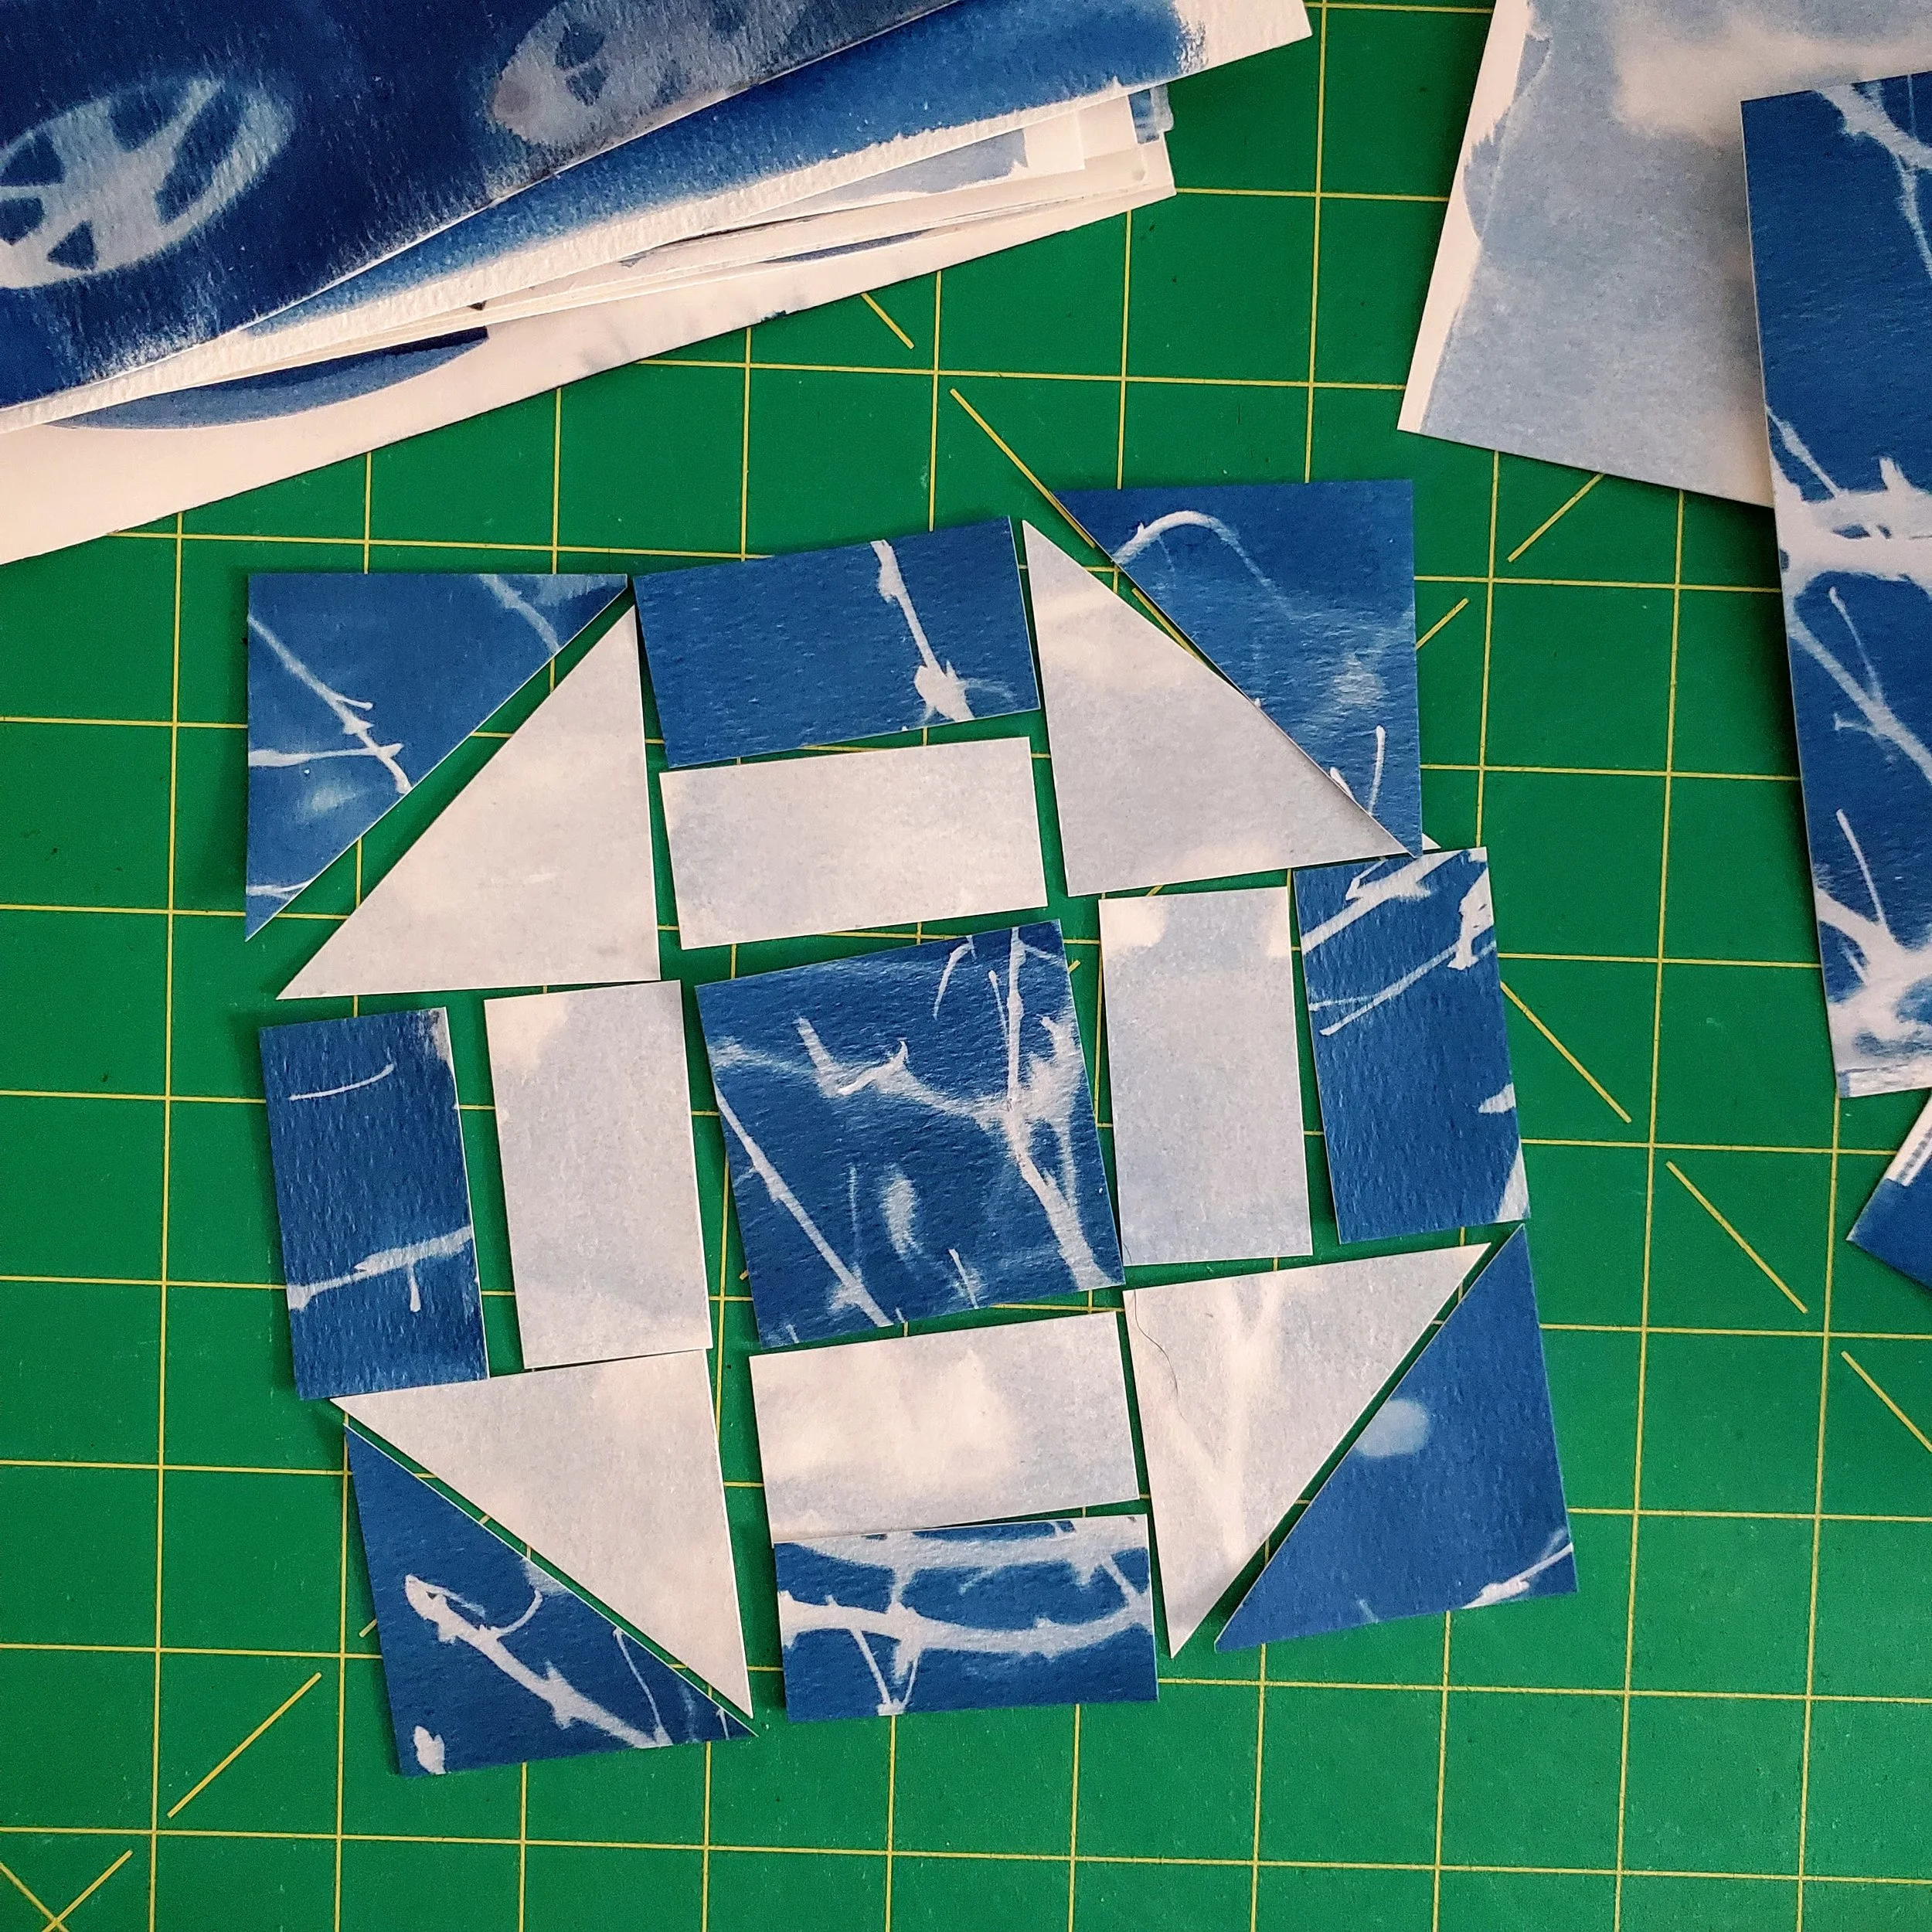
I need to test my assembly idea for these but if it works, I think it could be pretty cool. And it just might get by the ‘no quilts on the wall’ rule in the house!

At the end of the month I have to say this was a lovely exploration. I admit to being intimidated by the chemicals and the idea of it at the beginning. What foolishness! It is actually really easy, I felt totally safe mixing the agents together, and it was an adventure to see what could happen. Sure, things didn’t always work and I’m still on the low end of the learning curve but it was a low stress experiment. The anticipation each morning of what could happen was a great way to start the day. Pure creative optimism.

PS. I saved a highlight of the process - start to finish - on Instagram.

March Morning Make 2022

Penguin felt ornament on skis hanging in a snowy spruce tree

Isn’t this so freaking’ adorable?

For Morning Make in March I made this little penguin ornament by hand. It is one month of Betz White’s Ornament of the Month Club. Betz was gracious enough to gift me a subscription so I could make ornaments this month.

I’ll be honest, I was unsure about this. I’ve long admire Betz’s felt work and her ornaments but was overwhelmed by the handwork, worried that it would all be too tedious. Participation through her online classes took all the fear away. Betz broke down every single step in a straightforward way, making it easy to understand and handle. One stitch at a time! For a Morning Make process, following along with her videos and tutorials allowed me to work a bit at a time. Again, making it more manageable.

And the end result is so cute!

Felt handmade  penguin ornament on skis hanging in a snowy spruce tree

Unfortunately, Covid hit me hard mid month. I was finished the penguin and had plans to make another ornament or two. With quarantine, however, I had no access to a printer to get the pattern. Bummer. (I chose sleep over Morning Make for the remainder of the month.)

Betz releases a new pattern each month in the club. Yes, they are ornaments, but they are not all winter/Christmas themed. I’m looking forward to getting those patterns printed and trying my hand at making a few more. I can’t resist, they’re just so cute!

Fleur - Paint by Numbers Inspired Quilt

Left side is a paint by numbers of a hummingbird over flowers. One the right is an improvised quilt based on the hummingbird picture.

Fluer

16” x 20”

A sweet mini inspired by that hummingbird paint by numbers. It is clear I am much better at quilts than paint by numbers!


In June of 2021 my kids bought me the paint by numbers for a new Morning Make activity. Each day I patiently worked my way through the numbers. It was the right kind of meditative play for me for Morning Make, but when I finished halfway through the month I declined the offer to start a new one. Just not my thing. Then a friend suggested I make a quilt inspired by the painting.

Once finished, it, like many other quilt tops of mine, sat. And sat. A few weeks ago I was in the mood to play with some free motion quilting. Having a mini on hand was fortuitous. It’s an easy baste and in 20 minutes I was stitching. Once I completed the leaves to the flowers (in a perfect olive green from Aurifil) I decided the hand stitch in the centers of the flowers and leave the rest unquilted. Simple, yet graphic.

Details of the quilting. Free motion leaves around improv pieced flowers with seed stitch yellow centers

So now they are both done. Will they hang together? Probably not. For one, I did a pretty crap job on the painting. And two, we have a no quilts on the wall rule. That’s okay, I’ll just bring her out every now and then when I need a little pick me up.

February Morning Make 2022

Stack of 25 multicoloured, improvised quick blocks made from scrap fabric

No, you have not gone back in time. It’s February and I made crumb blocks for Morning Make. Again. That’s because the scraps never disappear and there was a whole year of quilting between now and then. Besides, you can never go wrong with crumb blocks.

A collection of scrappy, improvised quilt crumb blocks grouped together on a design wall.

The technique is the same, the collection of fabric is 95% my own scraps, but there is one difference between this year’s blocks and last year’s: the size of the crumb. When I went to sort the scraps into size - always the first step in these crumb blocks - I realized that my scraps were just that little bit bigger. What counted as a small in this collection was a large in last year’s. I debated cutting things down for a brief moment, so that the blocks were similar. Then I, wisely, decided that that would be ridiculous. Extra work and it would then barely make a dent in the scraps.

Design wise, I was sure I could make a combination of the blocks work. You can see above a hint of what might happen when they come together, as the first few blocks made with smaller crumbs are in the center. With small bits in all the blocks regardless you can make transitions come together.

Hand woven rope basket in front of scrap quilt blocks on a design wall

Of course there is still fabric left. Of course.

One of these days I will get last year’s blocks up on the design wall with this year’s. Then I will use the scraps I have left to fill in any gaps. After that? Well, I make no promises on the scraps’ fate.