Go! And Stop

"Can I have some candy? I don't care, I'm going to pull down your underwear!"

"Trick or Treat. Smell my feet. Give me something good to eat. Not too big, not too small. Just the size of Montreal!"

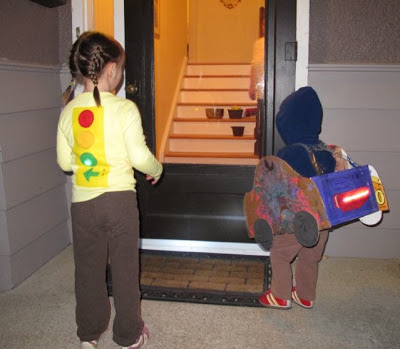
These and the the screams of More Candy! More Candy! are echoing in my ear. The girls are off, speeding through the neighbourhod as fast as their costumes and legs will let them, trick-or-treating their hearts out. It may seem a little young at 2 and 4 to let them go. If you've got a problem with that, keep it to yourself.

Besides, who do you think gets all the candy?

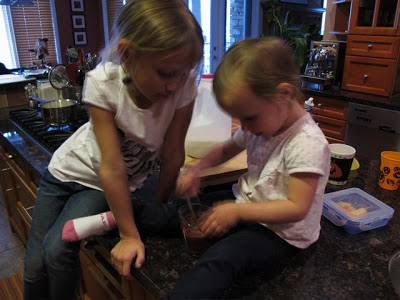
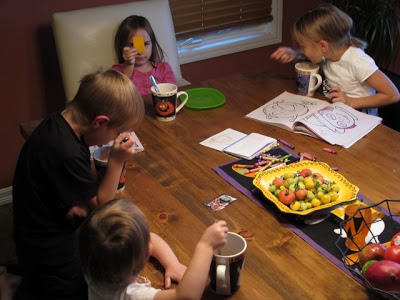
Before I sent them out they were fed with a proper dinner. I'd love to say it was quick but, despite their impatience they still spent a half hour chatting and practicing their Halloween chants. This wasn't the night for a huge Sunday dinner. Roast, potatoes, and cake for dessert? Not going to hold the attention of my girls. Or frankly me, after a 10 day stint on single parenting.

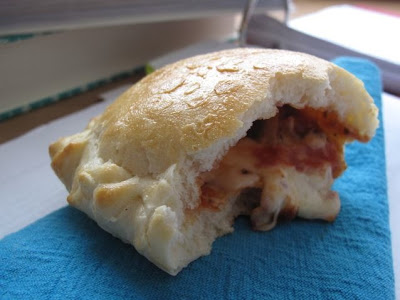
Instead, I pulled out a weekday favourite: calzones. With a puffy, light dough that comes together quickly I can make dinner in about 20 minutes of active effort. It only needs an hour to rise and about 10 minutes to bake. The hardest part is waiting for them to cool so you don't burn your tongue on the fillings.

The recipe was developed for an article on after-school snacks for What's Up Families. Since then it's become our go-to pizza crust recipe in addition to the calzones. For pizza, stretch out the dough, top with sauce, tomato marmalade, garlic oil, or pesto and all your favourite toppings.

Calzones
Makes 8 hearty calzones


Fillings
Tomato Sauce
Shredded Mozzarella Cheese
Toppings - peppers, ham, mushrooms, artichoke hearts, fresh tomatoes, onions, olives, pepperoni

1 egg, beaten

1. Preheat oven to 500 degrees F. One section at a time roll into a rectangle about 8 inches by 6 inches. Cut in half at the 4 inch mark.
2. Top each half with a tablespoon of tomato sauce, leaving a half inch without sauce around all the edges. Add a half cup of shredded cheese and toppings of choice.
3. Fold each calzone in half, pinching and rolling over the edges to seal. Brush each calzone with the beaten egg.
4. Bake for 10 minutes. Let cool completely before eating as fillings will be very, very hot.

Doug's Frog Shirt Quilt


Doug's Frog Shirt Quilt
Approximately Twin Sized
August 2004
Stack and Slash, Fusible Applique - Original Design

Considering that I shared my Dad's quilt (Roots) during the last Blogger's Quilt Festival it only seemed appropriate that I share my Father-in-Law's quilt this time around. Sadly, my Father-in-law, Doug, never actually saw this quilt. He was diagnosed with pancreatic cancer and 6 weeks later passed away.

As soon as he was diagnosed I pulled the fabric. It was all inspired by t-shirt he had. This pretty ugly batik t-shirt, known as the Frog Shirt. That t-shirt was, as far as I know, the only source of tension between he and I. My teasing was a bit much, but we got past it quickly. So, in homage to that shirt and him I took it as my inspiration.

The top was pieced with the Stack and Slash concept in rectangular blocks. I picked the black sashing for a few reasons. Number 1, the frog shirt was black. Number 2, it went well with the rest of the fabrics, setting them off nicely. And Number 3, it was kind of symbolic. Cancer can be a sentence - as it was for him - so it is rather like bars holding in the chaos of cancer in the blocks.

The frogs, of course, needed to be on there. Each frog represents his wife, my amazing Mother-in-Law, and their three kids. Even the grandkids, of which there were only two at the time, are given their place on the backs of the frogs.

The quilting was an all-over stipple with random fern and plant motifs added in. I used a Sulky variegated on my old 1960s Brother machine.

Sadly, I never got the chance to finish the quilt before he passed. Then the overwhelming world of grief took away my quilting desires. But in time for what would have been his birthday that year I finished the quilt and presented it to the family. Initially I'd hoped it could roam the family and provide some comfort where necessary, but it has always stayed with my Mother-in-Law. And there is nothing wrong with that.

Doug has been gone for over 6 years now and I still miss him terribly. He would have adored his new granddaughters and been proud of his son. He still lives on in his family and in the memories. Those never go away. Neither will the quilt, which I pet every time I visit my Mother-in-Law.

  • Amy's Creative Side - Blogger's Quilt Festival

Hot Cocoa for Brett

Not surprisingly, it snowed in Alberta this week. Saskatchewan too. (Hubby is snowed in there right now.) For all the grumbling of my mom and mother-in-law, it is actually expected. I remember more Halloween's with snow than without.

Snow means snowsuits, snow forts, snowball fights, wet mittens, and hot cocoa upon re-entry to the centrally heated house. Most kids these days are quite used to the package of hot chocolate, full of sugar and preservatives. Well, they don't know the last part, but they are used to the packaged taste.

I was watching some of my nephews and niece yesterday. All five kids ventured into the snow as soon as school was out. When the four youngest came in I set to making them a little treat. It was all for them, I swear. My 6 year old niece and Smilosaurus were keen on helping. I hope my brother doesn't mind them sitting on the counter. But they were quite into the whole process. I'm writing this post so my niece has the recipe for cocoa, she was trying really hard to memorize it yesterday.

Hot Cocoa - The Basics
1 serving

1 cup milk
1 tbsp cocoa
1 tbsp sugar
1/2 tsp vanilla

1. Heat the milk in a pot on the stove (ask Mom or Dad to help if Auntie isn't around)
2. In a small bowl, stir together the cocoa and sugar. Add a few tablespoons of warm milk. Stir well to make a runny paste.
3. Stir the cocoa and sugar paste into the hot milk. Add vanilla. Serve with marshmallows.

If you want to make this a little fancy, try some garam masala, chai spices, peppermint extract, orange zest, or raspberry syrup. And definitely add marshmallows. Personally, I am a huge fan of these ones from Aimee.


Conquering my Fear

Handquilting is something I've tried a sum total of three times. The first time was on my third quilt ever. And only because I was terrified of free-motion quilting. The second and third times were earlier this year. That makes a 10 year break between efforts.

I'm trying it again. I would be talking out of my ass if I didn't confront my own fears after that last post on Fear. In my case, I was afraid that I would mess up this project with bad stitching. And the wealth of excellent examples on-line seriously intimidated me. But I can't sit around in fear, I just can't. It isn't my nature, although it is certainly easier. But I would be a hypocrite to you, my faithful readers, if I didn't challenge myself.

I would also be a hypocrite to my kids. You see, The Monster is a very intense child. If she can't do things perfectly the very first time she does something then the world essentially ends for her. Last summer, at 3, she tried her tricycle for the first time. When she couldn't figure out the notion of pedalling in the first 30 seconds she quite promptly got off the bike, picked it up, and threw it.

She gets that from me.

So, if I am working every day with her and her sister to get them to understand the notion of practice, work, and simply trying something even if you aren't perfect at it, then I need to do that myself. Enter handquilting.

Each of the 27 circles on my low-volume circles quilt will be handquilted. This is in contrast with the straight lines I'm doing on the background. It seemed an appropriate approach since the circles were done entirely by hand shortly after I injured my knees in January.

Now, I'm only three circles in. And it certainly isn't pretty. But each one looks progressively better. Seeing improvements certainly helps the confidence level. Regardless, I'm committed to the process and the product.

Full confession though, I'm stabbing these stitches, not using the traditional rocking motion. I know that isn't the correct way, but it is working for me. I believe that counts for a lot. Besides, on my recent trip to Nova Scotia I had the opportunity to snuggle by the fire under an incredible handstitched quilt that was entirely stab stitched. That was enough to motivate me to tackle my quilt. I don't know if I'll ever be as good as the artist, but I won't know if I don't try.