"process"

Improvisational Quilting, Australian Inspired

Improvisational Quilting and Improv Play

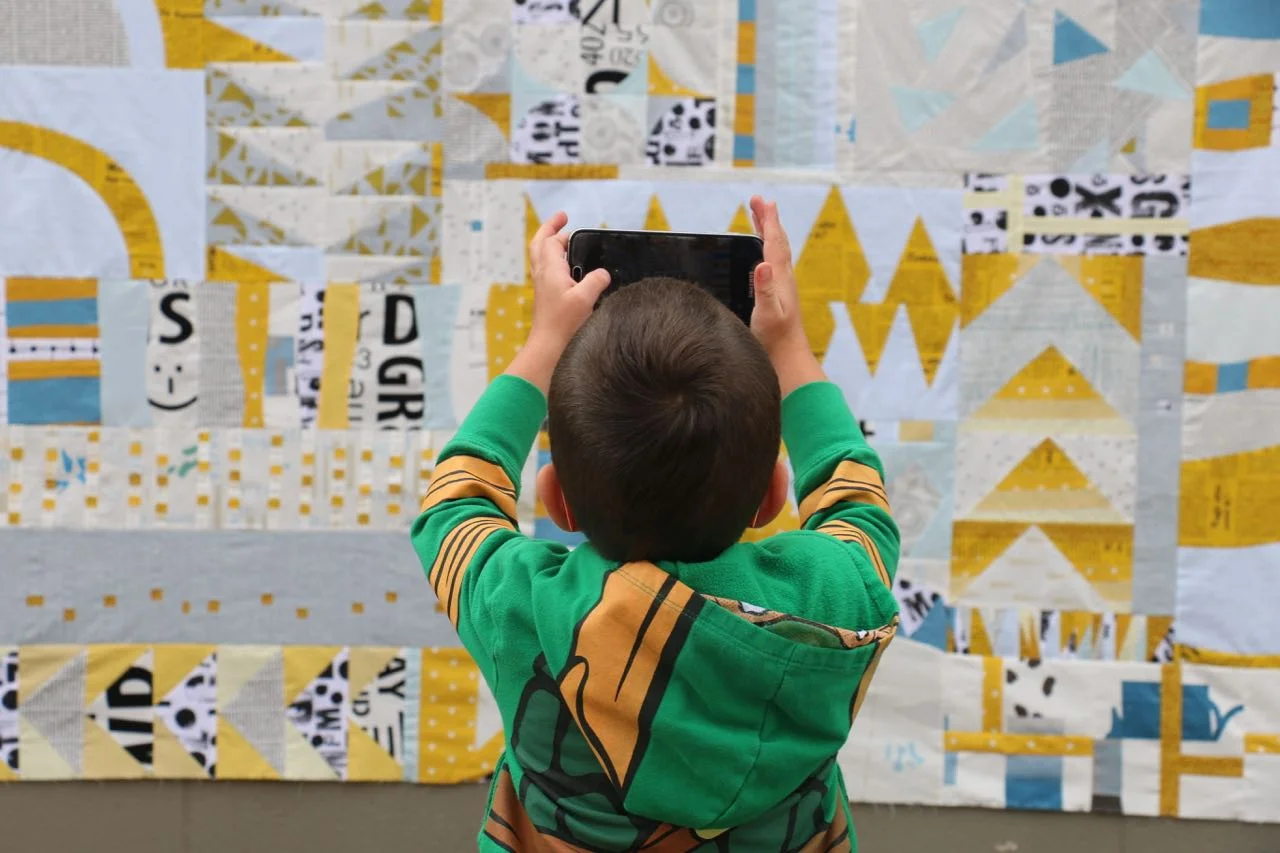
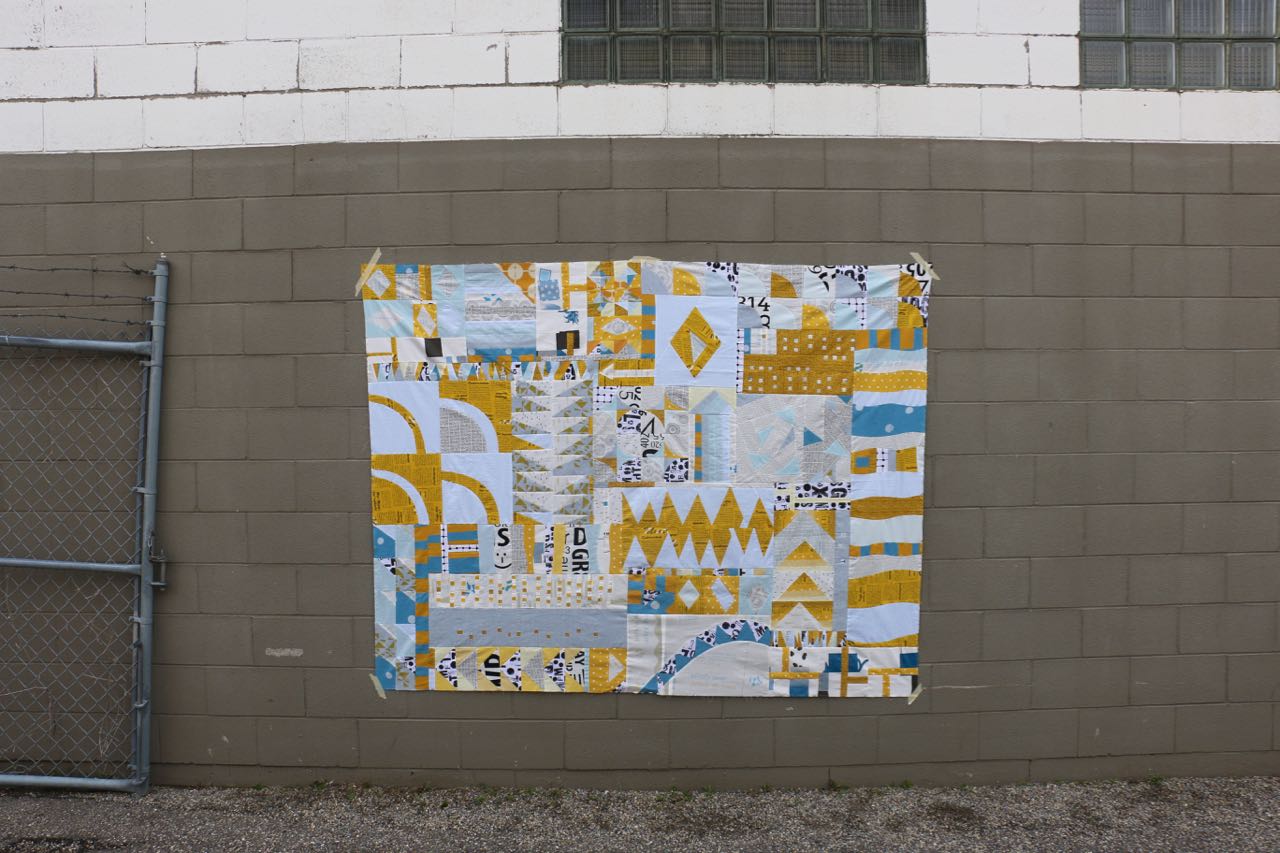
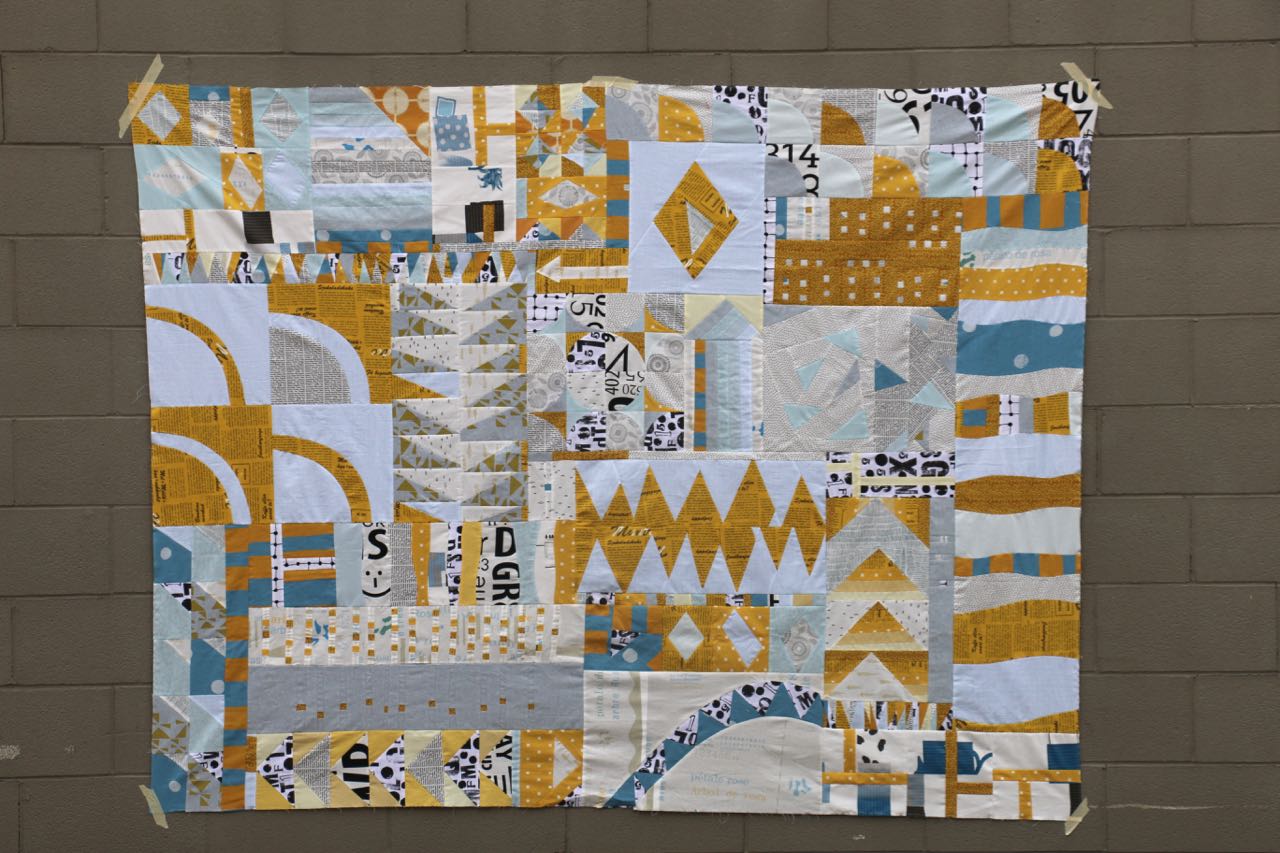
My #arkisoninaustralia quilt top is done. To be honest, I felt like I could keep going forever. That's what happens when I get going on improv!

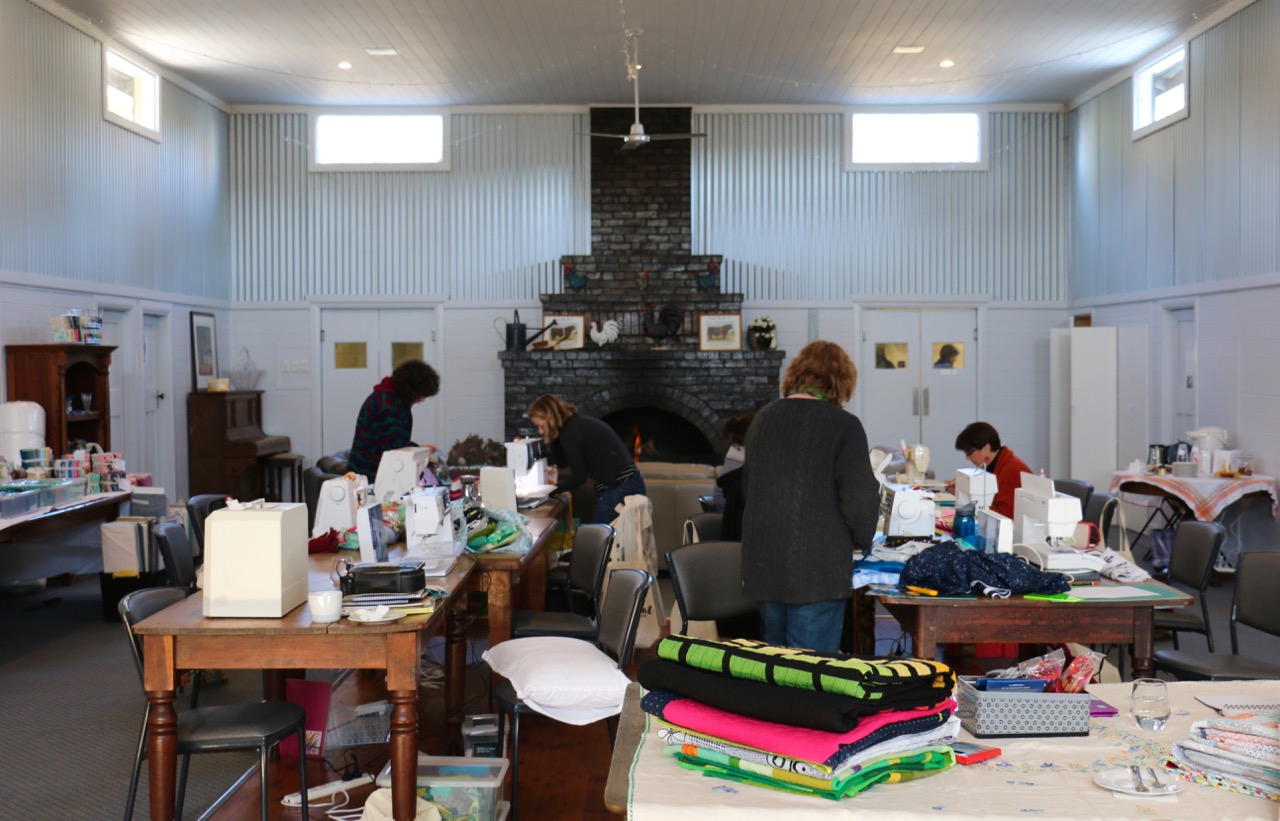
This whole quilt started as technique demos while teaching at The Creative Retreat a few months ago. Some random fat quarters grabbed started the colour scheme and the shapes. It is entirely done from improvisational piecing. From those first demos I ran with shape as my guide:
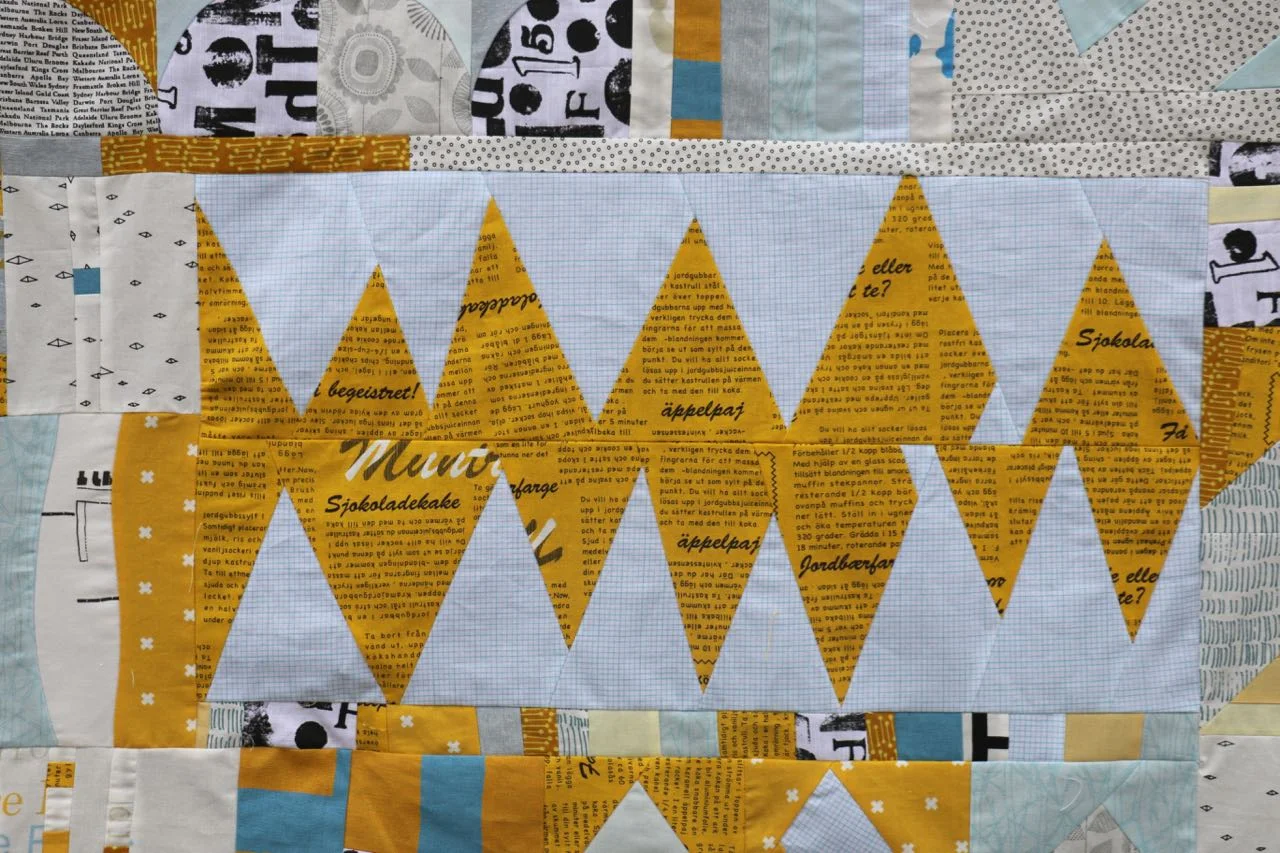
  • quarter circles
  • triangles, both spiky and as flying geese
  • inserted strips
  • curves and wavy lines
  • diamonds
  • a few arrows, for good measure when I needed to fill space

The colour scheme was led by the mustard and pale blue, the ones I started with, as well as black and white prints. I used solids, linens, even a canvas. Some of the prints are those of Emma Jean Jansen, an Australian designer who attended the retreat in Point Lonsdale. Some others are gorgeous treats from Leslie Keating at Maze and Vale, plus the ones we printed together

Improvisational Quilt Piecing - Triangles

As much as I was excited to get this quilt top finished I had a tremendous amount of fun putting it together. I made the components without any regard to specific size. I thought about scale - in terms of making the piecing large or small - but not a specific size. Depending on the technique you need a measured size to start, but that number was chosen out of the air or determined by the size of the fabric I had.

Components found a home on the design wall as I finished them. Eventually, I needed to find a bit of order. In stolen moments of time I would move, remove, and rearrange pieces on the design wall. With more and more mornings more and more components made their way up. Getting on the design wall allowed me to see where I had holes in technique as well as design. It also let me pick fabric to lend to the composition, as opposed to the composition being dictated by colour.

Putting together a quilt top with so many disparate sizes can be a necessary evil of improvisational quiltmaking. Personally, I don't see it as an evil, I absolutely love that part. One can always go the Magic Numbers route and square things off to relatable sizes. It makes assembly much easier, and for beginners that makes total sense. It might make sense for the design as well. I chose the path less travelled. It was a lot of fitting, adding, cutting off, making more, and y-seam construction. I stared at the layout a lot to figure out the easiest way to assemble. That challenge, for me, is a great boost. It gets me excited, the joy of accomplishing something difficult.

For tips and a demos and an understanding on improv quilting, check out my class on Creative Live: Improv Quilting Basics.

Improv Quilting at Its Best

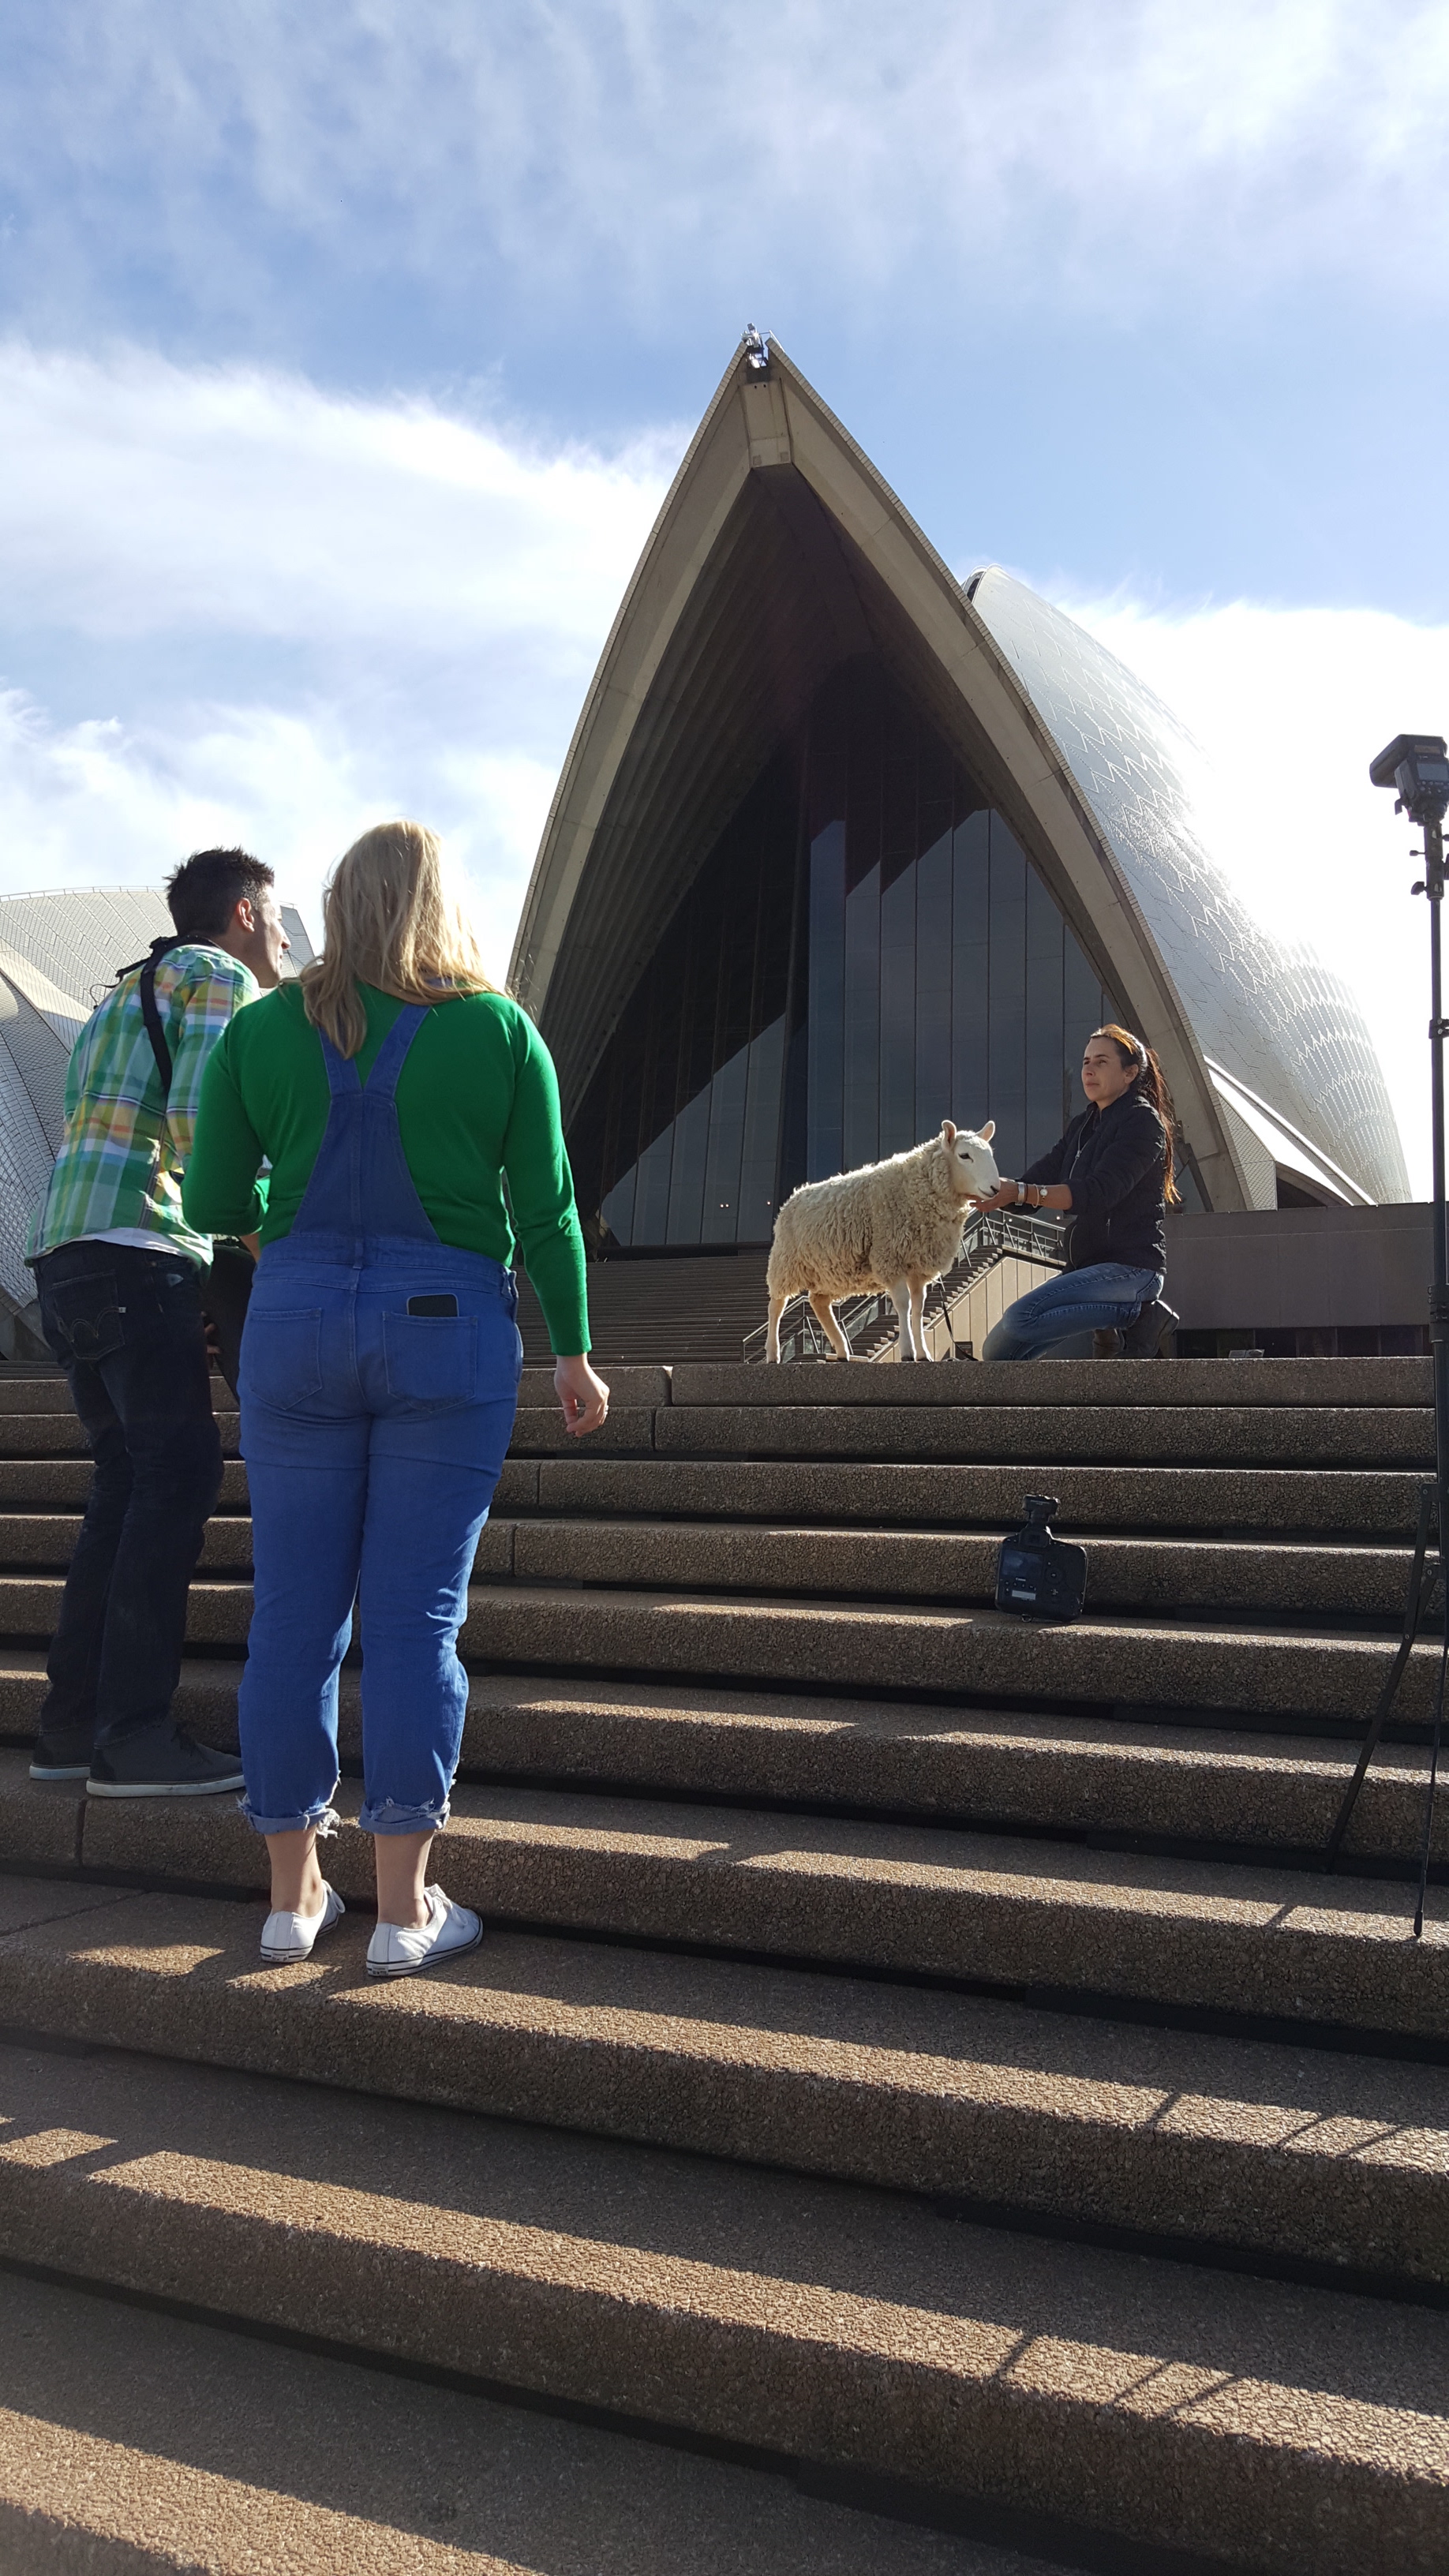
The next challenge will come with quilting. I have absolutely no idea what to do there. Open to suggestions... It is a busy quilt so an all over design, chosen well, wouldn't hurt. I'm not sure it would enhance things though. That being said, tackling each component individually has a lot of potential. Including the potential to take a really long time. I can't believe I am saying this, but i am considering hand quilting. I love what Jess, a student at the Kangaroo Valley retreat is doing with the the piece she made in our time together. Jess also designed and had printed one of the amazing black and white text prints used in the quilt. It could be a good winter project, defining my seasons.

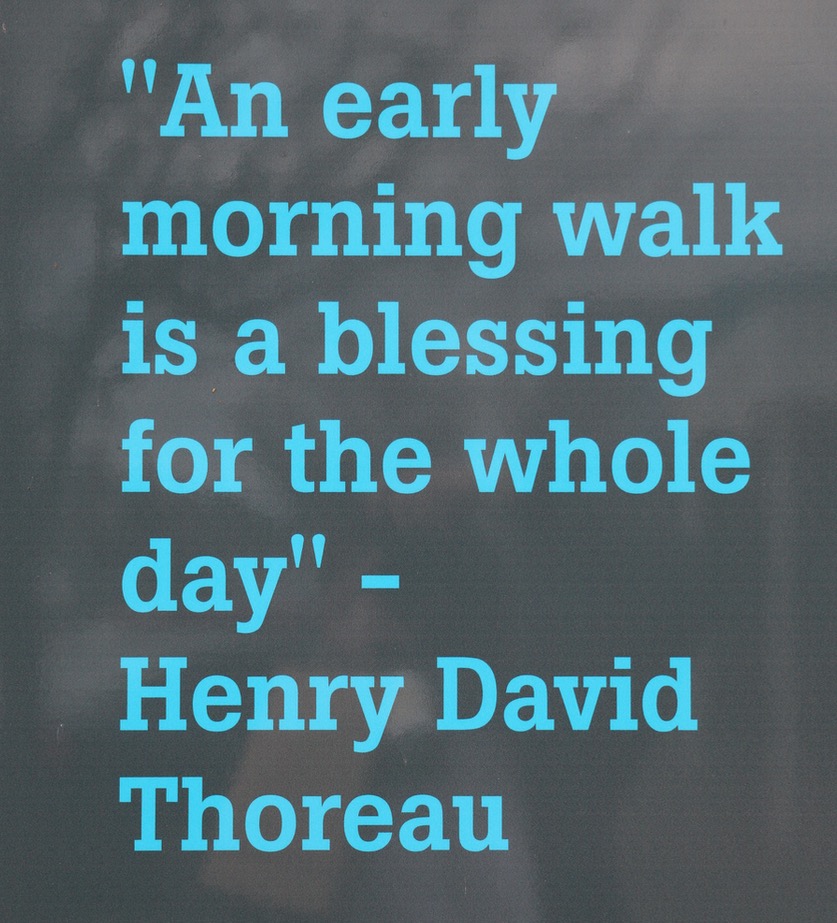
This project defined my summer, for the most part. It started at the beginning and I put the last pieces together on Labour Day. My early mornings on this got me through the onslaught of parenting all day. Morning Make, Australia style saved my sanity this summer.

Photography with kids and an improv quilt

Arkison in Australia

So, I went to Australia for 2 weeks. It was rather incredible. My first, but hopefully not my last time! Enjoy a quick slide show of my trip. I was there to teach at a couple of amazing events organized by The Creative Retreat. Jules did everything to create a space for action, imagination, creativity, and laughter. More on the creativity in another post.  A few highlights:

... I had no idea how fitting it was that one of the first images I would see would be a sheep photoshoot in front of the iconic Sydney Opera House. You cannot even imagine the number of sheep in Australia.

... After a morning in Sydney and sleeping off my jet lag in Canberra we went on the road to our first retreat location: Kangaroo Valley. A glorious spot among farms, Fitzroy Falls, and creating by the fireplace. 

... The birds! I never thought of myself as a birdwatcher, but now I am totally obsessed. To see a million different kinds of parrots, rosellas, cockatoos, plus kookaburras was phenomenal. Then to spot and hear the unique Lyre bird was mind blowing. I am totally obsessed with birds now.

... After Kangaroo Valley we made our way towards Melbourne, stopping in country towns where I was introduced to the pie shops, RSLs, old buildings, and what counts as mountains in Australia. Road tripping is awesome, my favourite.

... 48 hours in Melbourne! A city I really would like to explore more. They care about architecture and public art in a way I've never seen before. We ate well, we played with Leslie at Maze and Vale (that's a whole other post), and visited Jen Kingwell at Amitie Textiles.

... The second retreat was in Point Lonsdale. The ocean!!! Long time readers know how I love the ocean, no matter which ocean or where. There I was taking my morning walks along the Pacific, but seeing the sun rise over it instead of set. Mind blowing. And, of course, I went for a swim! How could I not? Such a lovely location and another group of hysterical and creative women.

... More roadtripping and then the long flight home. (Right after that last photo Nicole Kidman walked by.)

Such a amazing experience and I am forever grateful to this job. These sorts of trips are so appreciated and I get as much out of them as my students. Their work, commitment, and creativity is inspiring. Thanks Jules, for making this all happen!

Self Portrait - Making Faces With Melissa Averinos

Using air quotes in print infuriates me. (So does asterisks around an action to indicate action, but that is another story.) That being said, I almost put them around the words Self Portrait in the title. My eyes aren't really that colour nor are they that pretty. The fabric selection implies I wear eyeliner or mascara and I rarely wear either. My eyebrows are not grey. I do have pretty lips though.

Being real isn't the point here. It looks like a pretty good face, doesn't it?

I made this face in class with Melissa Averinos at QuiltCon in February. Having been totally taken with her face quilt at last year's QuiltCon this class was my top choice when registration opened. I was not disappointed.

Melissa spent a lot of time in the class teaching us the structure of the face. She started with having us draw a face, then breaking down components and proportion. Totally eye opening! I've never had any drawing training like this. It meant that even if we got figurative with features, it would still be very recognizable as a face. Now, I want to make all the faces!

It isn't for me to share Melissa's exact technique - she does teach this class for a living - but I can say that it was incredible easy to execute. Not to mention, fun!

So far I've only done the quilting on this - simple matchstick quilting. I'm not sure if I will bind it the traditional way or get creative with framing. Time will tell. 

My kids say that this mini quilt is creepy. I'll take that as a compliment, a testament to the skills Melissa taught me about making eyes. And they need to get over that because I think it would be fantastic to do portraits of the whole family. 

Playing with Stars


I'm chugging along and playing where I can. Working through this slump, pulling out old projects and trying new things. Last week, on my birthday, I got in the mood for some precision piecing. Rather than create any old random block I decided to add to my star collection.

Sitting in a bin was a little collection of 8 stars. I started them 7 years ago. Yup, that's how long ago. They were a Block of the Month from Planet Patchwork called Celestial Migraine. At the time I started them I did plan on keeping up - don't we always plan that with BOMs?! Then, as now, most of my sewing was improv based so taking a mental break to precision piece was nice. I also chose these soft colours and that provided a respite from the saturated colours I was using all the time too.

Well, I never downloaded all the patterns and the final quilt layout. It disappeared from the site and I could no longer find it. But, I did remember that is was a sampler of star blocks, with loads of Friendship Stars scattered among them. So last week I picked a star pattern (Pat's Star) off of Quilters' Cache to add to my collection. It was a spot of fun sewing and complemented the existing stars quite well.


I must admit, I'm kind of excited about these now. I'm going to make a few Friendship Stars and float them in background fabric. The stars I have finish at 12'' square, so I'm going to finish my Friendship Stars at 6'' square. I'd like to have all my stars float on the background a bit more so I'm going to play with layout.

(Scroll through here to see a version of the original pattern.)

Who knows how long these will stay up on my wall and when I can play again? I am quite enjoying their sunny nature and it was exciting to shop my stash for fabric additions. Another step forward in reclaiming my creativity.