try new thing

Improvisational Piecing For Those Afraid of Improv

Improv Piecing from Curved Quilt Blocks

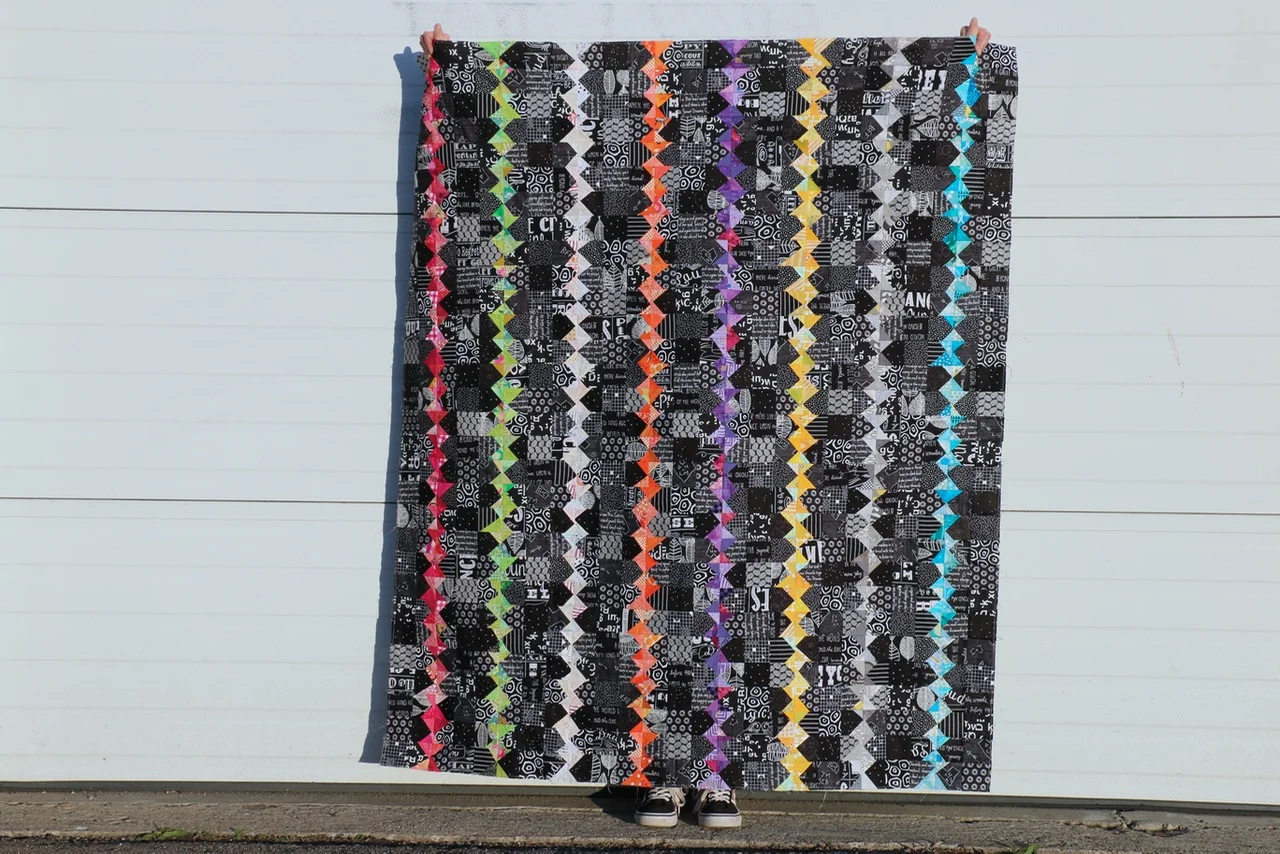
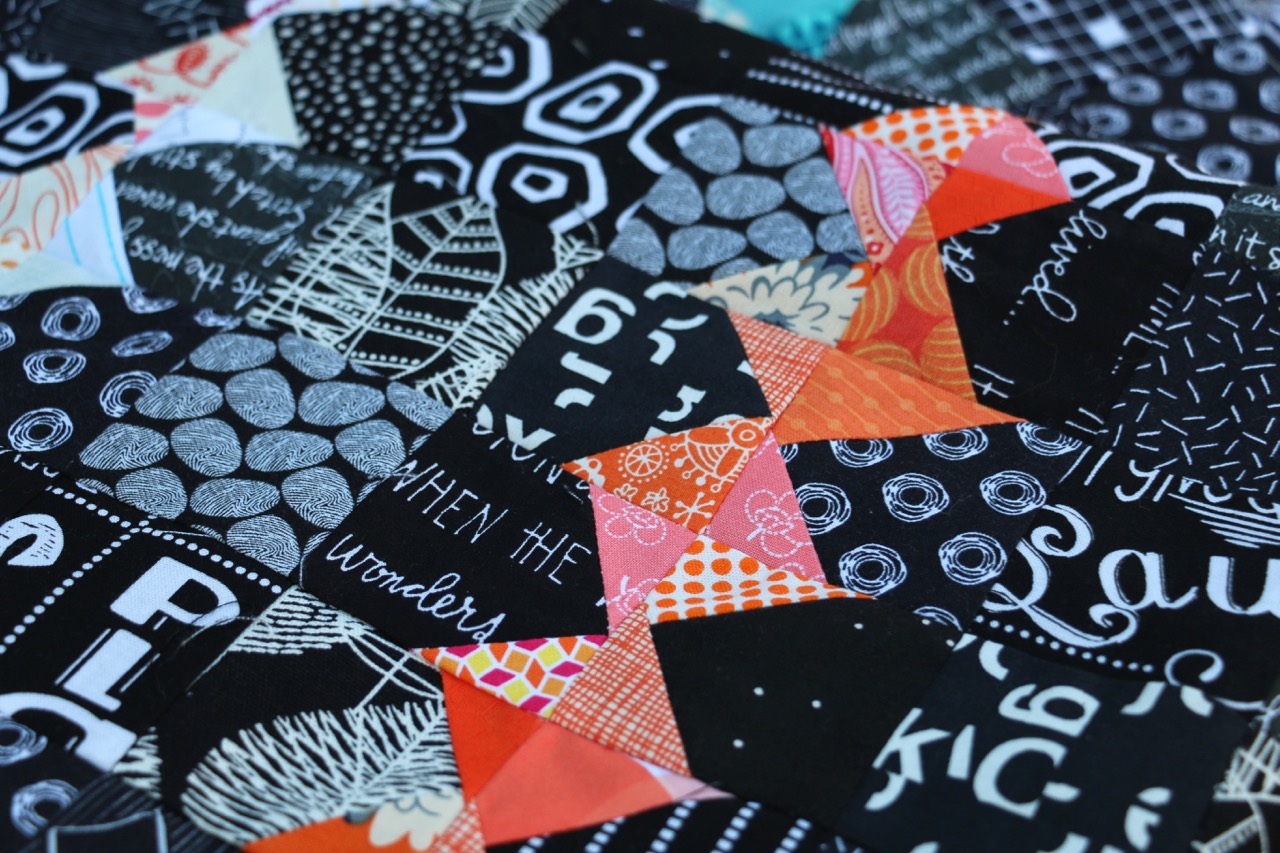
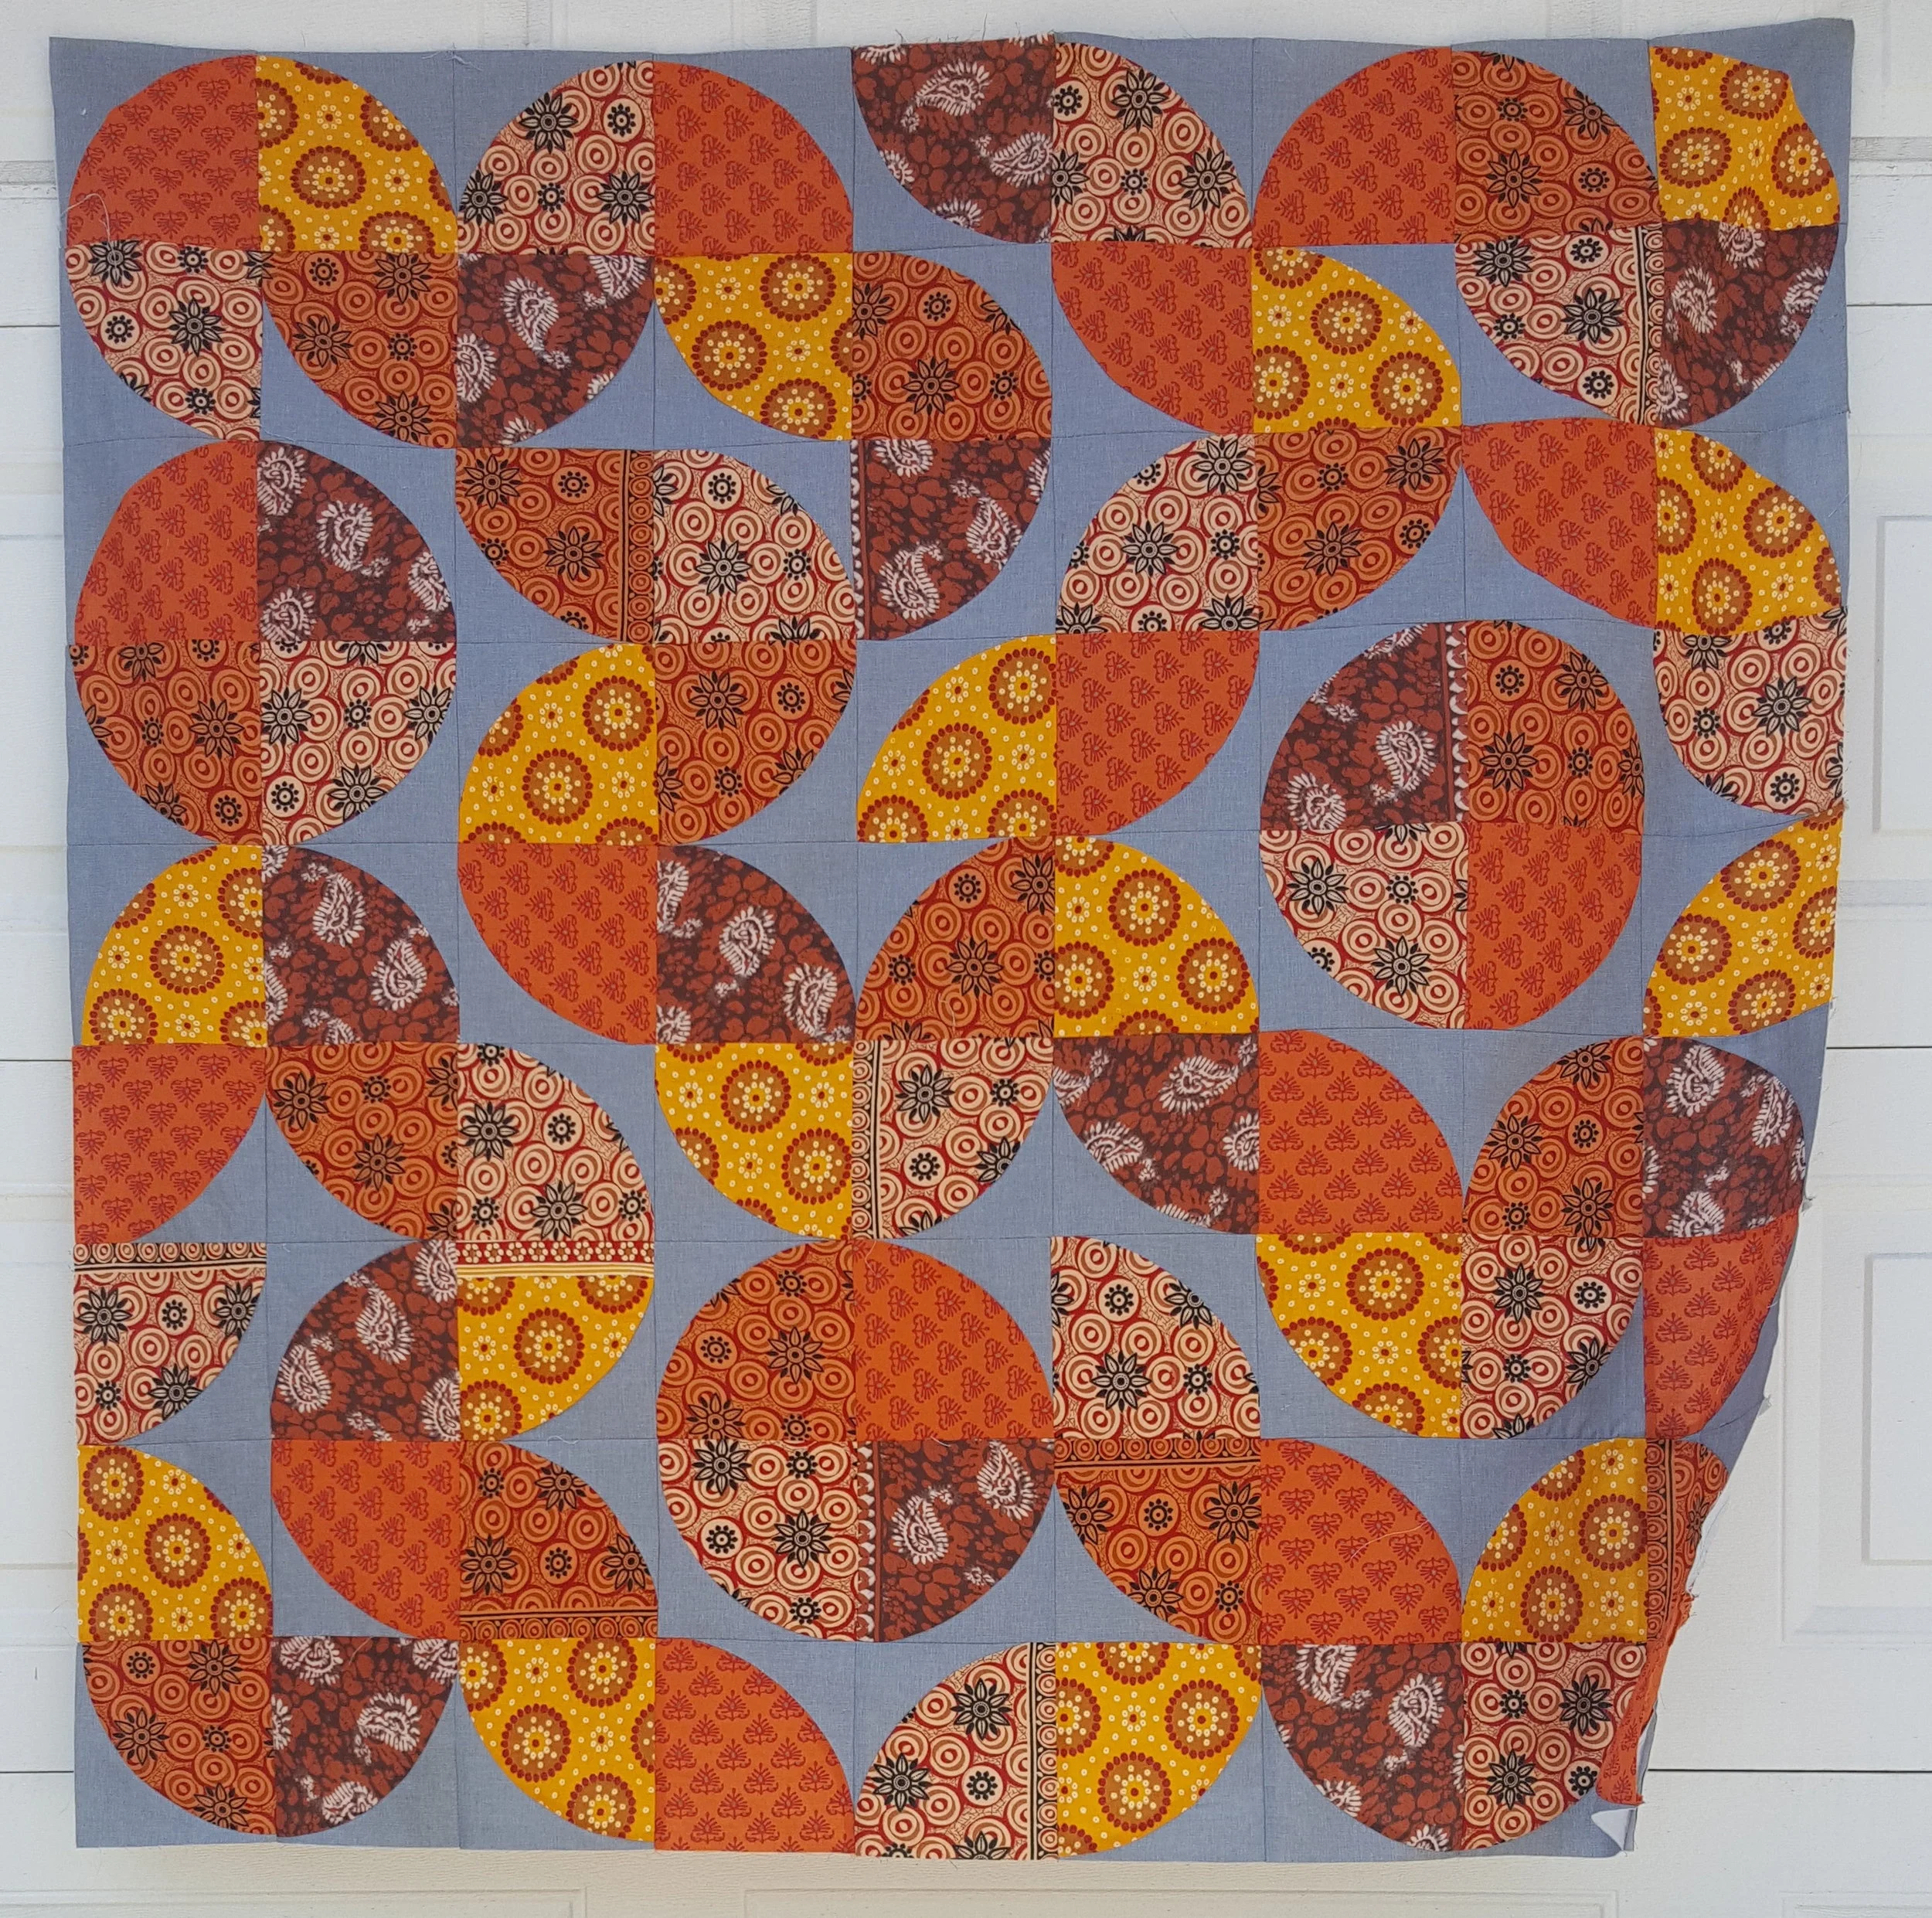
Yes, this still counts as Improv. It has precisely pieced curves, all made and squared up to the same size. It has a controlled grouping of fabric. It isn't at all what I thought I would make.

I define Improvisational Piecing as this:

Starting a quilt without knowing what it will look like when you finish.

This puts the emphasis on the process, on the path, on the exploration. It makes it about the act of sewing more than the fun of figuring out how to make something beautiful from that act. 

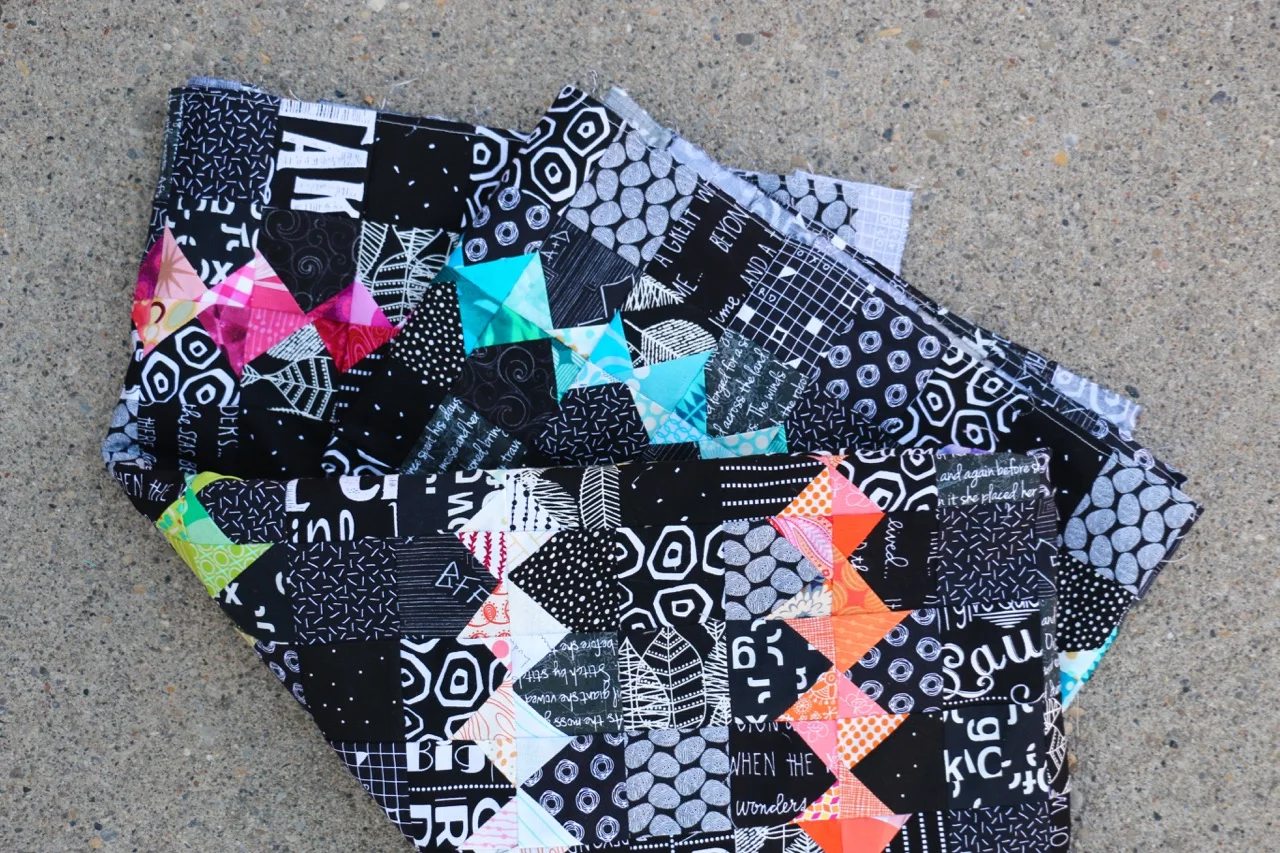
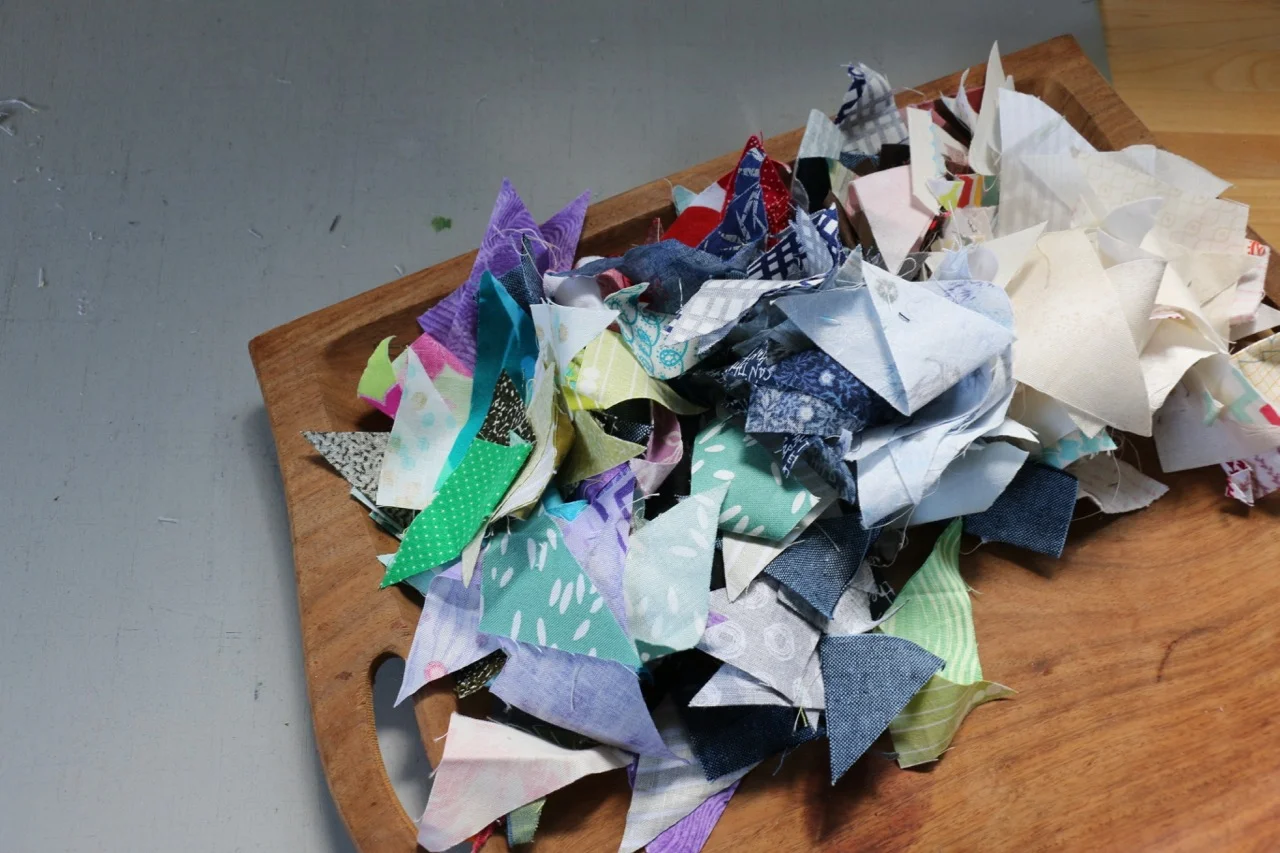
So when I started this quilt it was just to play with the fabric and the curves. Years later, when I returned to the fabric I kept the initial play and ran with it. I simply made the blocks. There was no finished quilt in mind. Obviously, my intent was to actually make a quilt at some point and not just a pile of blocks. But I had no idea what size that quilt would end up or what the actual design was going to be. I just made blocks until I ran out of the grey fabric. (To be perfectly honest, I'd wanted it bigger, but the fabric is years old and I was too lazy to try and hunt it down. So 54'' square is the size of the quilt.)

Then I had to figure out a layout. With quarter circles you have practically infinite design possibilities. I spent a morning sketching and colouring some options. I played on the design wall. I looked at the quilts of Jen Carlton Bailly, in particular. All cool and pretty, but not what felt right with these fabrics. In the end, I remembered the movement of a quilt I made with a stack of half square triangles. The design wall play worked!

No plan, no sketch, no pattern. Just a bunch of blocks turned into a quilt top. Complete improvisation.

If the thought of wonky or irregular cut fabric freaks you out - and I know it does for some people - but you are willing to embrace the challenge of an adventure then I suggest an exercise like this. Take precisely pieced building blocks, like a quarter circle, half square triangle, equilateral triangles, or even pieced coin strips and embrace some playtime. Make them without planning out a design, then try out a million and one different options for lay outs. This is indeed improvisational piecing. Don't let anyone tell you otherwise. 

Amanda Jean Made Me Do It

Seven years ago I made a leap. I was recuperating from my stupid knee injuries and thinking a lot about life, about what I wanted to be when I grew up. At that time I started emailing another blogger a bit more. One day we decided to take our relationship to the next level and talk on the phone. It was like being a teenager all over again, chit chatting for hours as I lay on my bed and ignored my family. Now I consider her a good friend, a professional colleague, and a quilty inspiration.

No Scrap Left Behind Binding Triangles

Amanda Jean Nyberg now has a new book. It is out now and I jumped on board to help her celebrate. No Scrap Left Behind is her perfect book. She is extraordinarily frugal and saves everything. This book takes that mentality and applies it to all your fabric. She does so with useful tips, storage ideas, and completely inspiring quilts. 

To celebrate the release of the book Amanda asked us to not only blog about the book but to also make something from it. Back when we were writing Sunday Morning Quilts she got me to save my binding triangles. Those little bits we cut off when joining binding strips. I hadn't exactly been throwing them away, but they got dumped in with the rest of my colour sorted scraps. In our discussions writing the book we agreed on sorting by colour as well as pulling out strips/strings and snippets. She took it to the next level with those binding triangles. So I started putting mine aside. They filled a jar. Then overflowed the jar. After that they filled a bowl. Just as I was thinking it was time to do something about them No Scrap Left Behind comes out. It was meant to be.

No Scrap Left Behind Chain of Diamonds

There are two quilts in the book that I could have done, Remainders and Chain of Diamonds (not to mention Up, Up, and Away from Sunday Morning Quilts). I chose Chain of Diamonds because it reminded me of a sketch I once made myself from a store window I once saw. Plus, I had a lot of colours in my overflowing jar and bowl.

I'm not going to lie, this was an intense make. Made more so by me doing it over the last 2 weeks while I was sick (and my kids). I counted, there are 1709 seams in this quilt! But the good thing is that they are all small. 

No Scrap Left Behind Small Piecing

To keep the project a lot more manageable, I suggest turning this into one of two things. Make the blocks as leaders/enders. That is, prep your background squares and keep them next to your machine with the triangles. At the end of a seam when you are working on something else sew a triangle on instead of cutting your thread. Or, turn this into a Morning Make project. Spend 10-20 minutes a day and slowly but sure the blocks will come together. 

Regardless of how you do this I would totally recommend this quilt. It was fun, it has great impact, and it makes excellent use of those scraps!

I went from a full platter (once I unsquished them from the jar/bowl) to barely a third. I even had to cut a few extra scraps to round out the selection. Now I just might have to make something else to use the rest of the triangles! For a change from my instinctual mix of low volume fabrics for the background I went all the way to the other end of the spectrum. Black prints, including many from my Tag collection, played together. As I made blocks it was a lot of fun to think back to the quilt where the scrap came from. So many memories.

No Scrap Left Behind Binding Triangles

Thanks for being a good friend all these years Amanda Jean. And for continuing to be such an inspiration to quilters everywhere.

I'm happy to be giving away a copy of the No Scrap Left Behind to a lucky reader, courtesy of C&T Publishing. Trust me, you want this book! Please leave a comment below, including your email: nameATserverDOTcom. I can't auto reply through my blog so I need your email to get you your prize. US winners get a hard copy of the book, International winners will get a digital version.

GIVE AWAY IS NOW CLOSED

No Scrap Left Behind


Make sure you check out all the other bloggers sharing their projects from the book:

Monday, April 24th Mary Kolb

Tuesday, April 25, Lee Monroe

Wednesday, April 26, Sandi Hazelwood

Thursday, April 27, Bernie Kringel

Friday, April 28, Erin Cox

Monday, May 1, Katherine Greaves

Tuesday, May 2, Tracy Mooney

Wednesday, May 3, Cheryl Arkison

Thursday, May 4, Debbie Jeske

Friday, May 5, 

Giveaway Winner was Sue, comment 190/226. Thanks to the Random Number Generator.

Love the black & white background you used! It's nice to read how you became friends with Amanda Jean too. :)

Arm Knitting Trial - A Pouf!

Back in January I found myself in Denver (more on that later). While there I got to finally meet Anne Weil from Flax and Twine.  We connected on-line years ago and have that sort of internet friendship that can do no wrong. So to meet and hug in person was such a delight. My last day in Denver Anne happened to be teaching an arm knitting class at Fancy Tiger. How could I resist?!

Arm knitting was surprisingly fun and easy. And this is coming from a non knitter. Anne explained everything so well, demonstrating the technique herself - have you ever tried to teach a class with your arms literally tied up? In the class we covered the basic technique, yarns to use, and knit up the foundation for a pouf. 

What's a pouf? Well, in my house it's become a footrest, a book rest, a toy, a dog hair catcher, a perch for small children, and a back roller. It's whatever you want it to be. Plus, it looks cool.

The most awesome thing about arm knitting is that the yarn is the only supply you need. Barring amputation you have everything else you need.

I made mine out of an orange Wool and the Gang wool. You use 4 skeins of the thick stuff, officially referred to as super bulky (200-250g). Orange, because well, orange! We cast on, made a gauge swatch, then frogged our swatch and started at the project. For a pouf you essentially make a blanket then cinch the ends through the casting on and off stitches. (are there more correct terms for that?) By the end of the class I had my blanket part down and went to the airport armed (ha!) with the instructions to finish the pouf. I hugged Anne goodbye and got out of Denver on Superbowl Sunday.

At home I filled an orange pillowcase with buckwheat hulls, sewed it shut, then cinched my pouf around it, tying it closed. Anne suggested using an old duvet or comforter, even something you find at the thrift store. I wanted something more substantial so it could be a footstool or perch for the kids, hence the strange purchase of 35 pounds of buckwheat hulls (for multiple projects).

Anne literally wrote the book on arm knitting. Knitting Without Needles is a beautiful and fascinating book. It covers both finger and arm knitting - only used your fingers, hands, and arms. And it is so much more than scarves! Despite the freakish amount of quilts in this house and a treasured crochet blanket from a friend I think I want to try my hand at a cozy blanket next, but the pillows and the tote... The book, and Anne, are gorgeous and inspirational.

Denver was a lucky trip. On my way home from QuiltCon judging I fit in an Instructors' Summit with Craftsy. (Anne is also a Craftsy Instructor so that's how we were able to meet.) It was great to get back to Craftsy to connect with staff there and other instructors. Filming my class and ongoing participation with students has been a tremendous experience. 

Now would be a good time to tell you about a promotion Craftsy has going on (seriously, like attending the Summit, this post is only about lucky timing.) For every class you sign up for until March 13 you are entered into a draw to win $1000 for your favourite craft based charity! If you've never signed up for a Craftsy class now is definitely a good time to do it. There are so many interesting and informative classes on Craftsy. Did you know they even have gardening classes? I just discovered that myself. I'm a huge fan of the cooking classes too and am learning photography skills. 

Full disclosure: there is a small incentive for instructors here. For every five NEW buyers I get $100 (That is people who've never purchased a Craftsy class before). That's not my concern though. What I do love is that if 50% of instructors drive at least 1 new buyer they will double the charitable donation.

To be entered in the draw for the donation you have to purchase classes through this link. Feel free to share.

Now, back to regularly scheduled crosswords with my feet up on my pouf.