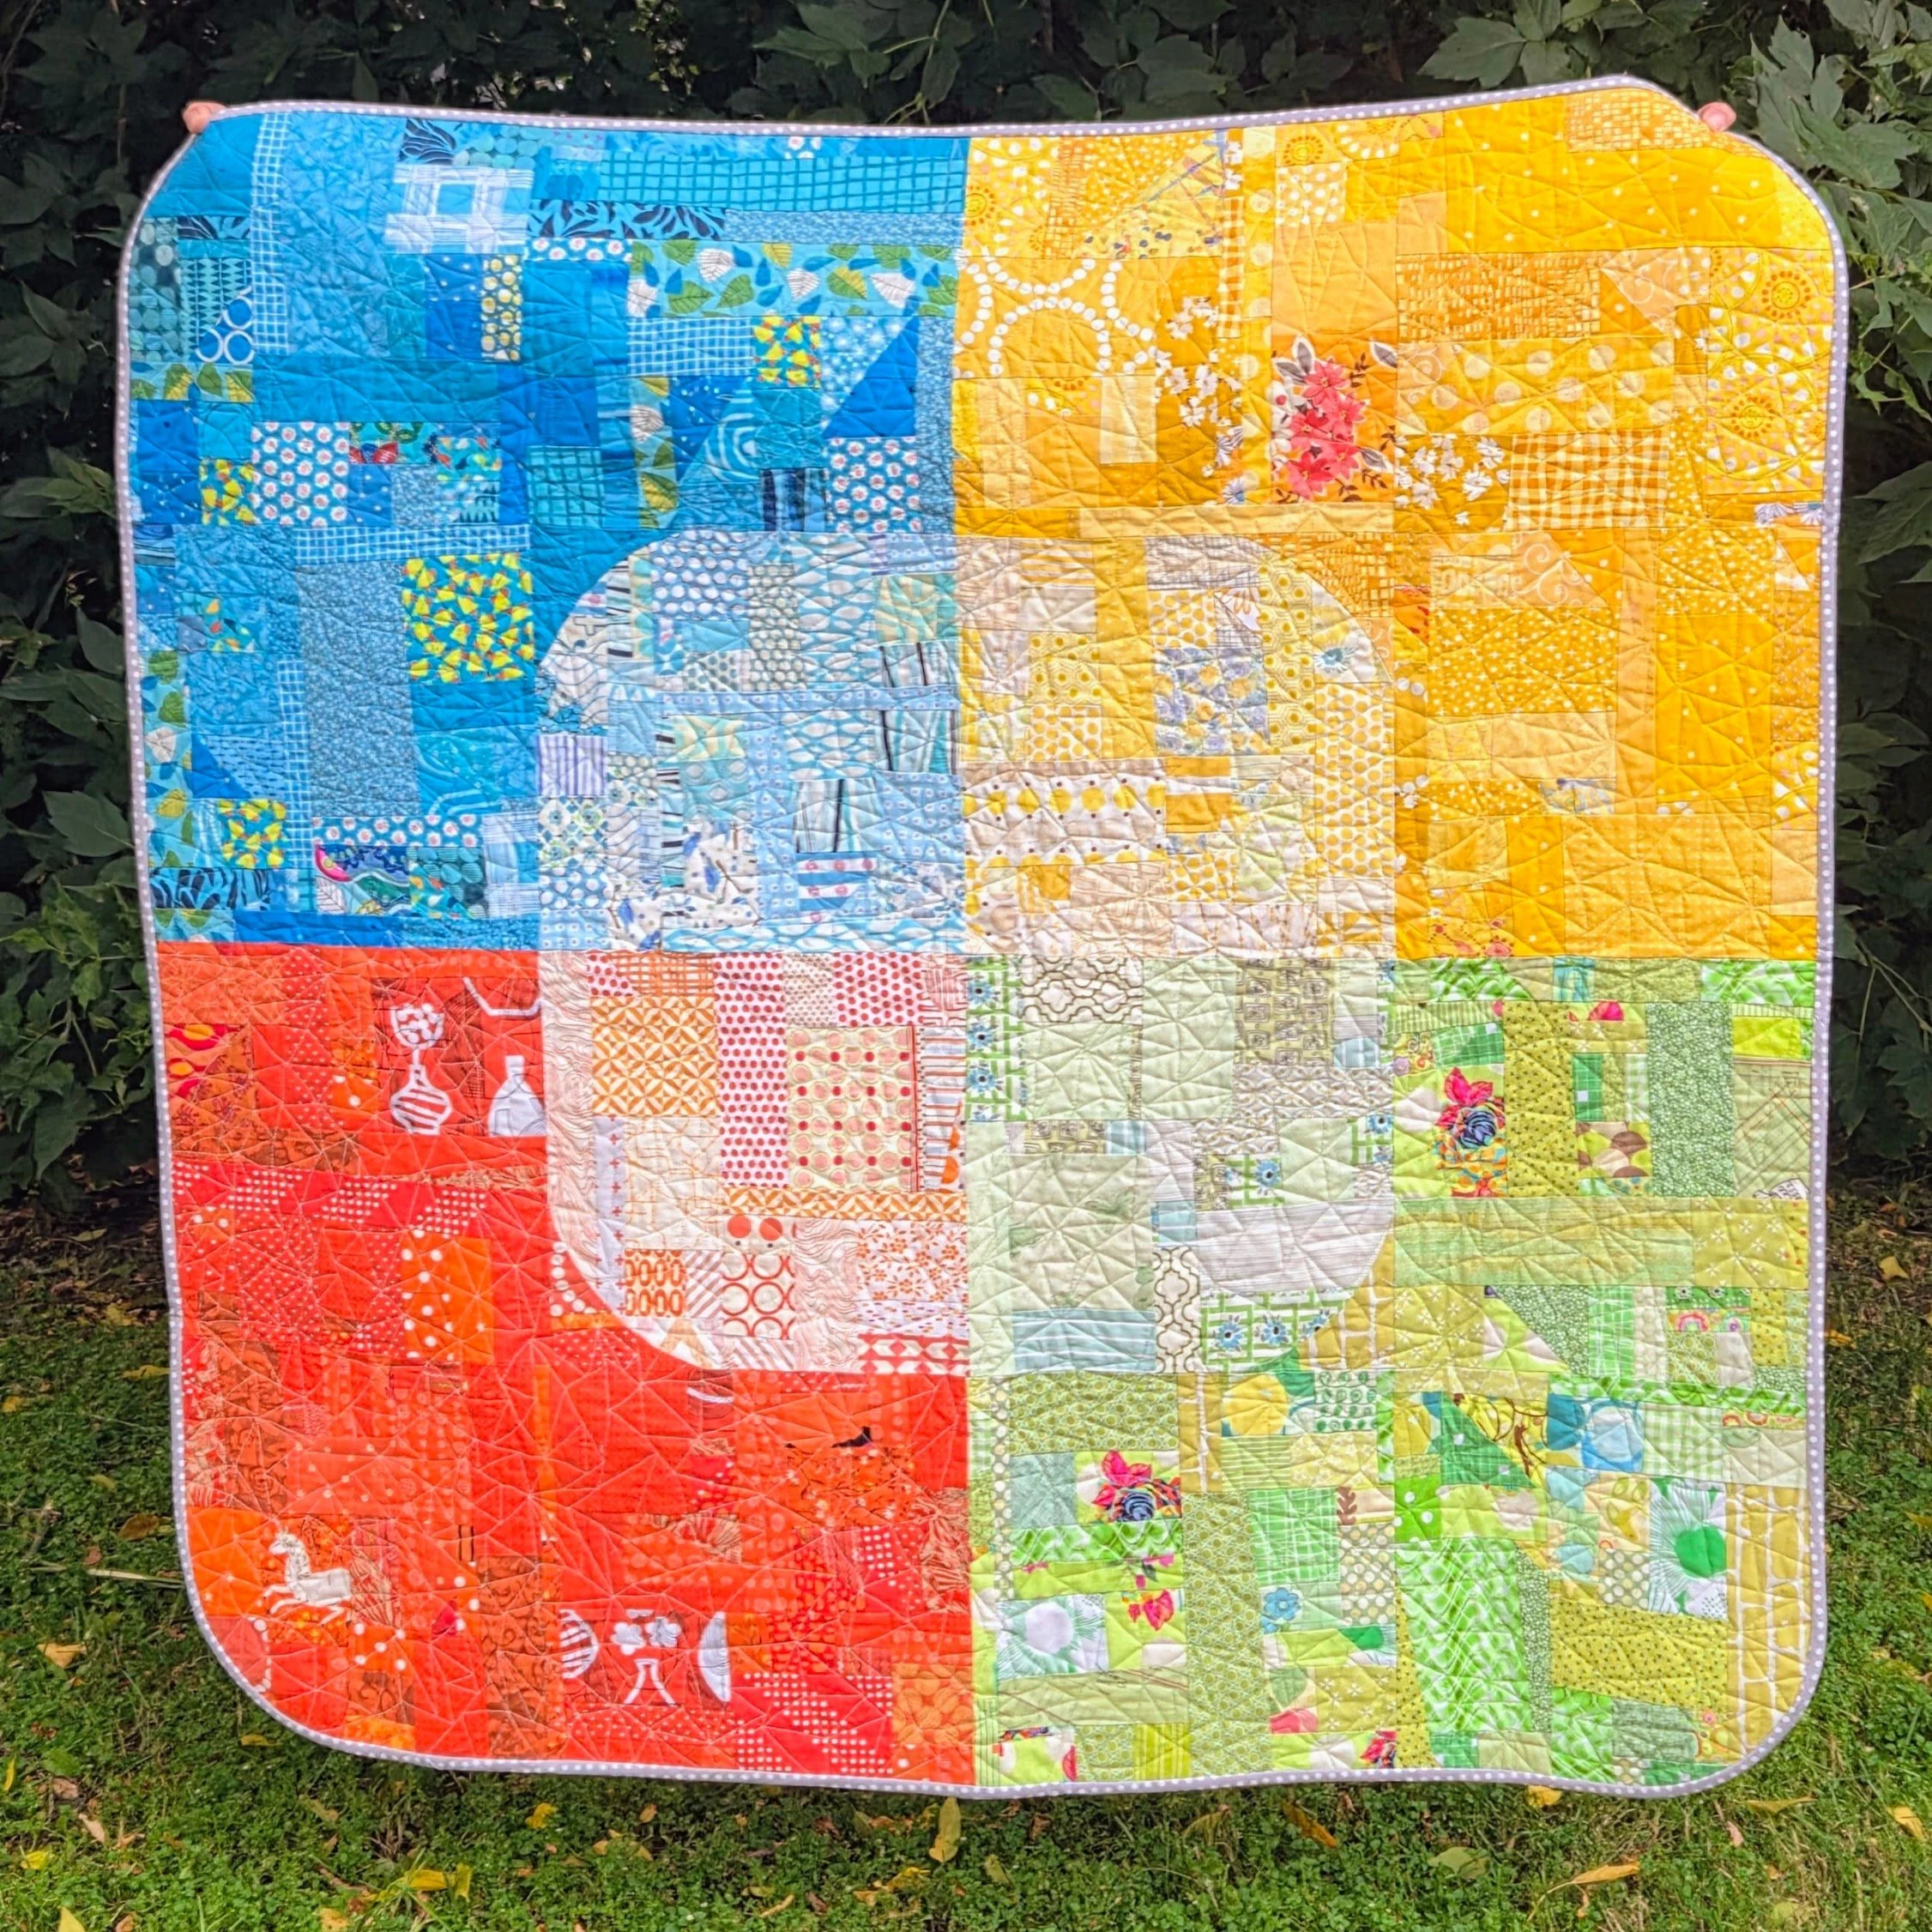
"machine quilting"

Pat - Playing with Scraps and Slabs

Pat

44” x 44” (ish)

Great grandmother, grandma, mother, wife. From British stock to Canadian stalwart.

This quilt was very recently gifted for an upcoming baby in the family. 28 years ago I made my first ever quilt when I found out my (future) sister in law was expected her first child. That boy is now married and they are expecting their first child. This quilt is a gift for that upcoming baby. Isn’t that a full circle moment?!
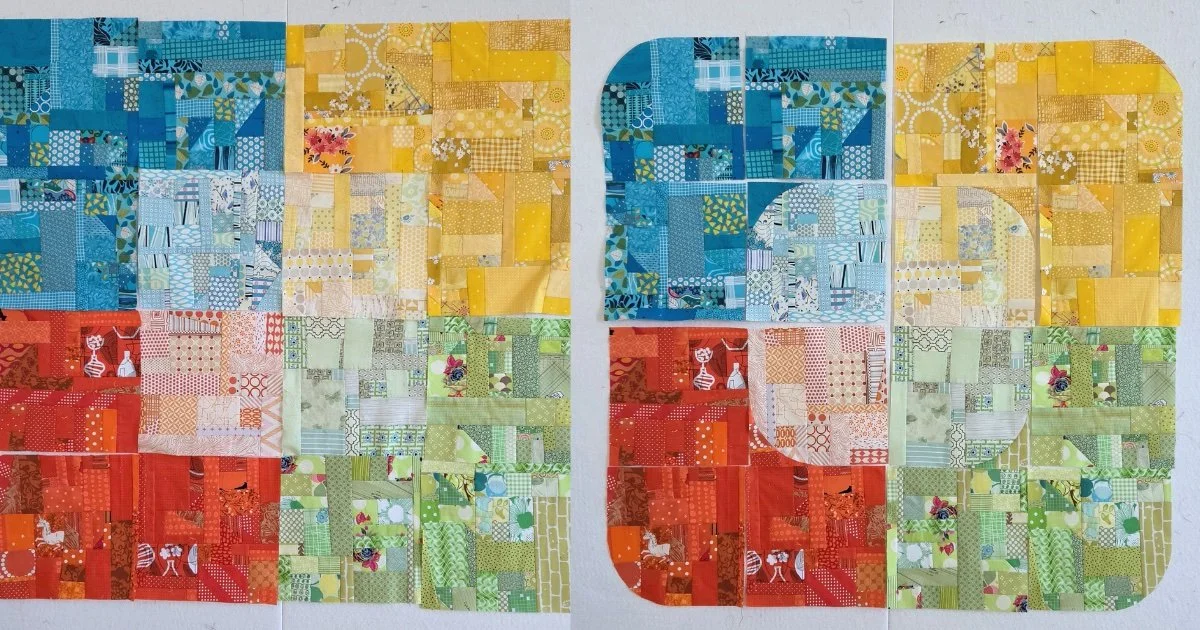
As a quilt teacher who loves her scraps, one of my most often made samples are slabs. In the last year I had made a handful of them during classes and they were just hanging out. After one event this spring I decided to add to the pile with some alternate values in the same colours. In the end, I made the 12 slabs you see on the left. However, I felt like these blocks - if they were going to be a quilt top - needed something a bit more. Not a right or wrong situation, but a “why not” kind of thing.

It’s been a while since I made precise curves. I’m usually all about the improv, but precision felt right for these particular curves. Yes, I had to look up my own instructions because it’s been that long. Good thing I have them in this book!

Piecing out of the way, I turned to quilting. After an afternoon flipping through both free motion and straight-line quilting books, I returned to a doodle I’ve done a few times. I don’t even have a good name for it, maybe a connected triangle meander? See? Not a good name. You can see it better below.
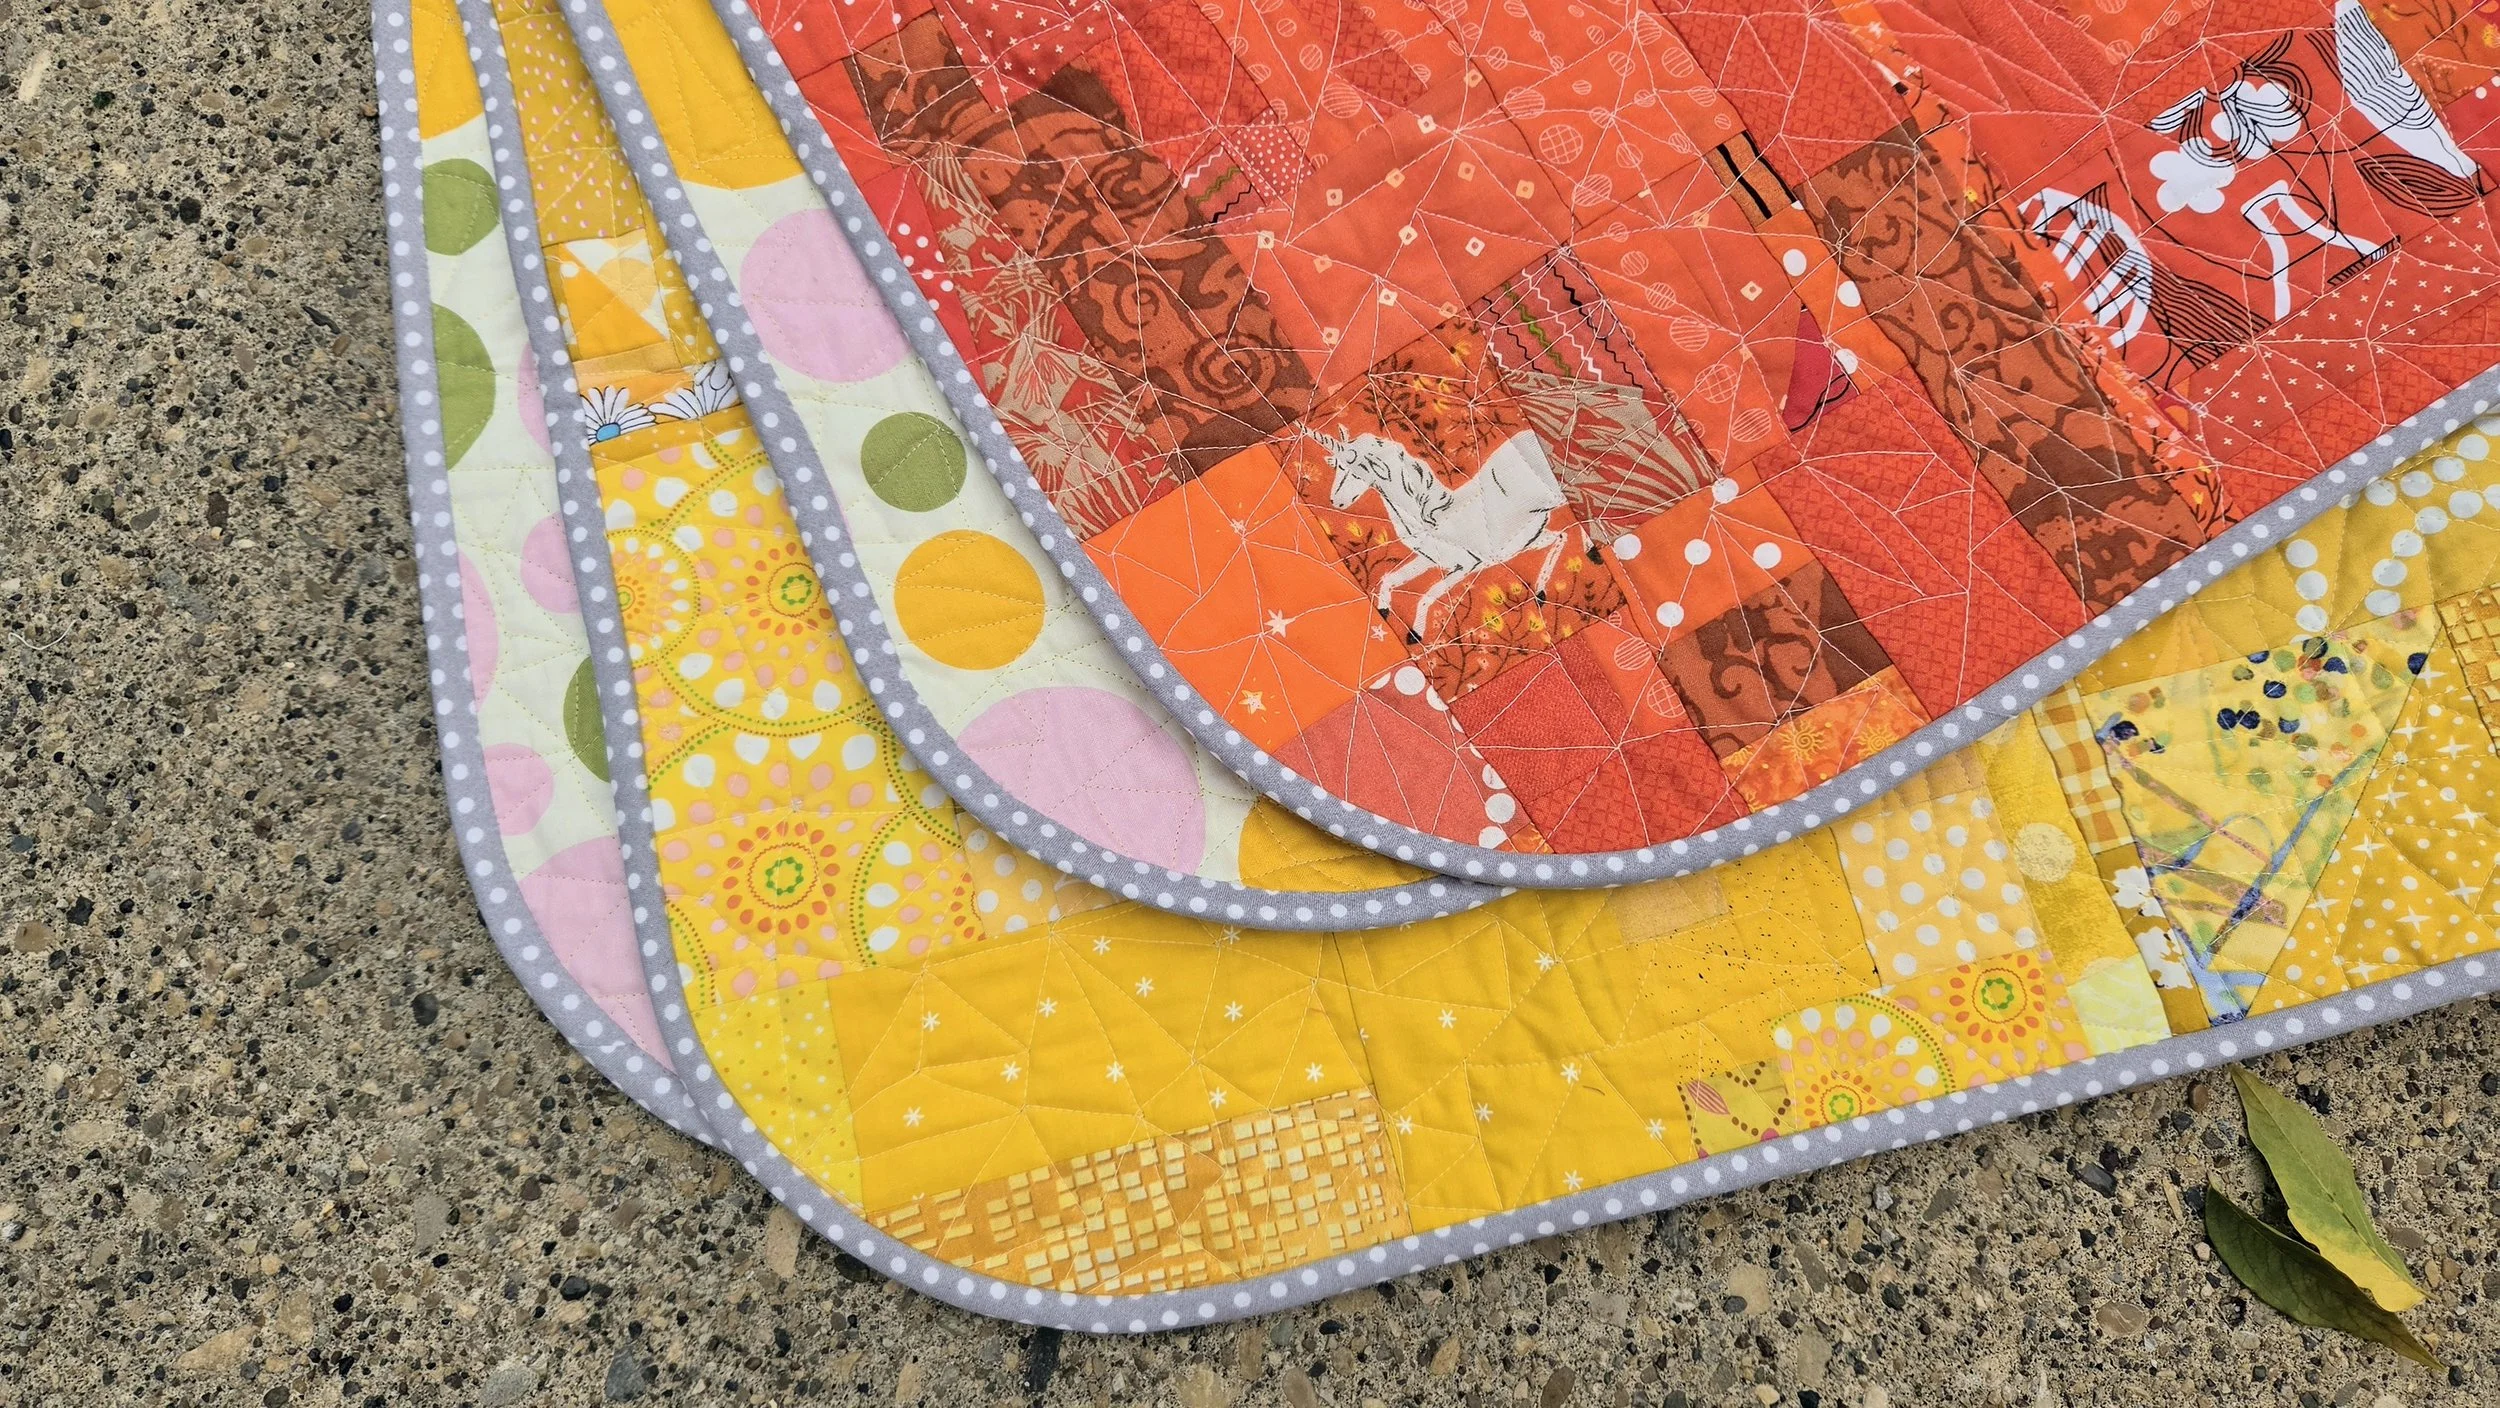
The real stars here, let’s be honest, are the corners. Look at those curves. So freakin’ adorable!! You do have to make a bias binding to do this well. Not hard, but definitely uses more fabric. I made the entire quilt from scraps and stash - including the backing and the batting - but had to go buy fabric for the binding. I don’t generally buy big pieces of fabric so I did not have enough of anything in an appropriate colour. Absolutely worth it, though. The binding went so smoothly around the corners.

(Yes, I may add rounded to corners to every single quilt from now on. The bias binding will be worth it.)

Now the quilt lives with my nephew and his wife as they await the baby this fall. I am grateful to them for indulging my creativity and being able to share my love.

Yesenia - 'Modern' and Minimal Log Cabin Quilt

Yesenia

70” x 70”

This girl is a bundle of energy, when you get to know her. She is warm and welcoming to all, but saves the best of herself for her friends. But don’t worry, she is quick to make you her friend. With an infectious laugh she can make anyone smile. With a great hug she can make anyone feel loved. She gives so much there might not be enough left for herself, so this quilt is a way to give herself a hug.

A good family friend, my MIL’s best friend, is going through a challenging time and deserved to be hugged, to be reminded that she is loved by many. When I heard her news I immediately wanted to make her a quilt. There were some time constraints so it had to be a quick finish. In consultation with my MIL I went though the available quilt tops to see if any of them would work. Turns out the answer was no, our friend is more of an earth tone person than any of my quilts. Unphased, I went through sets of blocks and samples to see if any of them would work. This collection of log cabins was the winner!

Collection of minimalist log cabin blocks in grey, coral, yellow, and turquoise

The set of six blocks were made as a sample for my friend Janine at Uppercase Magazine when she was launching a fabric collection. I’ve made a few things for her over the years, but with this set she wanted in progress, not finished quilts. The blocks have sat for years since, with me only pulling them out as samples when I teach my Traditional Variations class.

The bonus challenge set by this project is the use of sage green. You see, sage green is probably my least favourite colour. And it is our dear friend’s favourite. Thankfully, these blocks played well with sage. There is a touch of a yellow green in a few of the fabrics so I added yellow and green into the mix. I did have to make more blocks so it was an easy add. This only would make the quilt 60” square, however. In my opinion that is on the small side for a snuggly quilt. Instead of making more blocks I opted for a border.

What? A border? You, Cheryl?

Sage green and a border, I don’t know who I am anymore.

Oh right, I’m someone who wanted to give out a hug that would be truly appreciated. I’m still me, though, so I had to do the border my way. That’s why it is only on the two sides, creating an off balance composition. It’s a bit of tension that seems to work.

4 corners of a neutral quilt with pops of turquoise and coral

The whole thing reminds me of the rise of modern quilts 20 years ago. For quite a few years a modern quilt was defined by a log cabin, wonky or not, with a lot of negative space. This quilt comes across as a little throwback to those times!

To quilt her I opted to contrast all those right angles with flowers and swirls. Most of the fabrics are tone on tone so the quilting is very visible. And to up that sage green I picked that exact colour in my thread for the stitches. The whole thing was done in a few hours on a rented long arm at one of my local quilt shops, My Sewing Room.

I had no good fabrics for binding either. I wanted a softer edge versus high contrast. Did I have that in my stash? Of course not, thankfully this beige was perfect and found at My Sewing Room as well.

From blocks on the design wall to a delivered quilt it was only 3 weeks. A record for me, especially in December! Totally worth it as it is coming in good use to give hugs through a trying time.

Unquilting

Sigh… Big sigh.

Last week I was all excited because I gave myself a day to quilt. It’s been a stressful few months and I needed a day to myself. I also needed a quilt finish or two in order to clear my brain. So I booked a day on the long arm, got a few quilts all prepped, and went in to My Sewing Room to hang out with Emily, who runs the long arm department there. She helped me load my first quilt and thread the machine - the two tasks I always forget how to do. Otherwise I feel pretty comfortable on the long arm. I started up and went along merrily.

Yes, I checked my tension - once - at the very beginning. Admittedly, it was hard to see as it was yellow thread on a yellow part of the backing, but it looked okay. And so I rambled on. Nothing fancy with my quilting, just loops and stars all over. I was listening to some upbeat dance music and in my groove. Emily was doing her thing and left me as I felt more than confident.

Overconfident.

About halfway through I noticed that the tension was off on the stitching. I saw the blue fabric of the background as it wound around the bars and I could see my tension was off. I made some adjustments on the computer of the long arm and continued. Folks, it did not get better. Finally, I conceded to my mistake and called Emily over. I should have stopped there but I decided to proceed, after she made more adjustments. Bad move. Long story medium, we never fixed the problem. I pulled the finished quilt off the frame and set it aside. Maybe it will get fixed with a wash? I foolishly thought to myself.

Emily tinkered with the machine - the bobbin casing was a bit off - and we loaded the second quilt. This time I pulled out an extra bit of fabric and tested the tension before I touched needle to my quilt. Much better! I proceeded to quilt the second quilt without any problem and in the course of those few hours accepted what I needed to do on the first quilt. While waiting for me to finish Emily graciously started the job of ripping stitches for me.

Pile of discarded yellow sewing thread on the back of Uppercase magazine

It’s been a long time since I made a mistake like this. I don’t blame Emily, even though I was renting and she was technically supervising me. I know enough, and made that clear when starting that I should have caught this myself. It would be easy to get really frustrated and beat myself up. Or I could get angry and blame Emily too. Neither action is going to help. The only thing to do is let out that big sigh, find your favourite seam ripper, and sit down to rip. It’s just a mistake on a quilt, it isn’t life threatening or even life changing.

Ripping stitches when the tension is loose on one side is actually quite easy, just very time consuming. This quilt measures over 60” square and I have a tendency to quilt things to death, so there was a lot of ripping to do. Thankfully, my son and I have been rewatching Ted Lasso so I sat with him and ripped, and ripped. He would fiddle with the pile of thread that grew with each episode. Therapeutic for both of us in many ways. It took me the entire third season and almost all of the Netflix series One Day to finish ripping. I only put one hole in the backing so that will be an easy fix.

It was all just a mistake, it happens. I know many of us would get ourselves quite worked up over this. Maybe call ourselves a few names? Cast blame and shame? Perfectionism is a nasty beast. Of course we want to improve, not feel like we are wasting time, and get things finished. That’s normal and understandable. But making ourselves feel bad over quilting? Totally uncalled for and unnecessary. Shit happens. Acknowledge it, clean it up, and move forward.

Time to rebook in to the longarm. This time I will remember to bring an extra piece of fabric for testing tension. I will also not be so cocky and use the resources there (Emily) to make sure I am doing things right.

Sunny Day Stars

Star Sampler Quilt Cheryl Arkison

Sunny Day Stars

72” x 72”

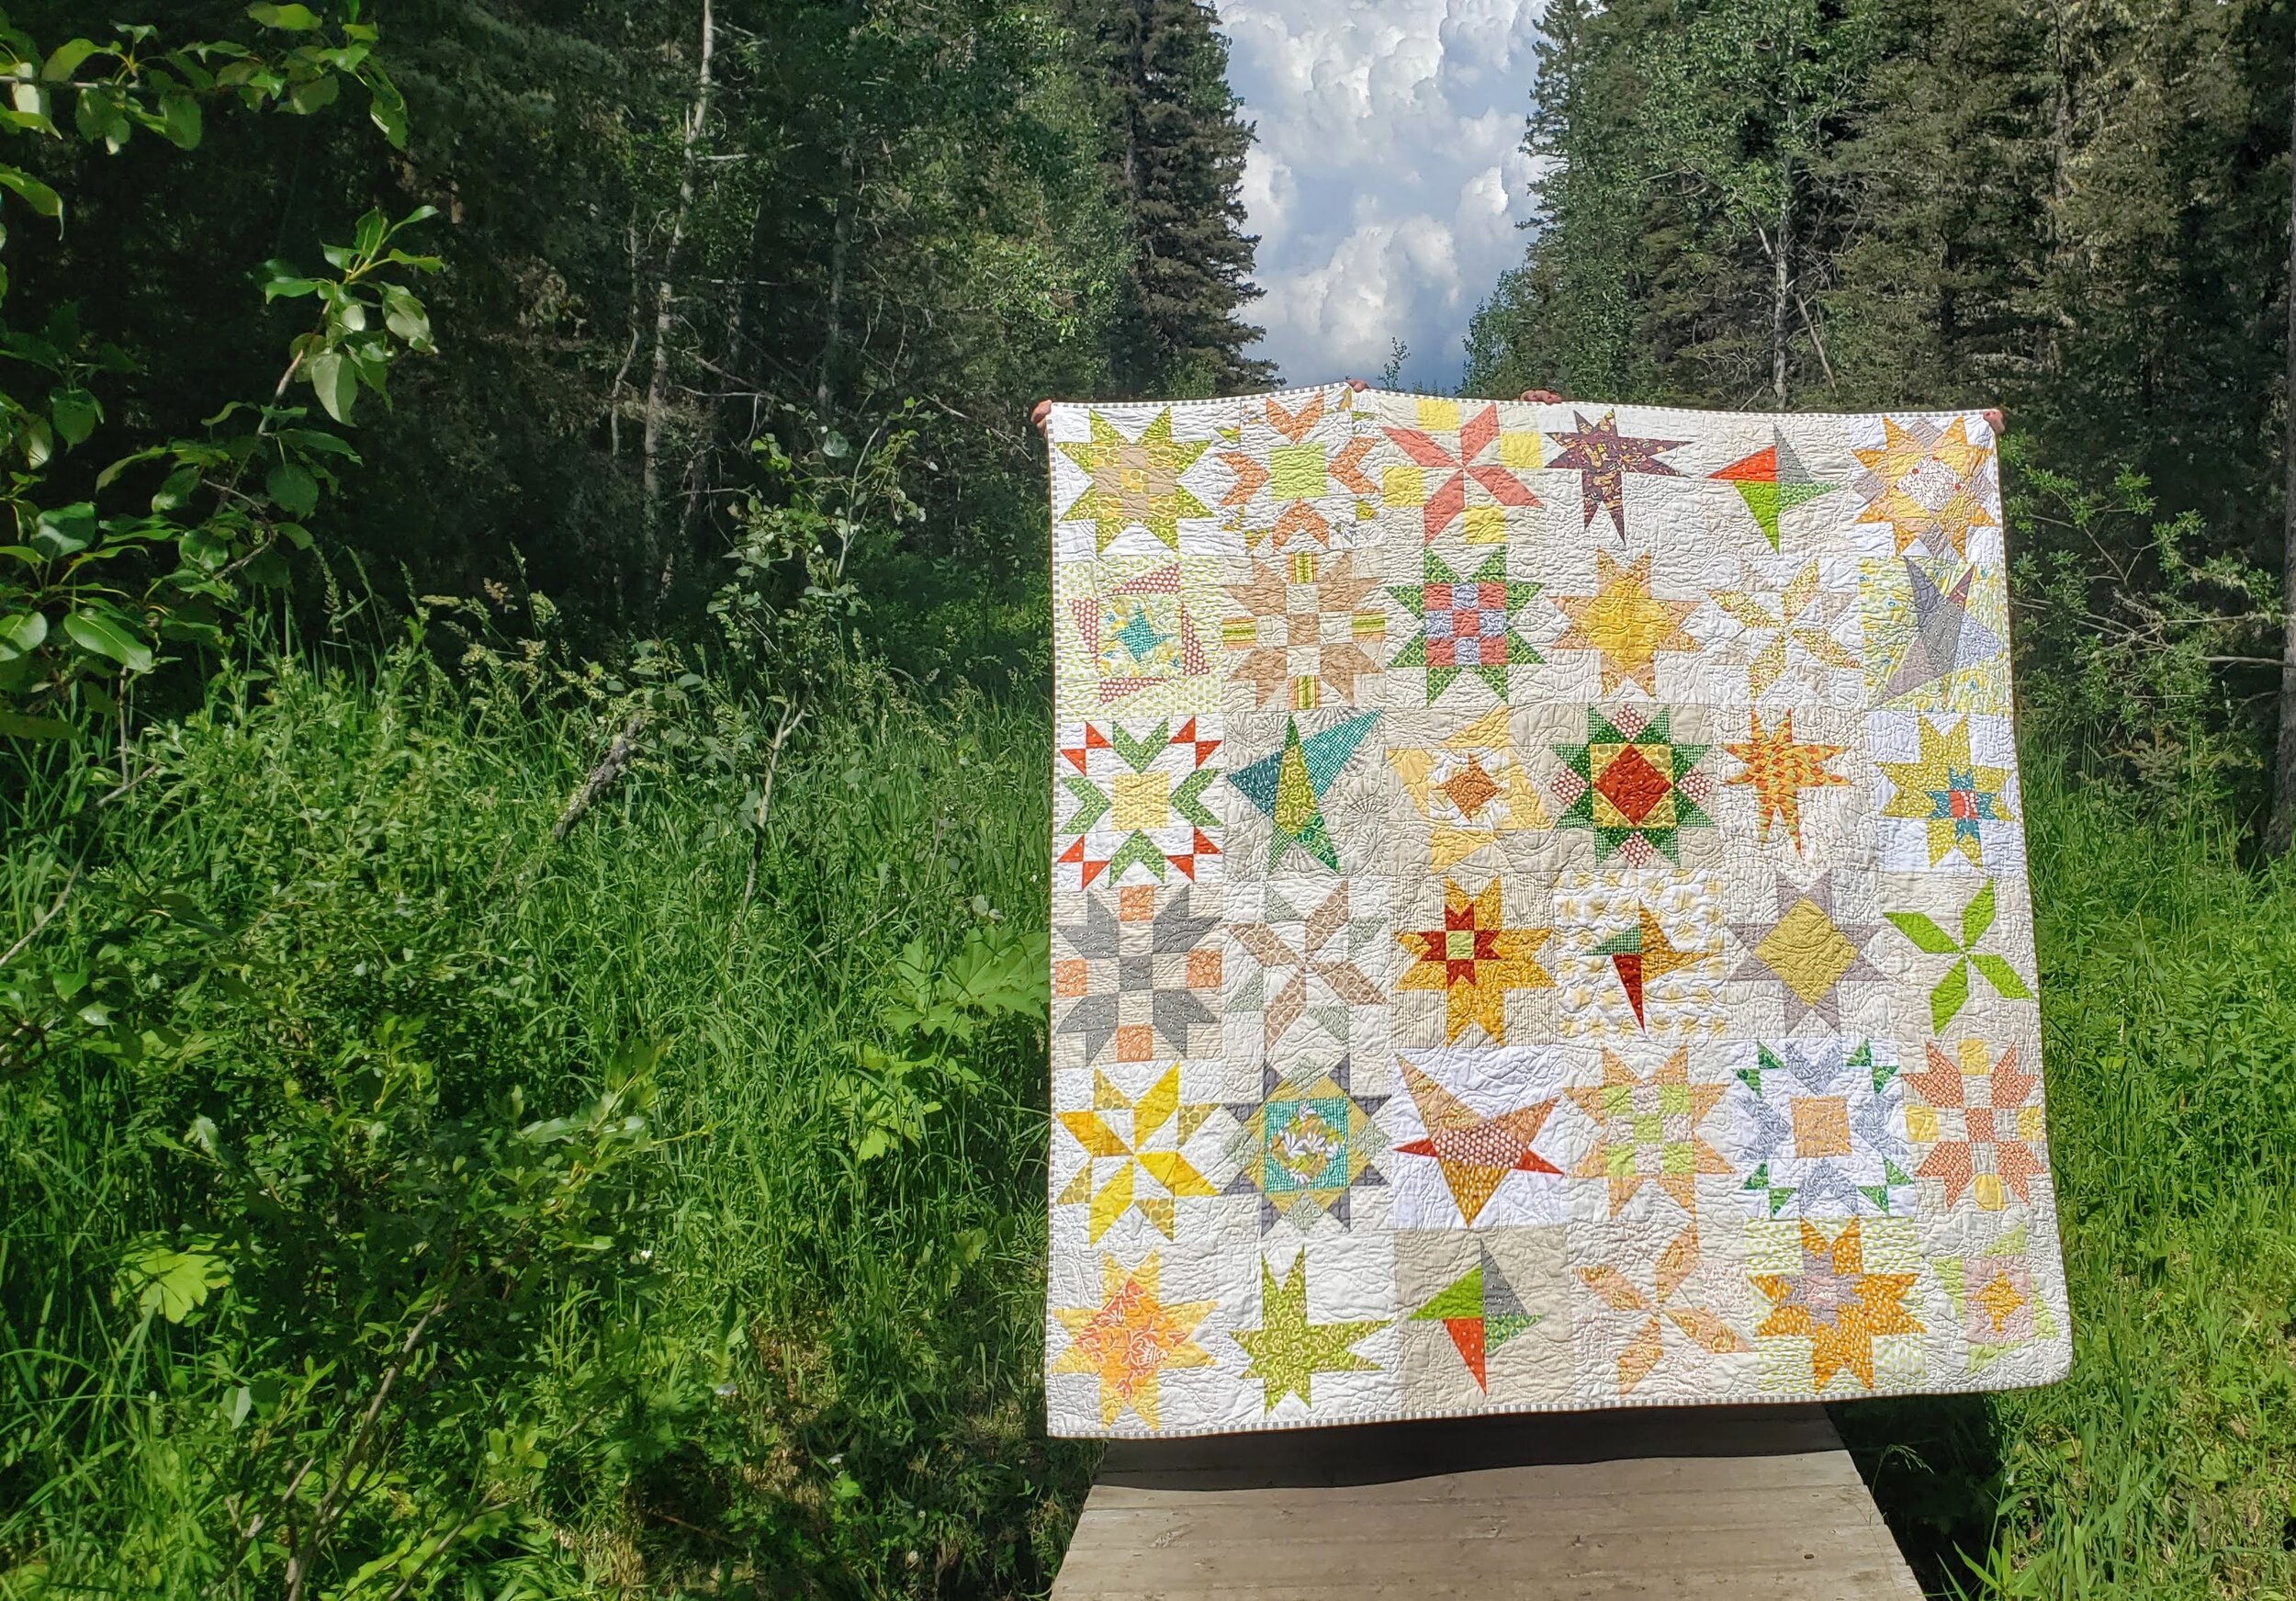
This was one of the oldest quilts from the Quilts Under Construction list. I looked back and realized I started it in 2007! It began as a free Block of the Month called Celestial Migraine by Planet Patchwork. Shortly after the year it ran the whole thing disappeared. (Planet Patchwork also appears to be no more.) I think I made 3/12 blocks. I do remember that the final quilt was quite lovely in a seemingly random layout with a lot of negative space, mimicking stars in the night sky.

Over the years I would make another star block or two when I was craving some precision piecing. Lucky for me there are a tonne of traditional, free star block patterns. A few modern ones too. Then late last summer I got it in my head to actually finish this quilt. Well, at least the top! So I set out to make stars.

Modern Star Sampler Cheryl Arkison

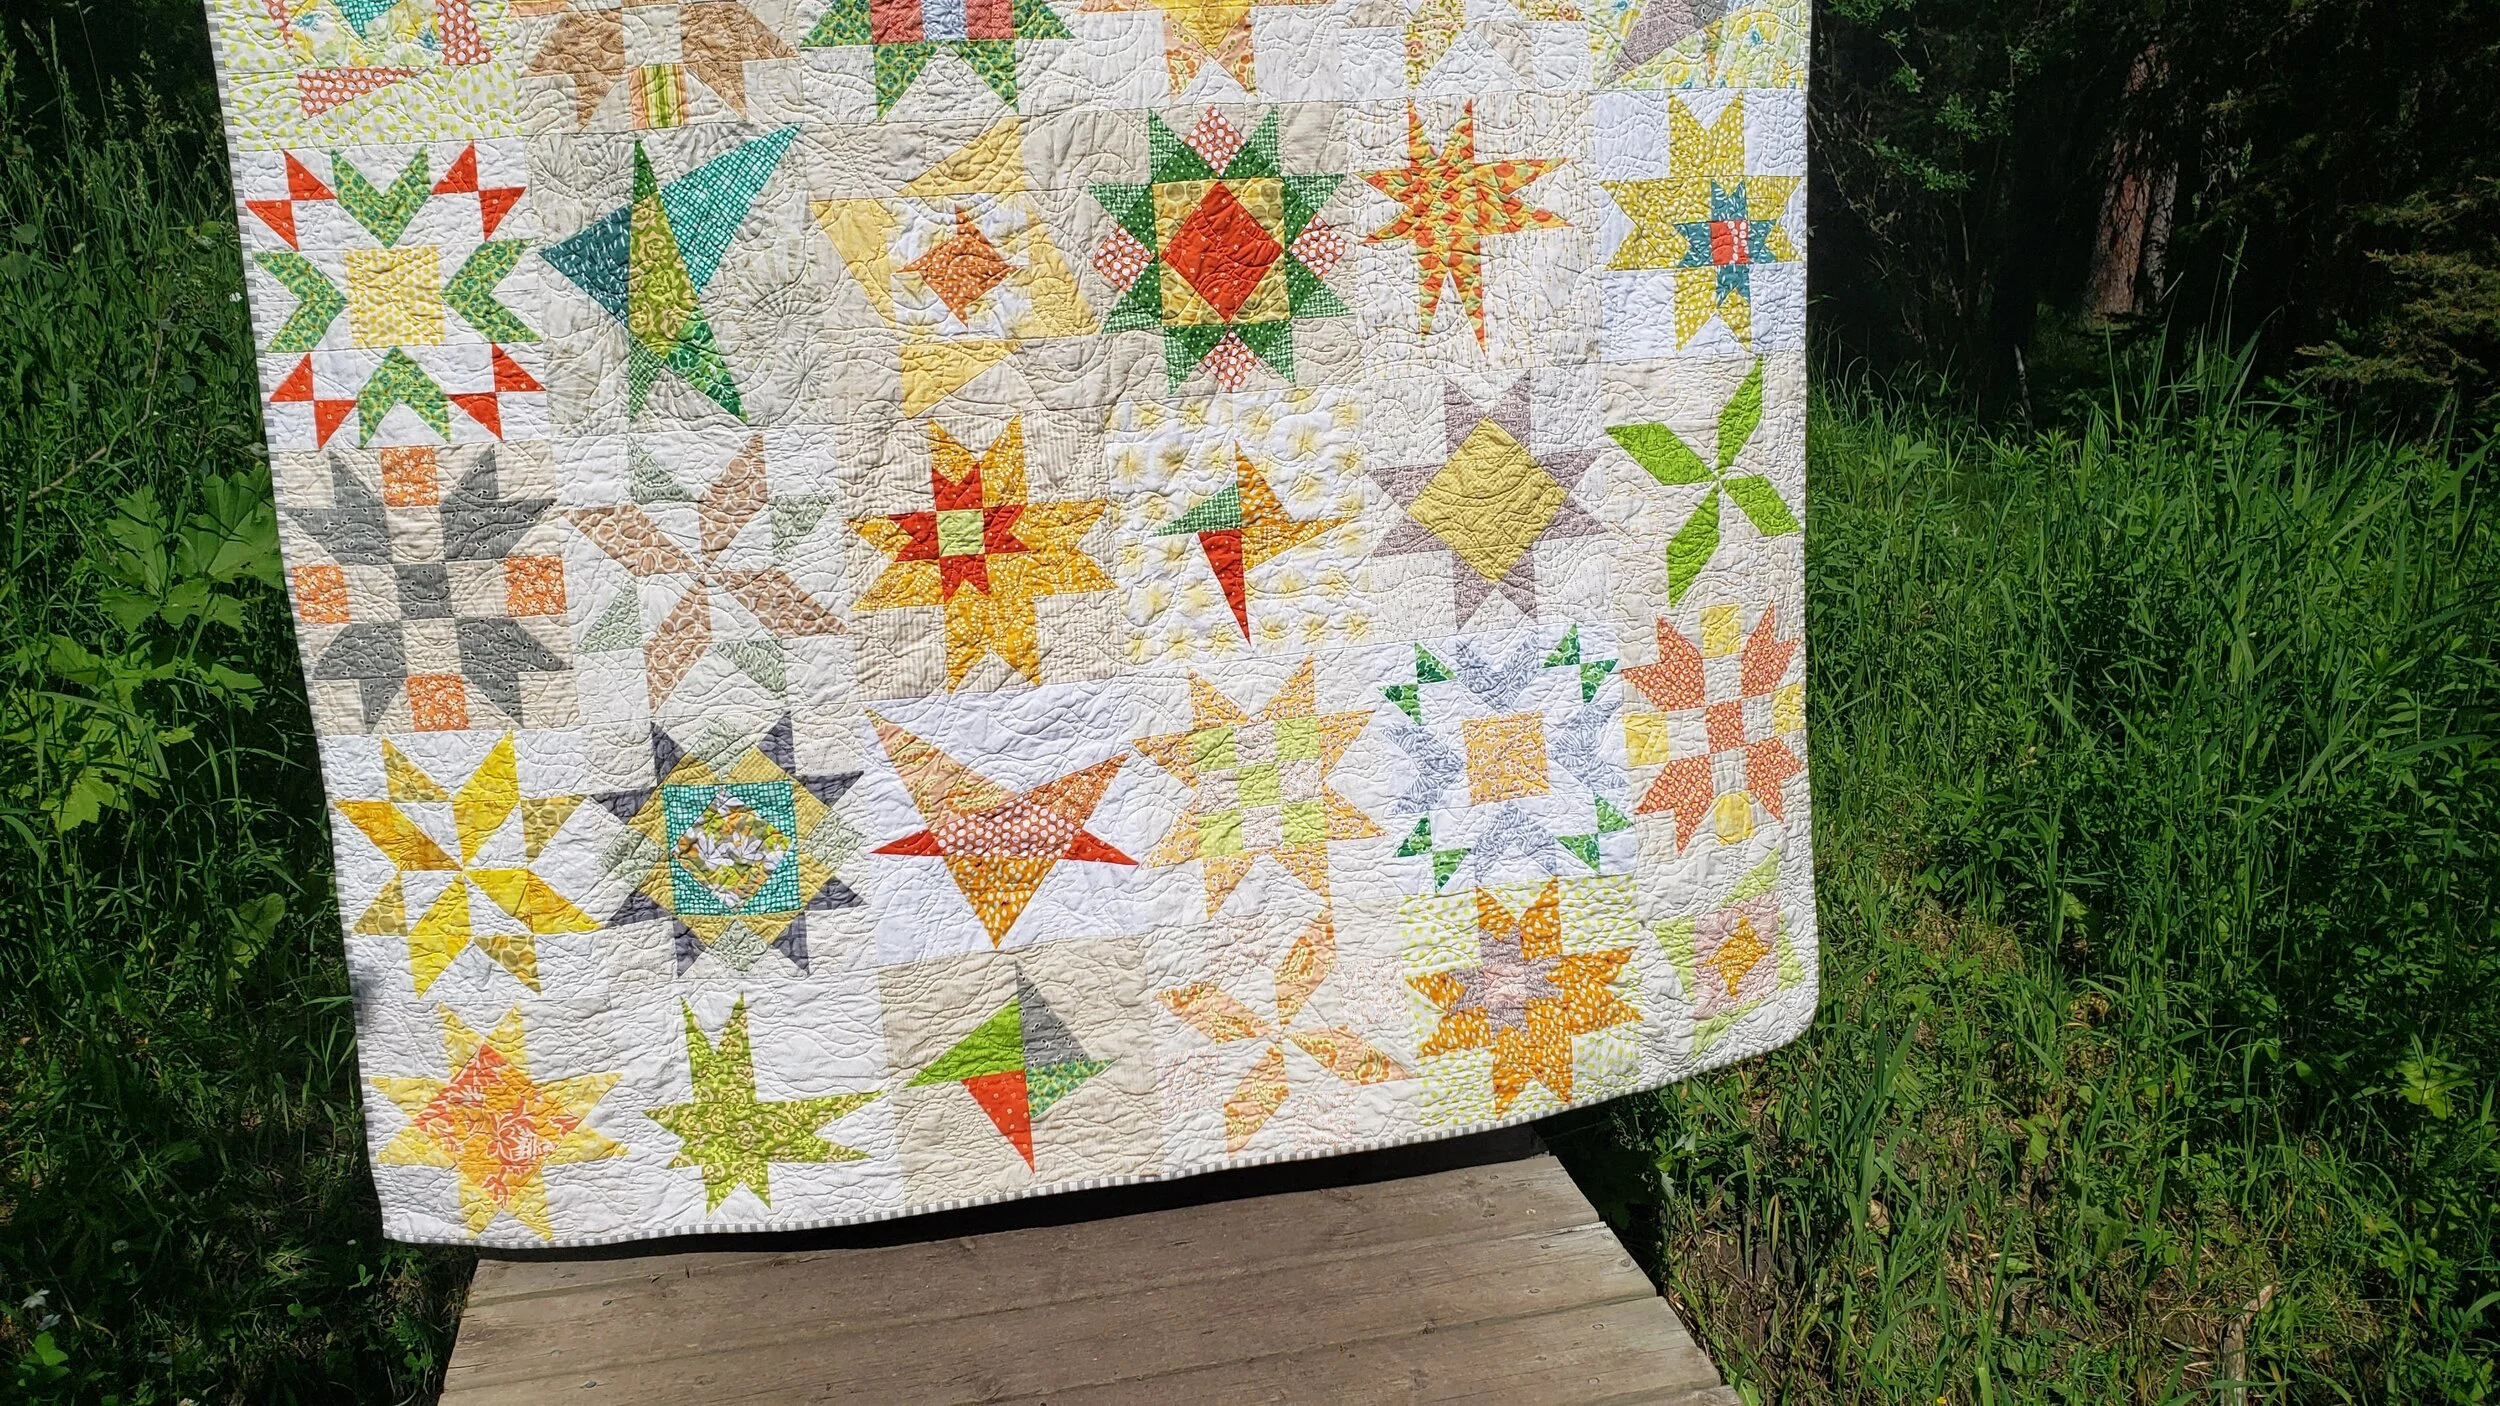
Each star block is repeated 3 times, for a total of 12 different star patterns. Each one, however, has a different combination of fabrics. Orange, gold, green, grey, beige, and white. In truth, it is a rather spring coloured quilt. But I finished the top during a September snow storm and finished the whole thing in the summer thunder storms. Still all about the sunshine!

It was a lot of fun to play with fabric on this quilt. Some stars pop, others recede. By playing with the contrast between the stars and the background, or the different components of the design I could change the entire look. The key was making sure not one star was too bossy.

Party in the Quilt Back Cheryl Arkison

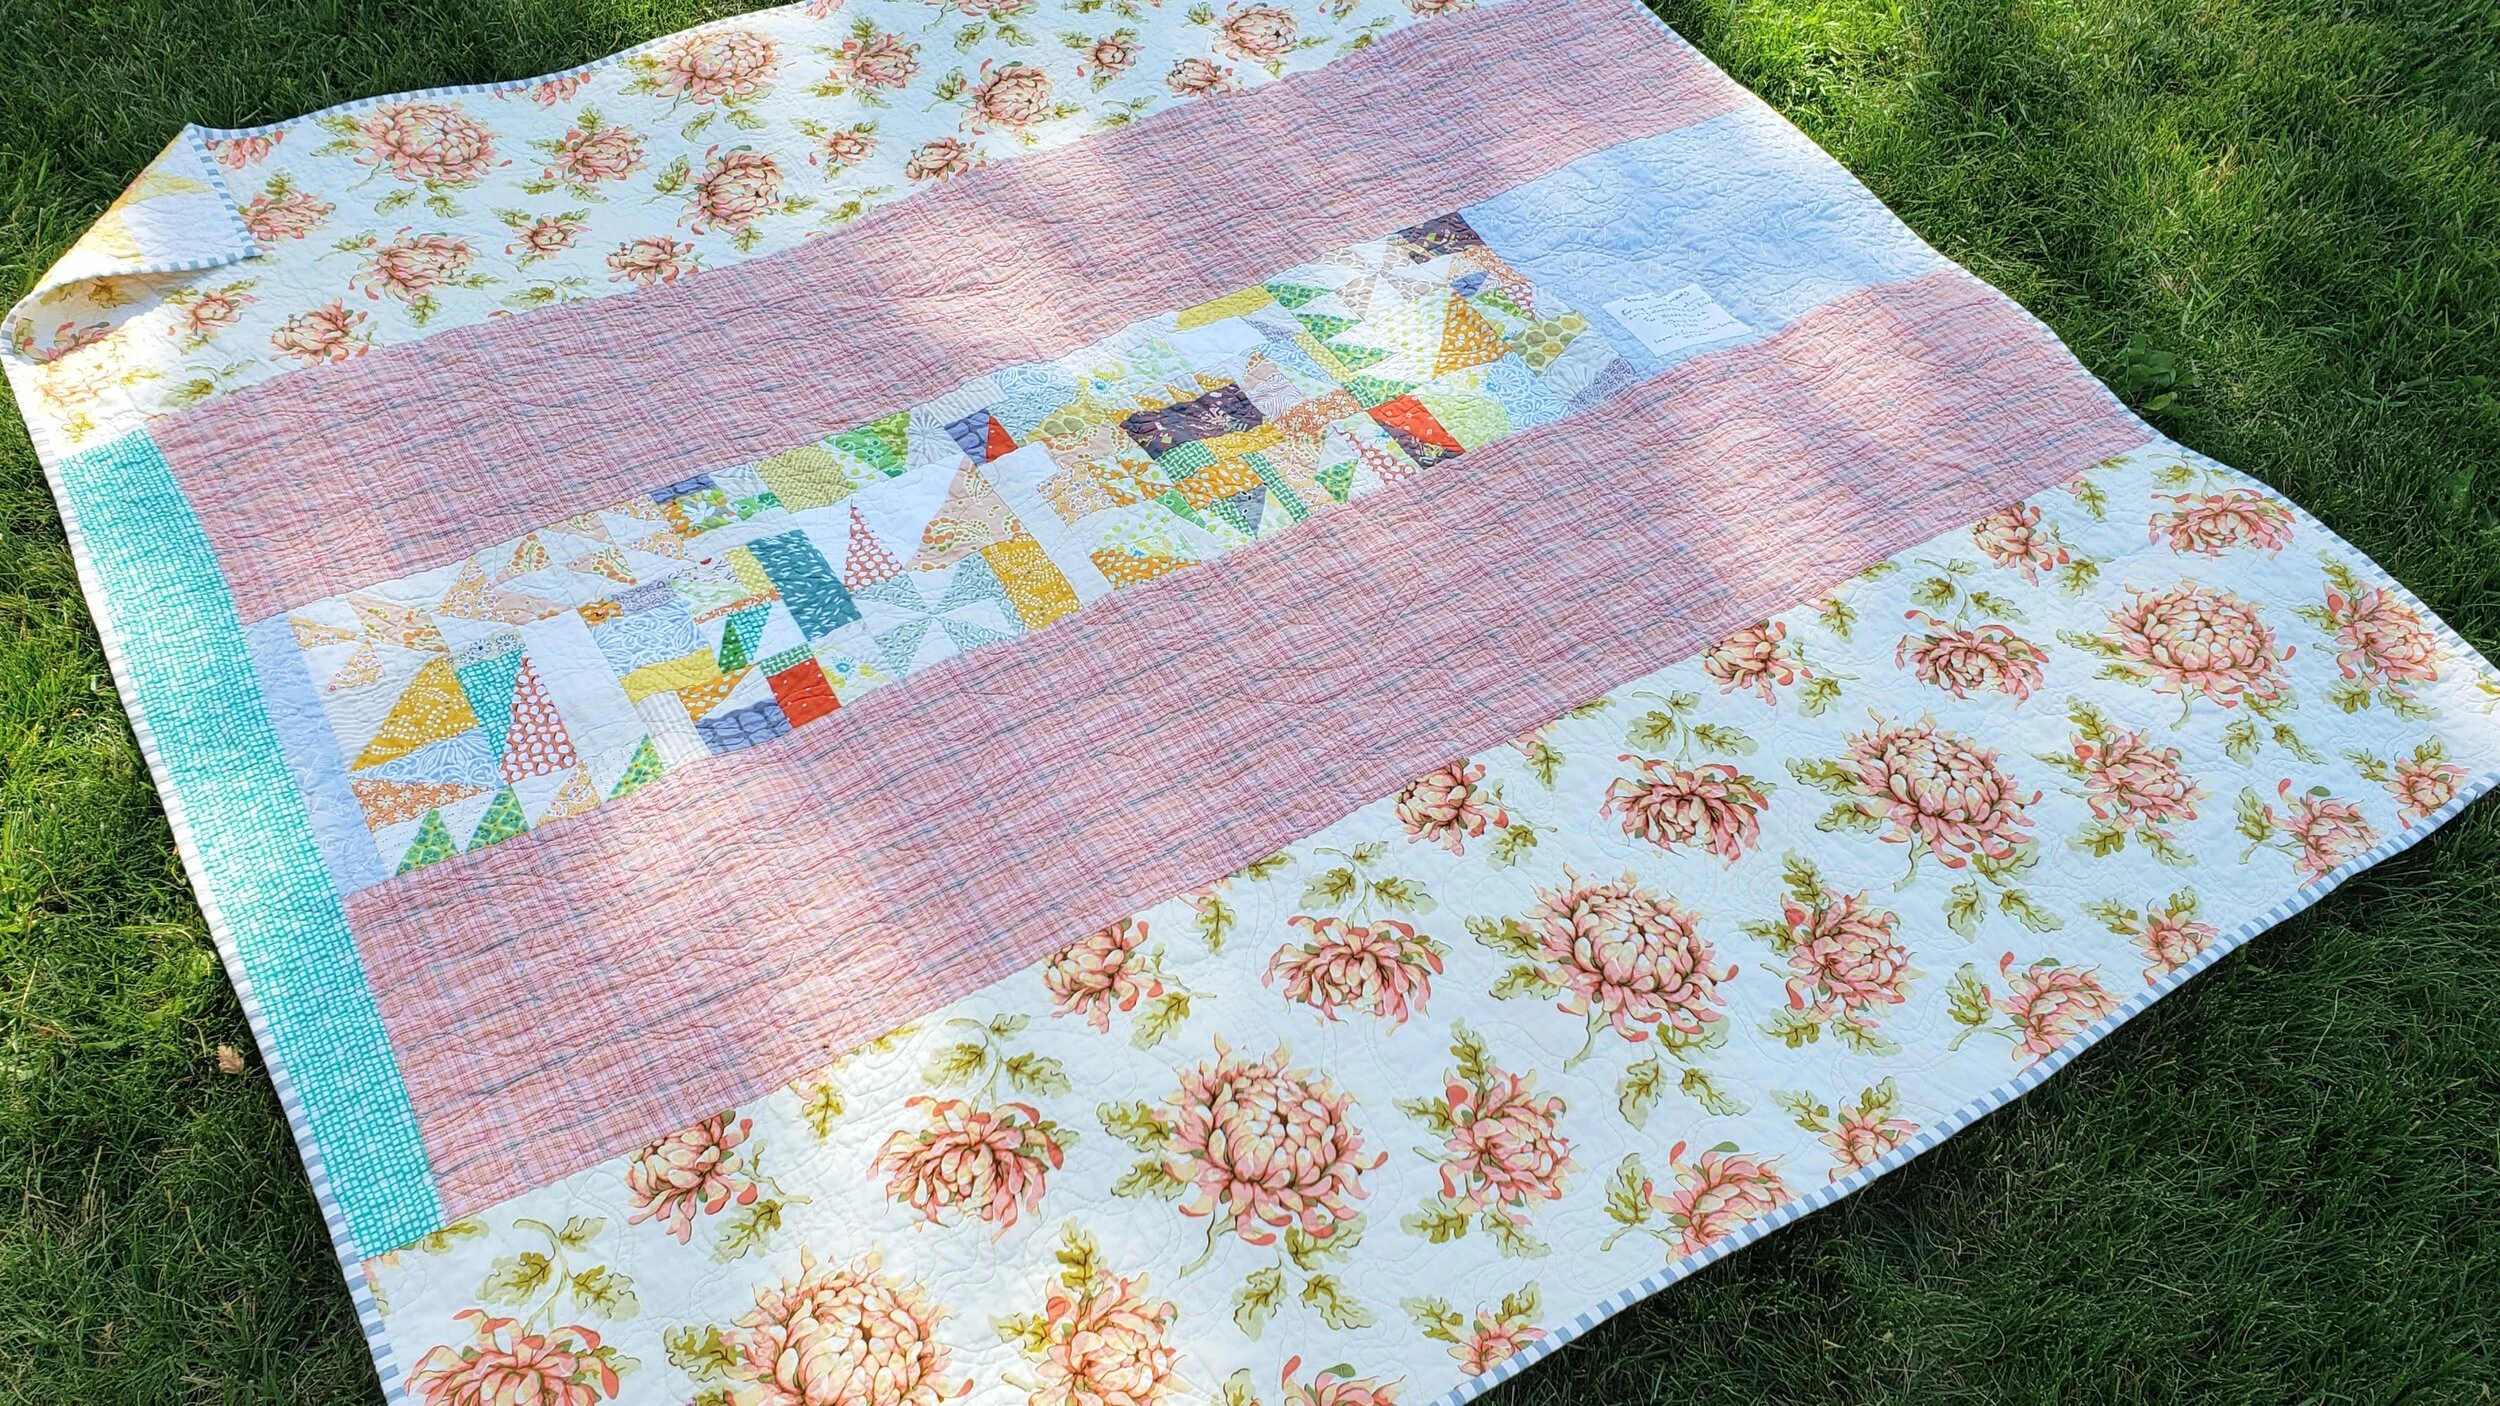
The quilt back started with the scraps from making the last of the stars. Little bits and leftover triangles sewn together for fun. I used that as the centre and raided my stash for the rest. That large floral just happens to go with the first stars I made years ago. All of them are from a collection by Heather Bailly. The rest was just stuff I had around to make it work.

Quilting inspiration came from Dara Tomasson and her book, Walk, Jog, Run. She shared a ribbon quilting pattern - essentially a large meander that you echo to look like a ribbon. It was perfect for this. I quilted the whole thing in a peach Aurifil 50W.

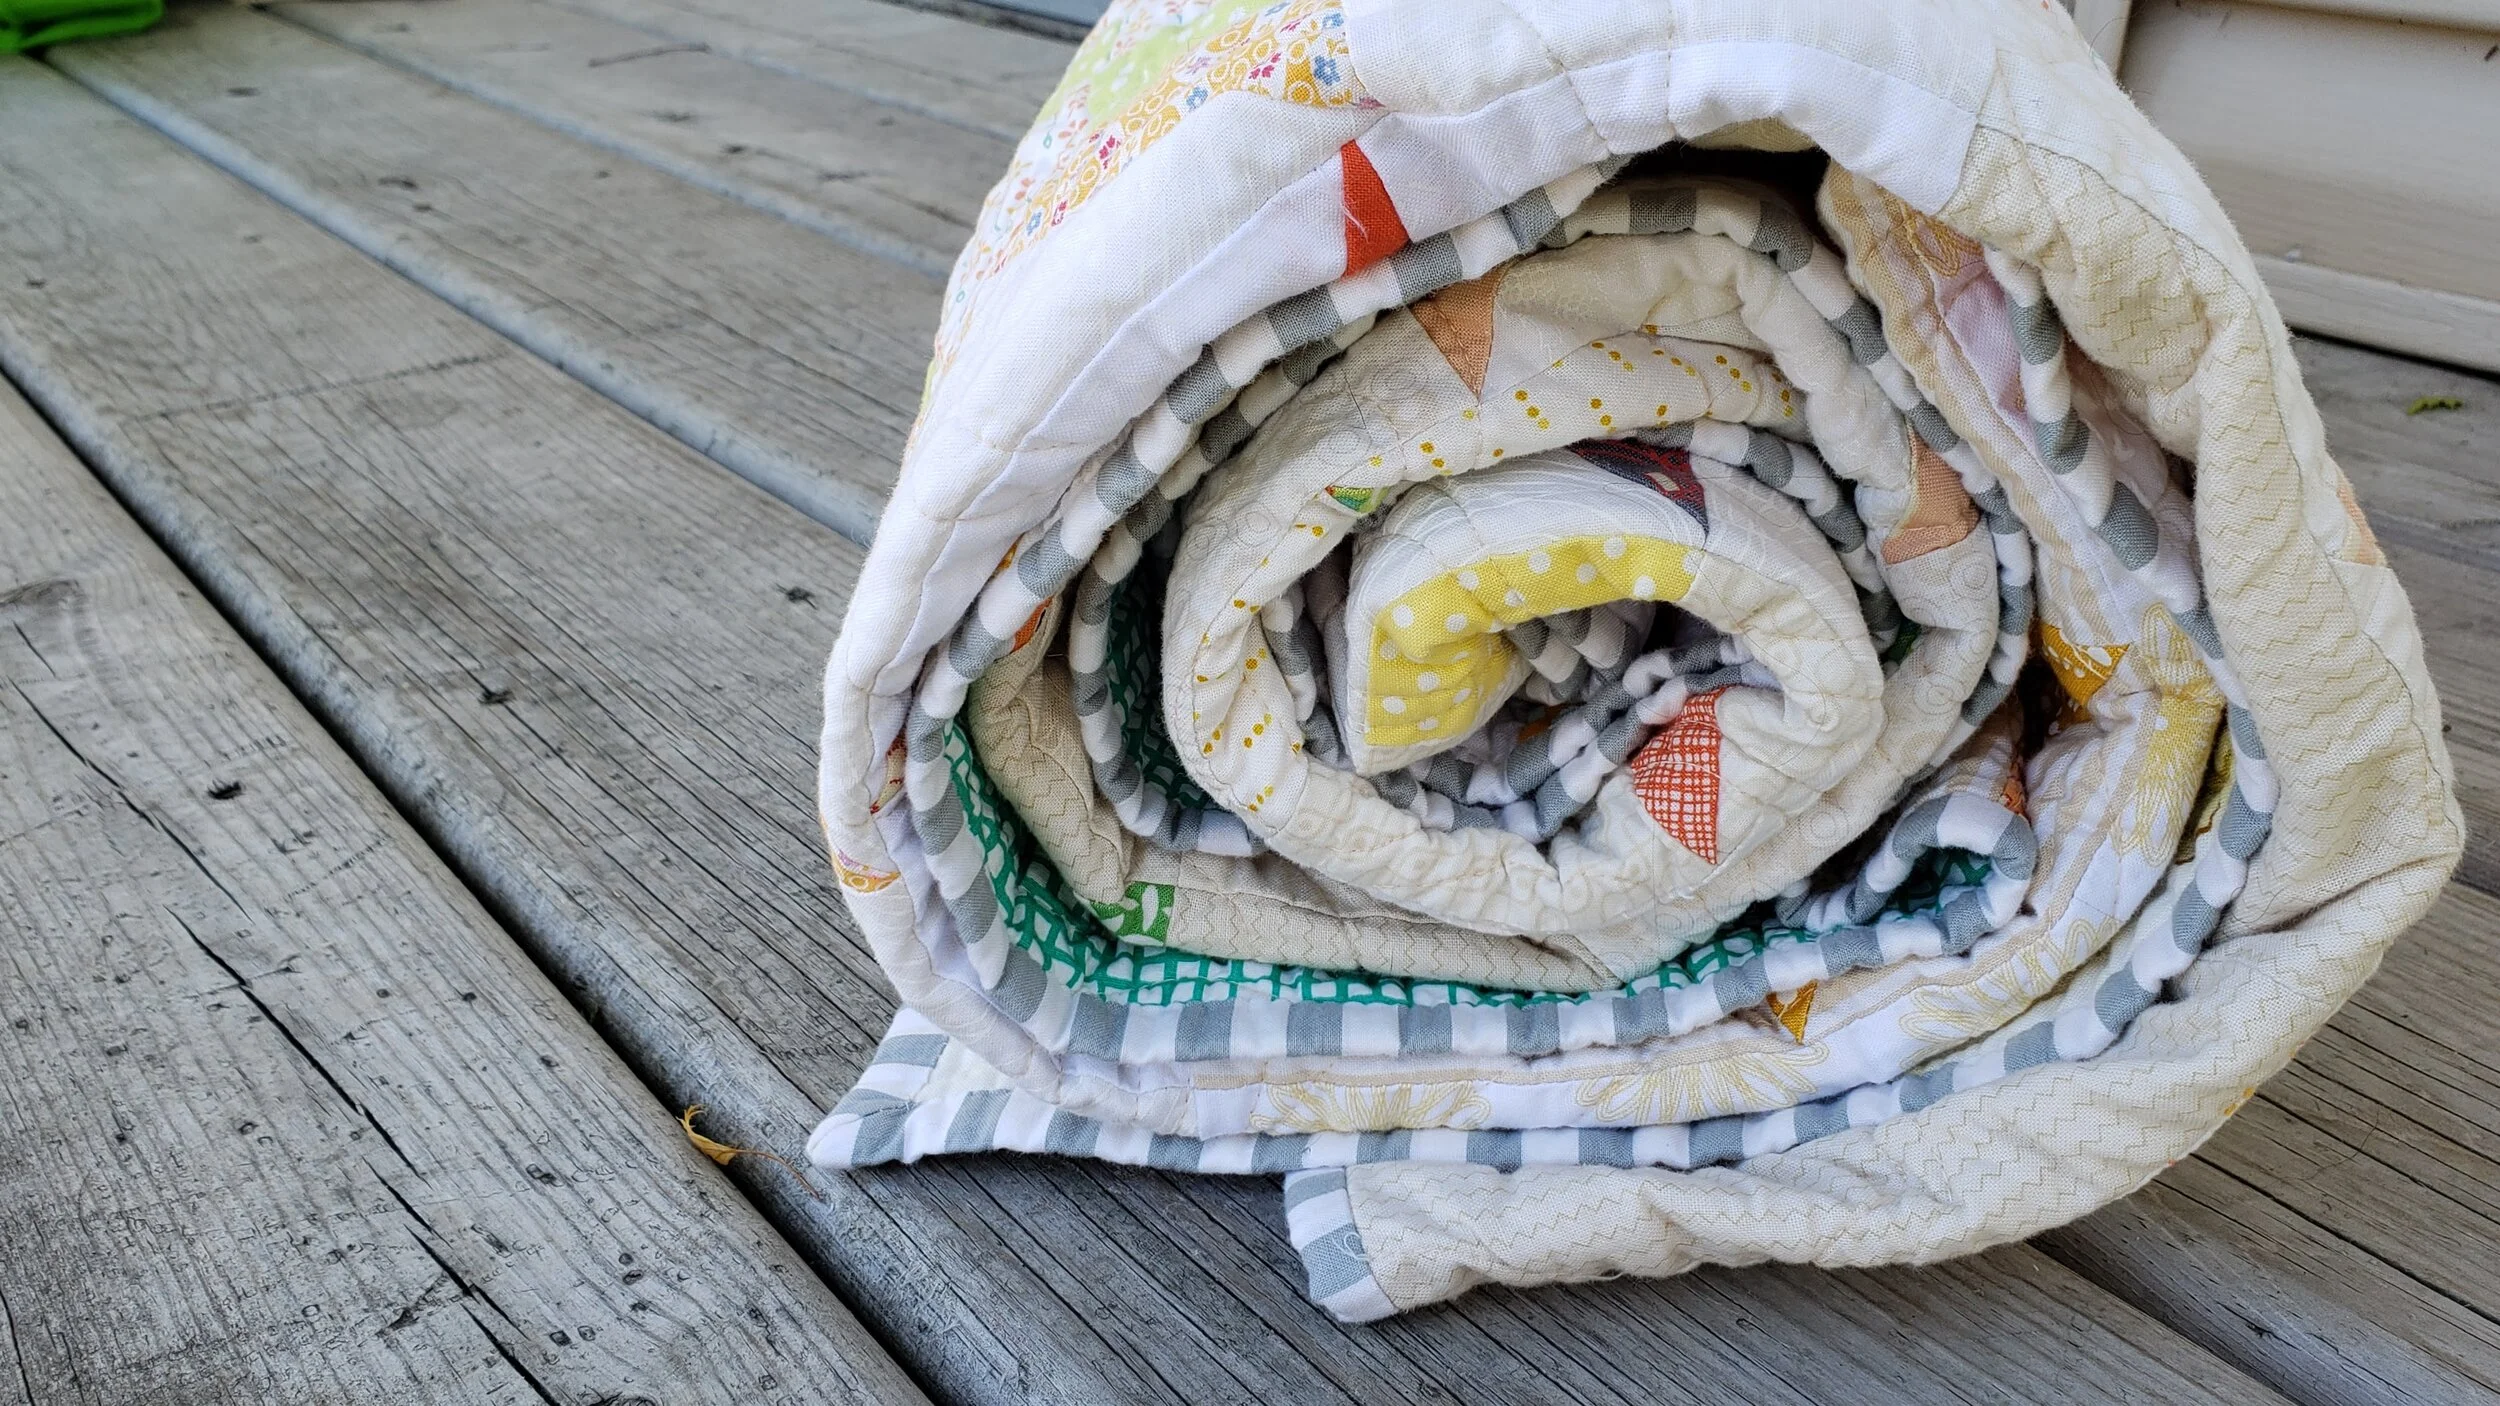
I won’t lie, I wanted a green binding. Alas, there was not enough of the right greens in my stash and these are Covid times. No in person shopping. Then I found the grey and white stripe hiding on the cutting table. Perfection!

Modern Star Quilt Cheryl Arkison

This quilt is already in it’s new home. As I was finishing the quilt top last fall I decided it would eventually go to a friend of mine. I wanted to spoil her with something just for her. Giving quilty gifts is the best!