improv quilts

Polly - Quilters' Playcation Adventure Sewalong 2022 in Prints

Polly

78” x 89”

Polly lived most of her life following the rules. Getting married when she was supposed to. Having kids when she was supposed to. Baking all the things, keeping a clean house, volunteering at church. Her life was as it should be. It was also painfully boring and Polly had no idea who SHE was in the midst of everyone else’s expectations. Finally, with the kids gone and her husband on the golf course Polly had a chance to explore herself. That meant figuring out what she actually liked in bed to what food she wanted to eat for herself. She took herself out almost daily and explored the world around her one little trip at a time. It’s not that she hated her life, but she didn’t know if she actually liked it. Little by little she explored, experimented, and learned to enjoy what she, herself, could give and get out of the world. She finally knew who she was, who she wants to be.

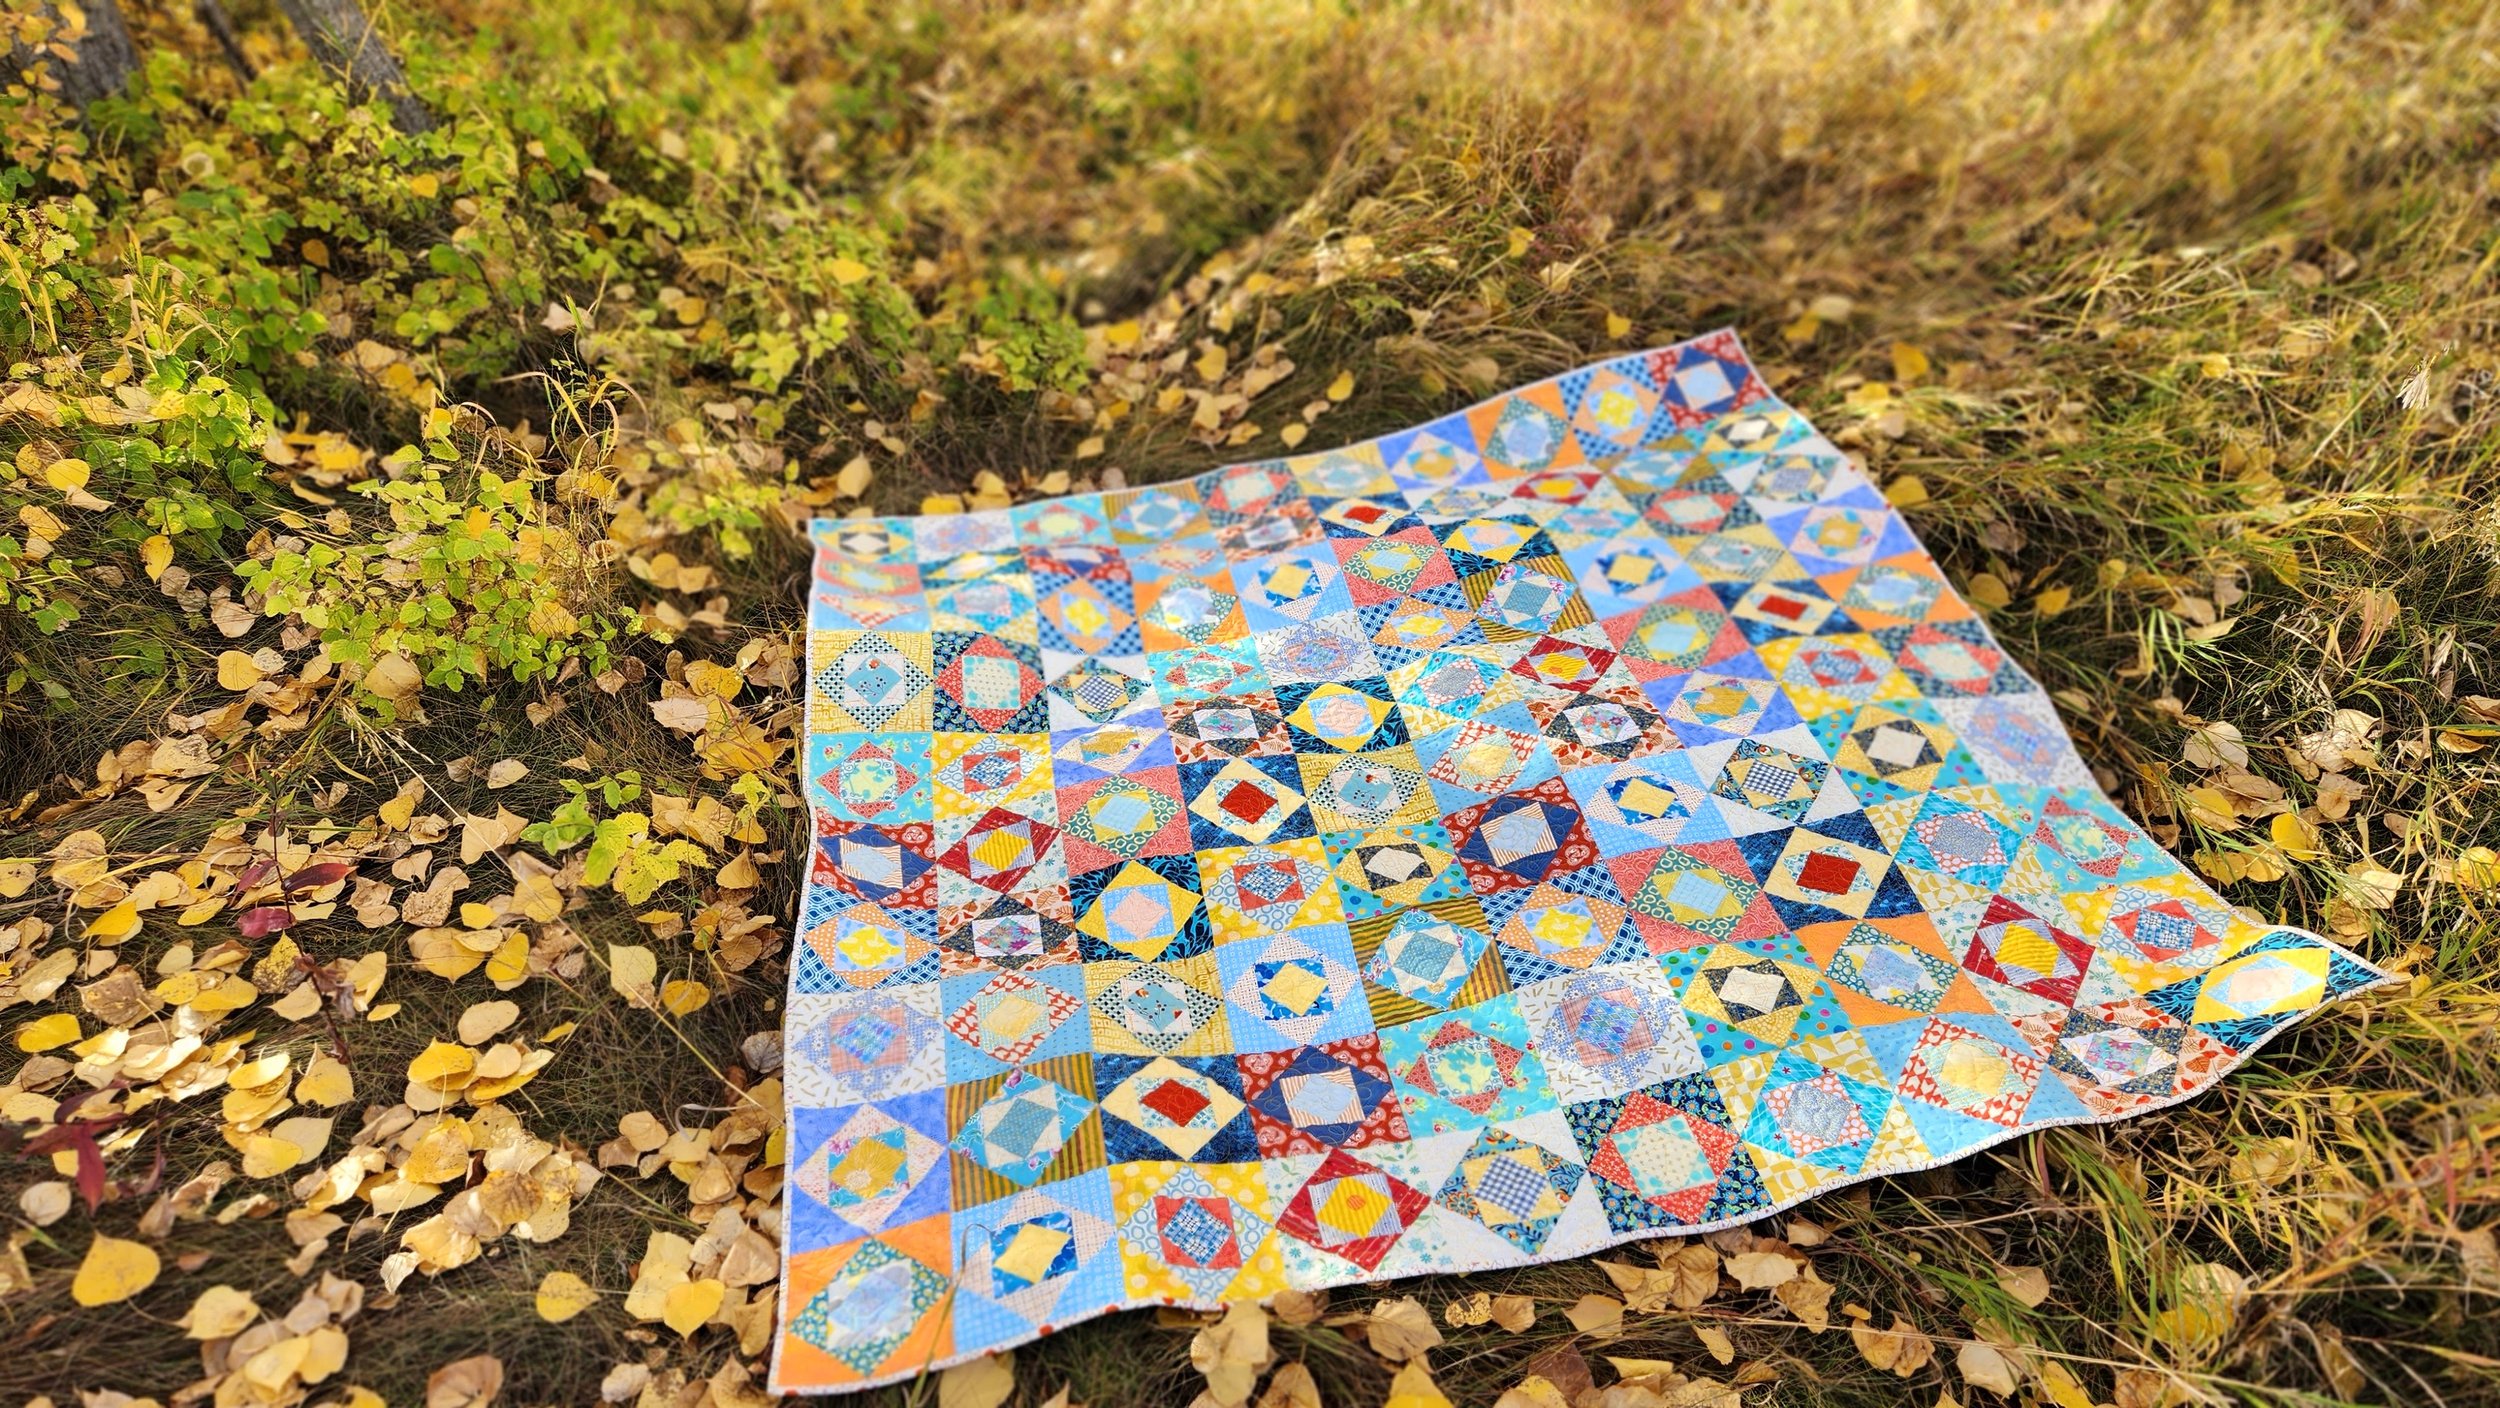
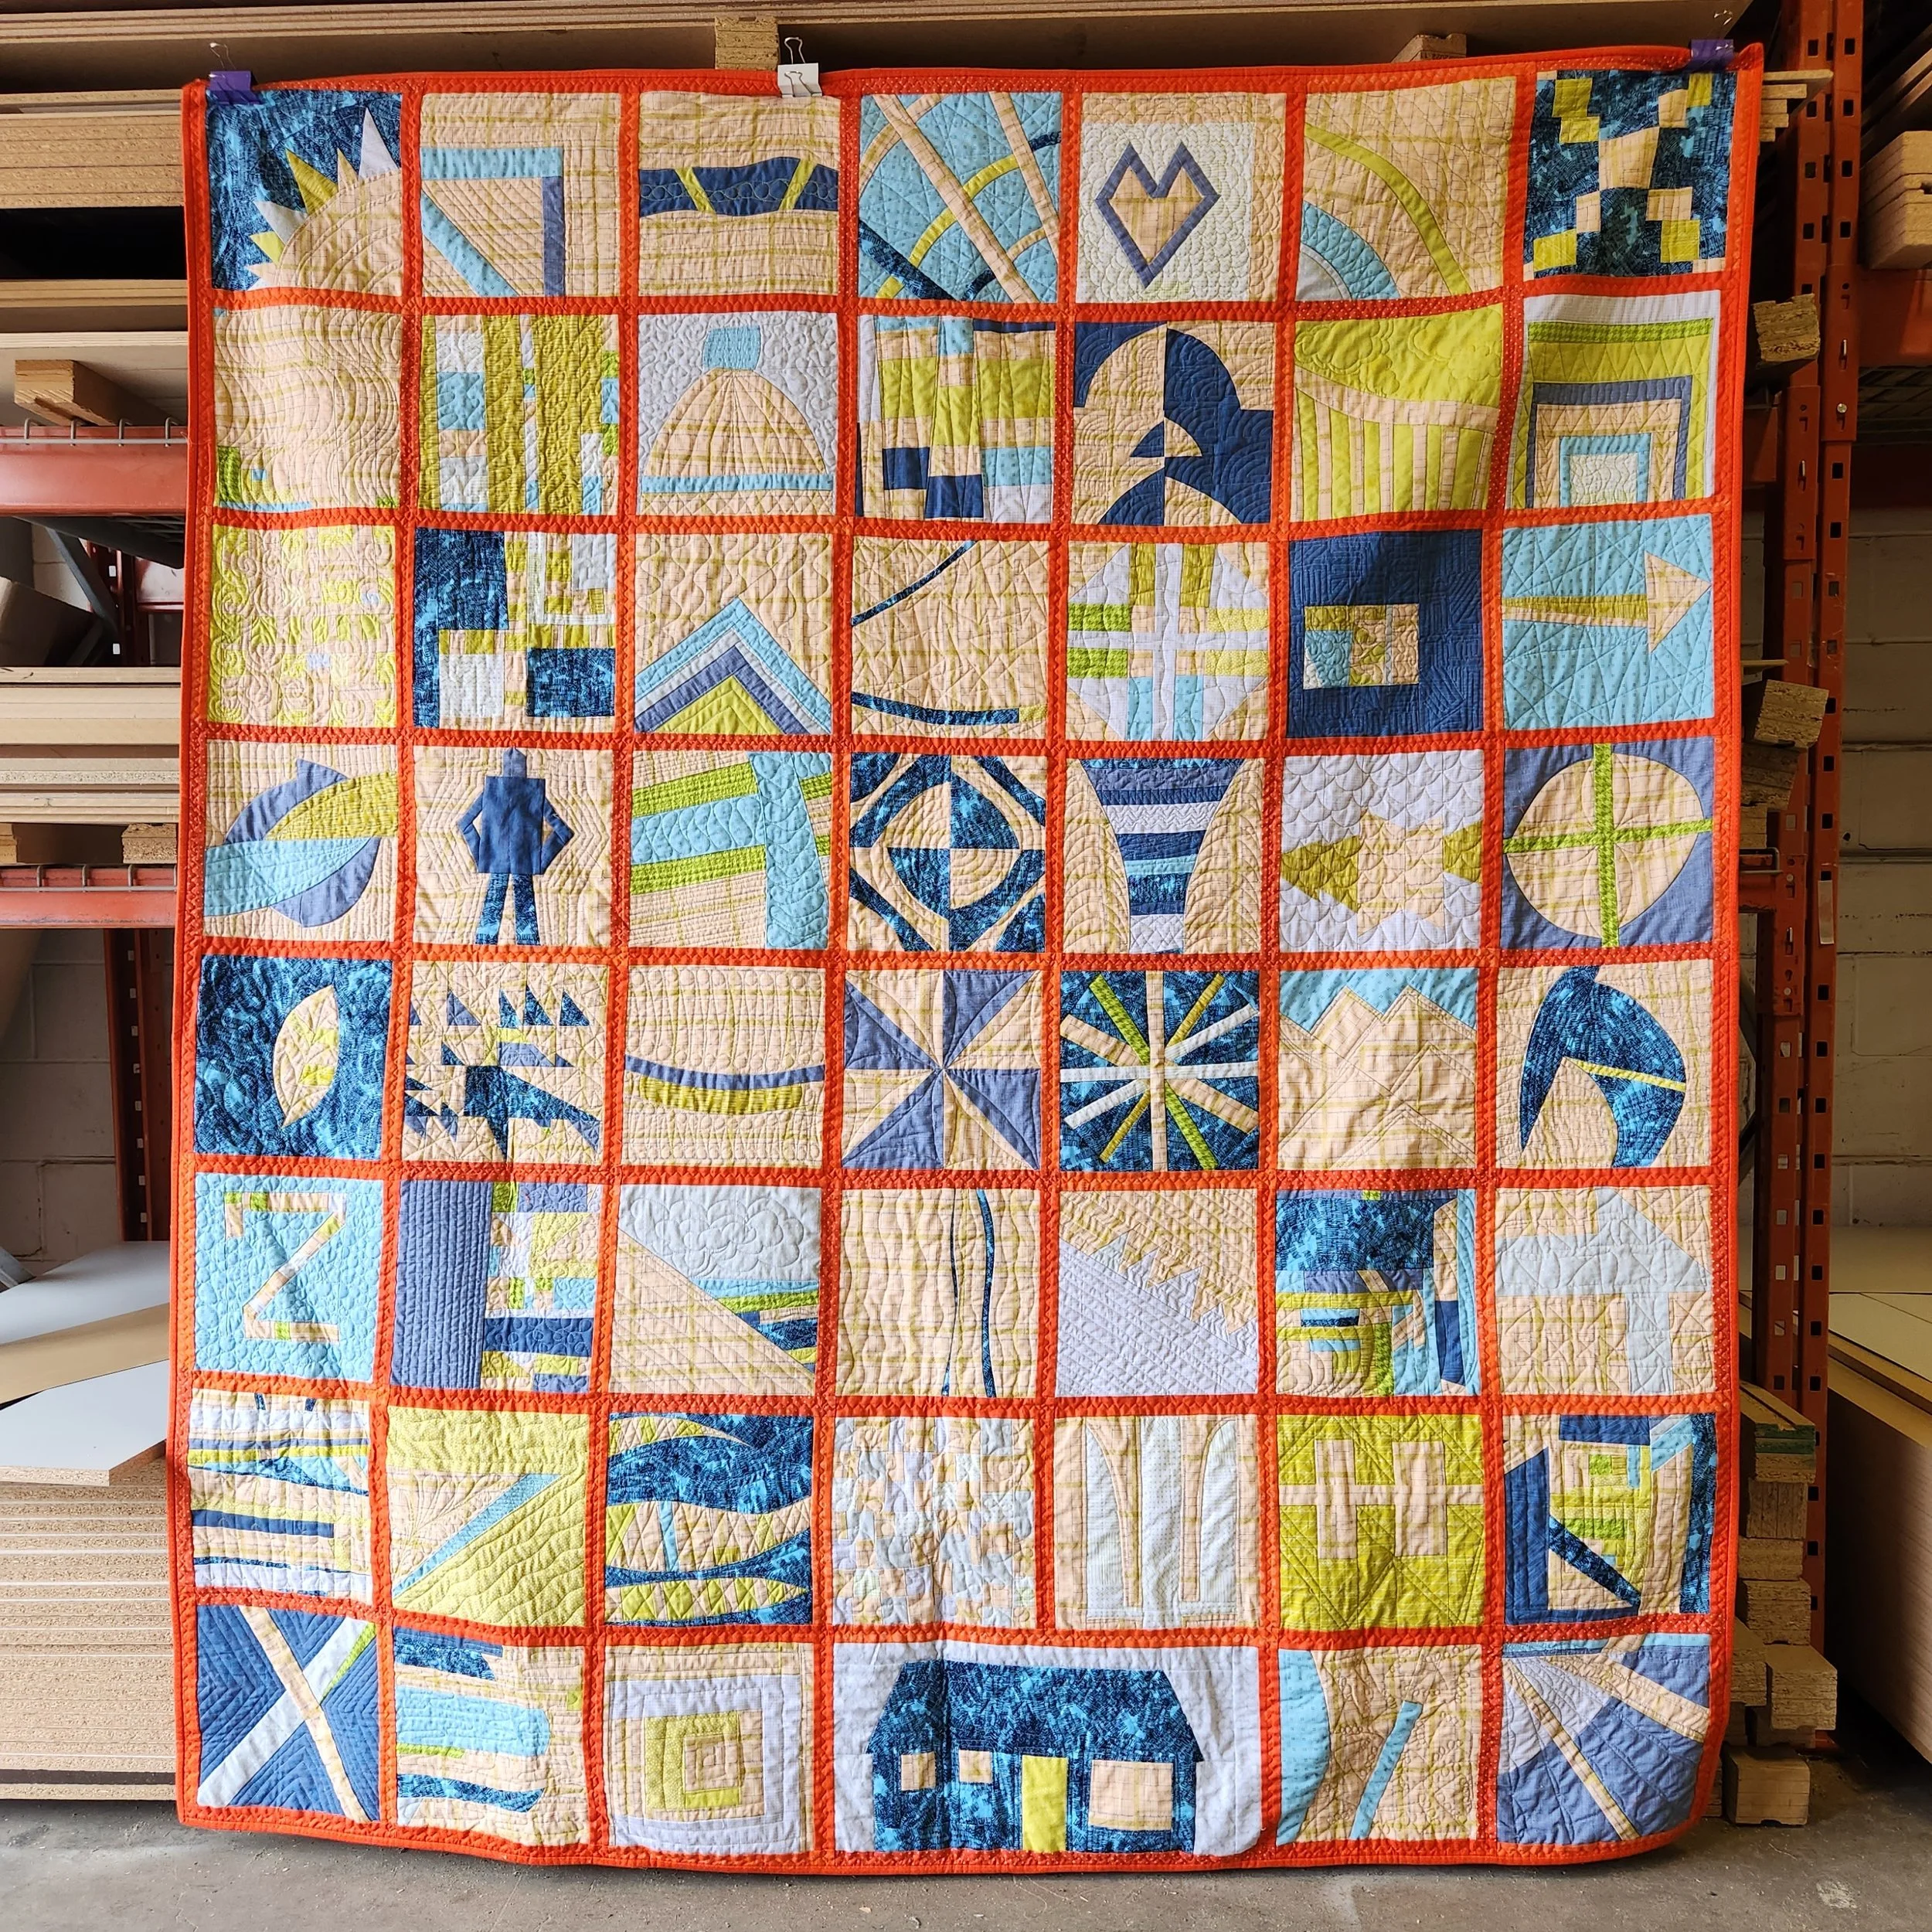
This quilt is a culmination of the Quilters’ Playcation Adventure Sewalong 2022. Each week for the year I shared how to make a unique improv quilt block. One version shared was a three colour solid and this version was love affair with prints. When I started the year and I stressed leaving open the finished block size so layout possibilities were endless. By the end of the year I knew this version would have blocks all the same size. After measuring my blocks I picked a 10.5” square as my default size and got down to the business of cleaning everything up. 52 blocks, however, does not make for even sides on a quilt, so I used scraps to make a handful more blocks to get to 56 blocks. This gave me a 7 x 8 block layout. Sashing in this collection of red-orange prints framed out each block. I’m not generally a sashing girl, but I think it absolutely works here!

She’s a big quilt so I knew that quilting her would not be easy. I had a friend baste her on the long-arm to save me some time. Turns out that this layout and the use of sashing actually simplified the quilting a lot. I used the curvy stitch that comes on the Bernini in the sashing. That was easy. Then I just quilted each block on its own. Free motion quilting is very manageable when you only work one block at a time. Each block got quilted uniquely. Sometimes it was an all over design, sometimes that outlined or directly highlighted the piecing. The decision was most dictated by my mood when I got to that block. I switched out threads between peach, pale grey, light blue, and an olive green. I filled a bobbin and when that or the spool ran out I switched to another colour. All the threads blended very well on the wide back Kaffe Fassett I used on the back.

The original plan was for a dark binding, with a bit of green piping. I did not have in my stash nor could I find anything in the store that was a good blue that worked for this. Grey washed things out too much. Also, I had deadlines for a local show. So I used more of one of the sashing prints and extended that orange line. The green did make an appearance in my stitching though. I chose to use a Perle thread (from Valdani) to stitch down the binding in a visible manner. I love this way of finishing a quilt. It’s fast and has a great effect.

Polly is ready to explore the world now.

View all the free tutorials here.

Check out the layout discussion for all the quilt blocks.

Sew along with the 2023 Quilters’ Playcation Adventure Sewalong.

Linda - September Morning Make 2022

Linda

79” x 72”

Linda is a force to be reckoned with. A retired educator she may be seen as not much to society now but she still brings joy to people and holds the world together for her family. The matters. She matters. She knows pain and joy, she struggled and fought but is coming out better for it. And now, as a grandmother she gets to see her children blossom more and those babies bring light to all.

This quilt came together in the month of September. Each day started with a scrap of batting and a handful of scrap strips. Trying to avoid a log cabin I sewed the strips to the batting one at a time. When the batting was covered I added a backing piece and quilted lines over it all. Sometimes straight, sometimes curved, sometimes on the diagonal. Then I trimmed it square. Repeat the next day. Essentially, I was making mini quilts, without the binding.

The technique is known as quilt as you go. There are actually a few different ways to approach the technique and, more importantly, how to approach attaching each piece to the others. Before I started I did some research and landed on the way that Marianne Haak teaches. I liked hers because I could quilt to the edge, rather than have to stop, and the joining method would use more strips. For my particular intentions this was perfect. I joined pieces every few days so it would keep me on track for a totally finished quilt at the end of the month.

Back of a quilt as you go quilt showing the various grey fabric squares joint together by strips.

You can see the back of the quilt here. Initially, I used the large scale print fabric. It is one from my 2017 collection with Connecting Threads called Tag. Unfortunately, I ran out of what I had left partway through the quilt so I had to back half the blocks with something else. With a busy fabric you wouldn't likely see the joining strips. In the end, I rather like the effect of the two fabrics on the back.

Close up of the straight-line quilting and pale yellow binding on a scrappy quilt

One of the great things about this technique is no basting! You quilt each block as you finish piecing and none were big enough to even need a more than a few pins. Then, at the end of it you have a finished quilt and it didn’t take much longer than the regular piecing. Brilliant! So all I had to do was pick the right binding and stitch it on. In the end, I chose this great pale yellow print from Heather Givens from Crimson Tate.

I used all scrap strips to make this quilt. I deliberately chose not to use blacks, dark greys, dark blues, or any muddy colours. As a result, the quilt is bright and sunny. It certainly made a dent in the strip bin, but I could easily make more quilts this same way. Indeed, I have a few more ideas for playing with this quilt as you go technique. It’s a win win situation too because I have a whole pile of scrap batting!

pastel scrappy quilt hanging off a forklift in a mostly empty workshop

All the photos taken in the space that will become both our family business’ new workshop and my new quilting studio.

For Sarah Golden

Sarah Gold Mini

16” x 20”

It was a few years ago, in the middle of another lockdown, that I became truly entranced with the work of Sarah Golden. Something about her shapes and colour use, not to mention that we are birthday twins, just got to me. One day she posted some paper collages she was making. It was instant inspiration and I wanted to turn it into a quilt. With her permission I explored the handmade and the shapes of her work but in fabric and thread.

Here is the inspiration image:

Sarah Golden paper and painting collage

To make the mini I dug through my stash for the right colours to reference her original piece. Some of my finds meant that I did not have to piece all the sections, but let the fabric talk. In the end, the components of my quilt collage were a combination of improv piecing, appliqué, and single fabrics. Then I used embroidery and hand quilting for additional details. I even matted my details like she did, with a ground of white.

Hand embroidery and quilting details on a gold, black, and blue improv quilt
Details of a gold, black, and blue improv quilt

Not entirely sure why it took me so long to finish this quilt. It’s just a mini! Yes, there is a lot of work in this small space, but that isn’t it. I just went in fits and starts on it. But it is finished now. Bound in a fabric to look like a wood frame. Sent to Sarah as a thank you for the inspiration.

Kayleigh - My Version of a Fall Quilt

Kayleigh

70” x 70”

Along with her friends Ashley, Ashleigh, Brittany, and Angelica, Kayleigh loves her pumpkin spice, wide brim hats, and the sweaters that the cooler weather brings. Or even just the hint of cooler weather. Time to put away the spaghetti straps and flip flops, bring on the boots and oversized turtleneck sweaters. She’s sweet but not all that smart. She’s kind but not all that generous. But she will always open the wine. And she always finishes the book for book club. Who wouldn’t when wool socks and warm quilts keep you company while you read? Kayleigh is fall.

Okay, so my version of a fall quilt is a little less stereotypical than your basic girl hunting for pumpkins. It’s a function of where I am. Here in Calgary we don’t get a lot of the rich reds and oranges of your New England fall. We get gold, so much gold. We get blue skies in late September heat. My fall quilt reflects that.

I didn’t actually set out to make a fall quilt. The whole thing started with an experiment with a square in a square technique. You know, I had to see if it could be done improvisationally. Of course it can! I loved it so much I taught it as an online class - a Quilters’ Playcation Playdate last year. Then the colour combo of blue, yellow, and coral made me so happy I decided to just keep going! On a walk last fall I realized that these indeed were the colours of our fall.

I can hardly believe I actually finished the quilt already. My quilt tops tend to sit for years. Fall is here though. While pumpkin spice is not my thing - unless actually IN a pie - I do enjoy exploring nature as the season changes. So when I had a long arm appointment booked a few weeks ago I made sure to bring this quilt top and give her her due in the right season.

She is quilted with Wonderfil Tutti in a variegated yellow (TU01) with deco bob in the bobbin. I rented time at My Sewing Room on their Bernina long arm. In a little over 2 hours she was quilted! Nothing fancy, just an all over loop de loop design. There is no point going too fancy because you won’t see the stitching on such a busy quilt.

This is a great example of using prints and not being afraid of it! Most people call this look scrappy. It works because I paid attention to both colour and value as I made each set of squares. There are actually 5 of each fabric combination. I made five at a time simply so I could chain piece without getting confused. I would pick the four fabrics I wanted in the blocks, start with a centre square and build out. Each block wanted to finish around 7.5” so I decided to make 100 blocks in total. That meant I need 20 sets of blocks. To keep order with all these fabrics that meant I did 10 sets that went warm-cool-warm-cool, and 10 that went cool-warm-cool-warm. That way, when it came time to laying out the quilt top I could alternate the groupings for an effective layout. I think it worked well!

I also paid attention to value, although not as fastidiously. Some blocks have high value contrasts between each round, some are lower contrast. I like that mix of bold and soft. I did, however, pay more attention to value when laying out the blocks to make the quilt top. The really bold blocks and the really soft spots are spread throughout the quilt, so no one area commands all the attention. This is what I call managing the bossy blocks.

The back is pieced from things in my stash. Nothing fancy.

She is bound with a Heather Ross reprint. I tried a number of different colours and fabric and felt the white was a nice touch. As you probably know, I usually like a high contrast binding but it wasn’t right here. There is just a touch of pink in the print, though, that makes me smile.

Our days haven’t actually cooled off that much, even though the colours are changing. Which means there isn’t a huge need for a fall quilt just yet. She came in handy at a cross country race as a soft place to sit. And the evenings are getting longer and a bit colder. If I sit by the window I definitely need a quilt. Besides, pumpkin spice is already at the coffee shop so it definitely means fall.