Teeny Tiny Scraps Shadow Box Craft

teeny scraps quilts

“How small is too small?”

Whenever I am speaking on scrap quilting, no matter the audience, this is a guaranteed question. I think people are looking for either A) someone to tell them it is okay to throw out fabric at some point or B) that they aren’t crazy for keeping every little bit. And both of those people would be right.

My default answer is that I will keep pieces as small as 1-2’’ square. And little triangles left from making binding or other blocks. Definitely keep those. Not to mention all those stringy strings of fabric shedding bits of thread, I always keep those.

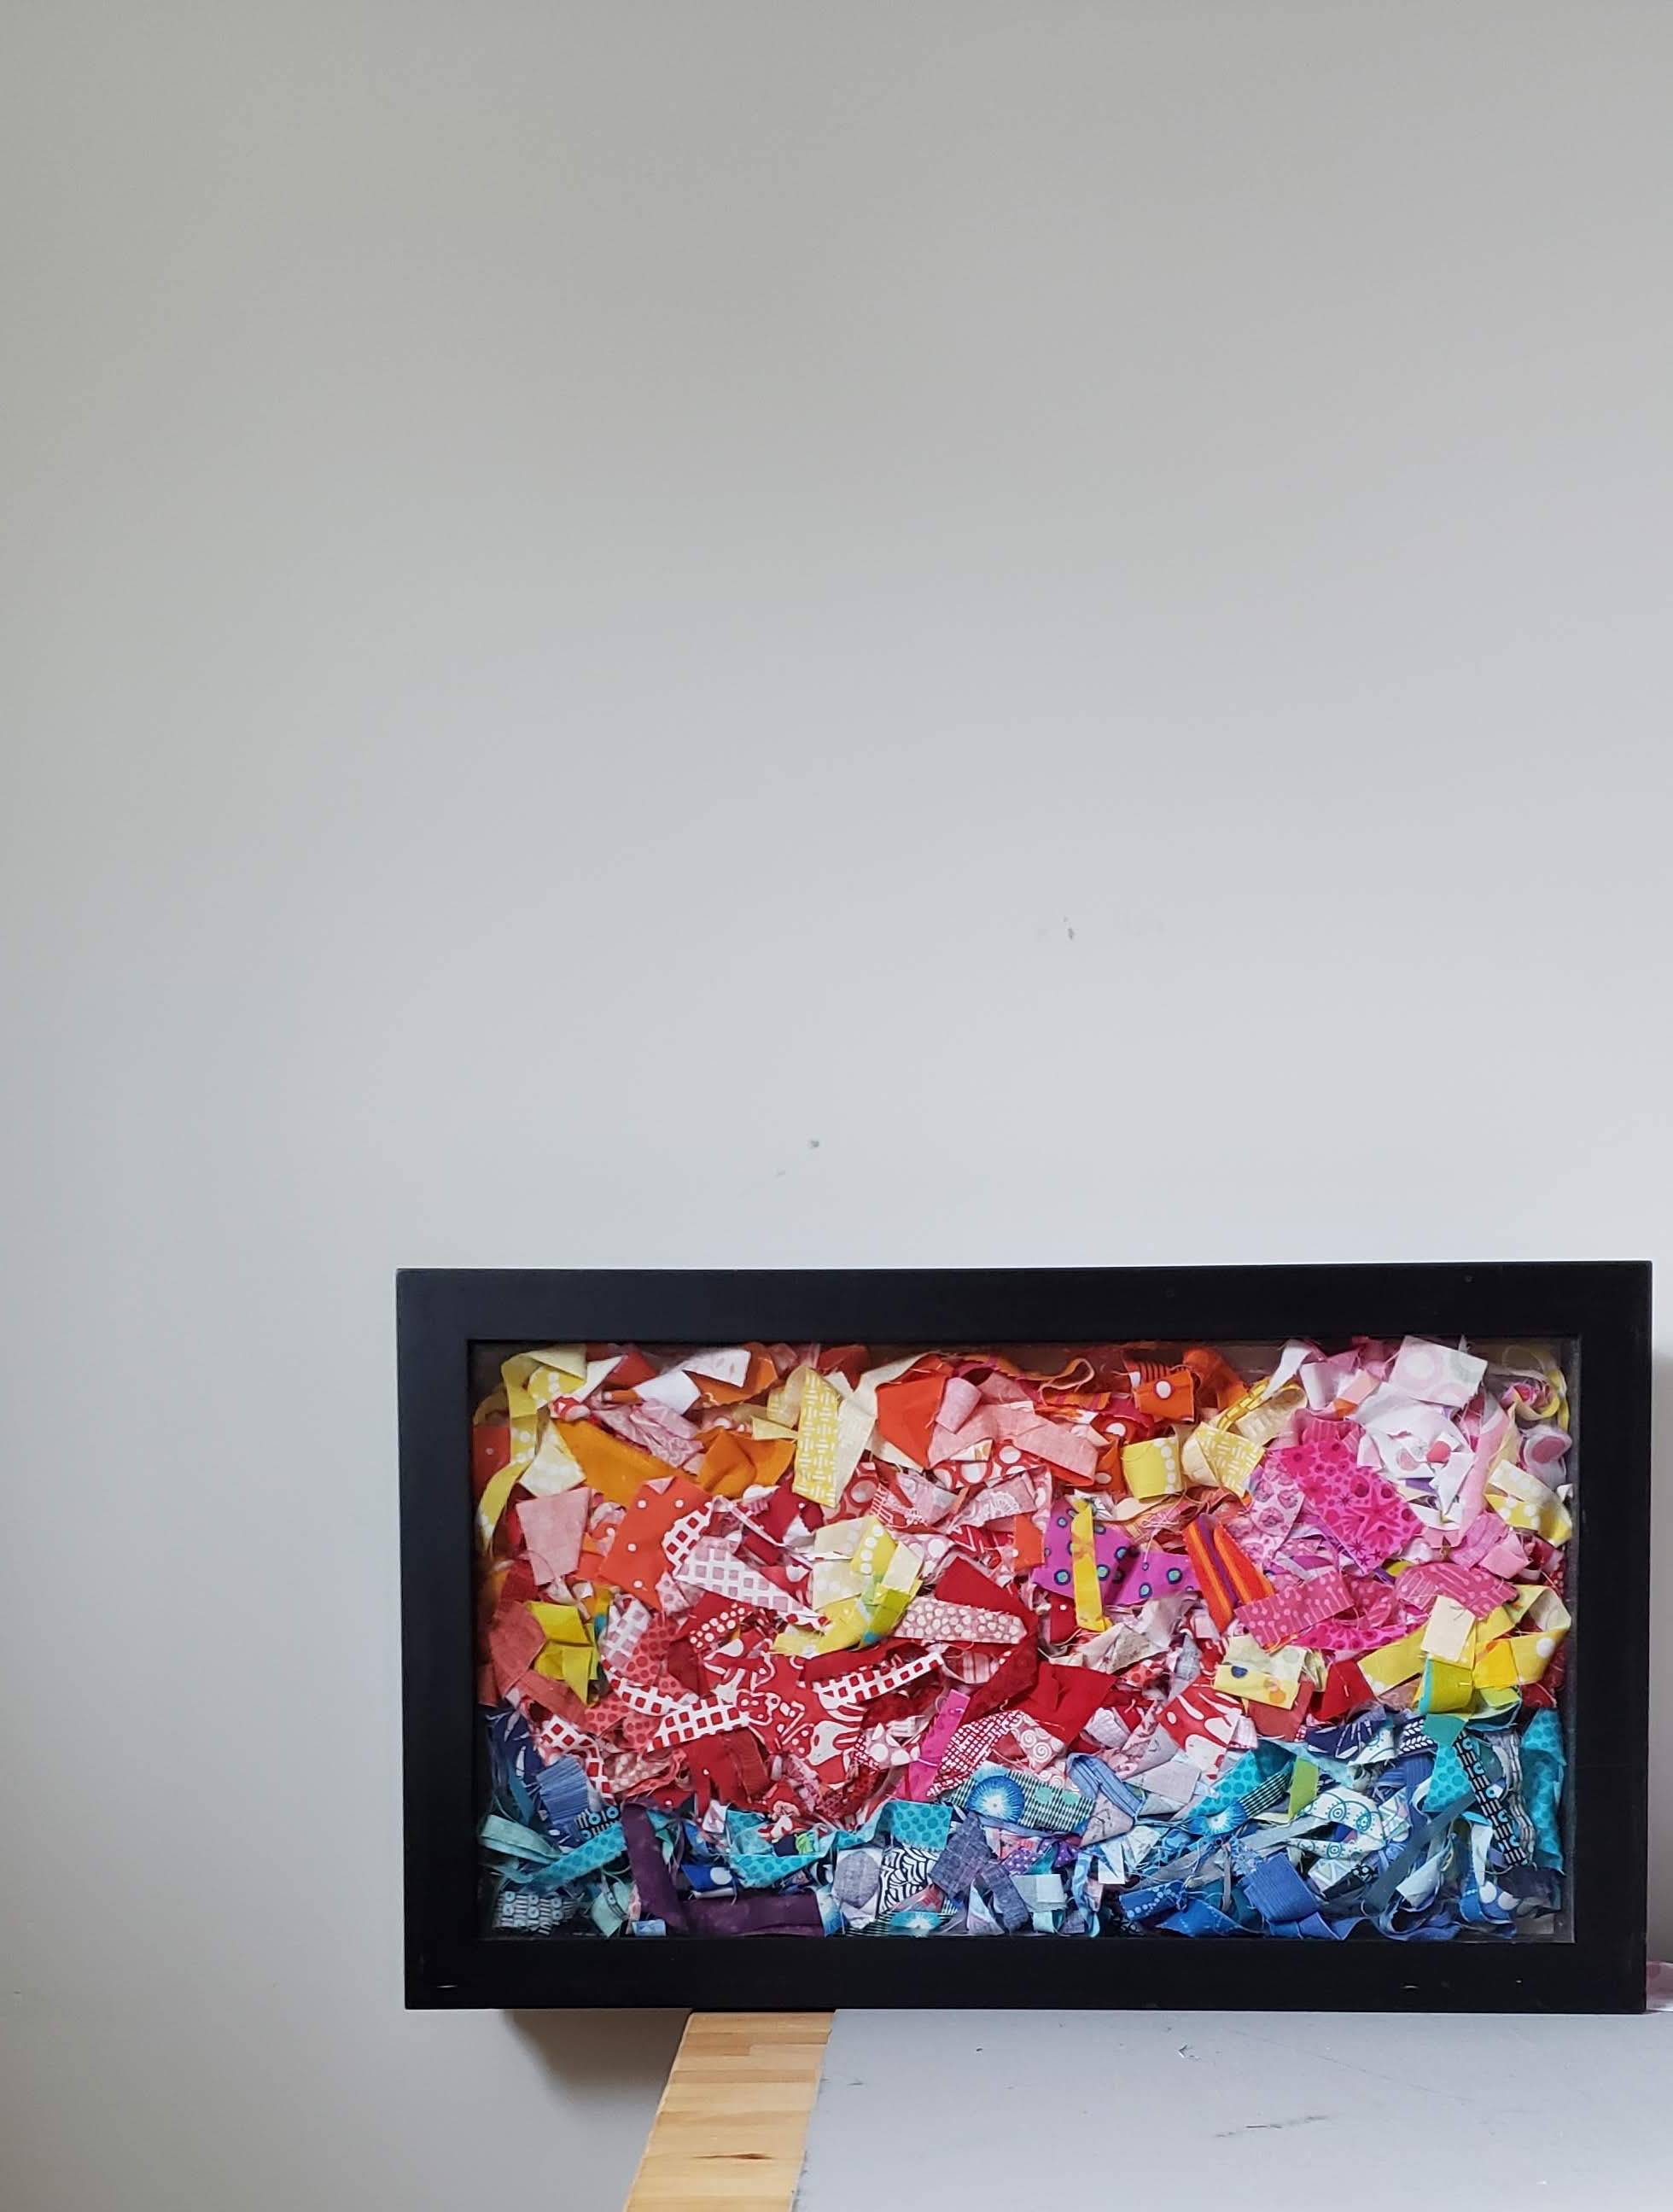
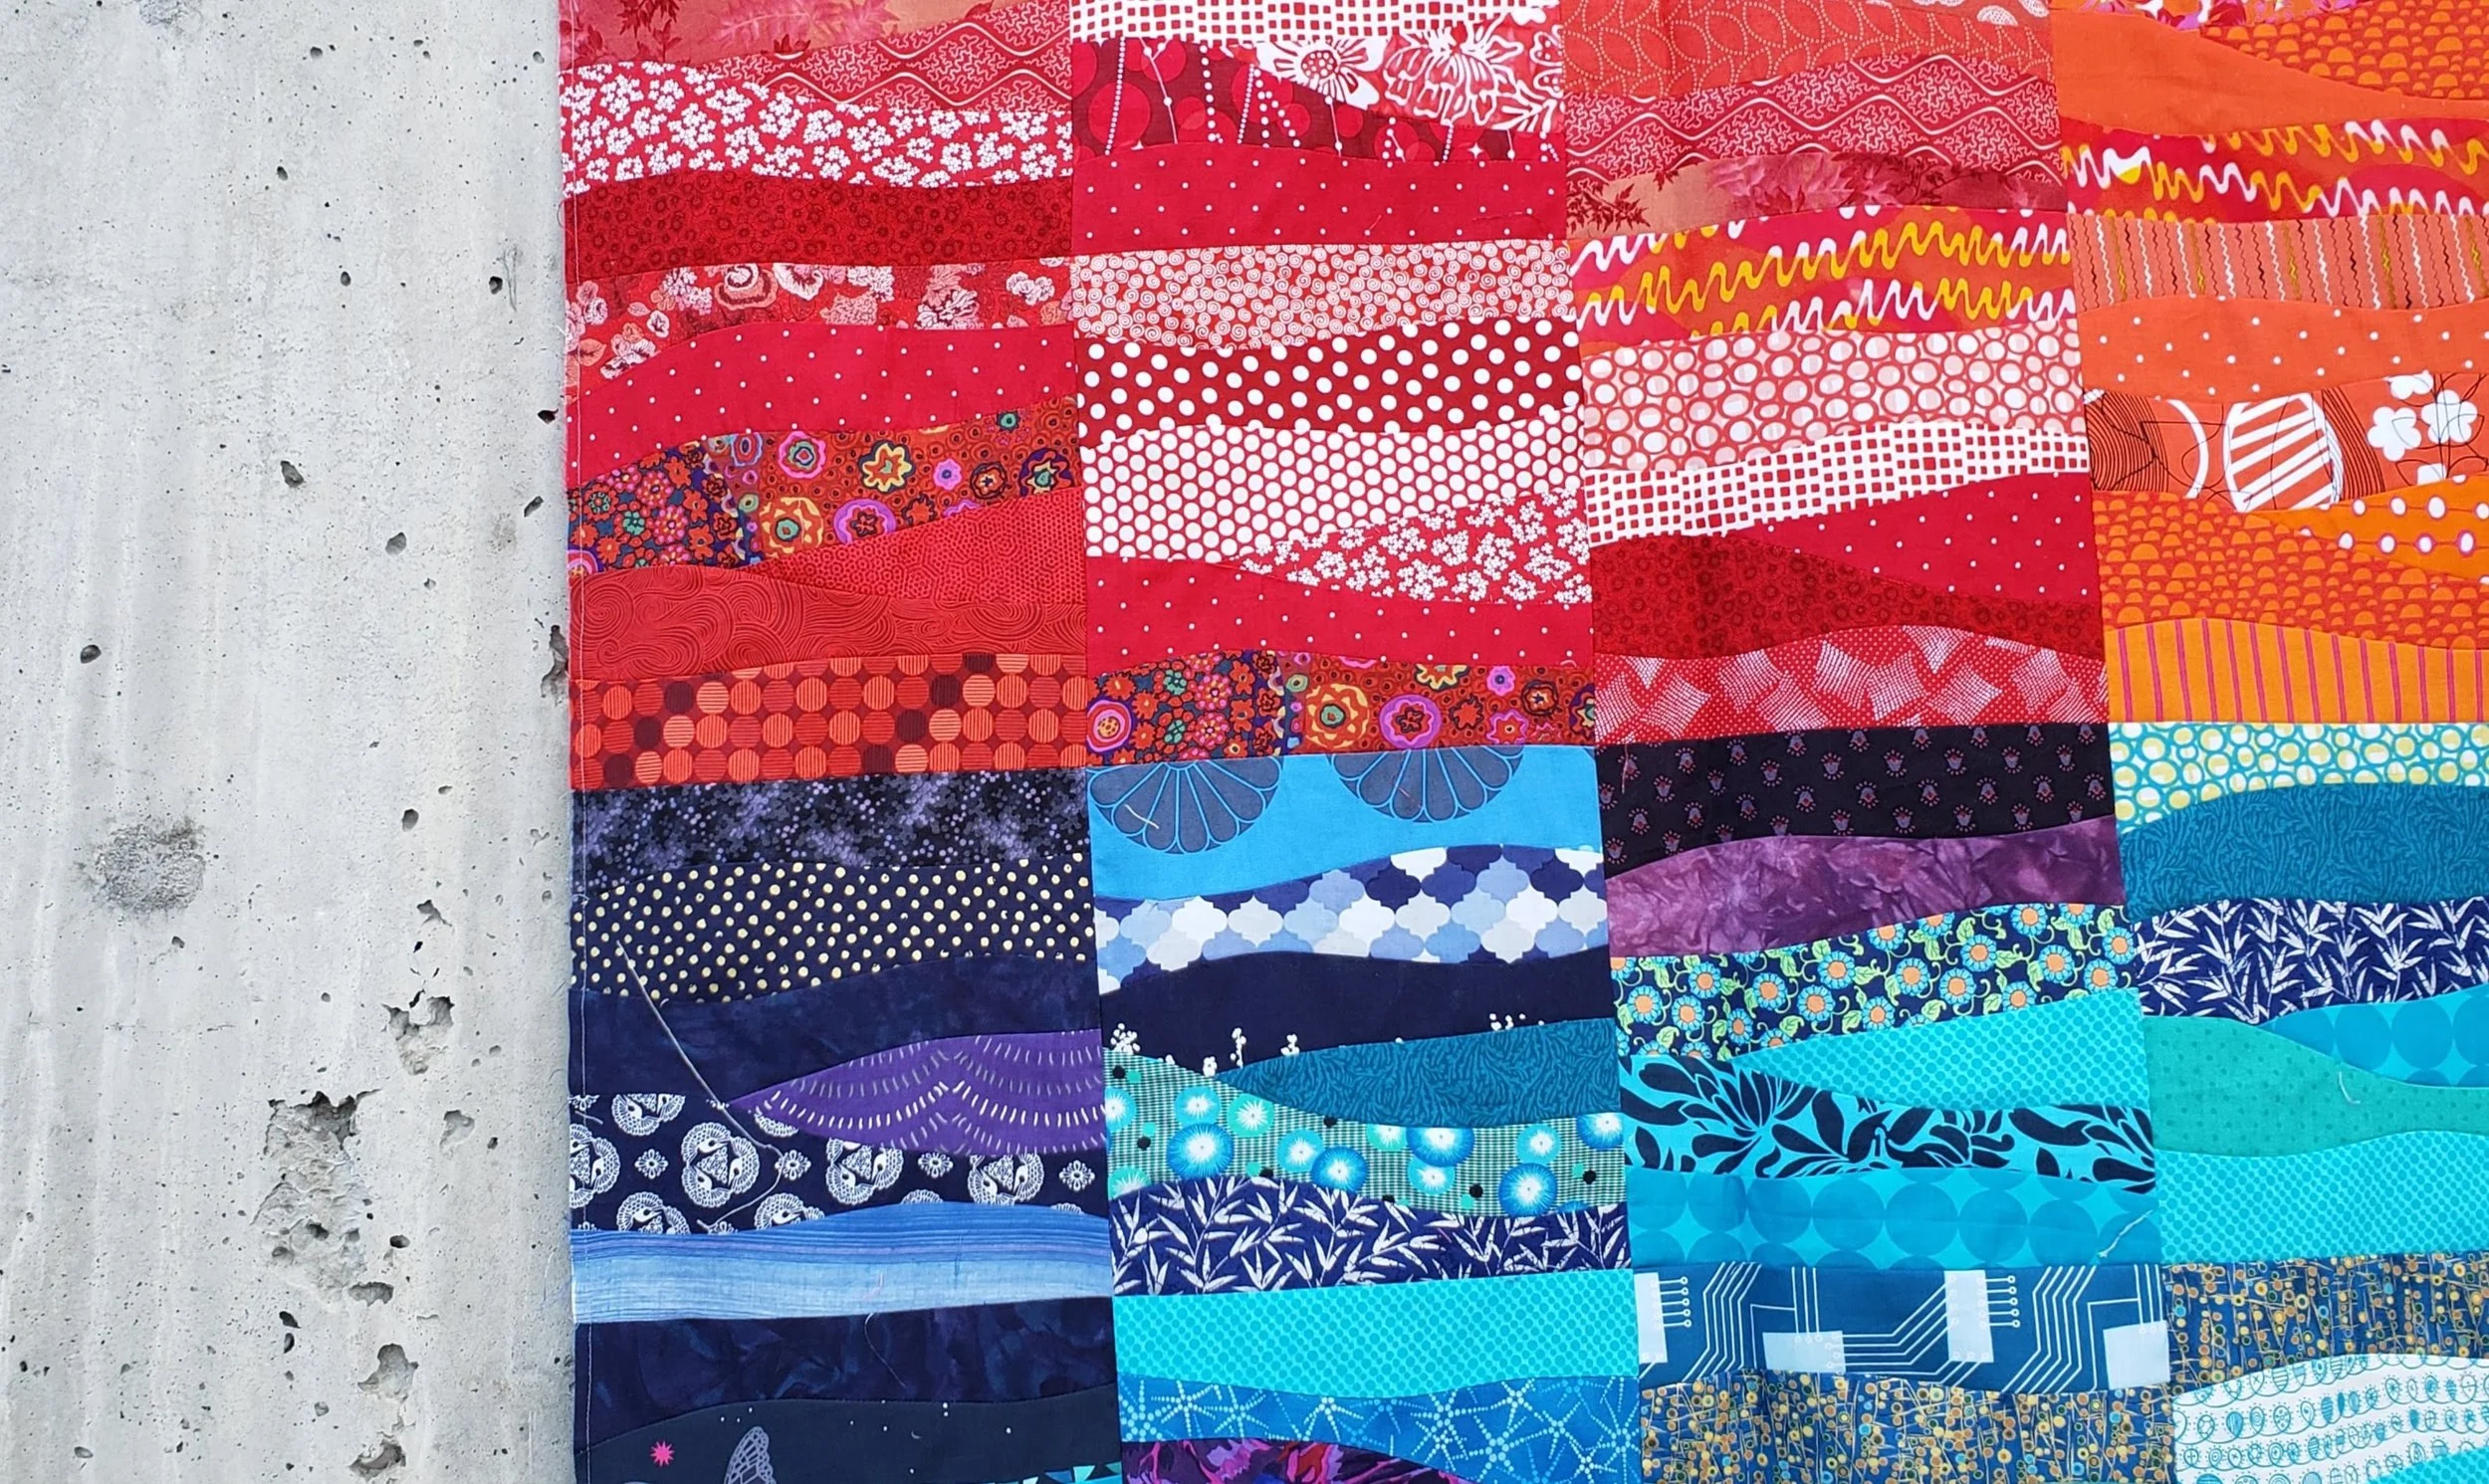
Then there are the trimmings. Because the bulk of the work I do is improvised at some point I need to trim and square up blocks or components on a quilt. I might be left with very useful scraps or a mess of threads and what used to look like fabric. While finishing up my last quilt top the dazzling array of bits left behind were just as inspiring to me as the blocks themselves. So I spent 5 minutes - yes, that is all it took - putting together this fun scrap project.

teeny scraps from make waves quilt


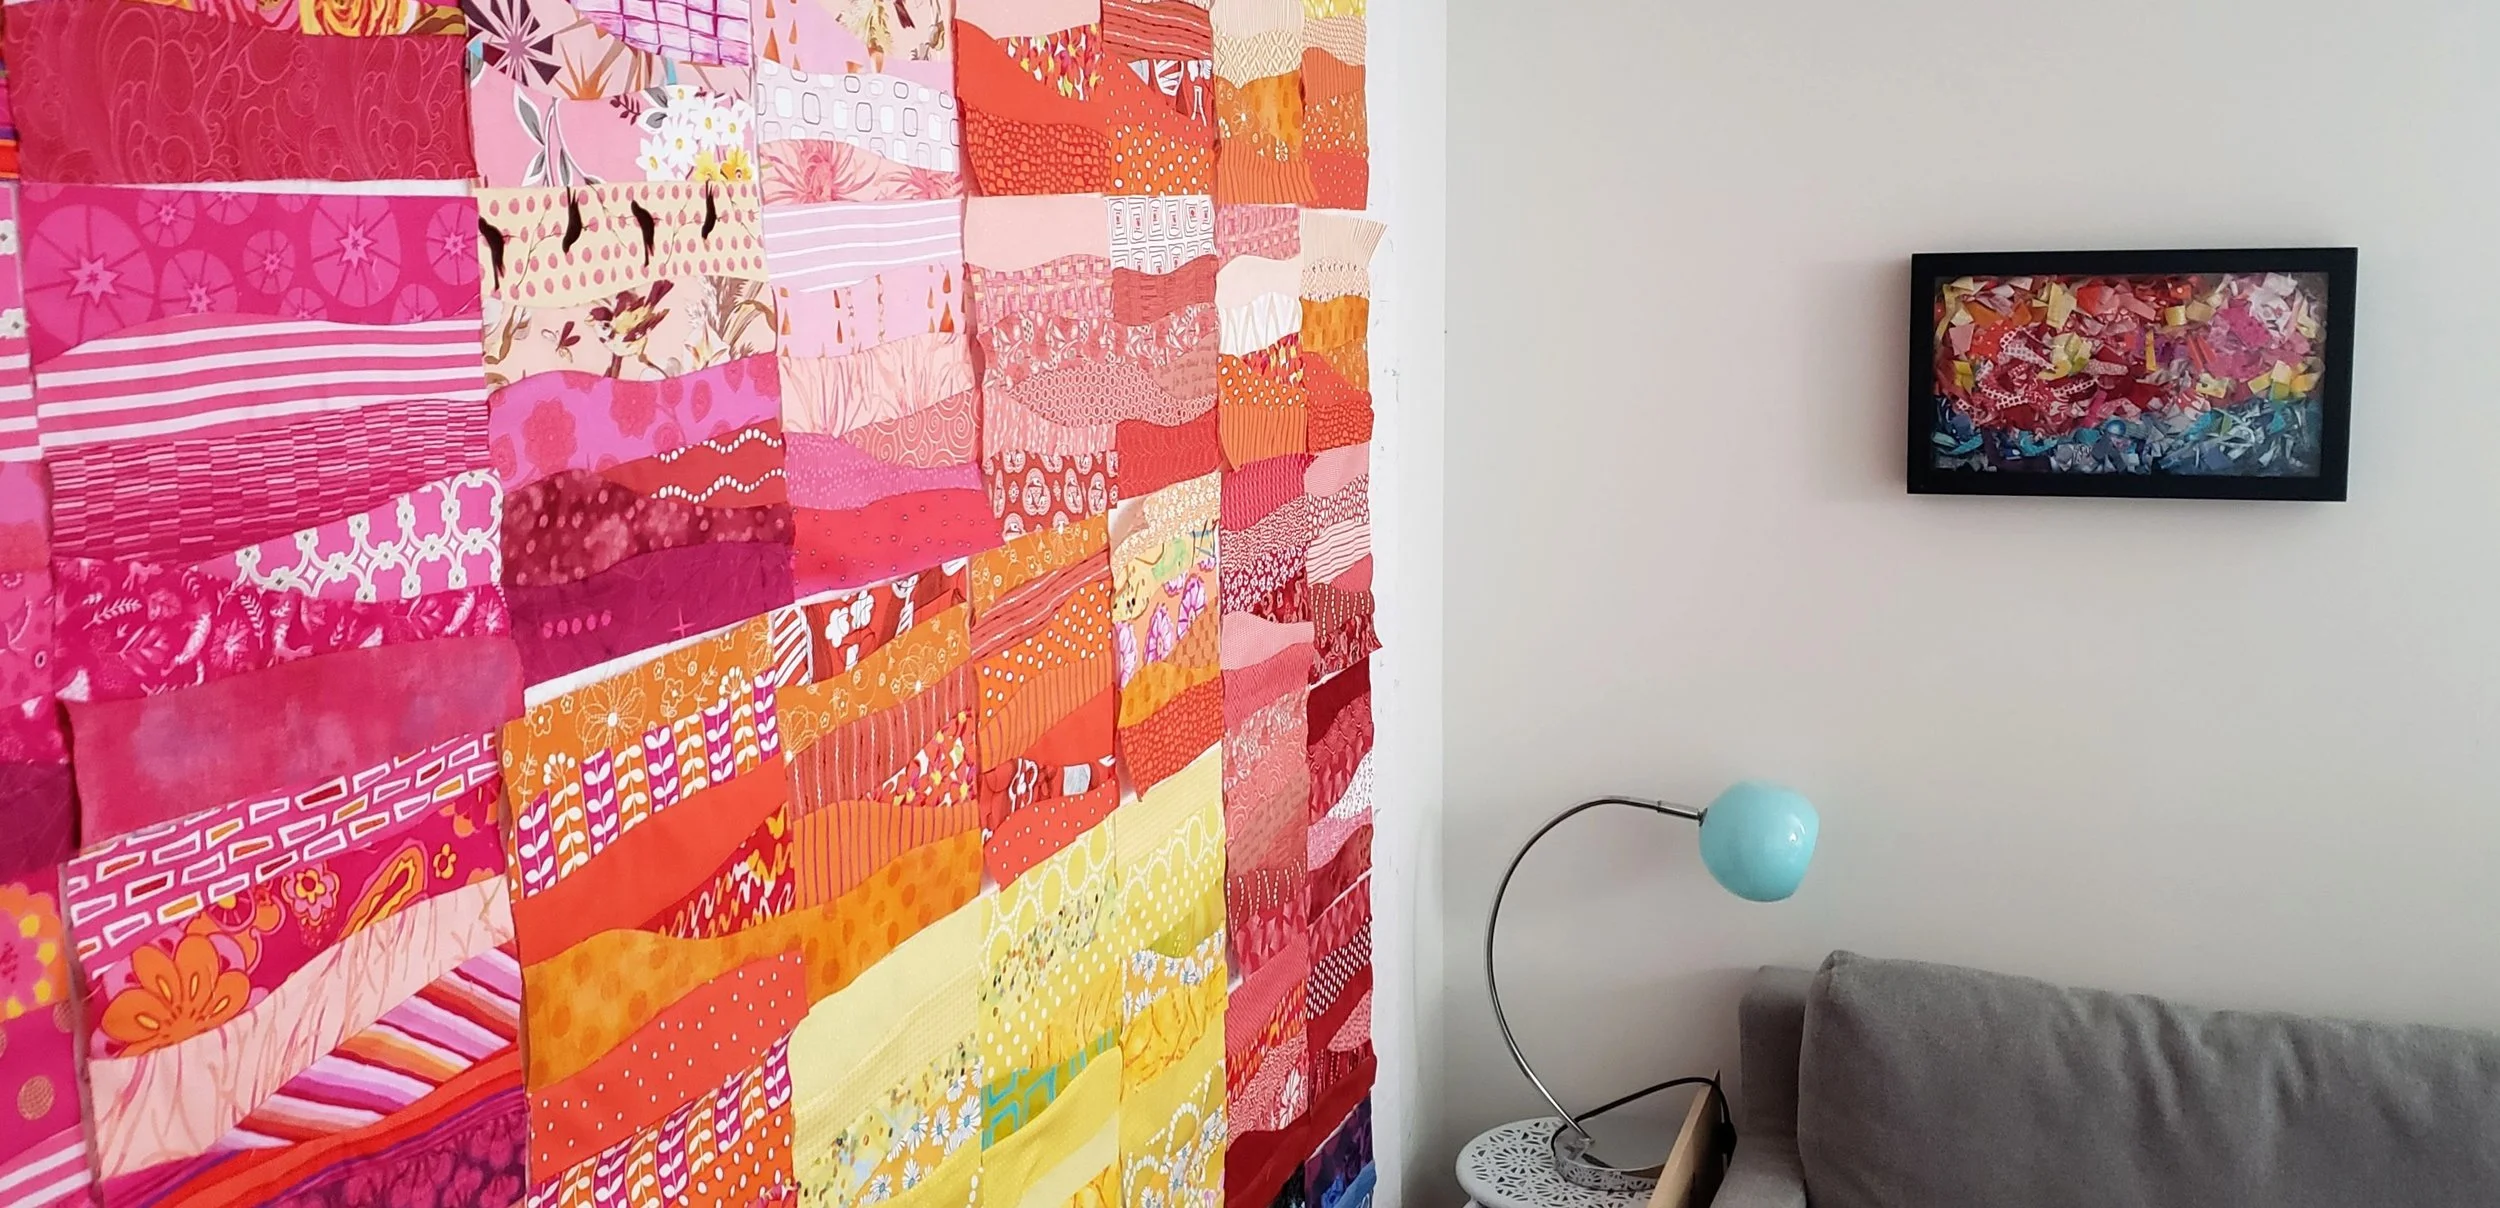
TEENY TINY SCRAPS SHADOW BOX CRAFT

Supplies

  • Fabric trimmings, thread bits, and tiny scraps of fabric

  • Clean Shadow Box Frame in any size

Instructions

  1. Fill shadow box with trimmings. Arrange in a colour order, if desired.

Notes

  • Take a little time to make the front side of the scraps pretty. The back of a fabric is really just another fabric in the collection, so it isn’t a big deal if it shows. Just be happy with the way the top layer of scraps looks.

  • It might be tempting to jam in ALL the trimmings, but unless you have a latch on your shadow box frame it won’t stay closed. Experiment with just the right amount to be full yet still keep closed.

Now my project happens to match the last quilt top I finished, because it was that quilt itself and her gorgeous colours that gave me the idea. But this has the potential to be a whole different kind of art project. In a way it reminds me of the sand paintings that some people can do.

So, to answer the question: nothing is too small.

teeny scraps Shadow Box Craft

Make Waves Quilt Top and Vacation Dreams

make waves quilt top 1.jpg

My obsession with this quilt is strong. From a random suggestion in a phone call to a live online quilting class to this. If I had a long arm or a clean floor this one would already be in the quilting phase.

It started with the planning for The Thursday Club with Marisa Anne Cummings. I’ve known Marisa for years and we were chatting about the class I would teach with her. She said something about the water and I quickly sketched a block. When I went to test the design it worked exactly as I sketched. Well, after we filmed the class - which you can still catch - I became obsessed with making more an more blocks. For me, this is normal.

Make Waves Thursday Club by Marisa
Make Waves Quilt Thursday Club by Marisa

It made a dent in both my scraps and stash as I searched for all the colours of all the prints. I didn’t want too much repetition so it was a deep dive in to the fabric closet.

On a related note, I am thinking of a new class on using prints in your quilts. Thoughts?

It took me a bit to come to the final layout. You can read more about that design wall play. Some days I only moved two blocks. It had to be just right. And now it is. It makes me think of sunsets at the beach. Or sunrises. Take your pick. But it has me all dreamy for sand and the crash of the waves and a Tequila Sunrise. So basically, it is a vacation in a quilt.

Alas, it is heavy competition season for my girls and we are at the pool, not the beach. And I make them help me take quilt photos after practice.

Thursday Club Make Waves Quilt

And you can still catch the class if you want to make your own sunset or just like the block. It comes together quickly and by the end of one block you will be the master of improv curves! Catch it here.

Garment Sewing Thoughts From a Scrap Quilter

Linden sweatshirt

May 1 - Me Made May begins. Do you participate? The whole point is to showcase the garments you make and wear. It’s rather quite awesome. And it falls the week after Fashion Revolution, so it seems fitting.

Don’t know about Fashion Revolution? It started in response to the horrible Rana Plaza factory collapse 6 years ago. The factory was making what is known as Fast Fashion. The cheap, generally considered disposable clothing found all over the world. Have you bought a cotton knit t-shirt for less than $10? That’s Fast Fashion. This article is a great backgrounder and motivator.

Last week I had the privilege to speak at a Fashion Revolution YYC event. To be honest, I am not entirely sure why I was invited, but I am glad I was. The panel conversation was about what we, as local makers, can do to address Fast Fashion. It ended up being so much more than that. Today I want to talk about two of the things that came up for me during the evening.

Plus Size Fast Fashion

Plus Size Gets Left Out, Again

I am a plus size woman. And I know I am far from alone. But the vast majority of sustainable or eco conscious clothing is not made for me. Whether that is in the sizing or the style, it just isn’t much of an option.

How many artisan markets have you been to with gorgeous clothes, the maker right there full of enthusiasm and inspiration, only to discover your leg would barely fit in their samples for sale? That large seems like a small? It’s at the point where I don’t even look at clothing at any market.

At the end of the day my shopping choices are limited and 95% of them are going to be Fast Fashion. Even if I want to spend more money for high quality clothing that I will love and take care of, I can’t find it. It exists in such miniscule amounts that the search is like finding hidden treasure. And no matter how much I spend on jeans or what they are made of, my thighs are going to rub and wear out.

Two suggestions for making even your fast fashion last longer.

  1. Take care of it. I treat my Gap Outlet shirts the same as I treat everything else. A lot of handwashing and lay flat to dry. Yes it takes longer but it also means I am not treating my clothing as disposable. A valuable mindset for sustainability.

  2. Mend. I will admit, the visible mending trend is not generally something I would go for. It just isn’t my personal style. But there are beautiful examples out there to inspire. Plus, I can fix a button, rehem when necessary, or even alter something to be a bit new.

The Waste When You Make

Making your own clothes is a glorious solution to Fast Fashion. You get fit, colour, and sizing that works for you. You also get waste.

As a quilter I am used to accumulating, keeping, and using scraps of fabric. As an amateur garment sewer, I also keep accumulate and sort my scraps. BUT they are often not the same substrate as my quilting cottons scraps, nor do they always act the same way.

  • So I keep my knit scraps all together. In my head I will one day turn them into a braided rug or mat.

  • Anything cotton or linen does get put with my quilting cotton scraps. I find that you can mix woven naturals easily.

  • The rest? Well, I haven’t sewn with silk and only once with rayon, so I am not quite sure what to do when them.

Bags, mats, small projects, all can be made with your garment scraps. Providing you trim and sort them because, unlike quilting, you are going to have a lot of weird shaped pieces.

My pet peeve, however, with sewing plus size clothing is the fabric cutting. More than one pattern I’ve used has a different cutting layout as soon as you jump above a size 12. Sure, it makes sense. Bigger clothing means more fabric. What I often find, though, is that the change in cutting lay out leads to a lot of fabric scraps. Whereas I could snuggle my pieces together and be left with random bits, that jump to plus size often means large strips of fabric left untouched and significantly greater fabric requirements.

Look at all that extra fabric!

Look at all that extra fabric!

Much better.

Much better.

Now, I know that grading patterns (changing the sizes) is difficult work. I admire the pattern designers tremendously. But I do not think this jump makes sense. My instinct kicks in and I want to see something more sensible, even though I know it isn’t easy.

Let me give you a super simplified example. When I design a quilt pattern I like to minimize waste. I design block sizes and cutting instructions so you don’t have useless bits leftover or large swaths of fabric untouched. I’ve even changed patterns I wrote to make this easier. So can’t garment pattern designers working with plus size options, design the pattern to maximize the cut fabric? Put a seam down the back so you can cut from less fabric, for example?

Again, I am NOT a garment pattern designer, but I do wonder if things like this are feasible? I’ve also not yet tried some patterns from Cashmerette, a well known plus size pattern designer. Maybe she does this? Or is it even considered? Food for thought.

I won’t be wearing homemade for all of May, but I am using #memademay as a motivation to make a few more things. I plan a Driftless Cardigan and a Kalle Shirtdress. You can be darn sure I will be saving those scraps!

Kalle Shirtdress fabric


What it really means to PLAY on the design wall

My absolute favourite part of making a quilt is the getting it all to work together part. For me, this means design wall play. Generally, I have a whole bunch of components and have to come to a lay out that I like. It would be different if I planned it all in advance. In that case the design wall would only be confirming what I intended. That just isn’t how I work.

More often than not I start out making a quilt without knowing I am actually going to make a quilt. An idea, a technique, a colour story. Anything can get me going. At the beginning, however, I don’t really know that it is will be a quilt. It is just something I want to try. Even if I have full quilt intentions, I have no idea how it will actually turn out. It could be awful or a different idea can come in to being. What is most important to me is to be open to the process.

Take my most recent project as an example.

I started off making sample blocks to promote my class with Marisa Anne of Creative Thursday fame. The Make Waves block is for the Thursday Club, an online class I taught earlier this month. With waves being obviously blue I made all my samples in shades of blue. Then Marisa suggested that I add in some other colours because not every one likes blue. (I know! Right?)

At this point I had no intention of making a quilt from these blocks. It was just fun times, a good sample. I honestly expected the blocks to sit around for a few years until I rediscovered them and then maybe made more.

Then I saw that yellow block, that pink one, the teal, the blue. I immediately thought SUNSET. More specifically, OCEAN SUNSET.

Make Waves Multi.jpg

And boom! I immediately starting making more and more blocks, picking colours of the sunset. Just running with the idea, no clear plan for a quilt just yet.

After I made a dozen orange and coral blocks I stopped to take stock. What exactly would I need? How many blocks should I make? Am I focused more on the sunset than the ocean now, or vice versa? Deep breath before I dive too deep. So I sketched a picture.

Make Waves Sunset Sketch.jpg

Nothing fancy, mind you. I just coloured the sunset of my imagination. An image search showed many, many variations on the theme of that red/orange sky and a dark foreground. The emphasis should be on the sky, not the water. This led to a more formal plan.

My goal was 2/3 sunset and 1/3 water. Since I’d already started with blocks squared up to 9 1/2’’ x 9 1/2’’ I kept that. If you know me at all, you know I don’t make small quilts, so my finished sized is typically over 80” square. It just so happens that that is the perfect size for a double bed and Oh! Guess what size bed all my kids have? Well then, 9 blocks wide gives me 81” finished. And 9 blocks tall gives me an even split into thirds. That meant I needed 54 blocks for the top part and 27 for the bottom. There, quilt math done.

Over the course of a few weeks I got the sunset blocks done. I did precisely zero planning for how many blocks of each colour. I just cut a bunch of fabric - first raiding scraps, then stash - and made blocks. All blocks are improvised, but with the same technique of gentle curves and number of strips. I did save yellow for last, assuming I wouldn’t need as much because that was my sun. It’s up to the design wall play to make them work together. Of course, I am open to deleting some blocks and making others, if that is what is called for.

Then I had to lay it out on the design wall - where the fun really begins. And frankly, it doesn’t truly end until I start sewing things together and commit to the layout.

Here is the first go around with all 54 blocks.

Make waves layout A.jpg

It feels choppy, like the colours aren’t flowing. I’m never going to have a perfect gradation, but this is too far off. I also don’t like that one random bit of yellow in an orange block. It needs to be managed.

On to the next try.

make waves layout B.jpg

Much better. The pink is more on the one side and the orange on the other, but without there being a defining line. But a few blocks stick out too much to me, I want more flow. And that pesky yellow strip is a bit more under control.

Still need to play.

make waves layout C.jpg

Closer yet. I think the pink has too much of a vertical dividing line now though. I may need to wrap the pink around the orange a bit more. And maybe have all the lights be at the top?

This is how it currently stands on my design wall, which means I am not done yet. I’ll know when it feels right. I usually, involuntarily, squeal and jump when it feels good. Then I sleep on it. Now matter how perfect I think it is I do not sew it together as soon as I think so. I always sleep on it. Then I do two things. 1. Look at it is bad lighting. If it still looks good, it’s probably a winner. And 2. Take a picture. Not just to compare to previous iterations like I’ve done here, but because then it is like looking at it far away on the wall. That’s when colour and shape become prominent.

The key thing is to not rush it. Something the perfect layout is the first one you do. No need to doubt that! Sometimes it is the 10th or 20th. Don’t doubt that either. By embracing the process of quilt making, but thinking of this as play and not work, you are giving in to creativity.