Opal
43” x 38”
A sweet soul, always there for others, full of love. Opal is a kind women, volunteering for her church, providing extra bandaids for the neighbourhood kids as they ride their bikes by her house, and always with a batch of cookie dough in her fridge. She loves a good cup of coffee and isn’t opposed to a little gossip on the side. Nothing mean hearted though! And you can always count on her for potato salad at the picnic.
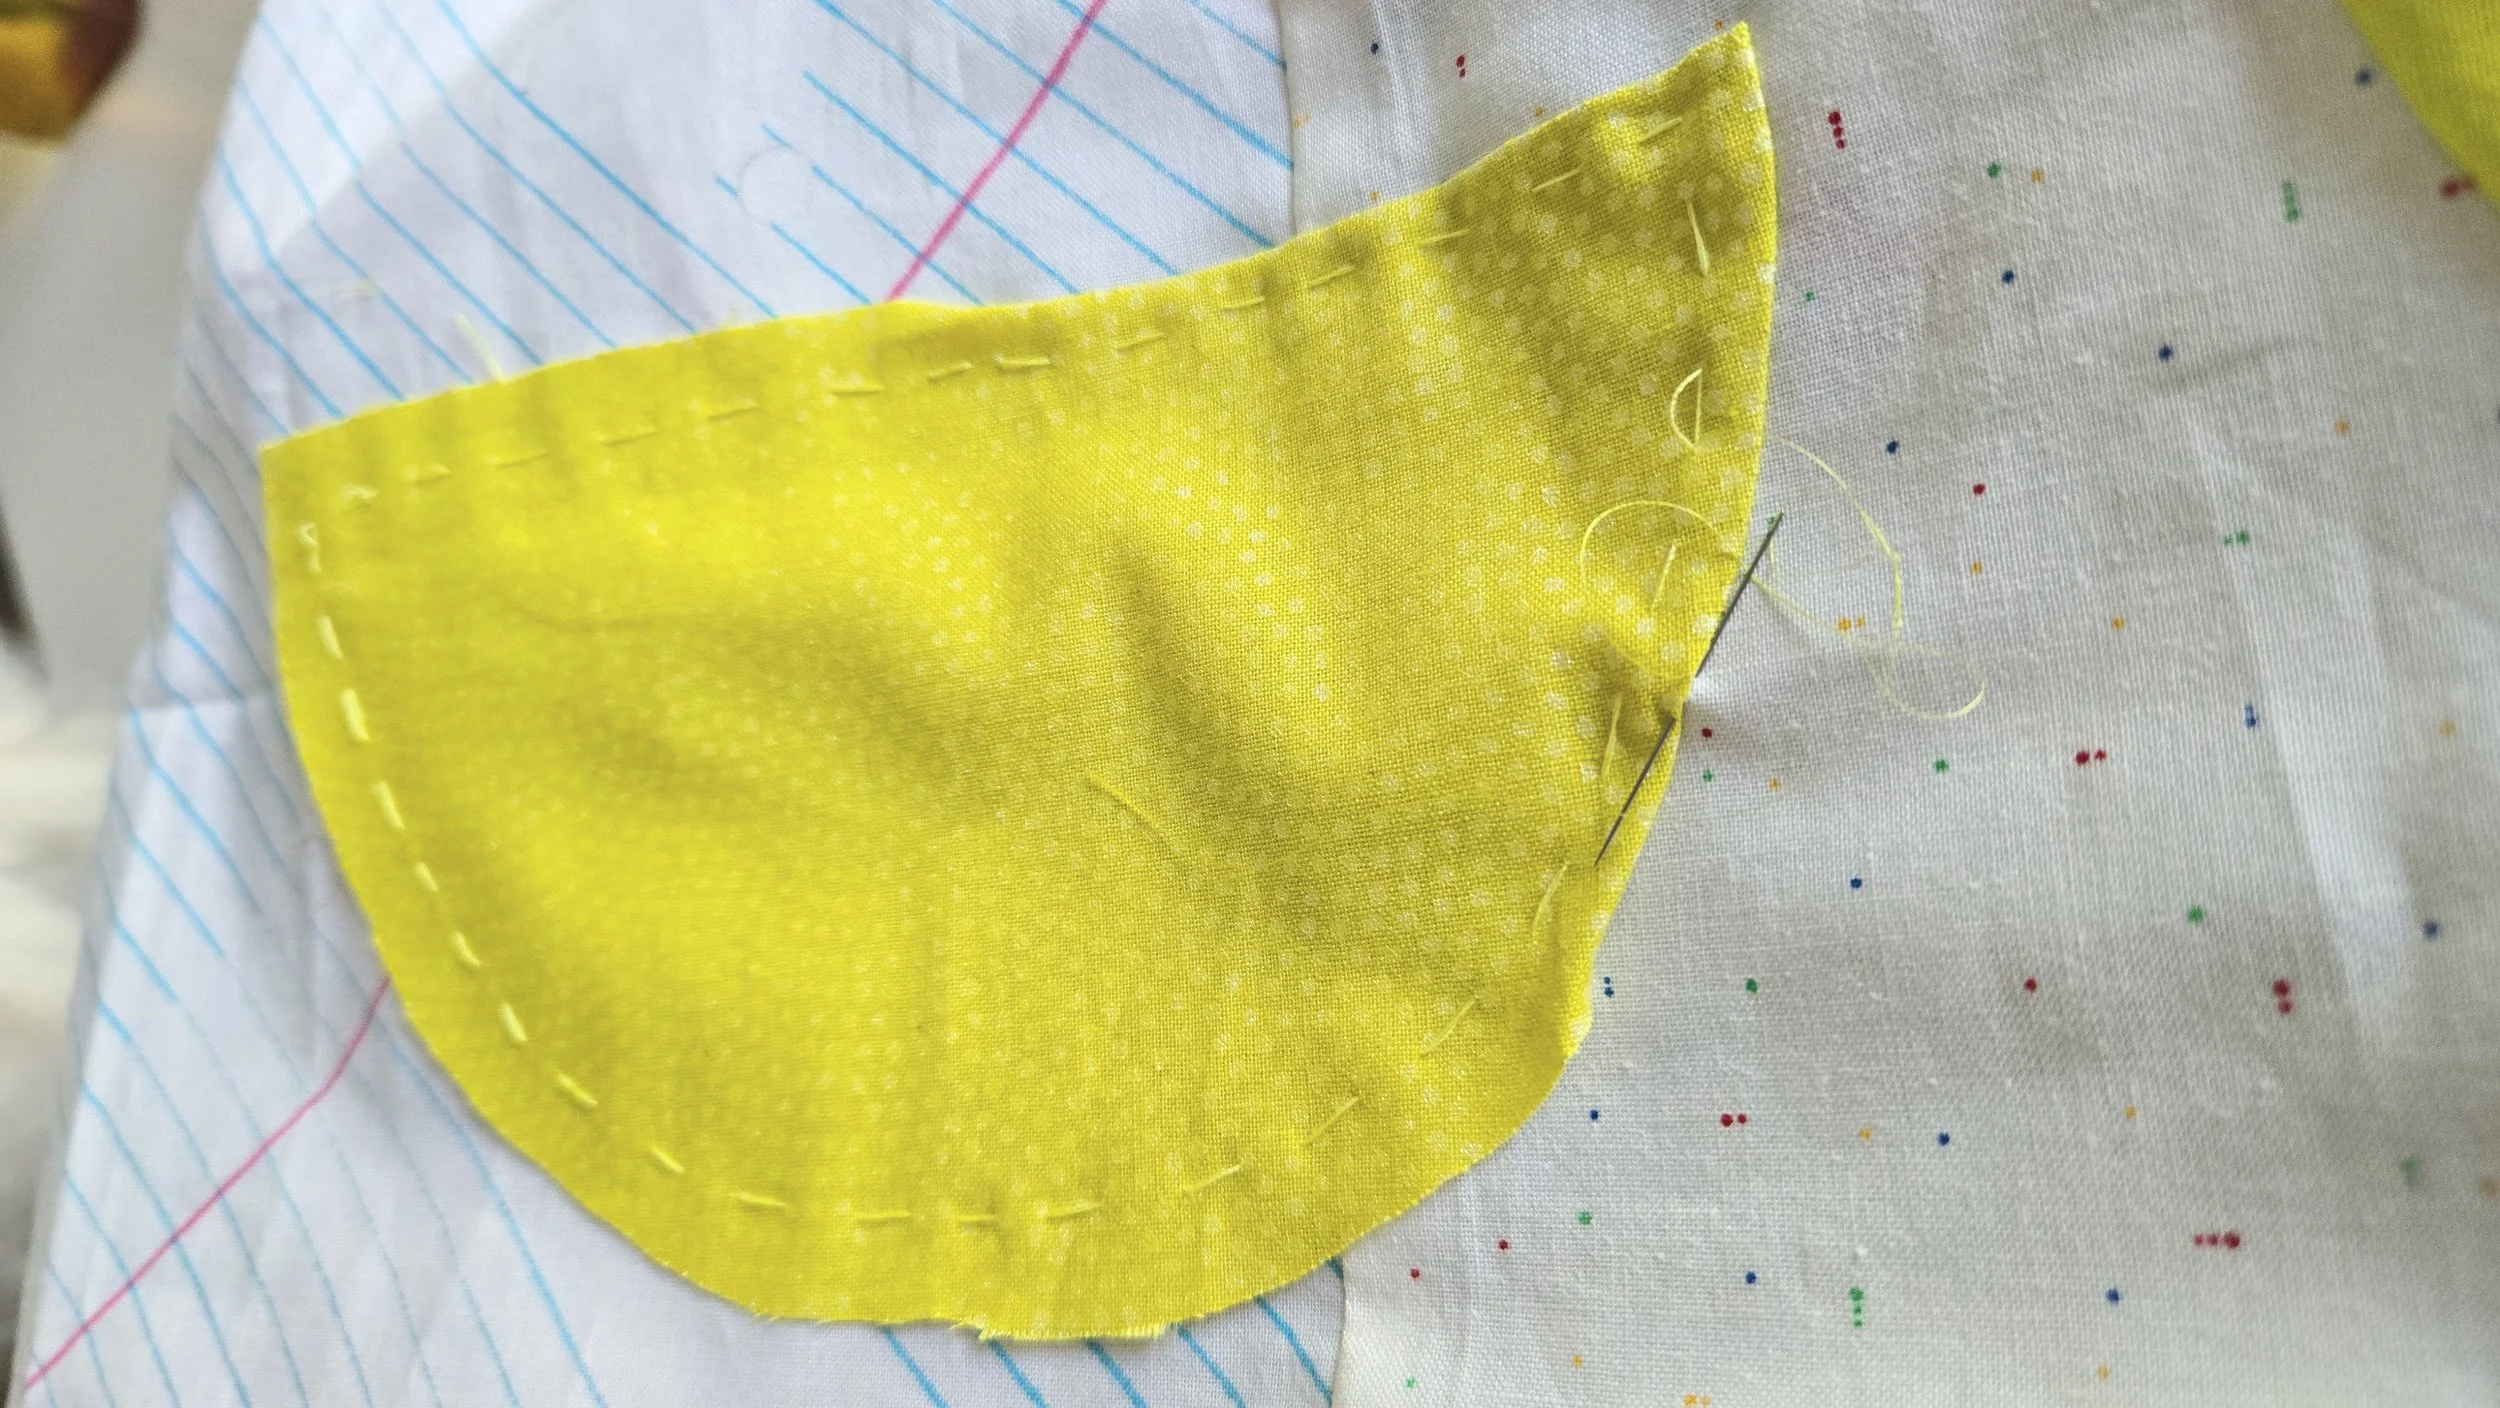
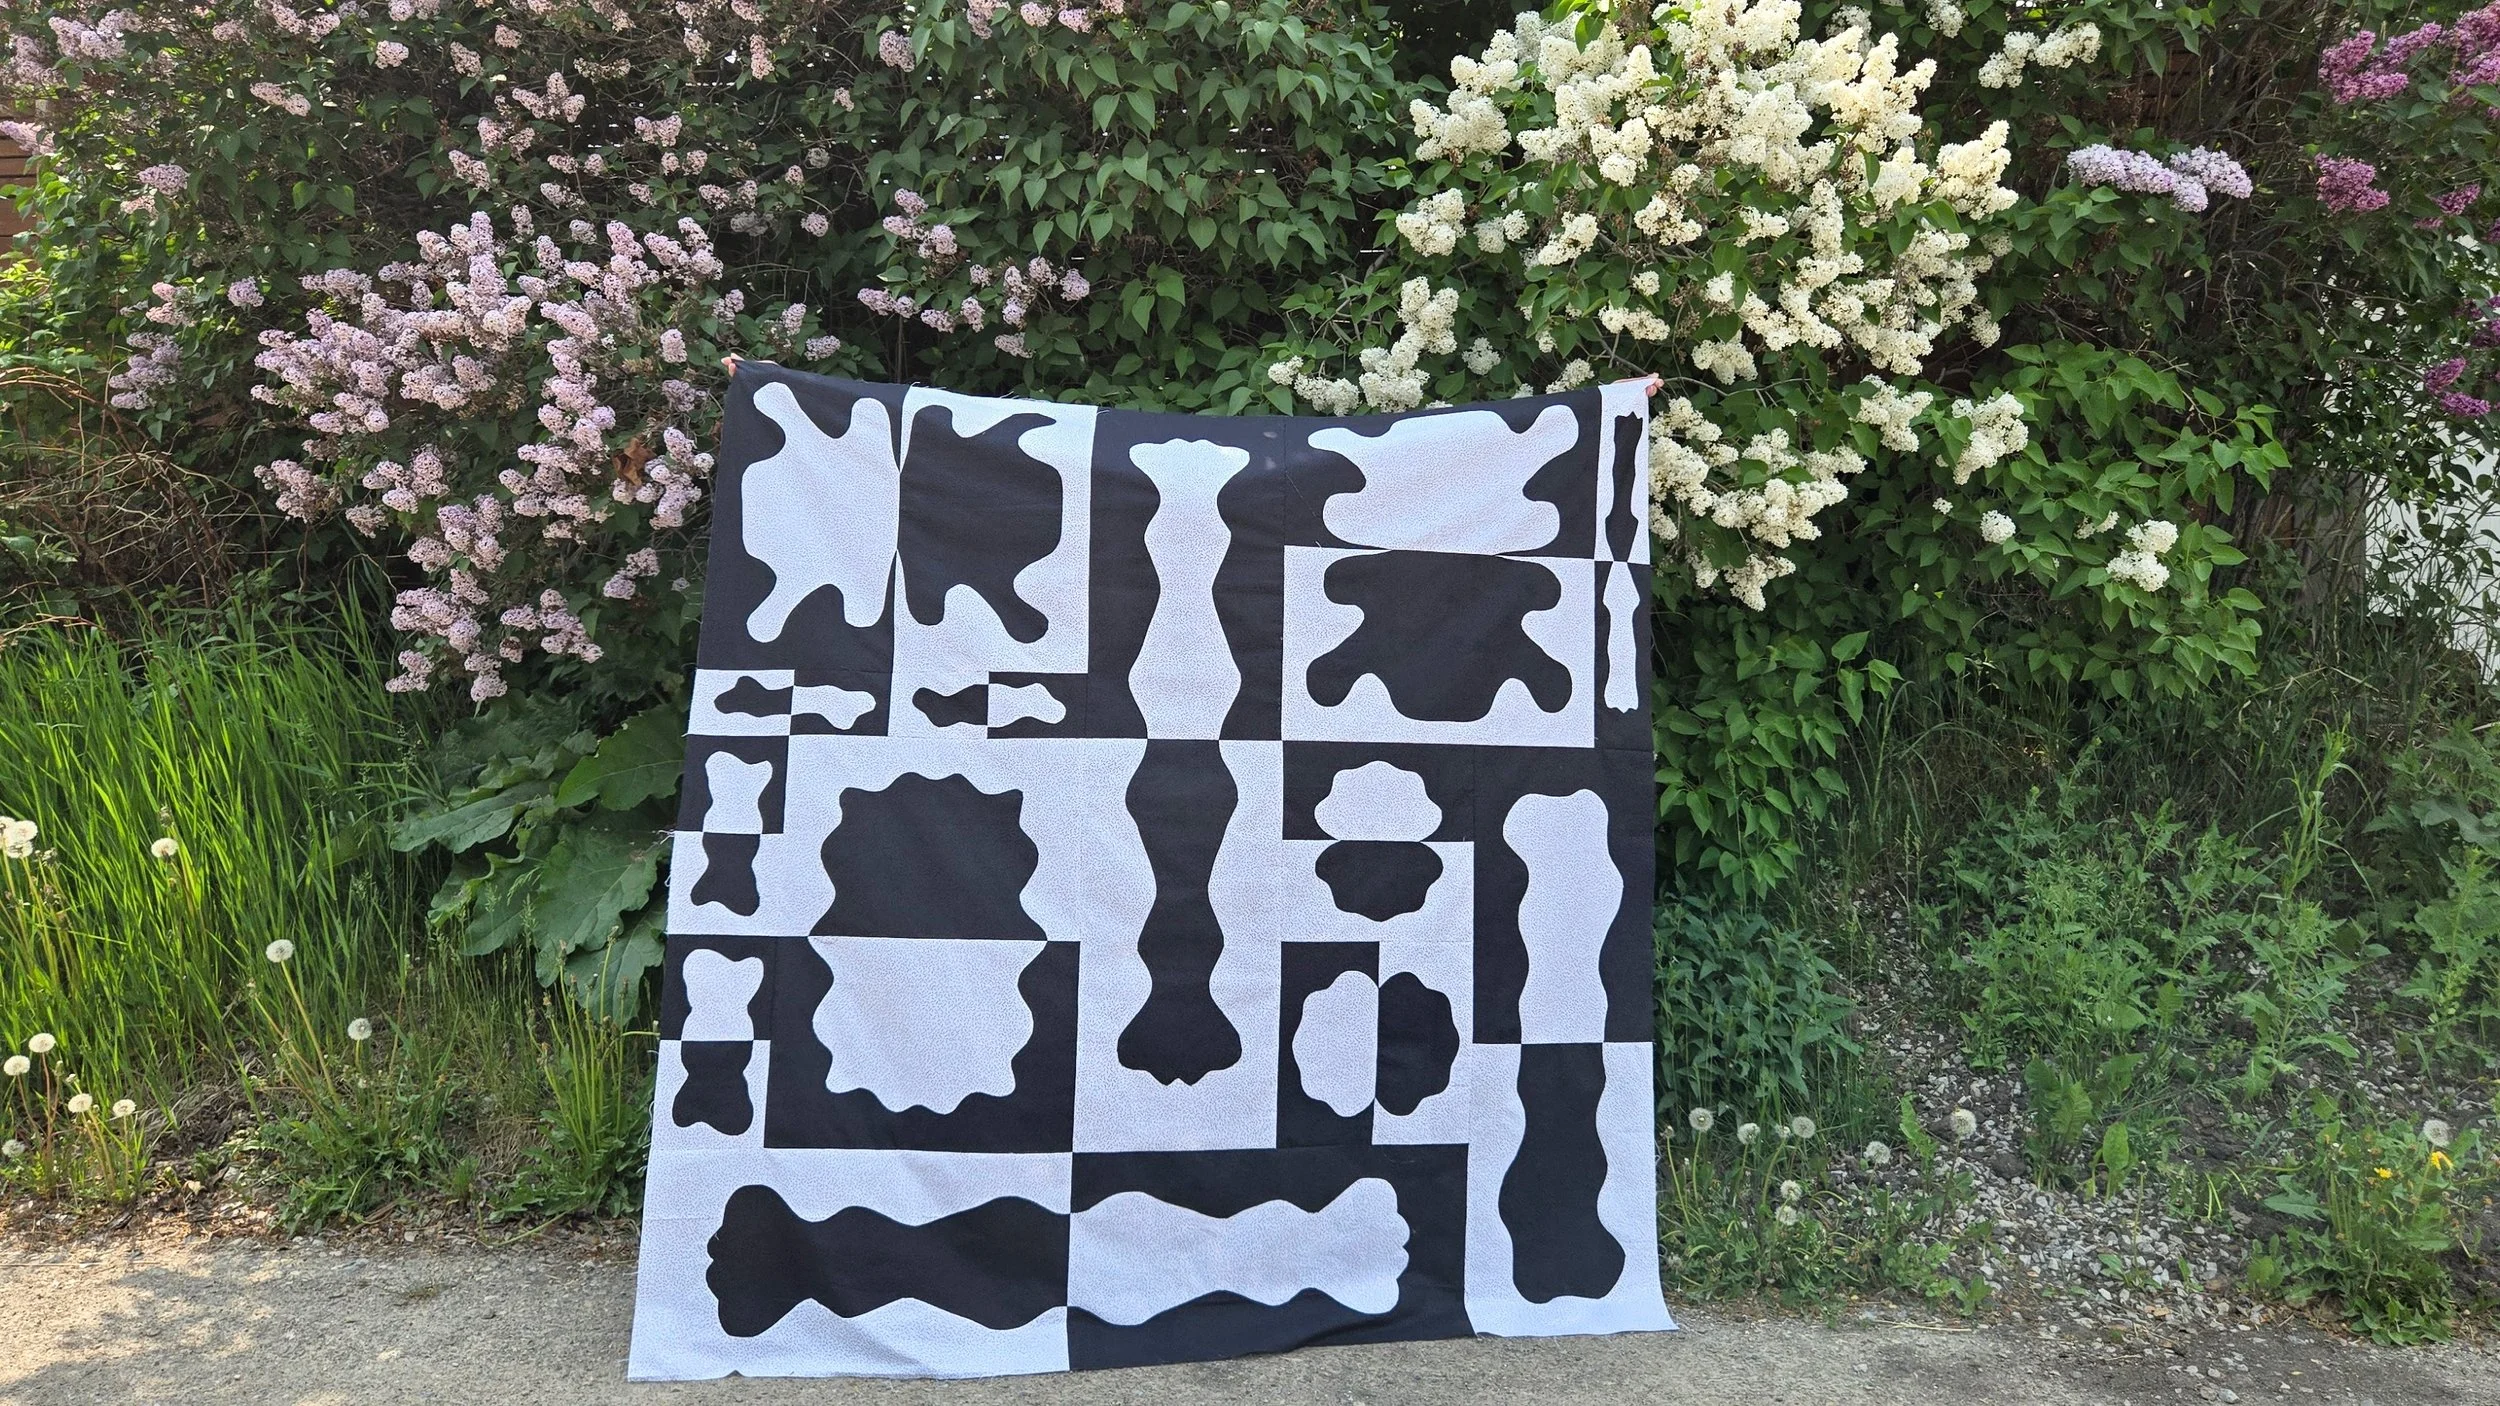
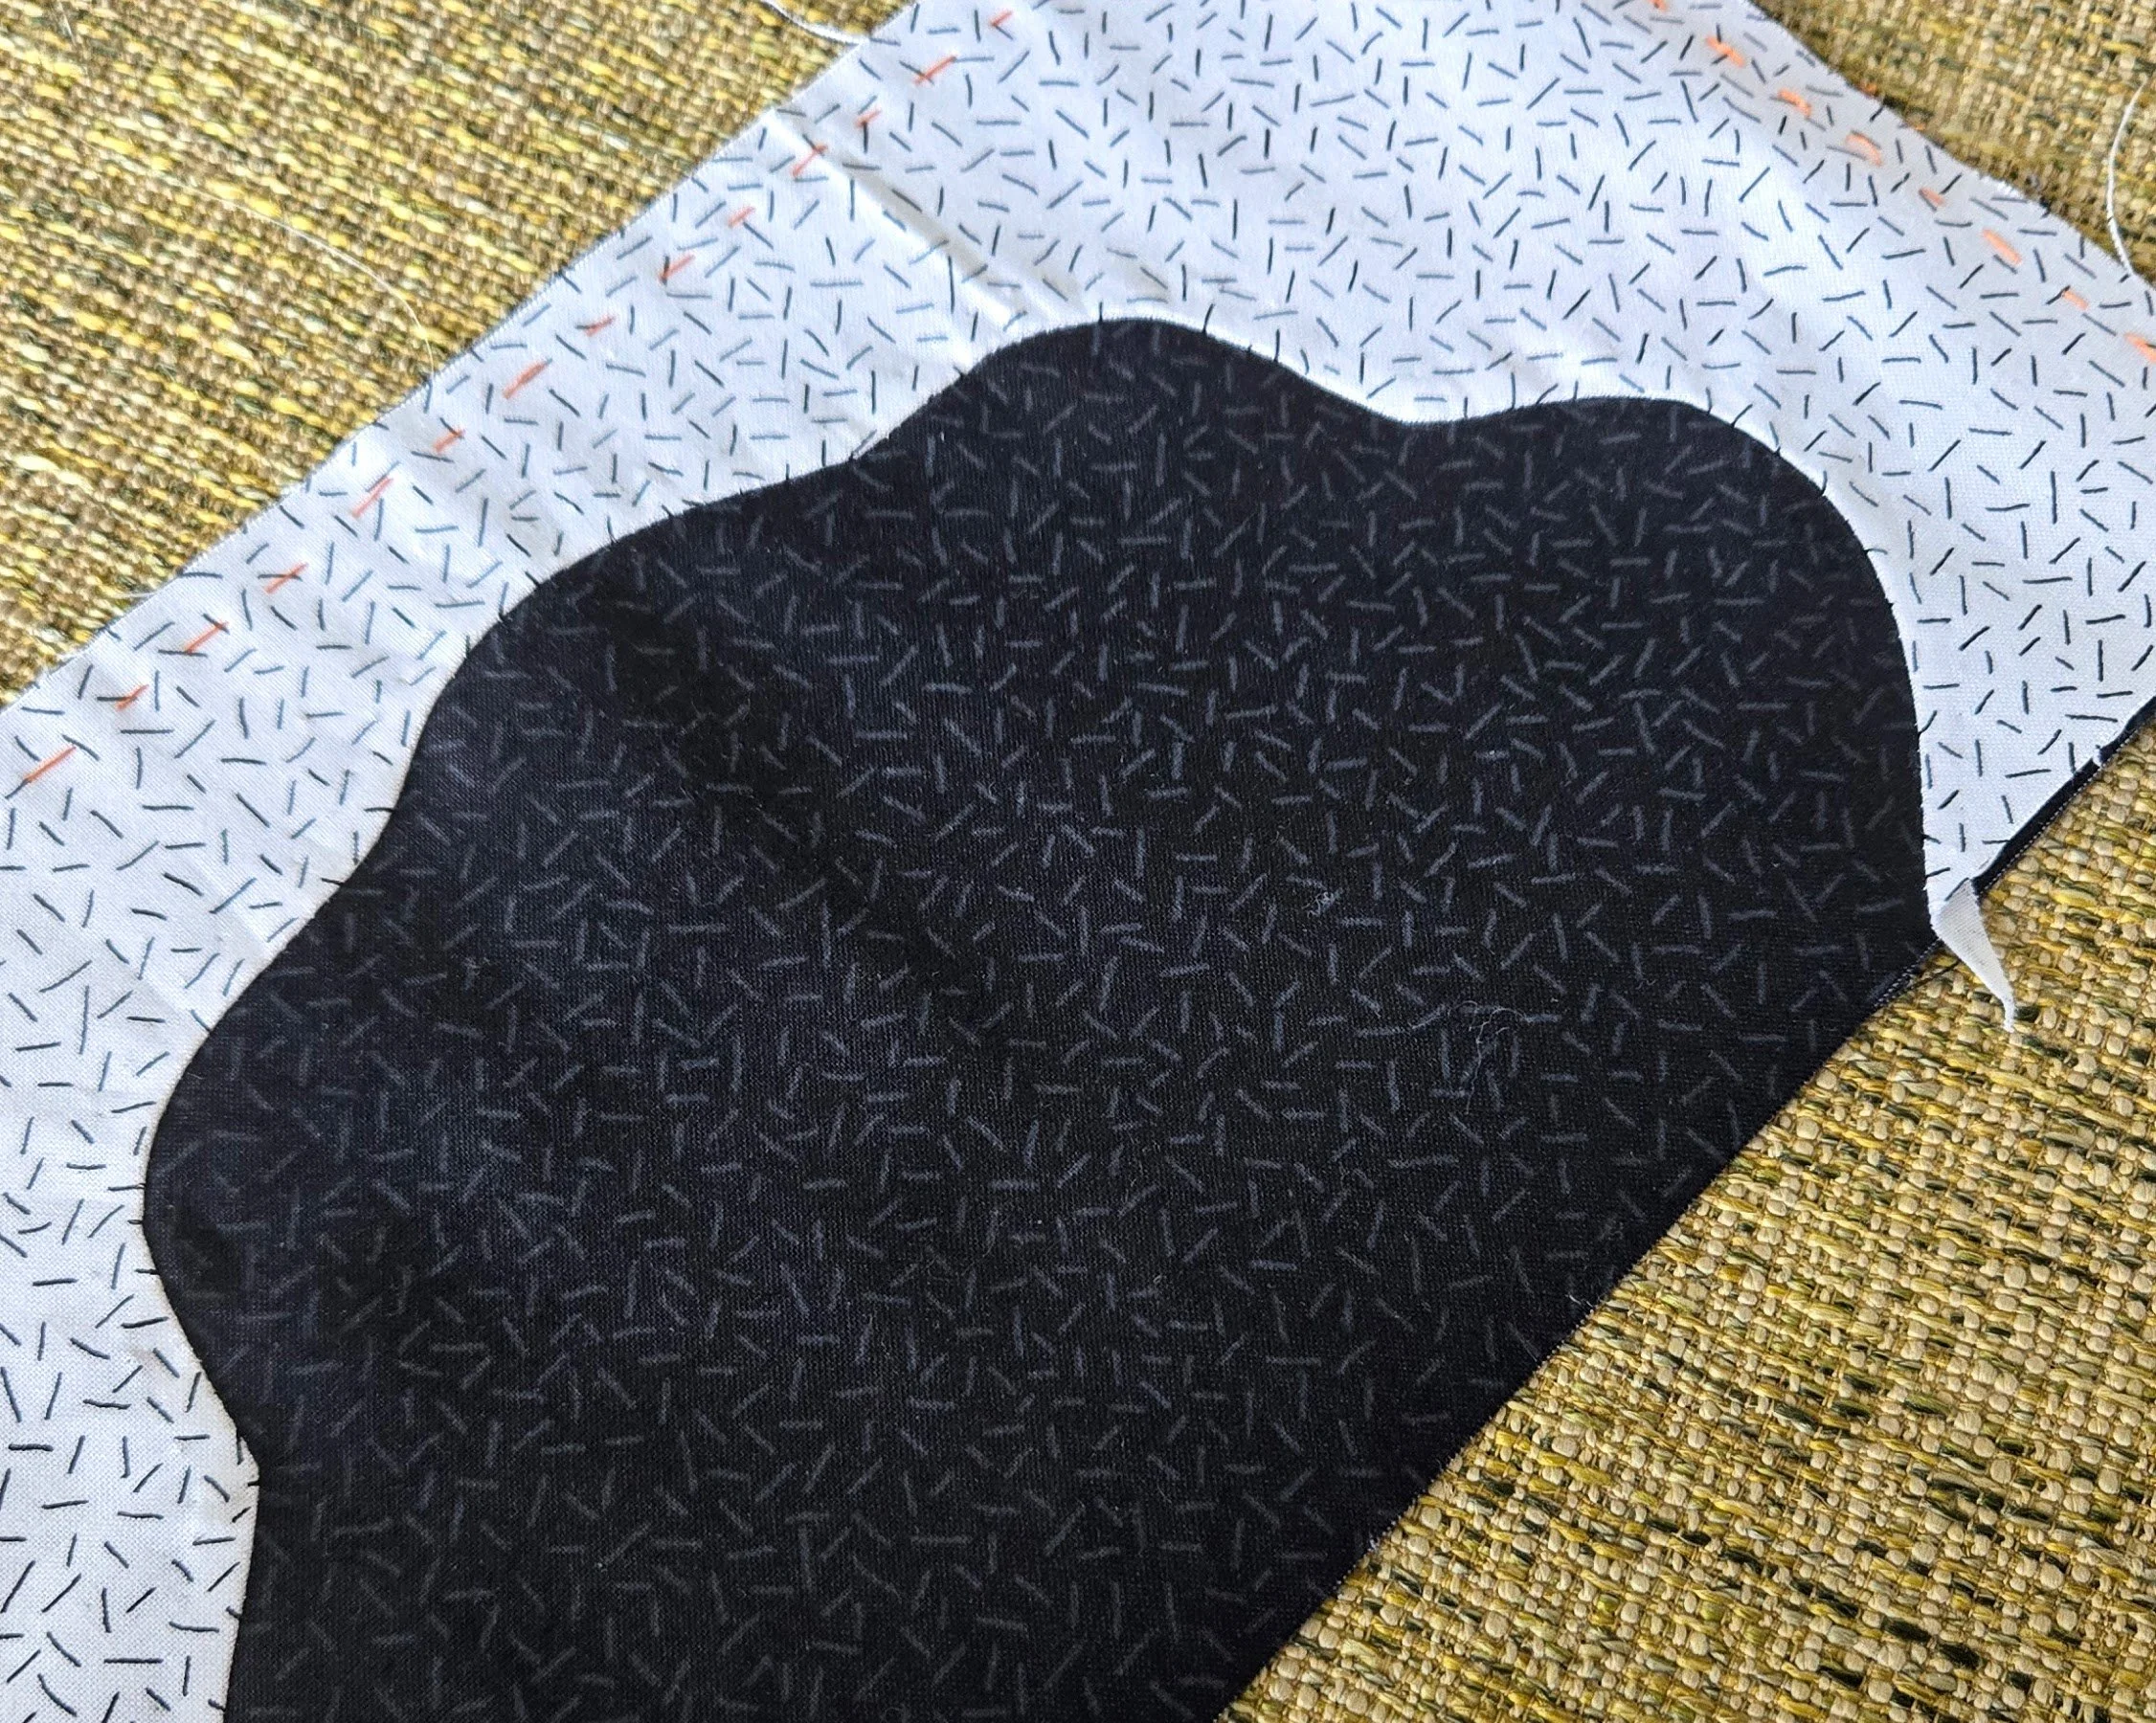
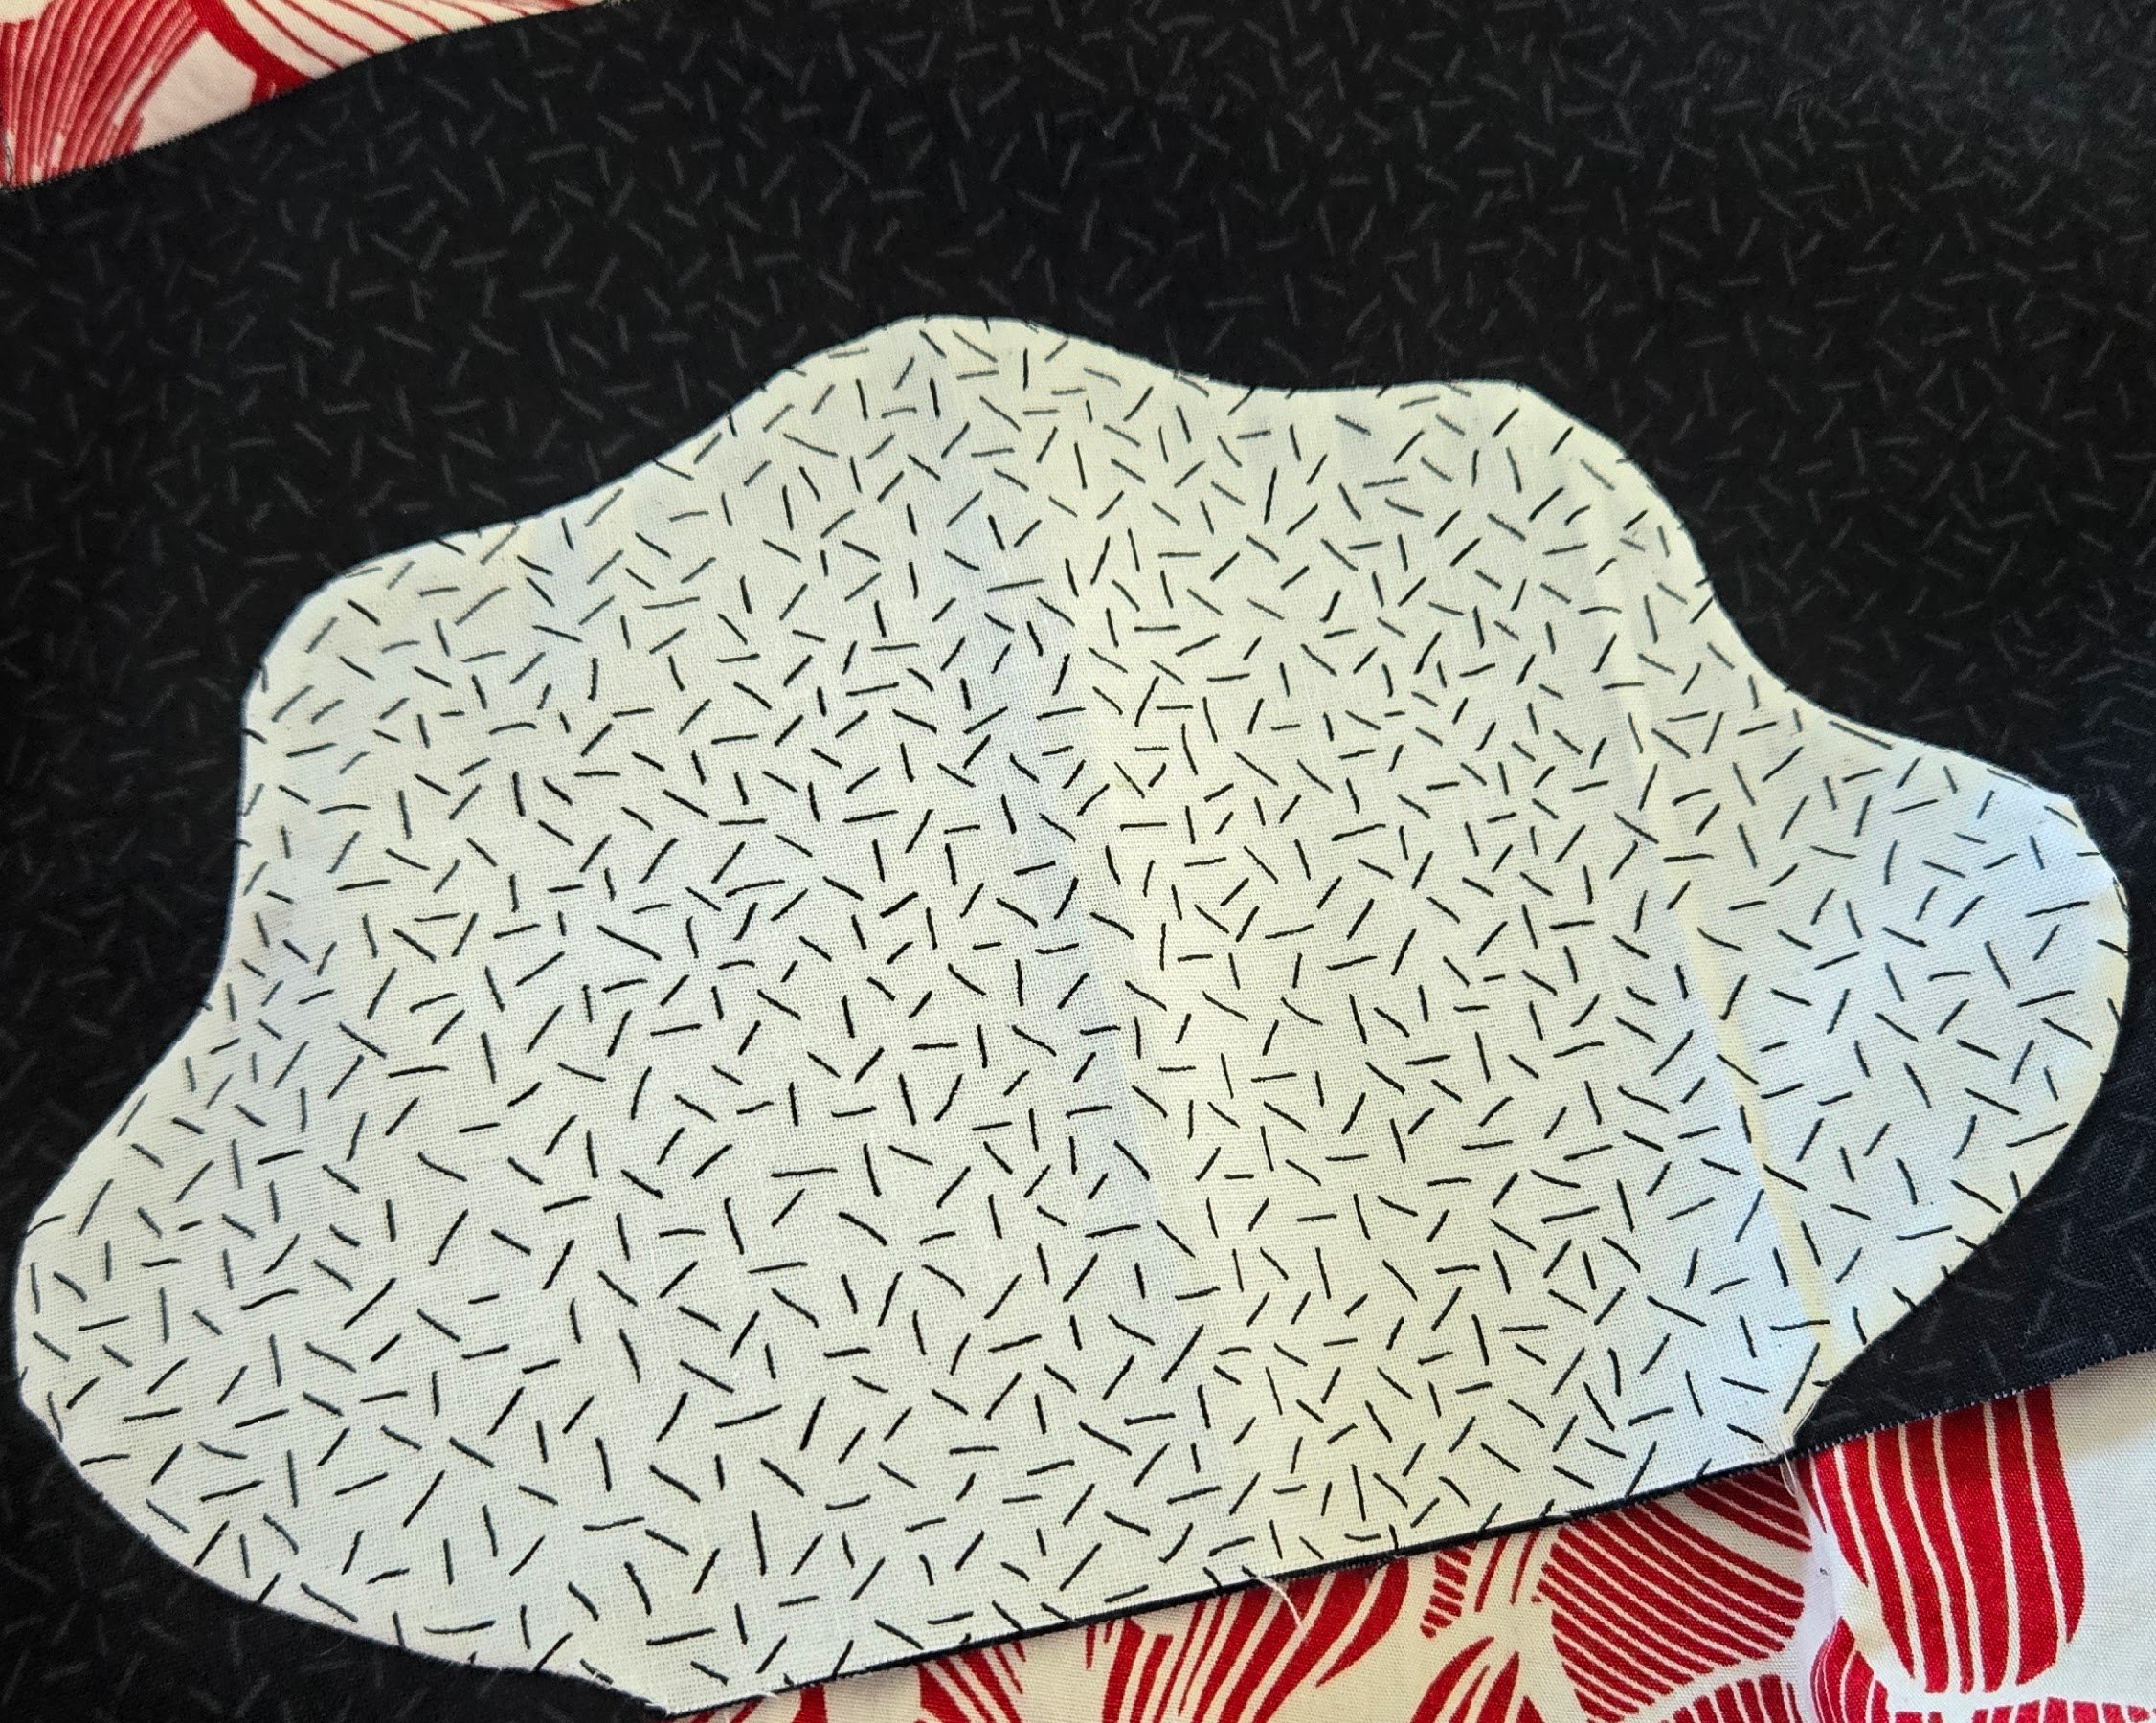
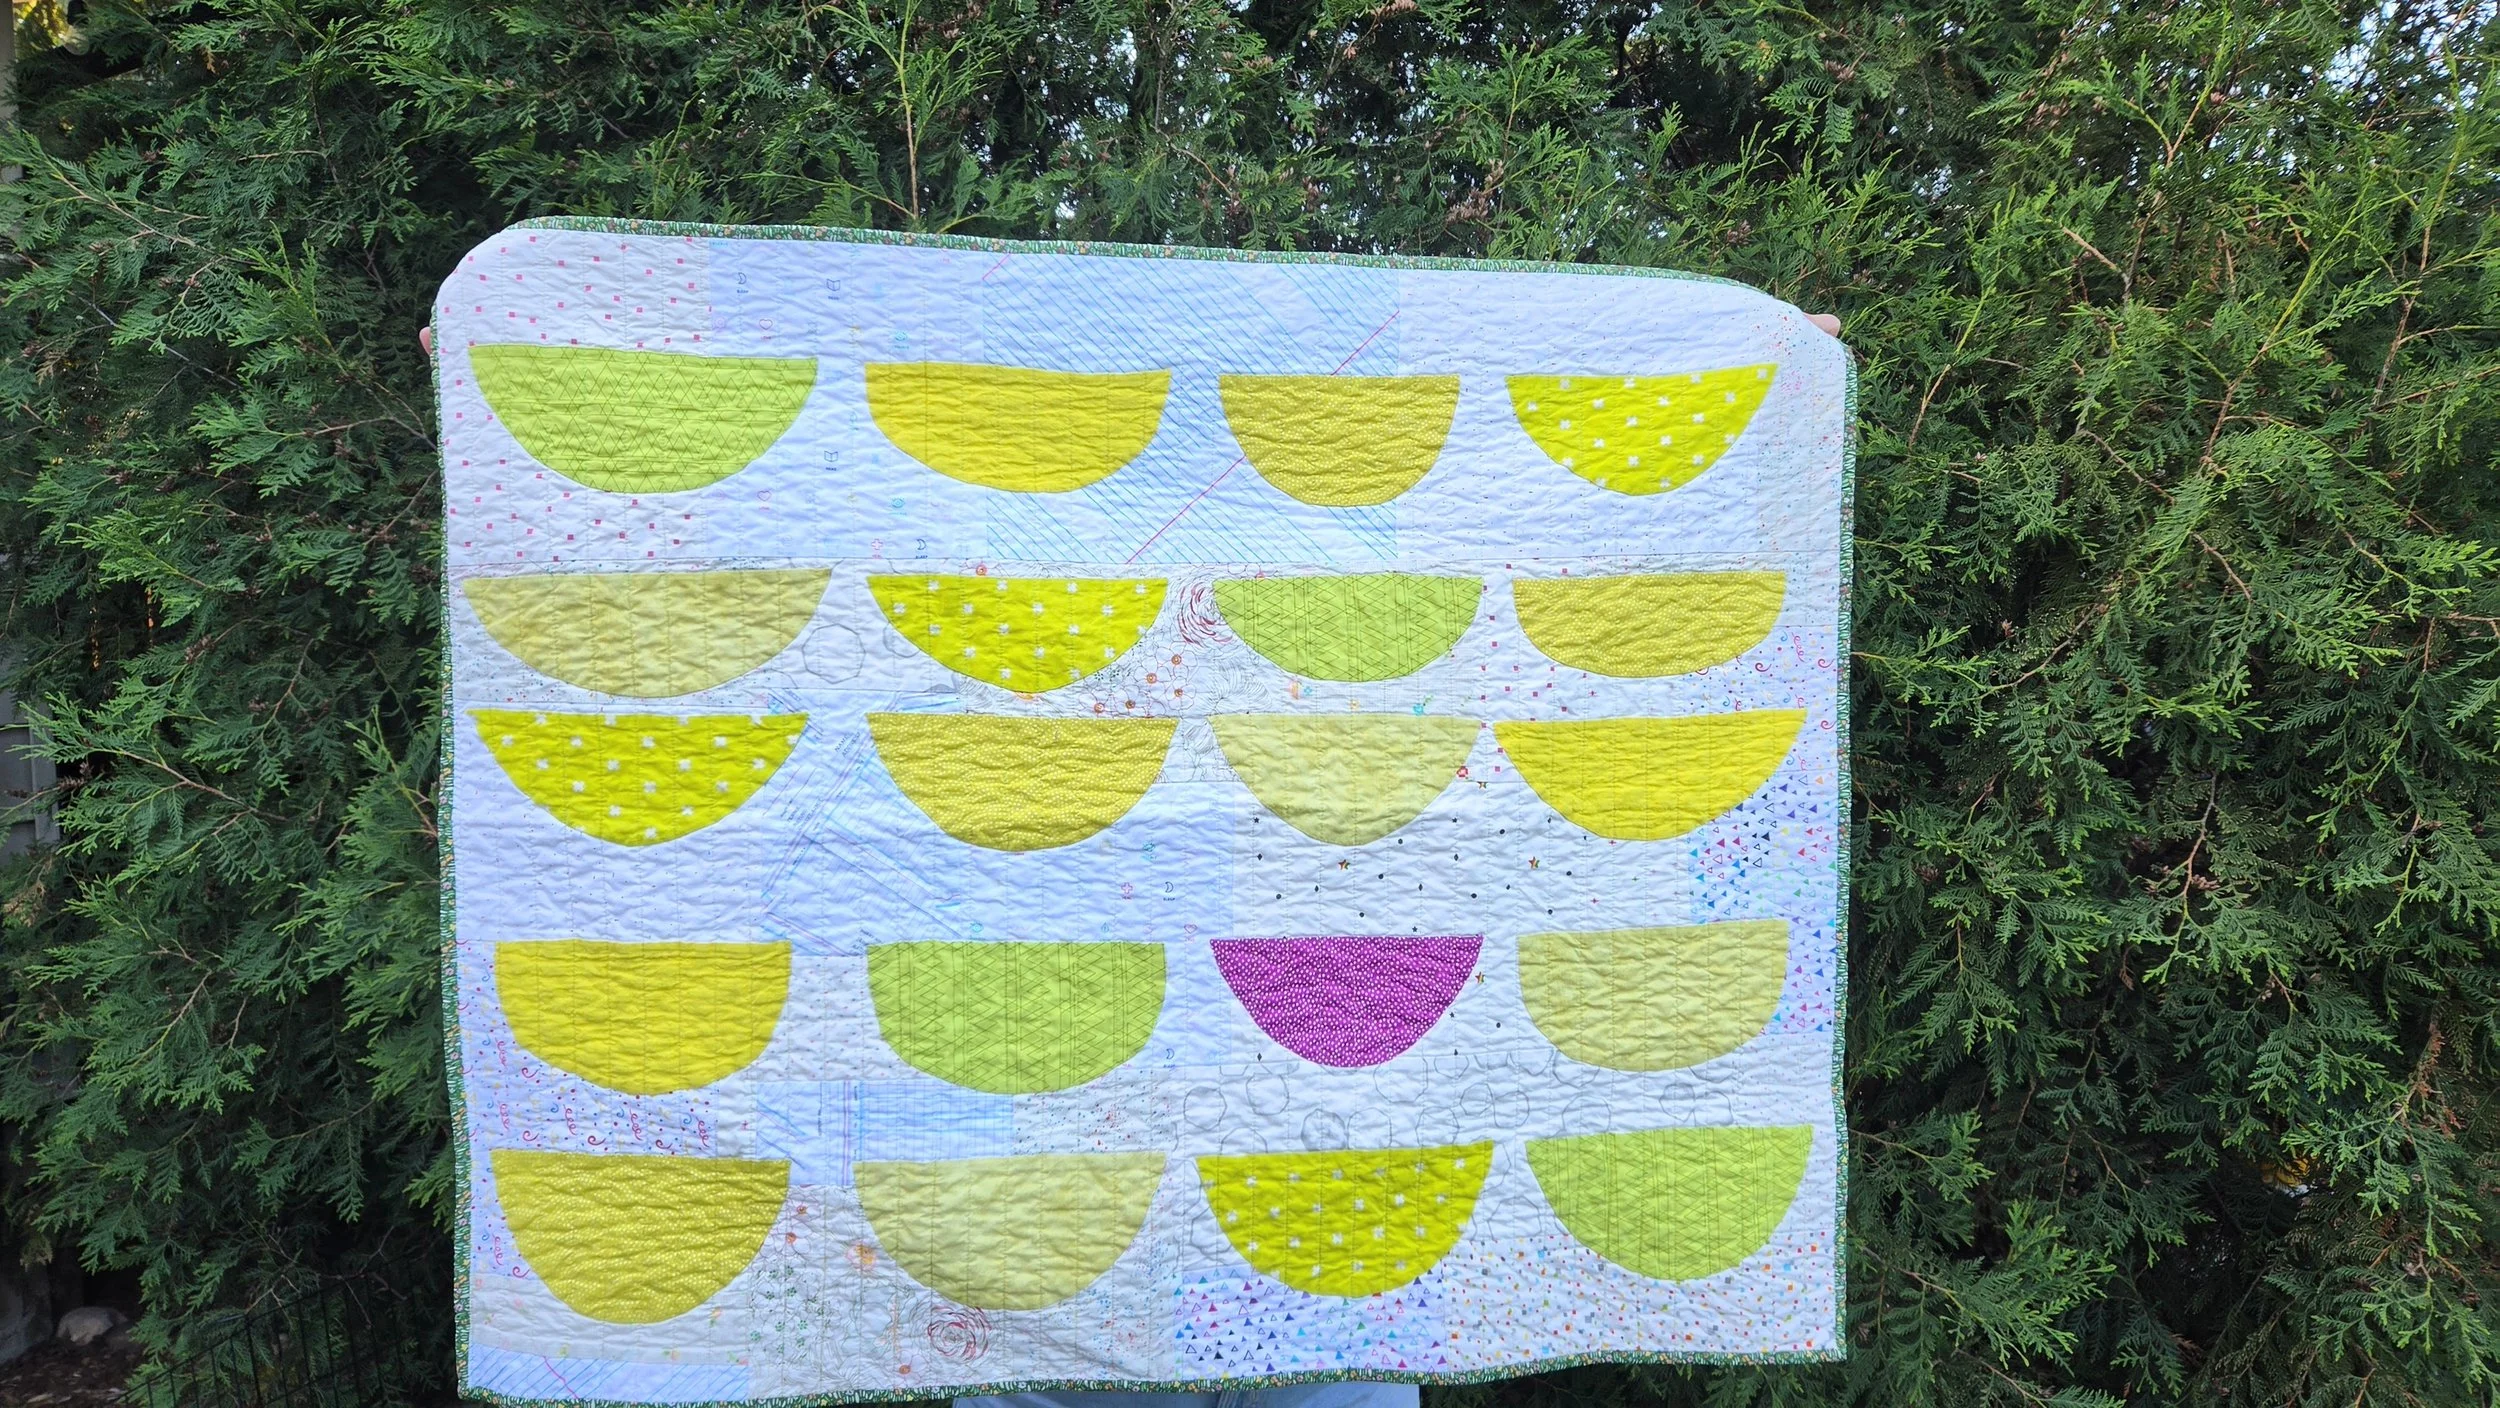
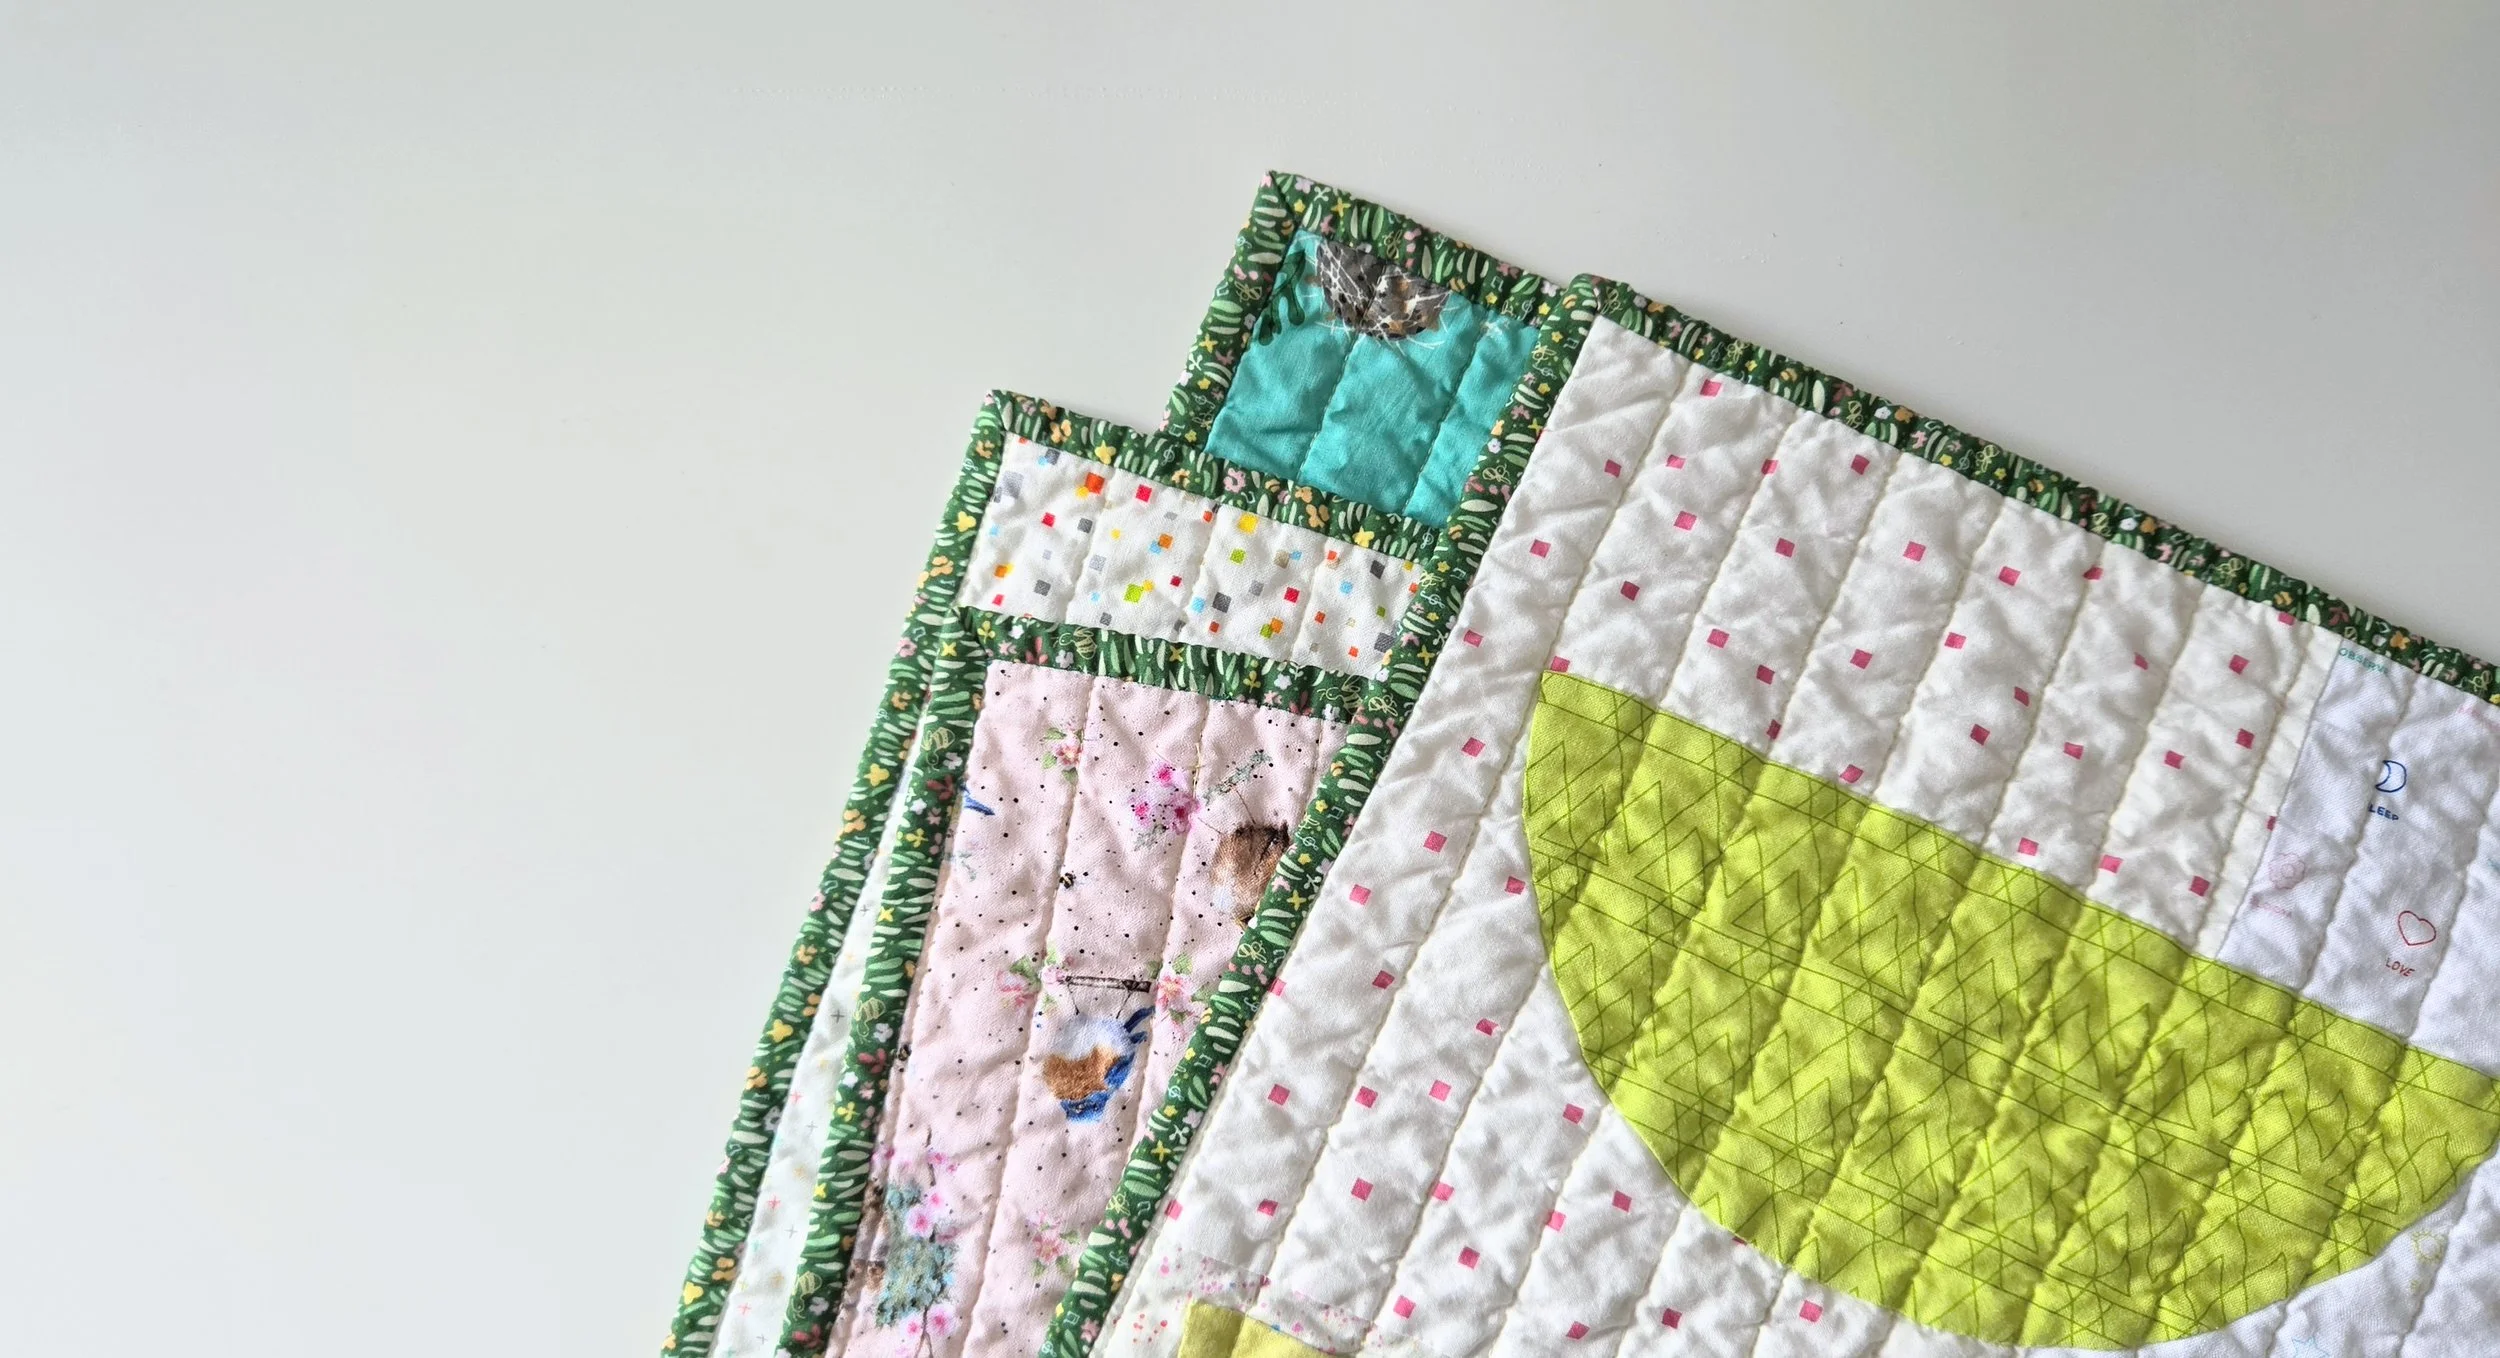
A year ago I was teaching Improv Applique at the Edmonton District Quilt Show. I made up a new sample for the show - piecing a background of low volume scraps. With the guidance of the participants I cut this bowl shape to demo the techniques I teach. It was a fun shape and the impact was strong. Come fall, I would add another bowl, as I called them, here and there. During the depths of winter I finished the top and it sat patiently, waiting its turn for quilting. It’s me, so it could be waiting a long time for that!
But then I realized I did make a baby quilt for a recent addition to the extended family. Like, I totally forgot. As I consulted my Quilts Under Construction list looking for something appropriate, this applique treasure came up. It’s absolutely perfect for the recipients! Maybe it was meant to be?
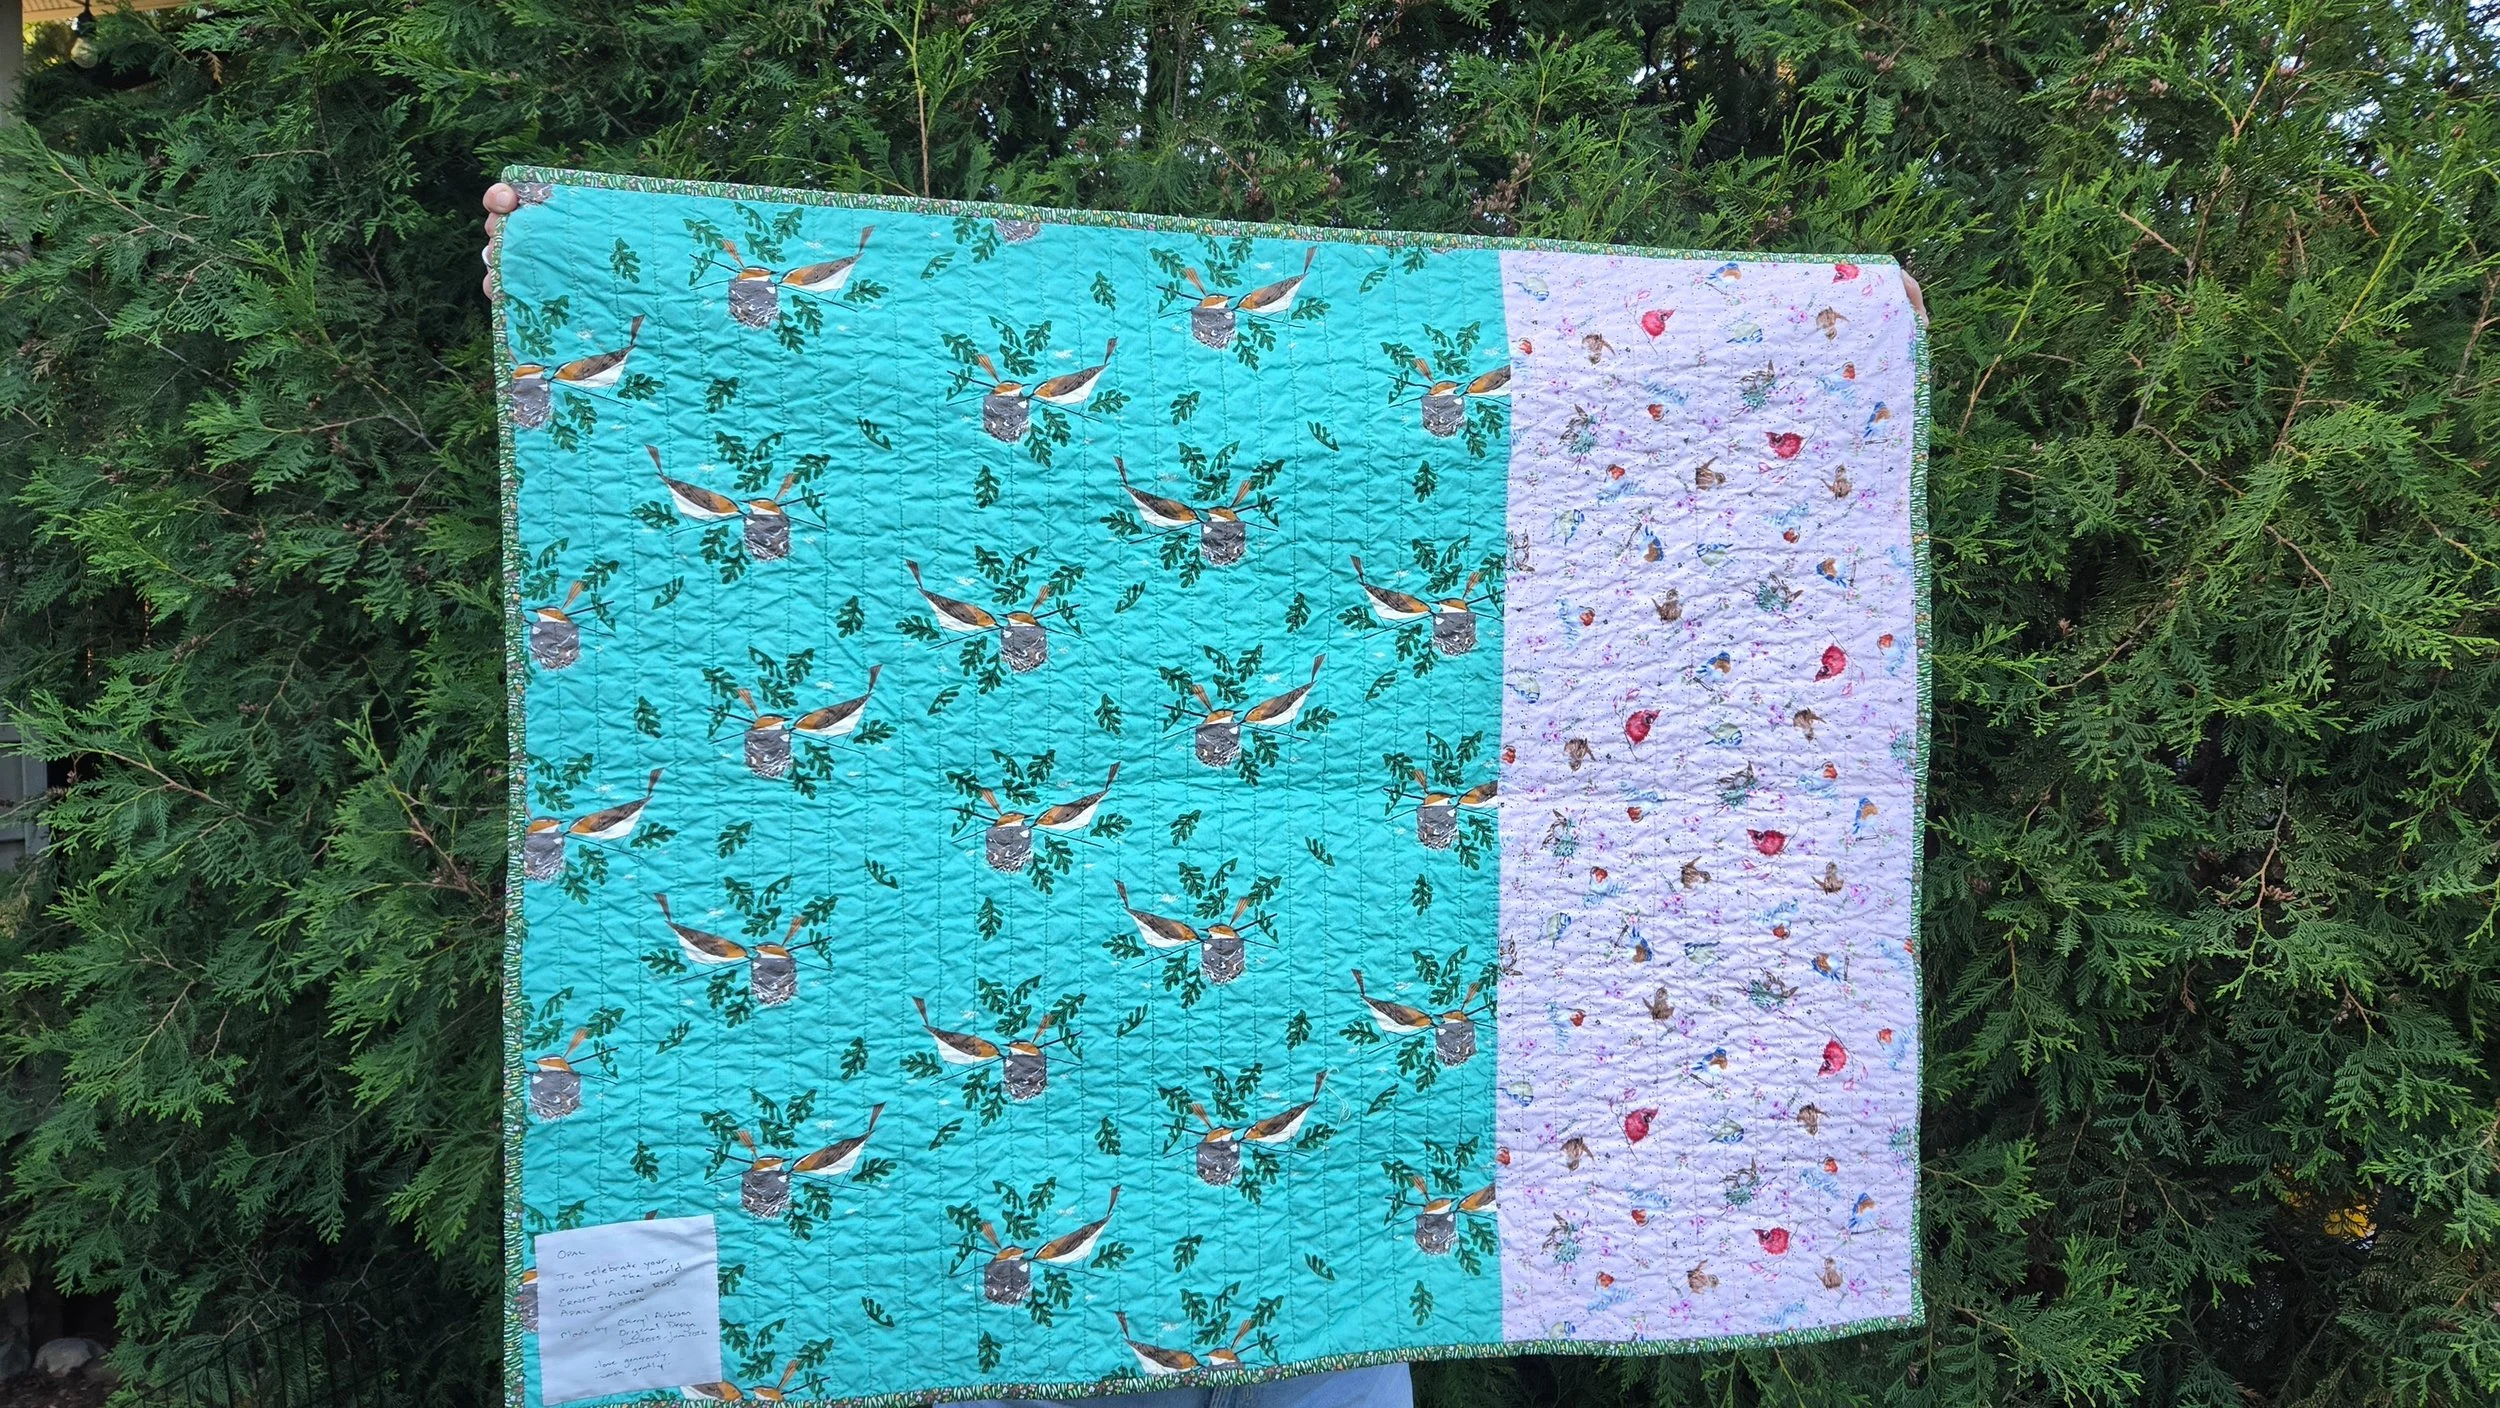
I quickly made a backing. Birds and more birds! I know that the baby’s Mamas love to watch the birds in their yard, so it was perfect. And I think I used the Charley Harper fabric on the back of a doll quilt I made for their first kiddo. With some simple straight line quilting it was a quick finish - once I decided to do it!
To bind the quilt I raided my green stash. I’ve used green in their wedding quilt, the first baby’s quilt, and a doll quilt. Plus, the dark green went well with the one darker purple bowl.
Ready for all the baby snuggles. Well, once summer is over! Unless I make a quilt out of a mosquito net or rubber boat, I doubt it’s getting used this summer.