quilts

Quilts Under Construction - 1Q 2015


In the interest of staying on top of things, not to mention full disclosure, here is the current status of Quilts Under Construction in my studio. Except when deadlines take over, I think I'm doing well at tackling at least one of these projects once a week.

As I wrote the list I got excited and thought I'd made all sorts of progress as the numbers seemed lower. Then I got to the part where I added the projects I started. Oh well. I'm still happy! And, let's not forget my new obsession with garment sewing taking away some quilting time.

Quilt Tops Ready for Quilting

1. Cosmos Blocks
2. Improv Sampler
3. Checkerboard from Sunday Morning Quilts
4. Slaveship Quilt  - I did buy some Valdani thread for some hand quilting on this and nearly started after watching the Book of Negroes miniseries.
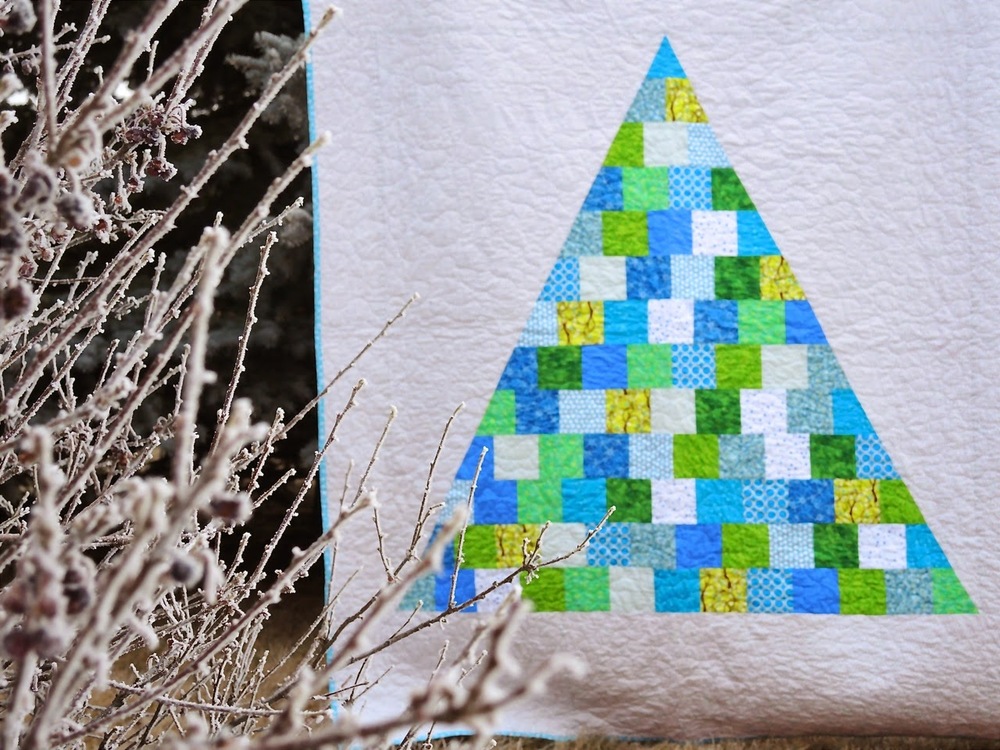
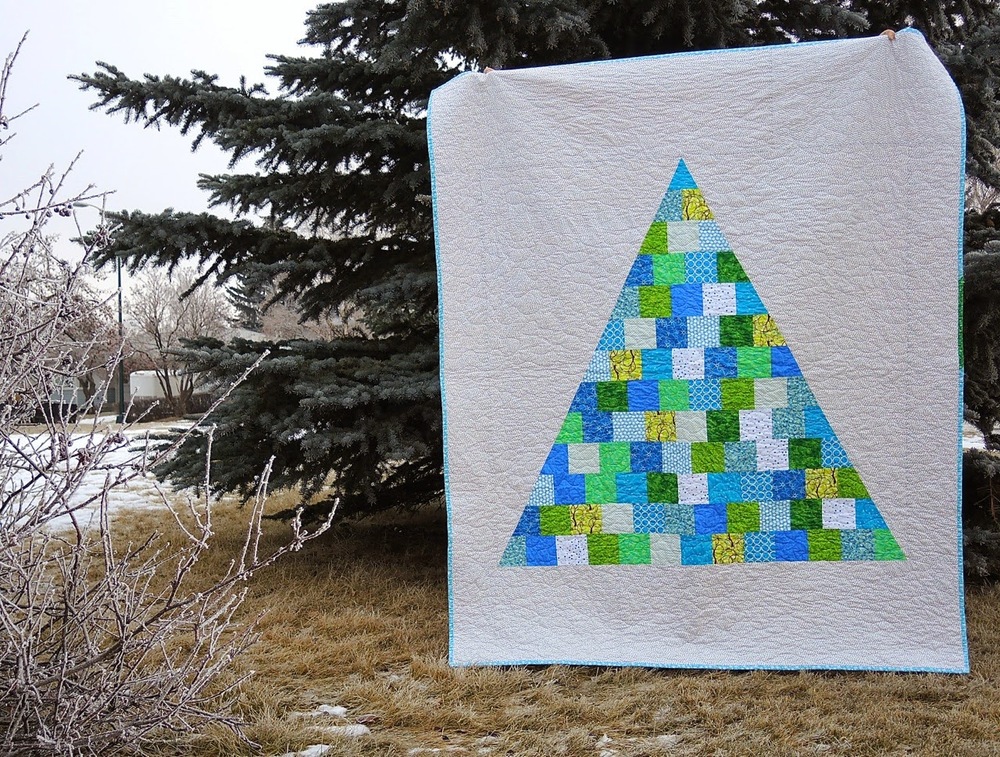
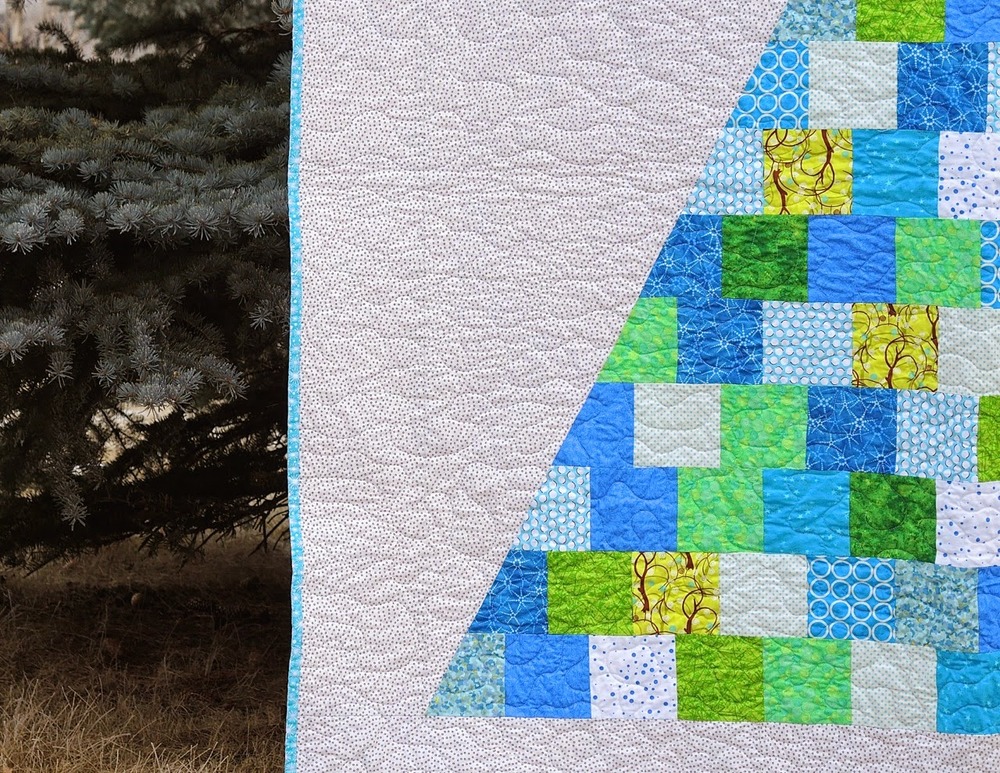
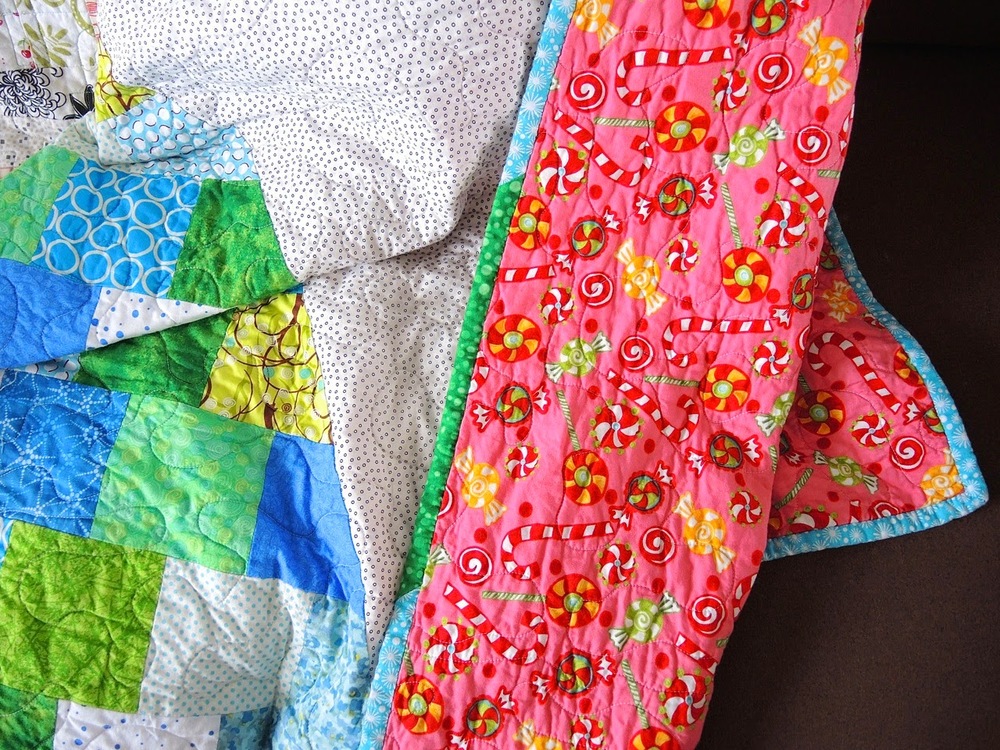
5. The Evil Genius' Triangle Quilt - now that she has her own bed she wants this finished. But it is isn't big enough for her double bed. So she's picked out side borders and I just need to sew them on.
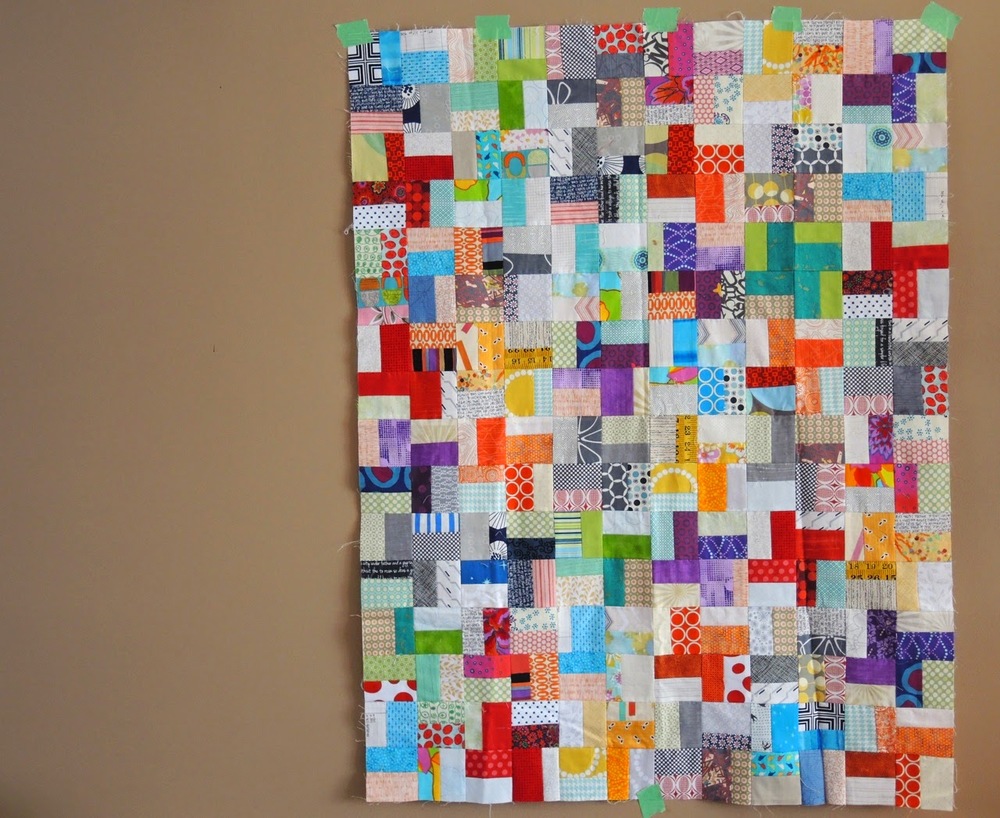
6. A low volume rainbow mini quilt that I've never shared with you.
7. Giant Hexagons - I did actually come with a plan for quilting this the other day and now I'm excited to move forward.
8. One red/purple turquoise quilt intended for magazine publication
9. Cirrus Solids Pinwheel top
10. Solid Sunday Morning - I even have the back made already. Will be doing this one very soon.

Quilts Being Quilted

11. Low Volume Circles - I took this out and looked at it once.
12. Antonio's Quilt - Still waiting for me to come back to this.

Waiting for Binding

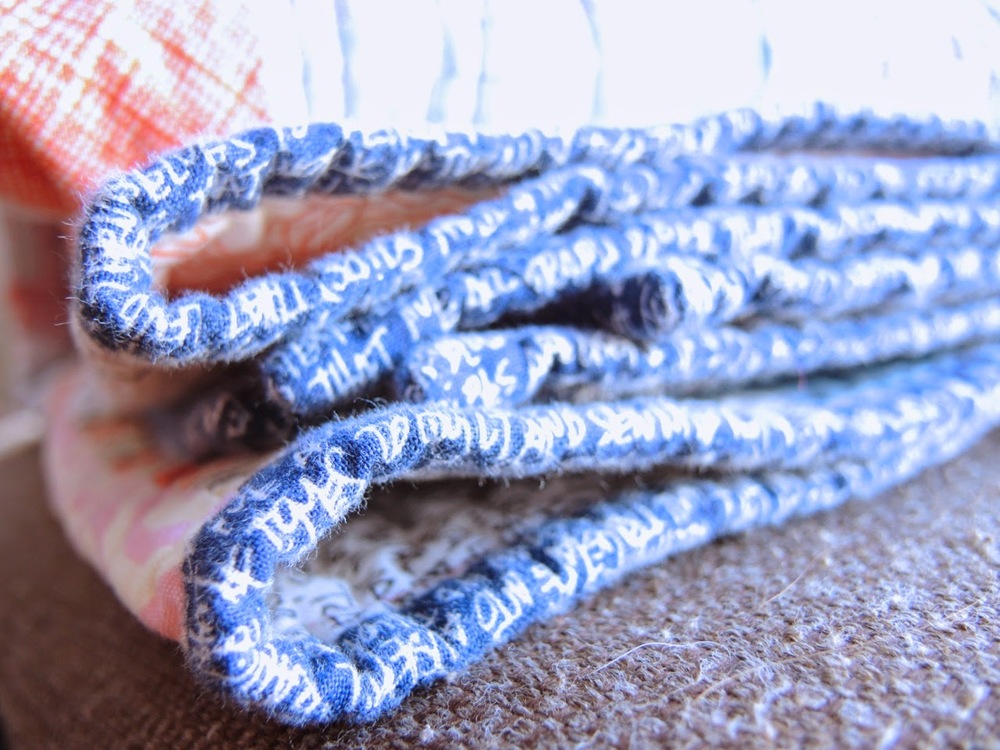
13. All voile quilt - just have the last side of the binding to finish, so I'm counting it here. Then I will photograph and share. So close to being done.

Blocks and Process

14. Mid Mod Bee - This is moving up the list in my head. Some setting ideas are percolating...
15. Hand Pieced Diamonds - I found the first section I made, it had gone missing/got buried in the studio.
16. More Cosmic Burst blocks
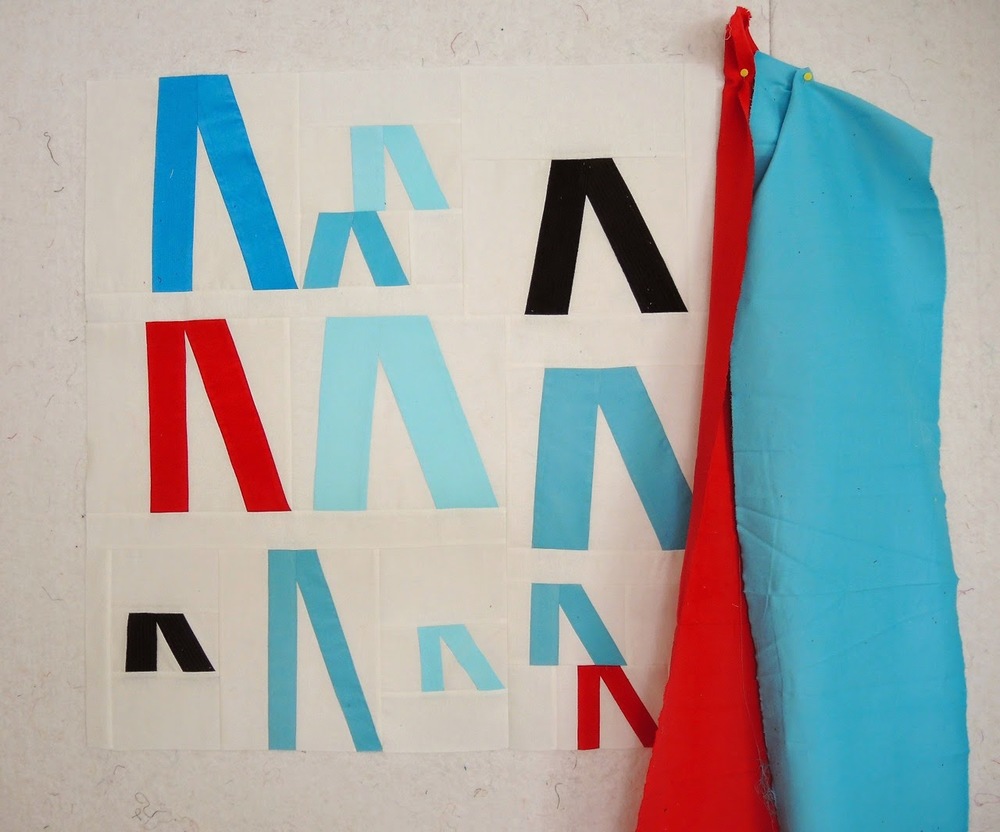
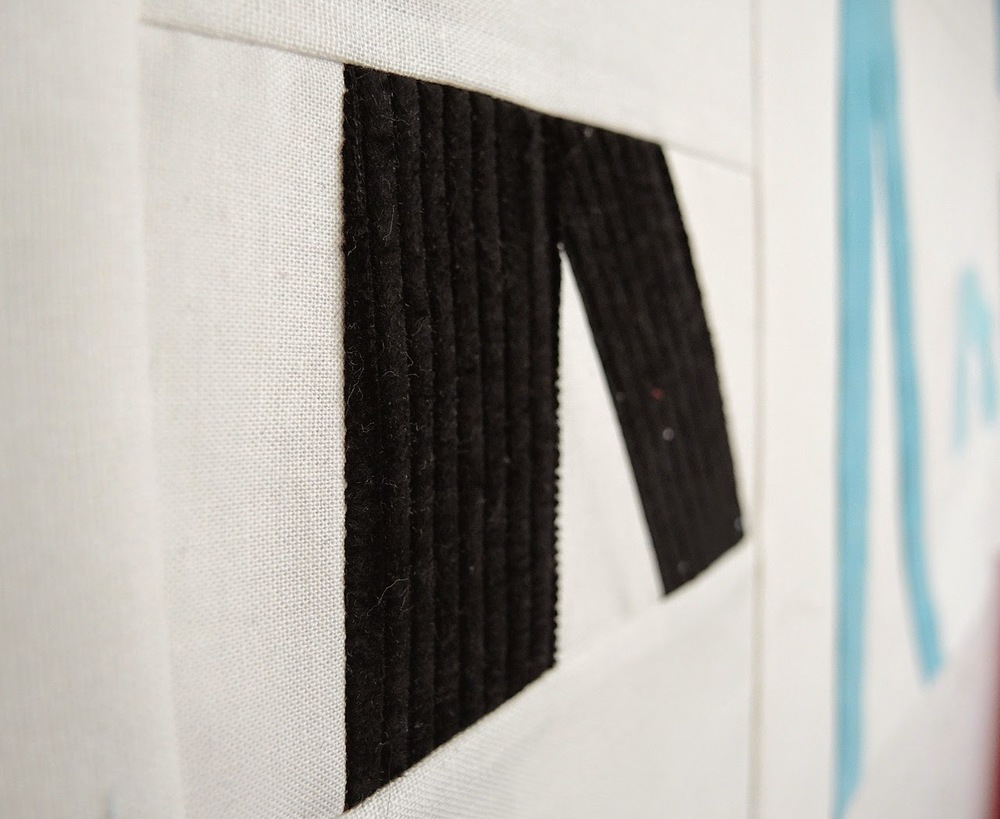
17. Name quilt for my daughter
18. Chandelier quilt
19. Liberty Circles - I actually finished all the circles for this, playing with my new machine. If I could decide on a background fabric I would finish this top up.
20. Respite - a project started in a Bill Kerr design workshop
21. Pieced Stars
22. The Water Quilt
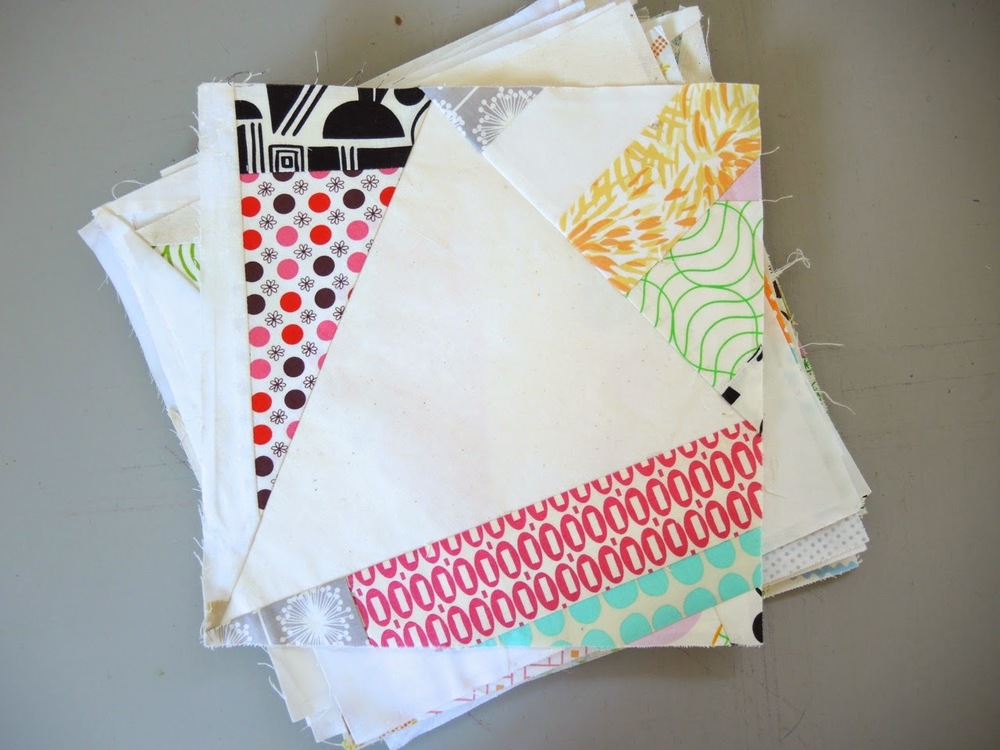
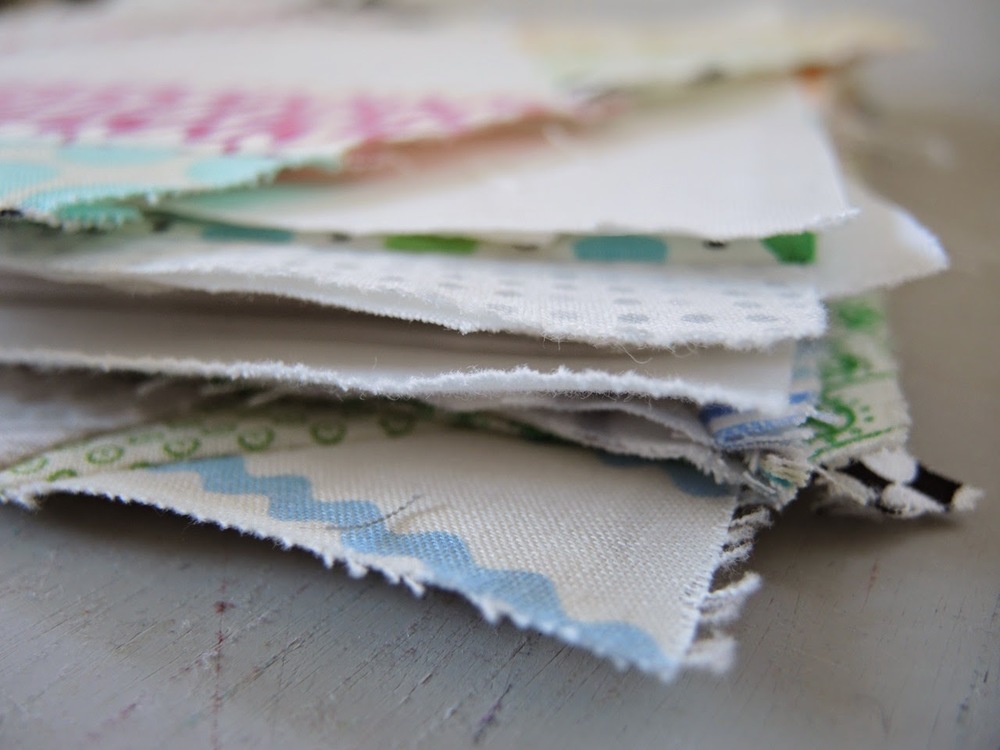
23. Low Volume Shoeman's Puzzle/Slab blocks - I made more blocks and plan to make at least another 21 more.
24. A values quilt in neutrals - After teaching this again at QuiltCon I have no more classes scheduled in the next few months. I've kept this out to try to get a new top together.
25. Green/Yellow/Orange Improv blocks (Class sample, so I keep adding more blocks each time I teach the class) - My son's favourite colour is orange these days and his room is painted green, so these blocks are sitting at the front of my brain lately.
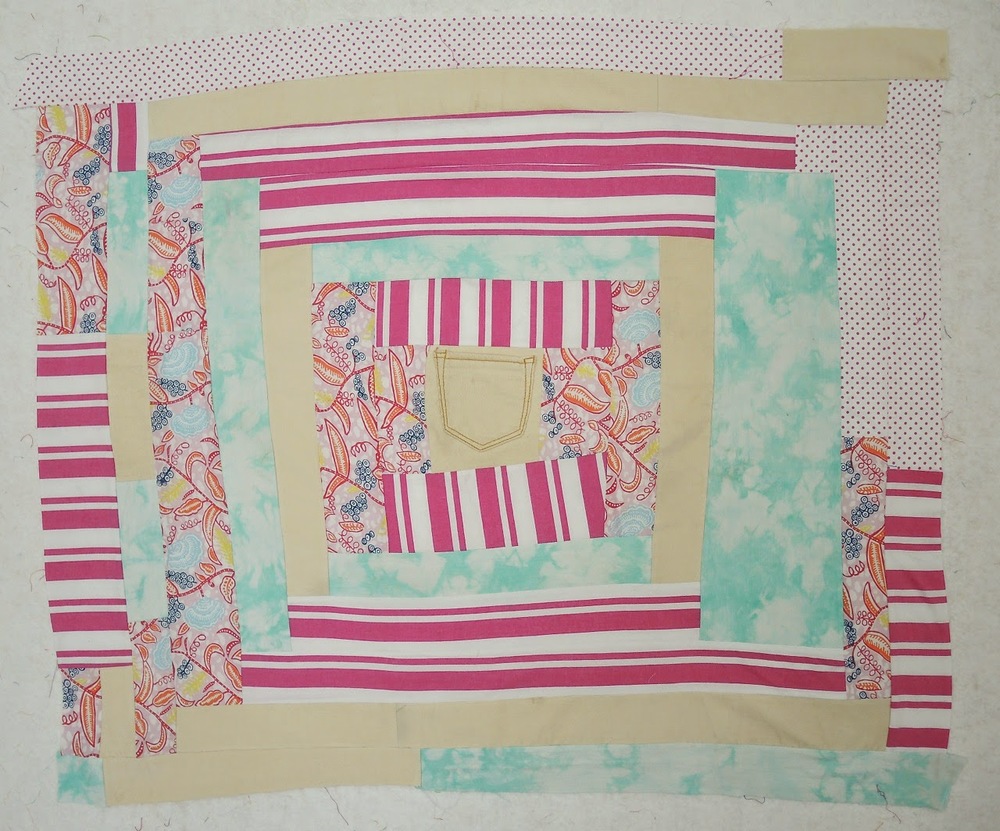
26. Edges/Studio Stash Play
27. Beach Grass Take 2
28. Y2K quilt - About 12 rows made. Of 50.
29. Another leaders and enders project, intended to be like Up, Up, and Away from Sunday Morning Quilts
30. Round and Round blocks - Up to 13 of these now.
31. Snippets on Dates - Just pressed another round of these. I'm curious as to how big things would be if I spent a few hours getting them all together.
32. Circle Lattice - Finished two blocks now, and started the third.
33. Leftovers from Modern Paris - These may come into play soon as the couple I made the quilt for are now expecting a baby.
34. Orange Circles from Craftsy/Perfect Circles class samples - I think these will stay class samples. Or not.
35. Gee's Bend inspired blocks after my trip to Alabama - I made up the small blocks into 1 large block, but now I think it needs more.
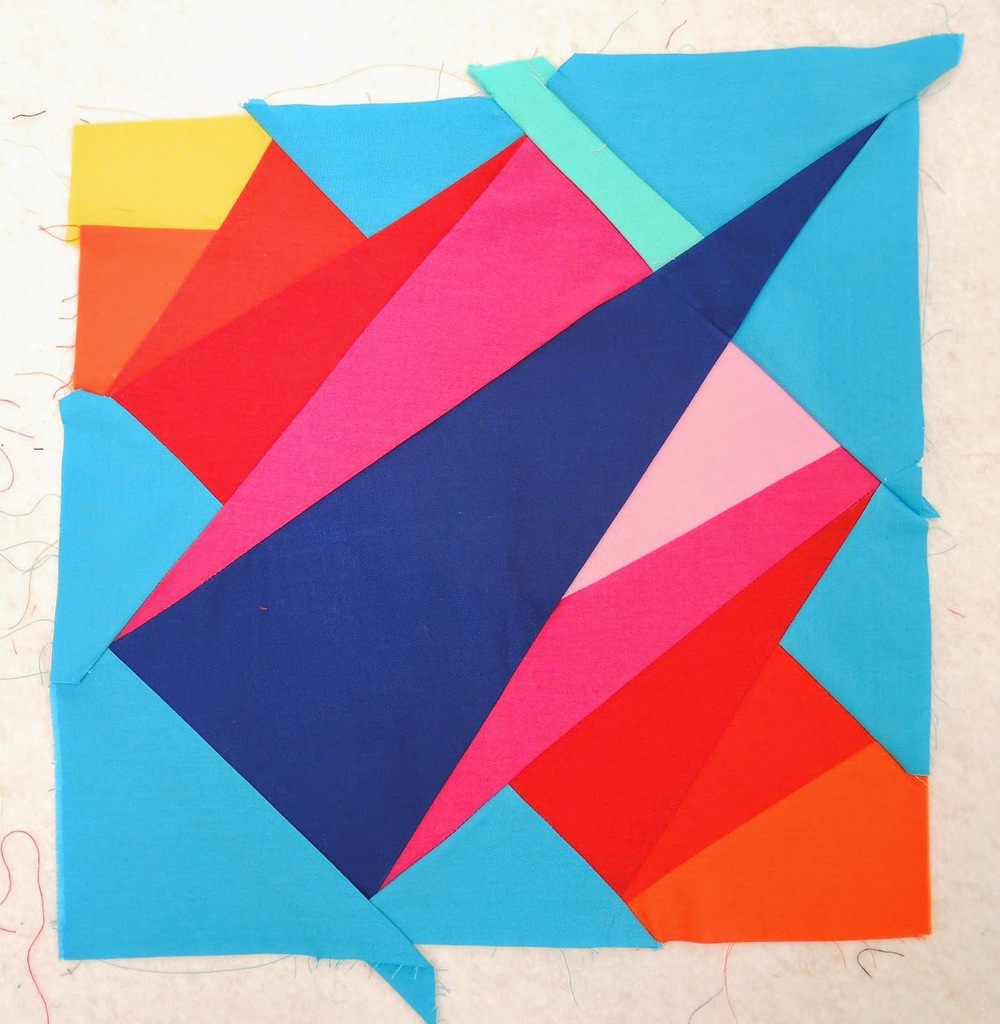
36. Paperless paper piecing block from my class with Cristy Flincher. I think it needs to be the start of a medallion quilt.
37. The girls' clothes turned into a quilt with the Gee's Bend quilters.
38. A Victory Spin quilt in progress for a baby that is already a few months old!
39. Improv work with Cotton and Steel Fabrics that I started for my CreativeLive Improv Quilting Basics class.
40. Blue Improv - pulled out some class sample I've used over the years and played with them for CreativeLive Improv Quilting Basics. Now I think I have a plan for them.
41. The X-Plus blocks I used in the Creative Live Quilting with Low Volume Fabrics class.
42. A stack of Doe from Carolyn Friedlander and some precious screen prints from all over to play with.
43. A whole bunch of pinwheels that I'm playing with. Started as prep for my CreativeLive Pinwheel Play class.

Finished or Moved out of the studio

Donated an Amy Butler store sample I bought years ago and never quilted.

Values Plus - This is finished, but I've yet to photograph and share it here.
Alturas
QuiltCon Quilt
Two magazine projects I can't share yet. Plus another one that is almost the same as the magazine project.
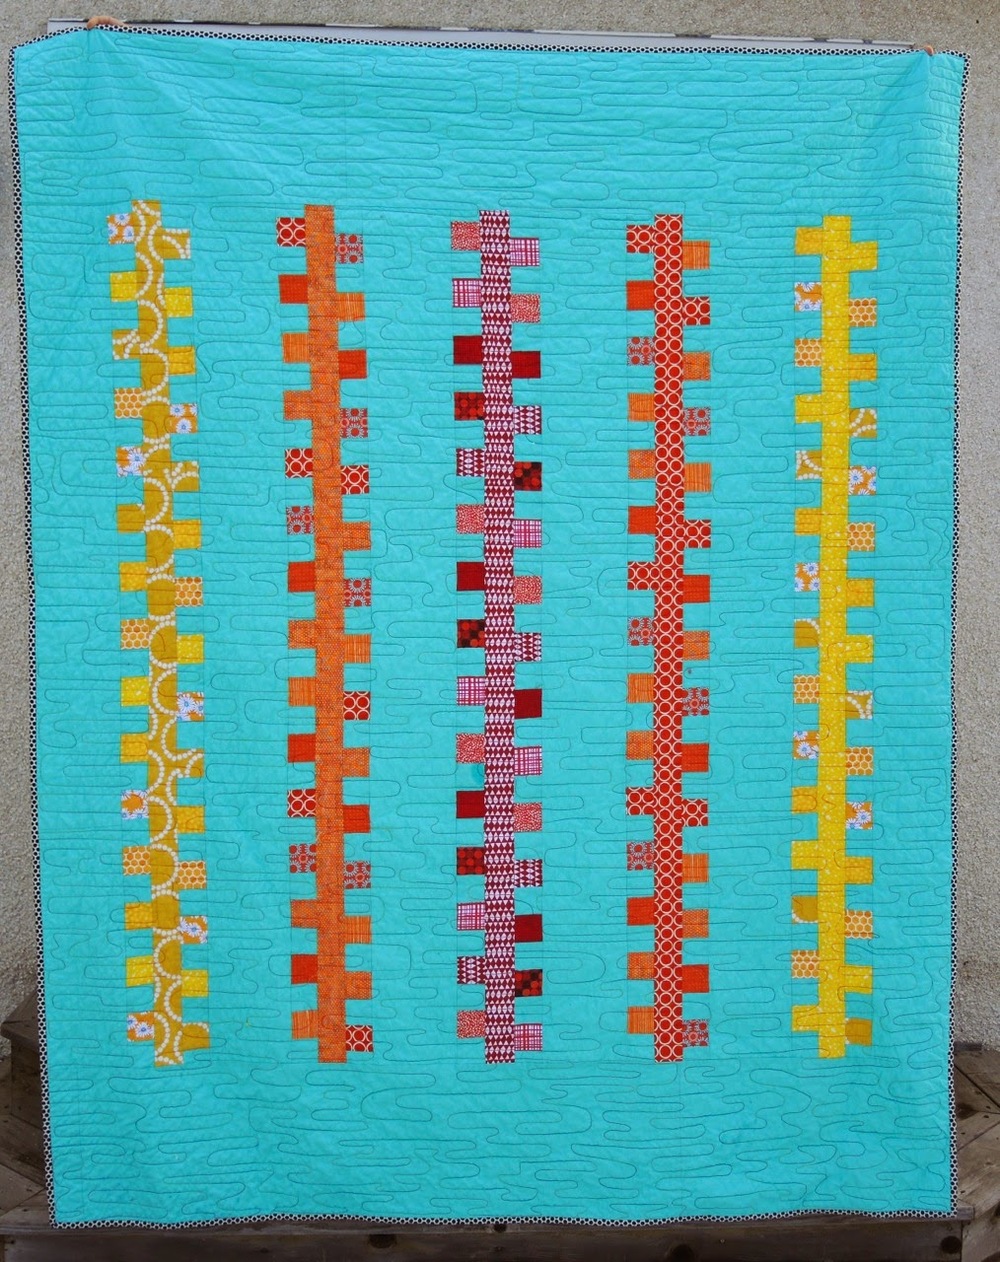
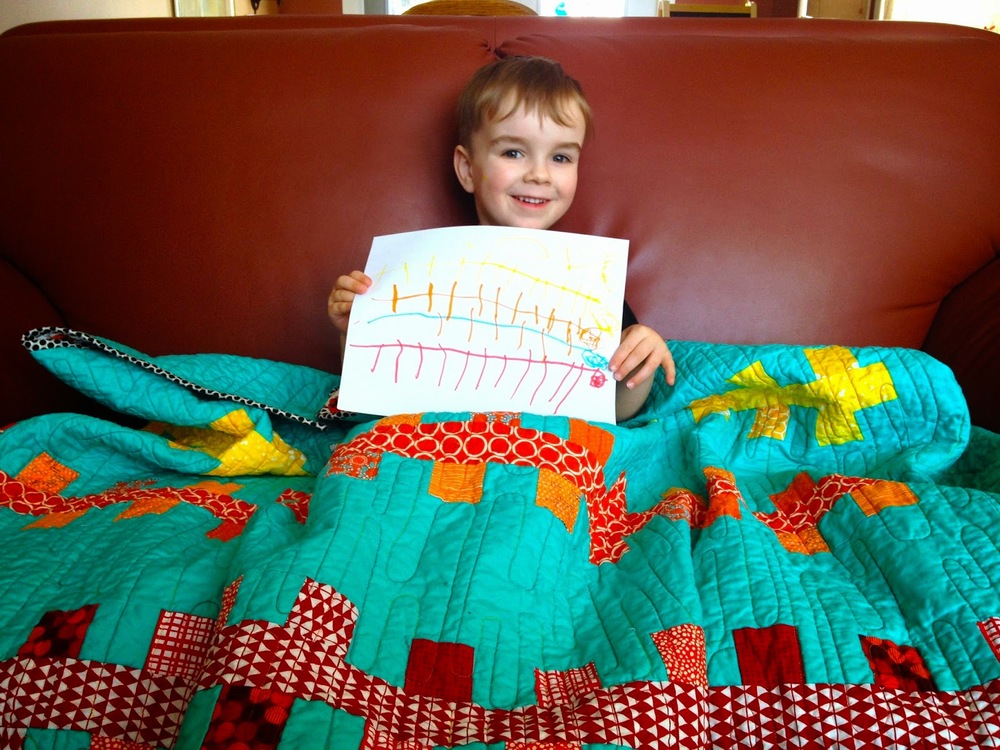
Caterpillar - technically finished this in 2014, but I hadn't shared it yet.
Ride the Waves -  technically finished this in 2014, but I hadn't shared it yet.

Two Linden sweatshirts and a dress.


What I Made At QuiltCon


QuiltCon was an awesome, eye opening, and super friendly experience for me. I think many people feel the same. My classes and students were wonderful. (I can say that Saturday night was a bit of a rough night for a class, everyone was pretty tired.) Thank you to everyone who came to sew, to laugh, to eat my chocolate, use my fabric, and push themselves. You made my experience for sure.

I did, however, get a little bit of time to sew myself. Taking a few classes was a welcome respite in my busy schedule. To be honest, I felt kind of sneaky being in a classroom. Or maybe it was more indulgent? Either way, I'm glad I made some time to do it.

I spent one morning with the Gees Bend quilters. After my time in Alabama in the fall I was eager for the chance to visit and sew more. The entire class was more of some playtime and visiting, punctuated with gospel singing and laughter. There was minimal direction, if any, so it would have been tough if you were totally new to improv play. But the 4 women made sure each student was acknowledged, helped, and guided. My neighbour spent a lot of time with them as they kept making her redo and redo a certain seam of her piece until it was just right. And when we saw the final seam the effort was totally worth it. Improv can be careful and calculating too.

My choice of fabric for the class were some old clothes of the girls. I cut up two pairs of pants, a dress, and a blouse. It was a miss mash of fabrics and textures. But having seen the original Gees Bend quilts it was a good push for me. And wow, was it liberating to cut up old clothes! I decided to go with their influence to the extreme and based my work on the Housetop pattern so many in Gees Bend have used. That block is all of the clothes, with only a few small pieces leftover. I didn't cut away grass stains that never came out of the knees or the tiny mustard spot. Initially I thought I might keep going with the technique and framing it with more neutrals. Now that I'm home, we'll see. Although, I do see that as a fun family marker.


The other class I took, and my first choice going into QuiltCon registration, was Cristy Flincher's Paperless Paper Piecing. I've been fascinated by this process and what she makes. It is so outside of my comfort zone and usual style. Yes, I like precision and do enjoy paper piecing, but this is a refreshing way to approach the style. Not to mention that Cristy is a great teacher. Seriously, she's good.

She gave us the template for the block so we were all working from the same foundation. But there were so many different fabrics at play that each block looked different. It took all day to make the one block, but that had a lot to do with a steep learning curve and not enough irons. (And for me, having to duck out for a book signing.) Now that I know the technique, though, I can see it being a very handy skill. It won't take nearly as long next time. Bonus: Cristy even told me how to add improv to this so my soul was touched a bit more.

I definitely want to make at least 3 more of these blocks for a small medallion.

Quiltcon Quilt Keeping Me Warm


 Quiltcon Quilt
103'' x 94''

It takes a long time to finish the binding on a king sized quilt. That was a lot of Top Gear and random Discovery Channel shows sitting on the sofa by my husband. But I'm not complaining one bit because it was totally worth it for this quilt.

Started 2 years ago at the first QuiltCon in an Improv class with Denyse Schmidt, this quilt is a new favourite for me. I know improv, I'm very comfortable with it. Taking cues and following the process of someone else was refreshing. I may not use the brown paper bags Denyse starts with, but that go where you may and trusting your intuition is very similar to my approach a lot of the time. And she totally taught me to embrace the small pieces, the tiny, right alongside the large.


A year after QuiltCon I took out my initial blocks again and made more. Many, many more. Then I spent some time puzzling it together. For me, that part is probably the most fun. It is a challenge, for sure, but so much fun.

(Confused about that puzzling it together part? Check out my new class on CreativeLive all about that!)

A few days of work to get it all together and I was thrilled with the completed top. I was not thrilled with the prospect of quilting another king size quilt on my home machine, however. Especially because I wanted something more than straight lines on this. So I convinced my friend Andrea at Urban Quiltworks to play.

And boy did she do a stellar job!


She embraced the spirit of improv with her quilting as well. We settled on a lovely yellow thread from Wonderfil, then I left her to her own devices. She did some all over work, some line work, some dense parts, left some spaces open. If your eye wasn't already moving constantly with the piecing, the quilting will get it going. There is just so much to see. And so much additional texture created.

To be honest, I feel totally spoiled and honoured to have her work on this quilt. It is absolutely perfect. The right compliment between the piecing and the quilting for sure.


A few people that have seen this quilt have commented on the colour scheme. I must say, that was entirely unintentional. In Denyse's class you start with your chosen feature fabric - the black and white in my case - and her bags of scraps. You also pick a solid. I must admit that my hand was directed a little by my friend Jules as it blindly searched in the paper bag for my solid selection. I never, ever would have picked this weird green/grey/sage colour. But I am happy she led me to it.

At home, when making more blocks I used the initial fabrics found in the classroom blocks as my guide. Just tiny bits of orange, yellow, and that magenta tones. A bit of brown and blue. More grey. Overall it feels cool. There is no bright pink and only snippets of purple. It feels like there is a bit of control, but mostly just randomness. 

Actually, it feels like home to me and it is wonderful to have this beauty finished and keeping us warm at night.

Happy 50th Birthday to The Maple Leaf


It was Flag Day here in Canada the other day. And this year The Maple Leaf turned 50. Because we are Canadian the celebrations were somewhat subdued. Some people, however, really got caught up in it.

A few months back I had the pleasure of an email conversation with a quilter in Ontario. She was planning on a big celebration and wanted to include my Oh Canada quilt as part of it. And what an awesome job she did! Check out this clip on The National. (That's the nightly, national broadcast on the CBC for my international readers.)

It got me all excited that I decided to celebrate as well. So from now until the end of the month the Oh Canada pattern is on sale in my Etsy shop. $1 off for the PDF version and free shipping on the print version.

#Flag50

Caterpillar from Sherbet in A Month of Sundays


Caterpillar
66'' x 85''

One day my nephew will understand exactly how much I love him because I put all this Charlie Harper cardinals fabric on the back of his quilt. For now he knows that I think he is pretty awesome and funny and cute and full of spirit. And he knows I want him to be warm and snuggly and have bright things around him. All because Aunty Cheryl made him a quilt.

This isn't his first quilt from me, he did get a baby quilt when he was born. But this is his first quilt as a boy. He's nearly 4 and within second of giving it to him he was running around the house with it as a cape, wrestling with his brother on it, and has slept with it every night since. Now that is a quilt success!


This quilt started off as a class sample for teaching Sherbet (from A Month of Sundays) last year at Quilt Canada. The class was great as I walked everyone through the steps for making this quilt. It is an easy quilt to make, but it takes some time with the cutting, strip piecing, cutting again, and assembly. It is worth every bit of effort.

When I decided to appropriate my class sample for my nephew I adjusted only the size of the final borders, making it more fitting for a twin bed.

With the original made in a lovely palette of low volume fabrics with a solid Snow background this version stands in sharp contrast. I definitely turned up the volume on this one! I think it works wonderfully both ways. Just shows that the patterns in A Month of Sundays don't have to be limited to low volume fabrics.

This quilt was quilted (by me) on the APQS long arm, rented at my LQS. I used a variegated thread in reds. oranges, and yellows from Wonderfil. In the end we called the pattern a watery meander. It came together quite quickly and worked perfectly.


As I said, one day my nephew will appreciate the depth of my love through this quilt (and my actions) but right now I think I can sense his total appreciation too.

Playing With Circles in Quilting - Part 2


Ride the Waves
50'' x70''

Improv curves are fun. In a fit one day last year I pulled out a playful and lovely combination of fabrics and made a whole bunch of blocks. It was just one of those quilts that came to be with no rhyme or reason. I'm pretty sure I had it done in just a couple of days. Then it sat. The moment passed and there was little motivation to finish it.

Then you realize that someone needs a pick me up, a hug as much as possible. And in your head you kind of realize that these fabrics are so her. So her, in fact, that you may have picked them with her in mind. You may have stuck with this size of quilt because it is the perfect size for her.

And then you finish it with big lines of loops because they are fun and everyone deserves a bit of fun. And she deserves a finished quilt so the loops make that happen too. So does binding it among a stack of quilts you feel you just have to get done for Christmas. That way you can give it to her when she most needs it.

Then she texts you that night to say how much it is helping in the dark and lonely moments and you realize that this is indeed why we work hard to make quilts for people we love. This way, love is all around them.


Even her dog approves. Then again, there is no accounting for taste.

The improv curves are easy to do and totally take any mystery out of curved piecing. There really are no mistakes with this technique. You can see that sometimes I doubled up the curves and other times they are just simple. All together they echo quarter circles. Which means you can use them like you would any other Drunkard Path block. I chose a setting that creates diagonal lines of movement across the quilt. Simple, fun, and effective.

Overall, that's what the quilt is - simple, fun, and effective. Design wise, yes. but also in spirit.


All year I am going to be posting more and more circle techniques. This is some time to play with circles and there are so many things to do beyond the basics. Join me for the monthly series, Playing with Circles in Quilting.

If you want more details on making circles or any of the techniques I introduce here, check out my Craftsy class: Inset and Applique Circles by Machine or my workshop in the book, Lucky Spool's Essential Guide to Modern Quiltmaking.

Worn Out Binding


It's a good thing that your quilt gift is so well loved that this is what the binding looks like.

This is from the wedding quilt I made my Brother and Sister-in-Law. They didn't quite get it in time for their wedding, but it is still 14 years old. It lays on their bed and gets used every single night. My SIL is from New Orleans and even in the summer in Alberta she likes to have the weight and warmth of the quilt on her.

When I was visiting them a few weeks ago my brother pointed out to me that the binding is quite worn out. Yes, yes it is. That means I need to replace it. The original was a double fold binding, hand stitched to the back. One layer of the binding is worn through, as you can see.

Would you remove the original binding first or put a new one over it?

Marching Together


We don't celebrate Martin Luther King Jr. Day here in Canada. As I've said before, we frankly aren't taught much about the civil rights movement. Not because we aren't without our own shameful past (and present) of racism, but the marches and protests of the 50s and 60s aren't much of a topic in our history classes. Until my trip to Birmingham most of what I knew was from pop culture - hip hop, novels, and movies.

When I found myself with an hour of unexpected free time yesterday I couldn't help but pull out my march inspired blocks. It seemed appropriate on the day and all.

My blocks were pressed, trimmed, and a lay out determined. I filled in the blanks with more white. Now this large block measures about 30'' x 32''. It needs to be framed or made part of something larger. I'm just not entirely sure what that next step will be. Right now I'm thinking a Courthouse Steps kind of construction for framing it. But I've also thought of making 4 more similar large blocks and doing something with those.

For now, I will keep this up on the design wall to contemplate the options, and the precious and passionate sacrifices that inspired it.


Low Volume Shoeman's Puzzle Update


This week's old project to work on was these Shoeman's Puzzle blocks. I was originally inspired by Denyse Schmidt's version in Modern Quilts Traditional Inspirations. Hers, however, is a two colour quilt.

The low volume prints mean the pattern is quite subtle, but it is there. That's because I used various shades of solid white for contrast. Print will always contrast with solid (as long as it isn't too tiny of a print) so the design still comes through.

I am so in love with these blocks. A lot of the quilts I've finished in the last while I've given away, or they are for teaching. This one, this quilt will be mine. With the slabs it captures the essence of my first book, especially because it is mostly made with the scraps from second book. Most of the slabs get made while I'm teaching - I use these as demo sewing. I feel it represents everything about my quilting as a career to this point. There is no way anyone else will get this quilt.

There are still more blocks to make. How many, however, is still up for debate. In my head I'd always pictured it 70'' x 70''. A generous lap quilt for me. For a brief moment I considered making it 80'' x 80'' so it could go on one of the girls' beds, but thought better of that. When the rows are an odd number the pattern is even. Normally I am all about the symmetry, but I kind of prefer the look with the uneven number. 50'' x 70'' is fine for a lap quilt, but I don't think that is enough to get the full effect of all the secondary patterns formed by this pattern.

So, I guess that means I have at least 21 more blocks to make. At least.

Lucky Lady


Check that out! Mama got a new sewing machine for Christmas. Hubby and the kids were very, very, very, very generous. And here I thought we were having a low-key, low budget holiday.

To be honest, I gave him grief for going all out like this. We are supposed to be in budget mode these days and a new machine wasn't in the cards. But he said he knew I needed a new machine and that I wouldn't spend the money myself. All true. So I will tighten the purse strings a bit more and thank him profusely for spoiling me.

Once I figure out how to use it.


Bernina refers to this machine as a sewing computer. That seems fairly accurate so far. I'm finding myself a bit frustrated with figuring out the commands, not to mention the knee lift. It's just because it is something new though. With some practice, play time, and a good class I will have this baby motoring. 

To break it in I thought some easy sewing was in order. And with my commitment to work through the Quilts Under Construction weekly I pulled out more Round and Round blocks. I feel like I need to really get into some chain piecing to maximize my time at the machine, so I hope to make a few more blocks this week. Right now I'm up to 12, including this one here.

I've got a few quilts I would like to get quilted as well, to test out the Bernina Stitch Regulator. To free motion at home again feels like such a luxury. And did you see the size of that throat? Almost makes me want to make a king size quilt. Almost.


Vintage French Quilt


About 18 months ago our wonderful neighbours moved. They were the first people to welcome us into the home. Of course, they thought my husband had moved in with his parents not his wife, but we totally forgave them for that. Over the years we've shared anniversaries together, summer nights with gin, and family gatherings. They treated us like another set of kids and our kids called them Poppa and Grandma. We miss them terribly.

On the day they were packing up the house Poppa showed up on my doorstep many times. Dropping things off, asking to borrow something, needing a break. Then he showed up with a mystery box labeled Quilting Pieces. Rather than let his wife go through it and hold on to One. More. Thing. He squirrelled it away to my house, a loving home for it. Inside the box were many interesting things, but my favourite was the quilt top.


Over the holidays our old neighbours invited us out to Banff, where they had travelled to spend the time with family. It was a great opportunity to hand them back a finished quilt, and get the story of it. Grandma Betty tells me the top was made by her mother, probably in the 50s. It was filled with fabric from old clothes, plus some commercial fabrics. She recognized a few charms from her own clothes.


It was a thrill to be able to take something that had languished, site unseen, in an attic box and turn it back into a family heirloom. All I did was add a simple stipple in Auriful 2600. The piecing was good, but not great so I did not want to straight line quilt. A gentle wash removed the stains I found on the quilt top. And then binding in some vintage inspired Denyse Schmidt Flea Market Fancy.


I'm happy that this quilt is now back with its family, where it belongs. Three generations are living on the same street, so this quilt will be continuing a tradition of love and comfort.

On the name, French is their last name. This is not a French quilt nor does it have, as far as I know, French fabrics.

Quilts Under Construction - December 2014


My finishing kick for December is still in full swing. So far I've finished 4 quilts - the Christmas Tree quilt and 3 others I still need to photograph and share. There are 2 more waiting for binding, but those won't get done before the end of the year. And if the kids cooperate I might get just one more done before midnight...

Hubby bought me a new sewing machine for Christmas, so I see a lot more finished coming as I will be able to free motion quilt at home again! I've got ALL the motivation now. If only I had the time.

To keep me on top of things I've decided to update this list quarterly. I've also got a goal in mind for keeping moving on some of these longer term projects, more about that in my next post. So here is the list as it stands. Watch for the updates. And look, the number is below 40 now! It is exactly how old I am, how convenient.

Quilt Tops Ready for Quilting

1. Cosmos Blocks
2. Improv Sampler
3. Checkerboard from Sunday Morning Quilts
4. Slaveship Quilt -
5. Old Amy Butler quilt top
6. The Evil Genius' Triangle Quilt
7. A low volume rainbow mini quilt that I've never shared with you.
8. Giant Hexagons
9. Values Plus
10. One red/purple turquoise quilt intended for magazine publication
11. Cirrus Solids Pinwheel top

Quilts Being Quilted

12. Low Volume Circles - I'm plugging away on the hand quilting, slowly. Actually, I don't think I've touched this in 2 years. Maybe this winter?
13. Antonio's Quilt - For some reason I've stalled on the quilting, yet I don't have much more to do.

Waiting for Binding

14. Alturas
15. QuiltCon Quilt
16. All voile quilt

Blocks and Process

17. Mid Mod Bee - Blocks to be assembled into a top
18. Hand Pieced Diamonds - I think I'm done with these, but I would like to get it into a quilt top.
19. More Cosmic Burst blocks - I have a whole other set of blocks for a baby quilt
20. Name quilt for my daughter - still haven't done anything on this. It might become the back for a new bed quilt for her. Maybe.
21. Chandelier quilt - was so close, then discovered a big mistake and have never fixed it
22. Liberty Circles - These have sat, but I was recently thinking about them. Maybe this winter?
23. Respite - a project started in a Bill Kerr design workshop
24. Pieced Stars - a BOM I started years ago when I wanted to do some precision piecing breaks when doing a lot of improv
25. The Water Quilt
26. Low Volume Shoeman's Puzzle/Slab blocks
27. A values quilt in neutrals (Class sample, so I keep adding more blocks each time I teach the class)
28. Green/Yellow/Orange Improv blocks (Class sample, so I keep adding more blocks each time I teach the class)
29. Sunday Morning in Solids
30. Edges/Studio Stash Play - I do hope to finish this for a friend. It requires a day or two with no deadlines/kids in the studio
31. Beach Grass Take 2 - this would make a perfect bed quilt for the girls and their new beds. And it goes together so quickly...
32. Y2K quilt - slowly, slowly with this one as I piece it as leaders and enders
33. Another leaders and enders project, intended to be like Up, Up, and Away from Sunday Morning Quilts
34. Round and Round blocks - these are addictive and I wish I could make them all day long
35. Snippets on Dates
36. Circle Lattice
37. Leftovers from Modern Paris
38. Orange Circles from Craftsy/Perfect Circles class samples
39. Gee's Bend inspired blocks after my trip to Alabama.

Finished

Improv Drunkard's Path - a gift, yet to photographed and shared.
French's Vintage Top - quilted, bound, and recently gifted back to the family it was made by/discovered.
Argyle - A gift for my nephew, but also a potential magazine publication, so I can't share it yet.
Caterpillar - I've shared the top before, but I need to share the finish quilt.
There is Peace in Pattern
Mountain Meadows
Giant Dresdens
Playground
Modern Paris
Improv Sewing Machines
Shimmer Table Runner
Equalizer - coming soon in You Inspire Me to Quilt


Christmas Tree Quilt


Christmas Tree Quilt
64'' x 70''

Sometimes you get something in your head and HAVE to do it. I thought that about three or four years ago, when I cut all those blue and green squares for a quilt. Then life got in the way and I never made it. After my quilting mess a couple of weeks ago I got cranky. I didn't want to bind or quilt. I wanted to piece a top. And not just make blocks, contributing to one of my many other ongoing projects. I wanted to make a whole quilt top. So I looked to my quilts under construction for possibilities.

Conveniently, these blocks were cut and sitting in a pretty little pile at the bottom of my closet. And they always were intended for a Christmas quilt. It was meant to be.


I must have anticipated a layout like this, I can't quite remember. But I had enough blocks cut, with only a handful leftover, to do this.

My quilting disaster happened on a Thursday. On Friday afternoon, while the Garbage Truck napped and the girls watched a movie, I got all those rows together. By Sunday night, while Hubby was playing hockey, I got the top pieced. All that background fabric only accounts for 6 pieces. Some thinking was required to get there, but it wasn't difficult sewing.


The next Thursday I was back at the long arm and this was the first quilt on the machine. Just a straightforward simple meander. Big and loose and loopy. It was fast, a good warm up for the other work I needed to do, and perfect. I could barely see the quilting as I was doing it - Aurifil white on that dotted Robert Kaufman print - so there was no point obsessing over how to quilt it. After loading the quilt it took me about an hour to get it done.

Lucky for me I had some turquoise binding already made for a photo shoot back in the spring. So that went on that Thursday night. And two days later - a record for me - I had the binding done and the last threads buried. 


What a sweet print for the backing. I don't exactly stash Christmas fabric. And the LQS I was at obviously has a pretty serious clientele for Christmas fabric. They usually have a huge stash, but most of it was gone when I went to the store to get something. But I really wanted to extend the holiday theme to the back. Something fun and pretty for the family. This candy print fit the bill. And I love the pink on the back. 

While this is technically a quilt for the whole family, I did kind of make it for my little guy. He's coming up on 3 and currently obsessed with Christmas. He gets it this year and the waiting has been sheer torture for him. If you ask him what he wants for Christmas - which adults love to do to children - all he answers is "A Christmas Tree!" We don't normally get ours until the weekend before Christmas so this way he got one a little bit early.

And he's already taking advantage of it. 


 May you and yours have a wonderful holiday (if you celebrate). And may you find joy, peace, and love. Throw in some giggles and a romp outside for good measure.

Finish All the Quilts


Well, I know how I'm spending my Christmas vacation. Lots and lots of binding. Oh wait, does having the kids and Hubby home for two weeks with me qualify as vacation?

That is four quilts there waiting for binding. Two of them are king sized. Those ones I got back from Andrea at Urban Quiltworks. Beyond excited for what she did on those. Wait until you see them. Alas, those have to wait for presents and magazine projects to be finished first.

Did I mention I finished two other quilts last week? And I'm hoping to get my Alturas quilt quilted and bound before Christmas as well? I'm on fire! If I get all these done that knocks of 6-7 quilts from my massive Under Construction list. Woohoo!

Honestly, I am on a finishing kick. And I'm already anticipating a very, very busy January and February. There won't be a lot of quilt finishes or sewing for fun for the rest of the winter. But there will be some very exciting things to come. No complaints here. In the meantime, I'm happy to snuggle with my hand stitching and Downton Abbey and Mad Men reruns.


Quilting - K.I.S.S.


In the real world I hover somewhere between planning as much as possible and flying by the seat of my pants. I used to plan everything, research it all, and know what I was doing before I took a step. Then I met my husband, a very, very spontaneous person. And I became a mom, where planning causes more anxiety at times than learning to go with the flow. So now, I occupy a lovely space of chaos somewhere in between.

It is no different with quilting. I adore improv and hand appliqué, I write and make precision pieced patterns, and I will happily straight line quilt as much as I will free motion.

All that being said, I learned a lesson in the past week.

I had a stack of tops and backs ready to go and an appointment on the long arm. I had plans for what I was going to do, or at least ideas. The first quilt went well. Even when I changed my quilting plan as I loaded the quilt top on the long arm. The second quilt was a fast make - I had an idea and made the entire twin sized top in a few days. I thought I knew exactly how I would quilt it. It got loaded up, I checked my tension, and went for it.

And right away I knew it was wrong. But I kept going because, hey, I'm here! Can't waste the time! I finished one pass across the quilt and stopped. Staring at it wasn't going to make it any better. My stitches were fine, but the pattern I went with was totally wrong. The idea surpassed my skills, for sure. It was also too fancy for the quilt.

So I tried something else. And that was just as bad.

I was totally overthinking things. But I was convinced that because I was on the long arm I had to do something MORE than the usual. So after some frantic texts to Andrea and chatting with my friend Phil who watches over the renters I decided to cut my losses and take the quilt off the frame.


Ahead of me looms hours of unpicking my quilting. But that is better than the alternative - giving away a quilt I cringed over. Sure, it is only a gift for a 5 year old boy. But I love that boy as much as I love my own kids, he deserves some quality work.

I will head back to the long arm and not only quilt something closer to my skill level, but also more appropriate for this quilt. This was a painful reminder that simple can be quite good, quite perfectly imperfect.

Don't get me wrong, I do indeed believe in continually pushing ourselves to improve, to be better. And the only way to do that is by doing. But we also need to give ourselves and our quilts perspective. This isn't a show quilt, it doesn't need super dense quilting. It's going on the bed of a thoughtful and funny little boy. It will be jumped on and barfed on. The dog will also find it cozy. It will hopefully last him long enough for me to make him a quilt when he leaves home and has a bigger bed.

I need to take some of my chaotic energy and calm it down with both a clear plan and a sense of adventure when it comes to this quilt. Something all over so the piecing shines and not some awful quilting. I'm going to unpick those stitches and keep it simple, stupid.

Antlers on Plaid - A Mini Quilt


                                                                   Antlers on Plaid
                                                                          15'' x 15''

I made a mini.

In the spirit of embracing a challenge posed to me, and pushing myself out of my comfort zone I made a mini quilt. And it didn't kill me.

But, I didn't particularly enjoy it. Of course I didn't hate it, I was making a quilt after all. I can't say as it was something I really want to do again. It seemed like a lot of effort for something so small. You have to do all the same steps you would if you were making a full size quilt. So yes, it goes quick and there is the satisfaction of a finish, but it seemed like too much work. Not to mention any mistakes you make are magnified.

On top of that, what the heck am I going to do with it?! We aren't really quilts on the wall people - with a few exceptions. And I don't need any table runners/mug rugs. So this particular one will now be on its way to my sister as she asked for it.

When I decided to accept the challenge to make a mini I also decided to tackle a few things that irritate me. Go the whole way with pushing myself. So I pieced a red plaid pattern. I'm sick of seeing red plaid on everything this winter - from men disguising themselves as urban lumberjacks to Christmas cards. Lumbersexuals and their beards are not for me. Another thing I am sick of are antlers. Antlers on everything. I have family and friends that hunt for meat and if they want to mount antlers then so be it. And when I started seeing stag heads on quilts and stationary I kind of liked them. But now? Not so much.

Of course, someone commented that the antlers look more like Grinch hands and that is all I can see now.

So I made the mini. Don't expect me to make more.

The Need for Bigger Quilts


#gokingorgohome

That's the hashtag I've been using on Instagram whenever someone asks if they should make a quilt bigger or not. I always default to go bigger.

Frankly, that's a bit of a problem. Sometimes I start quilts just to play, to try a technique. There is no good reason to make it a queen sized bit of play. Well, other than then it would be big enough to put on a bed instead of just over legs on the couch. But if I'm just trying something out why do I insist on making it so big? This MAY have something to do with having over 40 quilts under construction...


Take these blocks for example. They finish at 10''. I'd always pictured that I would make 49 of them, to make a 70'' square quilt. But now? I think I might have to go up to 64 or even 81 blocks. Looks like I have a lot more sewing to go as I only have 28 of them so far.

Much like some people find it tremendously difficult to work on more than one quilt at a time, I have a very hard time making a small quilt. Since I said that last week I've been thinking about why that is the case.

I don't know why, it's just what I do. Possible reasons:

... bigger quilts are more functional.
... there aren't as many babies being born in my circle. Although, I think that isn't the case over the next few months.
... I'm a sucker for punishment.
... while I love hand binding, doing so on a small quilt feels silly.
... most of my ideas need to be big to be truly expressed.
... small quilts feel like a cop out on making.

What about you? What size do you tend to make? I'm not judging anyone else's choices, just trying to figure out my own crazy logic.

Lately I've been thinking of even bigger quilts. For my newsletter someone asked me the question about deciding what to make. In my answer I mentioned the need to make bigger quilts. I've noticed that many of my recent finishes fall into the twin/lap world. If they are square they tend to be 70''-76'' finished.

But, we just bought the kids beds for the first time and they all got double beds. Those 76'' square quilts don't quite have enough overhang for my liking. The kids are happy, but I want to see less of their sheets when the bed gets made. (Yes, I am that anal.) So now my brain is automatically going to 80'' square at a minimum.

What's a girl to do? Make more blocks. Make bigger blocks.

Values Plus


We've all seen a million half square triangle (HST) Values quilts. I, for one, don't get bored of them. I think that is because no two are the same - from the fabrics to the layout. However, I wanted to try something different. I was actually prepping for my upcoming class - Values Plus. In that class students will play with values and more than just HSTs. The class is about experimenting, not just creating a HST quilt.

So I dug into my jars of strips and strings. All random fabrics, random sizes, and only paired up by value. That is, as I grabbed strips I made sure that they had a value difference. Sometimes it was subtle, sometimes it was bold. That's generally how I approach pure value work. Subtlety makes it a bit more interesting.

After sewing the strips together I picked a size to trim to. It was mostly dictated by the width of most of the pairs. So 3 1/2'' square it was! And then I kept sewing, and sewing. And trimming and trimming.

I played with a number of layouts. More of a rail fence setting? Totally random? Strips of light/dark? After a long chat with Amanda Jean I went with this final set up. I also decided to create these little groupings on colour, a four patch.

No word of lie, it wasn't until I was posting these photos here that I realized that they looked like plus signs. For my Values Plus class. Get it?

I'm such a nerd.


Caterpillar Top - From A Month of Sundays


My husband called it Caterpillar so that name will kind of stick. But I also think of it as zippers or confetti strips. The original quilt, published in A Month of Sundays, was called Sherbet. In that case it was for the colours of the quilt.

Originally, I started this quilt simply to be step outs for a class I was teaching. It isn't often that I cut out the whole quilt before sewing a stitch, but with an already published pattern that is certainly the thing to do! So I demoed the piecing and assembly back in June, then it sat.

A few months ago my SIL asked if I would make quilts for her boys, my nephews. Of course the answer was yes. So we let the 5 year old pick out fabric, I grabbed what I had from their baby quilts, and we talked about patterns. When I started this particular quilt I wasn't intending it for any purpose other than a class sample. In the end though - and not just because I'm a multitasker - I thought it was perfect for my nephew.

I made two changes from the original pattern. One small, one significant. The small one was cutting the side borders narrower. In the original pattern they are 12 1/2'' wide. Because this was intended for a single bed I trimmed them down to 6 1/2''. That means the quilt finishes out at 66 1/2'' wide instead of 78 1/2''.

The big change was in the colour scheme for the quilt. Coming from A Month of Sundays the original quilt was full of low volume fabrics on a creamy, solid background. It shows the success of using scale of print to get value differences even with low volume fabrics. In this version I chose a coloured background. It's a Kona, but I'm not sure which colour (my colour card has gone missing). When I bought it I thought I would use some creamy prints, perhaps like these ones. In the end, the whole thing begged to be nice and bright. Now that's a way to turn up the volume!


There is Peace in Pattern


There is Peace in Pattern
53'' x 56''

It kind of says it all for us quilters, doesn't it? Well, it does for me. So, so perfectly. This might be a new contender for my most favourite quilt I've made ever.


This was actually the first quilt I made when I moved into my basement sewing studio. Well, the first quilt I started and the first top I finished. It all started with a bundle of Carolyn Friedlander's first line, Architextures. I pulled out the greens for another project and stared at the remaining fabrics for a bit. Then I picked and pulled from my stash some additional fabrics.

You know what I did next? I hacked it all up! Strips cut randomly from fat quarters, the scrap bin raided, chunks cut off of yardage. I created a giant pile of fabric pieces. One side had a few darker pieces in them, the remainder were all the low volume lovelies.

To make each letter I first sketched out the order of piecing. It was all improvised, but I needed a bit of direction. This is my Improv With Intention concept. Instead of choosing a single fabric for the background of each letter I went wild and grabbed randomly. As each letter, each word, came together I added more and more fabric.

And not a single one was a solid.


It didn't seem like it took a long time to get this top together, but it couldn't have been quick. If I recall I worked on it for a few weeks if not a month. That is, in snippets of time and a hour after bedtime or so. Once I got the words together there was a lot of extra piecing and puzzle work to get it all into a quilt top. When I do this kind of piecing I like to avoid totally distinctive grid lines so it gets fiddly at times. Just a personal preference of mine.

As soon as yardage of Architextures was available I ordered some for the backing and binding. But as the fabric and quilt top sat, I kept sneaking some of the fabric for other projects. In the end I was able to get my back together. And thankfully I'd made the binding already for a photo shoot. Phew. otherwise that awesome navy text print would have been long gone!


The quilting was done on the long arm, with Aurifil 2435. It is a great coral colour that worked wonderfully with all the fabrics. I free motioned a topography pattern. It fills the space wonderfully and totally echoes the main fabric on the back. Instead of doing any ditch work around the letters I actually just took the free motion pattern right to the letter edges, but not over. With the quilt washed the letters just pop now. Call it lazy trapunto. It works for me and I can see using this sort of pattern again.


In a slightly related note, I forgot to tell you something. Crystal from Two Little Aussie Birds interviewed me a few weeks ago. It was great to talk about modern quilting in a totally different way, and include a discussion of feminism in there. She is hosting a series of interviews called Modern Quilting Modern Women. Some great posts in there from some pretty spectacular and different quilters. I mentioned this quilt in my interview and that's what reminded me that I never photographed it. So, here is the quilt and here is the interview.