fabric

Pincushion Party for Good Neighbors Fabric


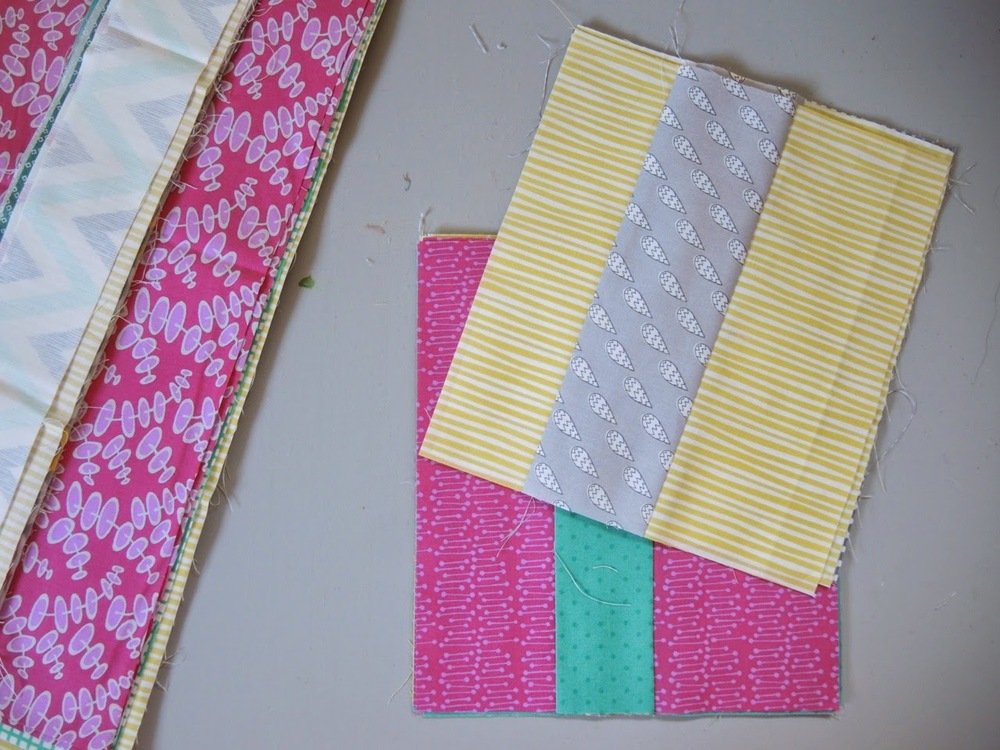
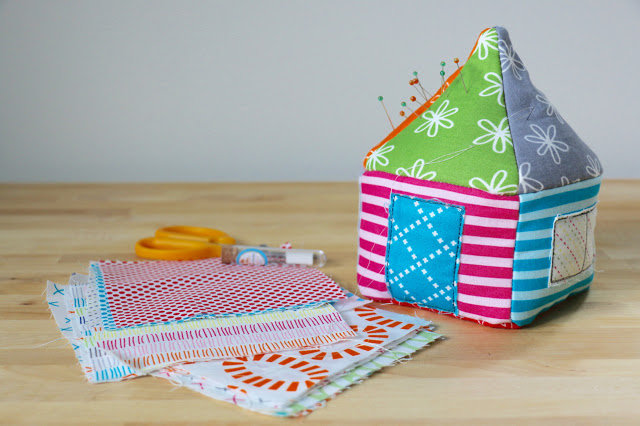
This is the first pincushion I've ever made. And I would only do it for Amanda Jean.

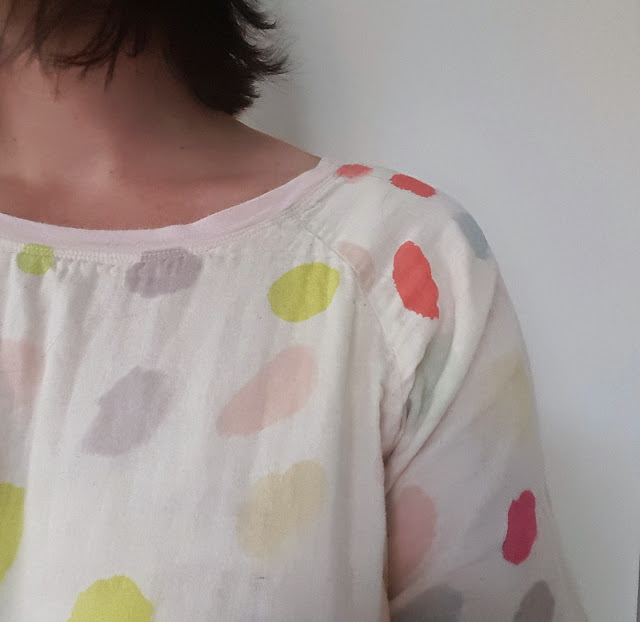
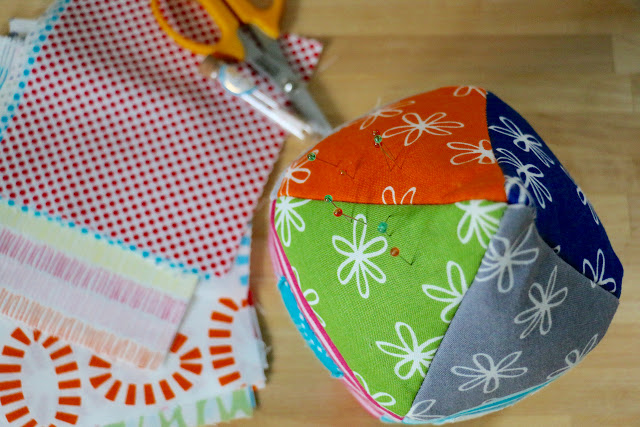
I was thrilled when I got the news that she was designing her first line of fabric. I say first because I'm positive there will be more. While I couldn't automatically picture what she would do, without a doubt there would be red polka dots and versatility in the prints. And most definitely, there would be no purple.

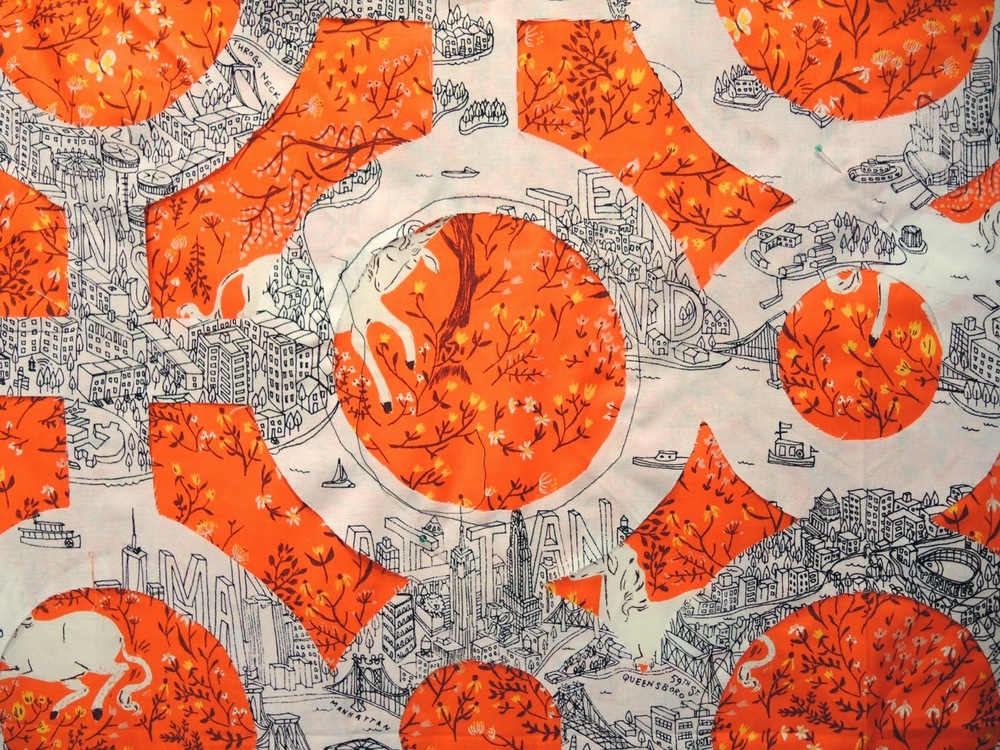
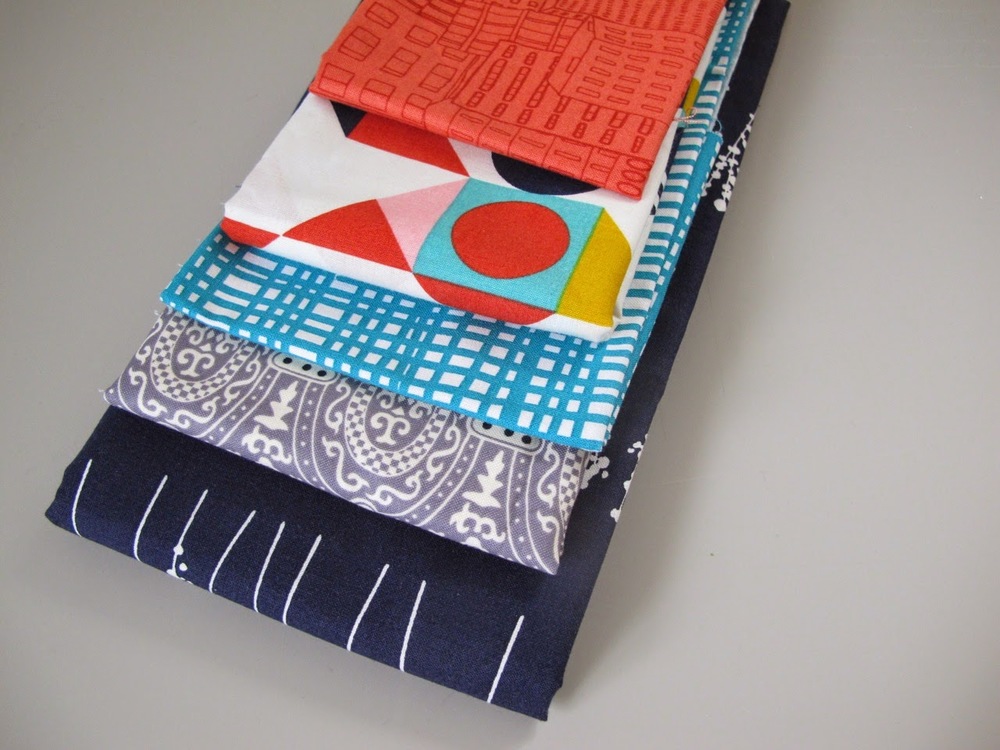
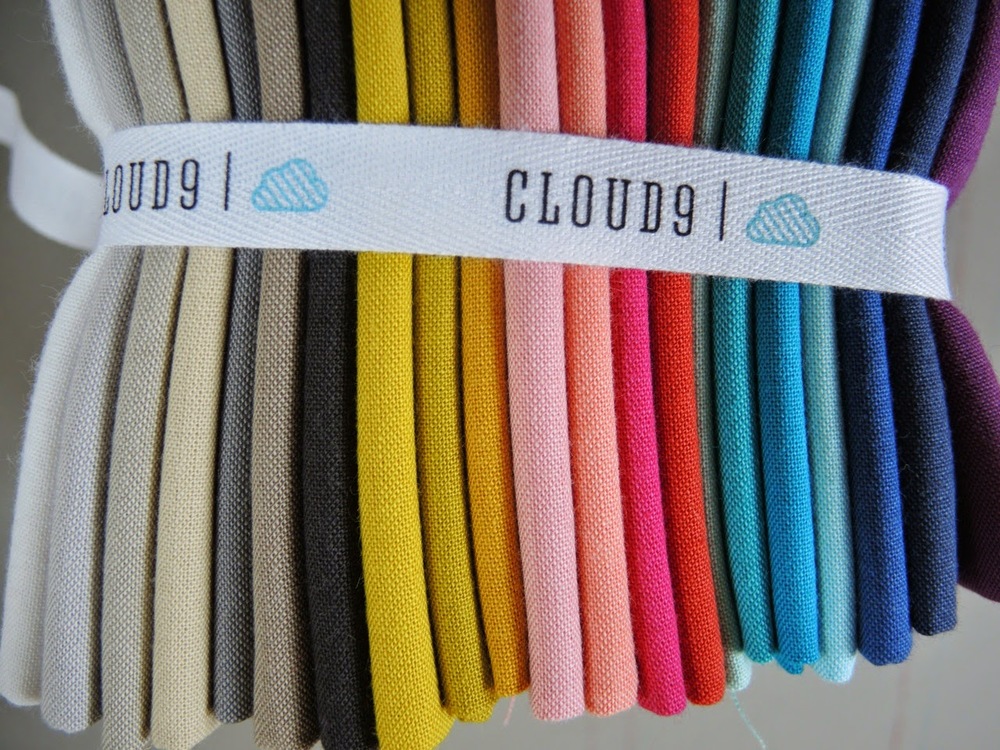
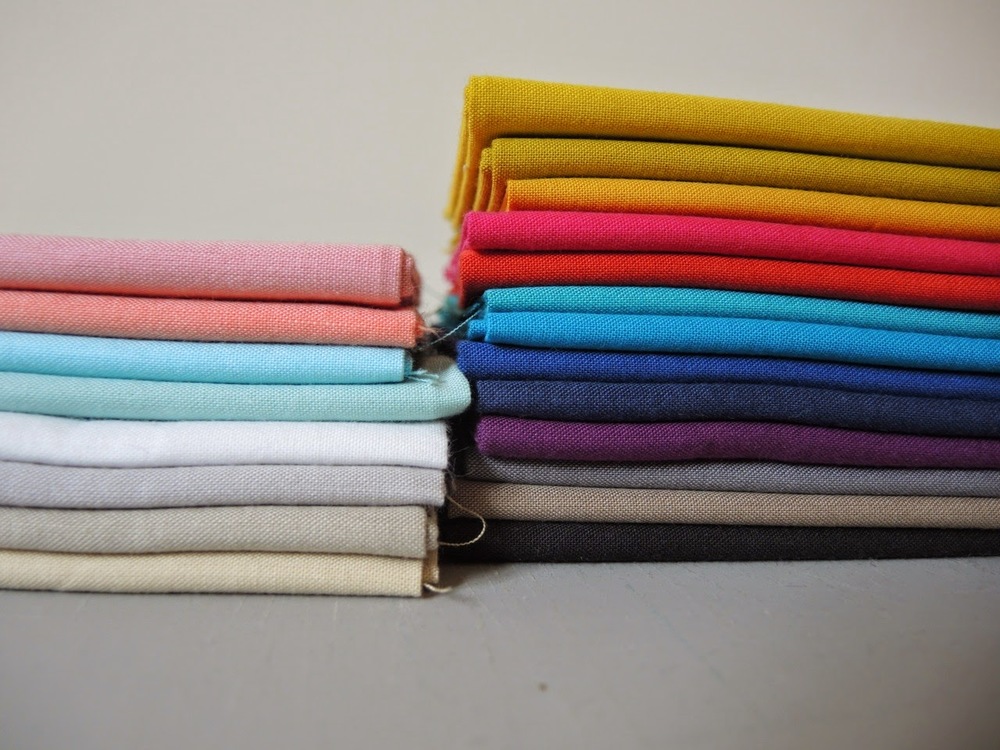
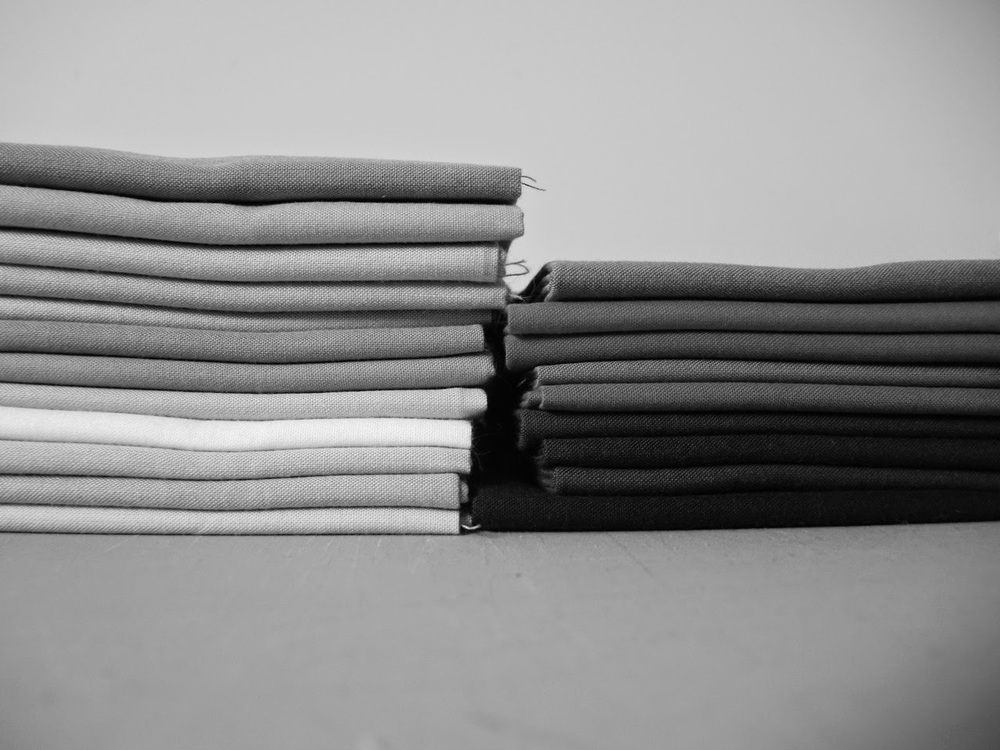
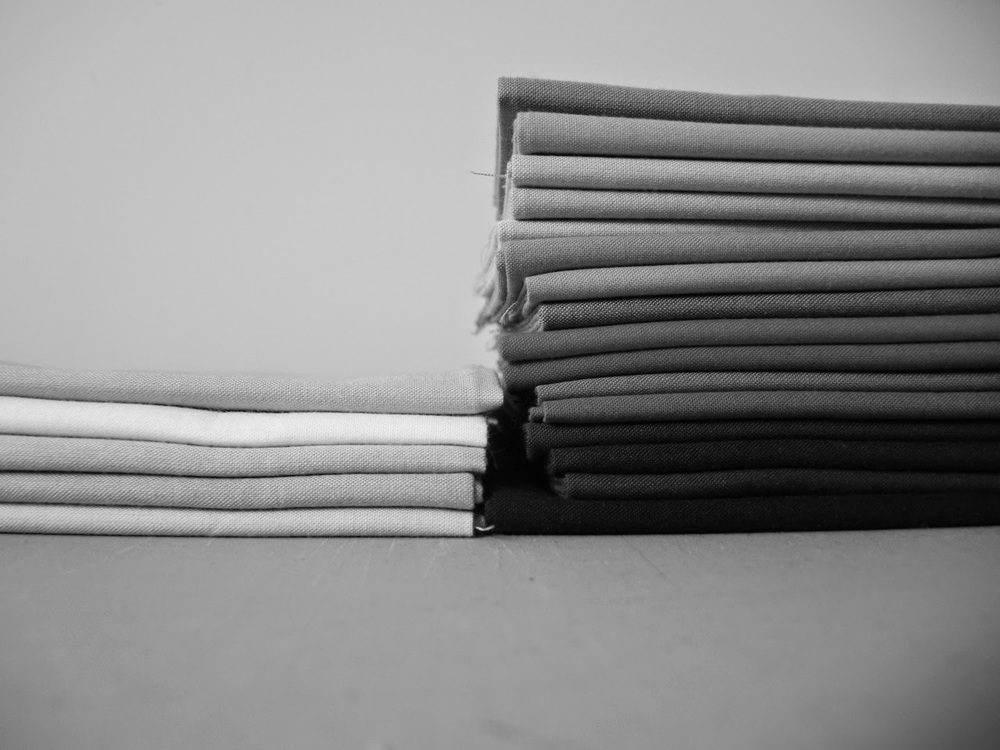
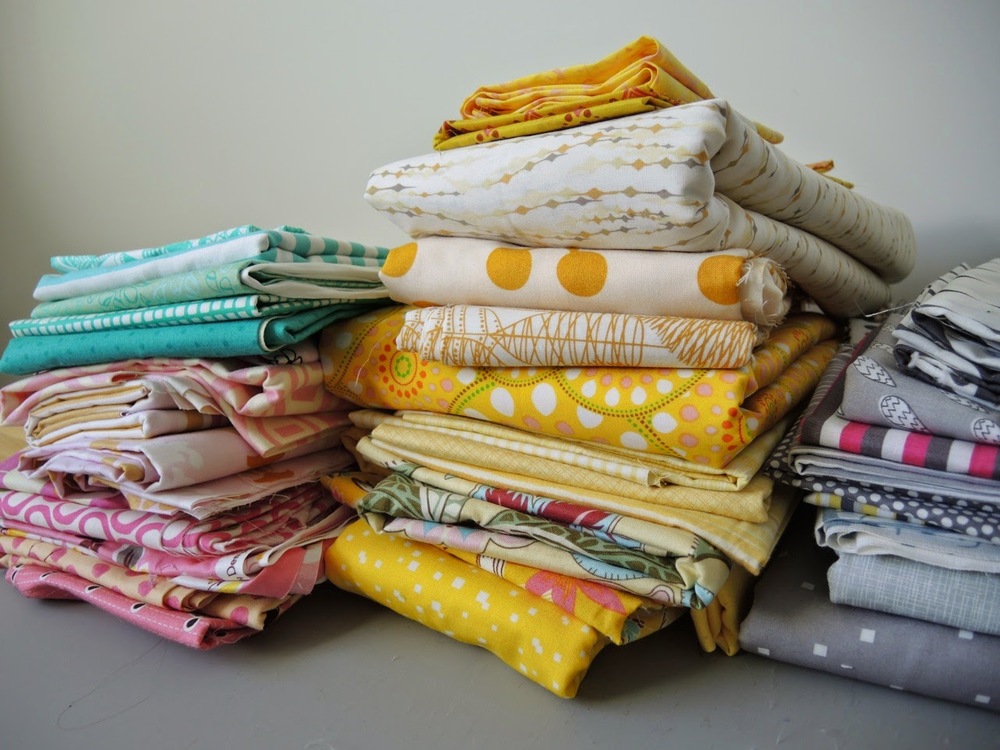
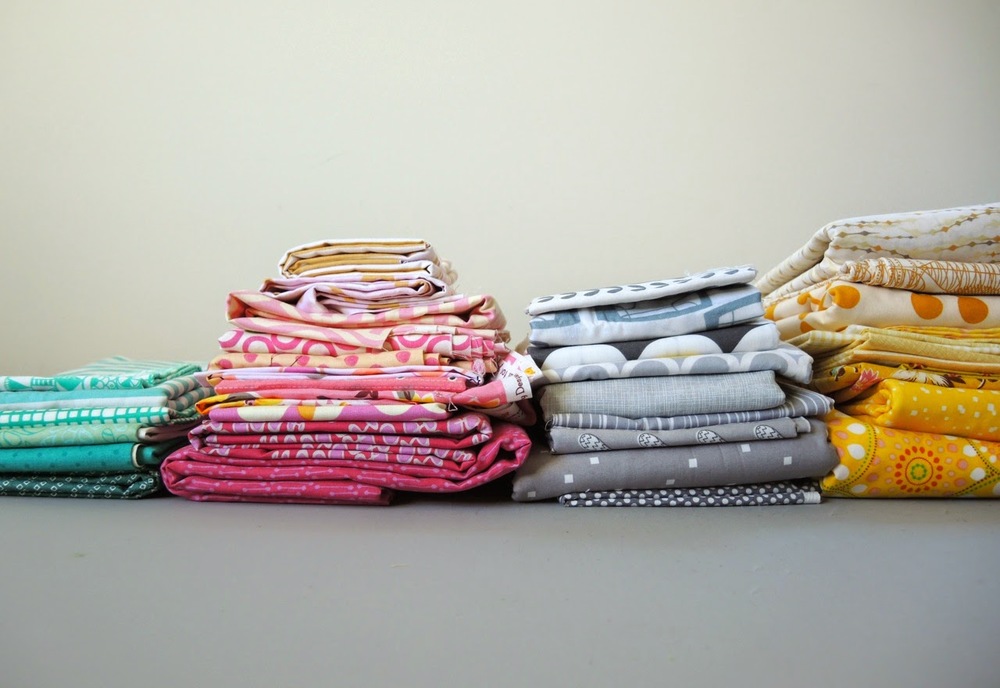
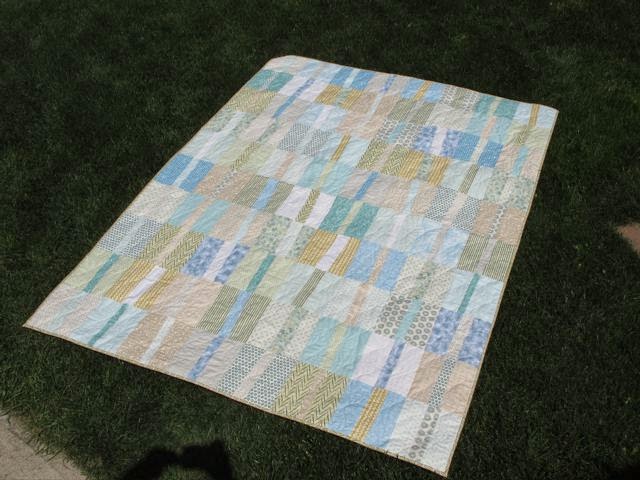
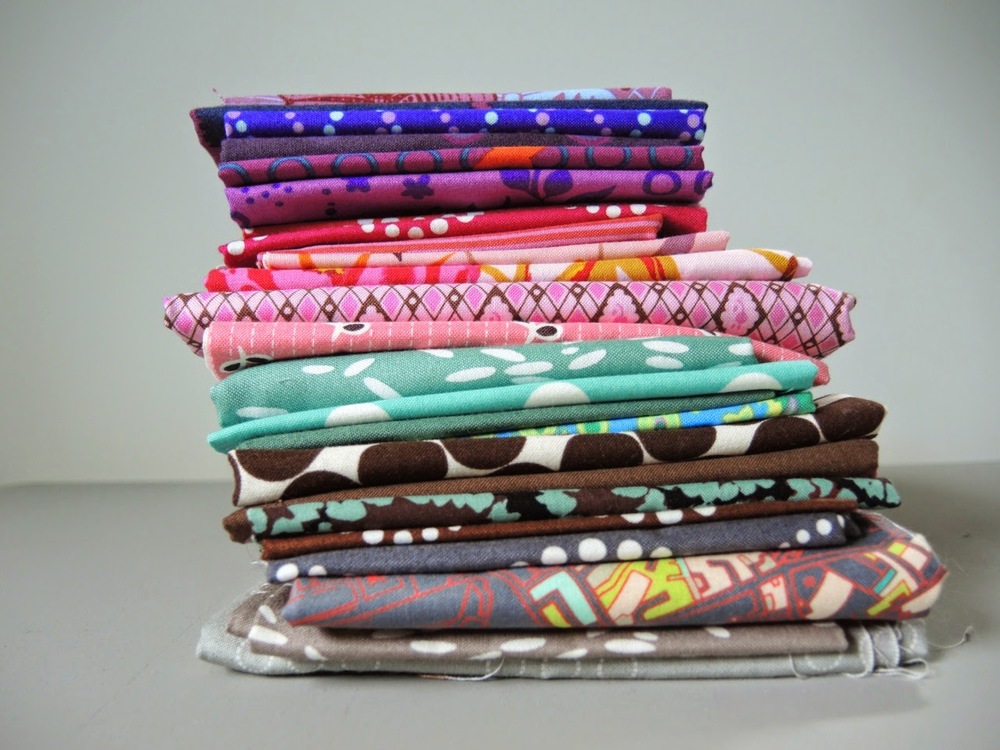
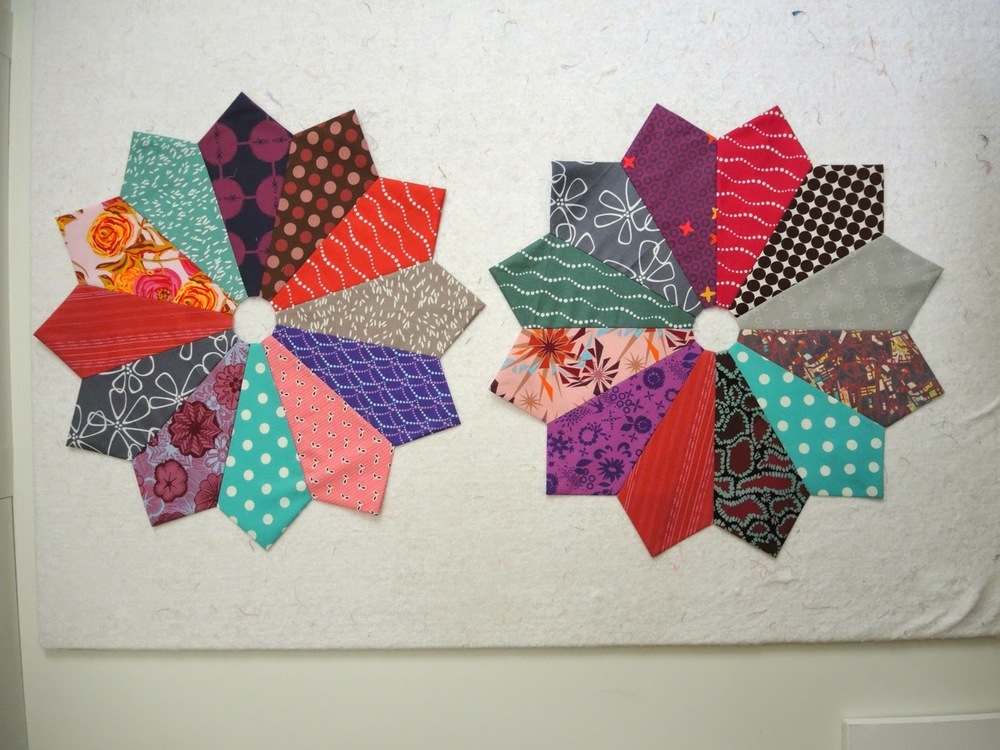
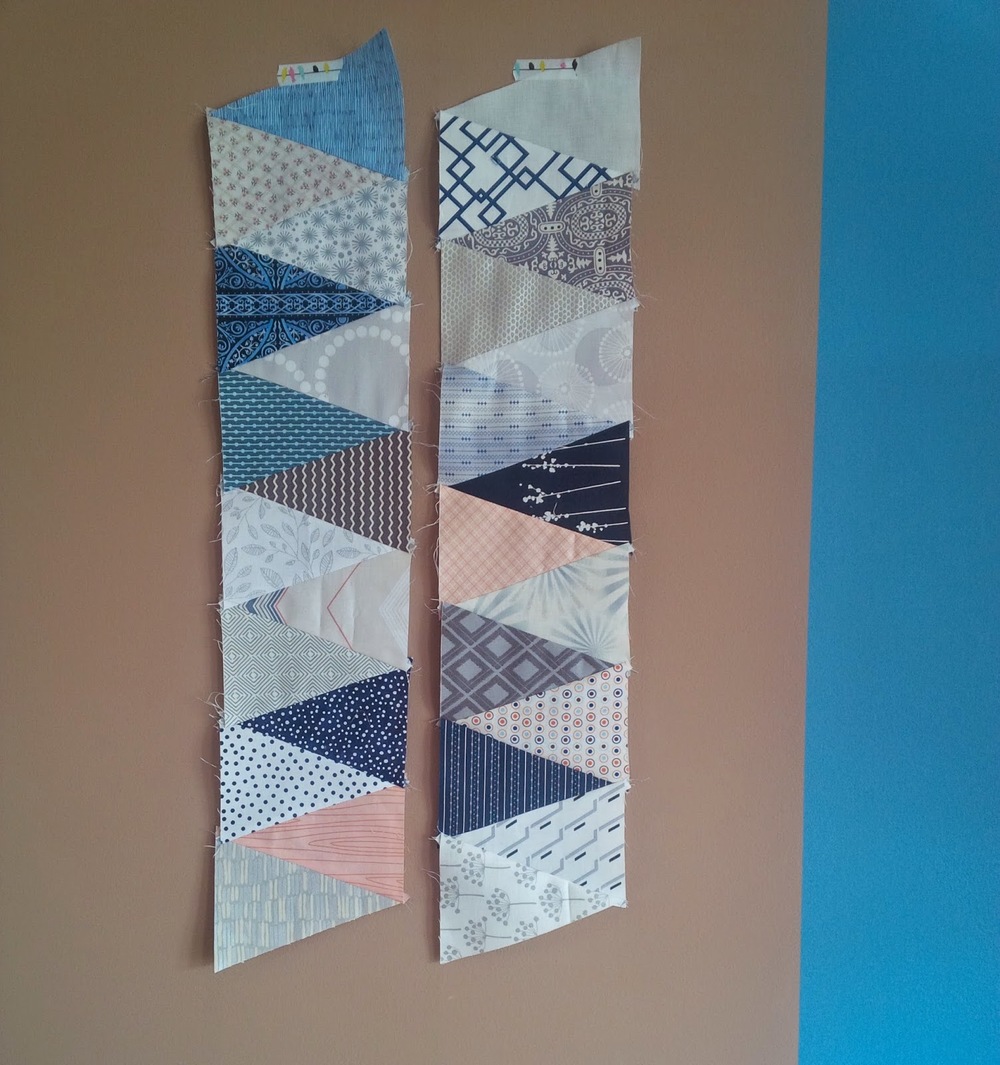
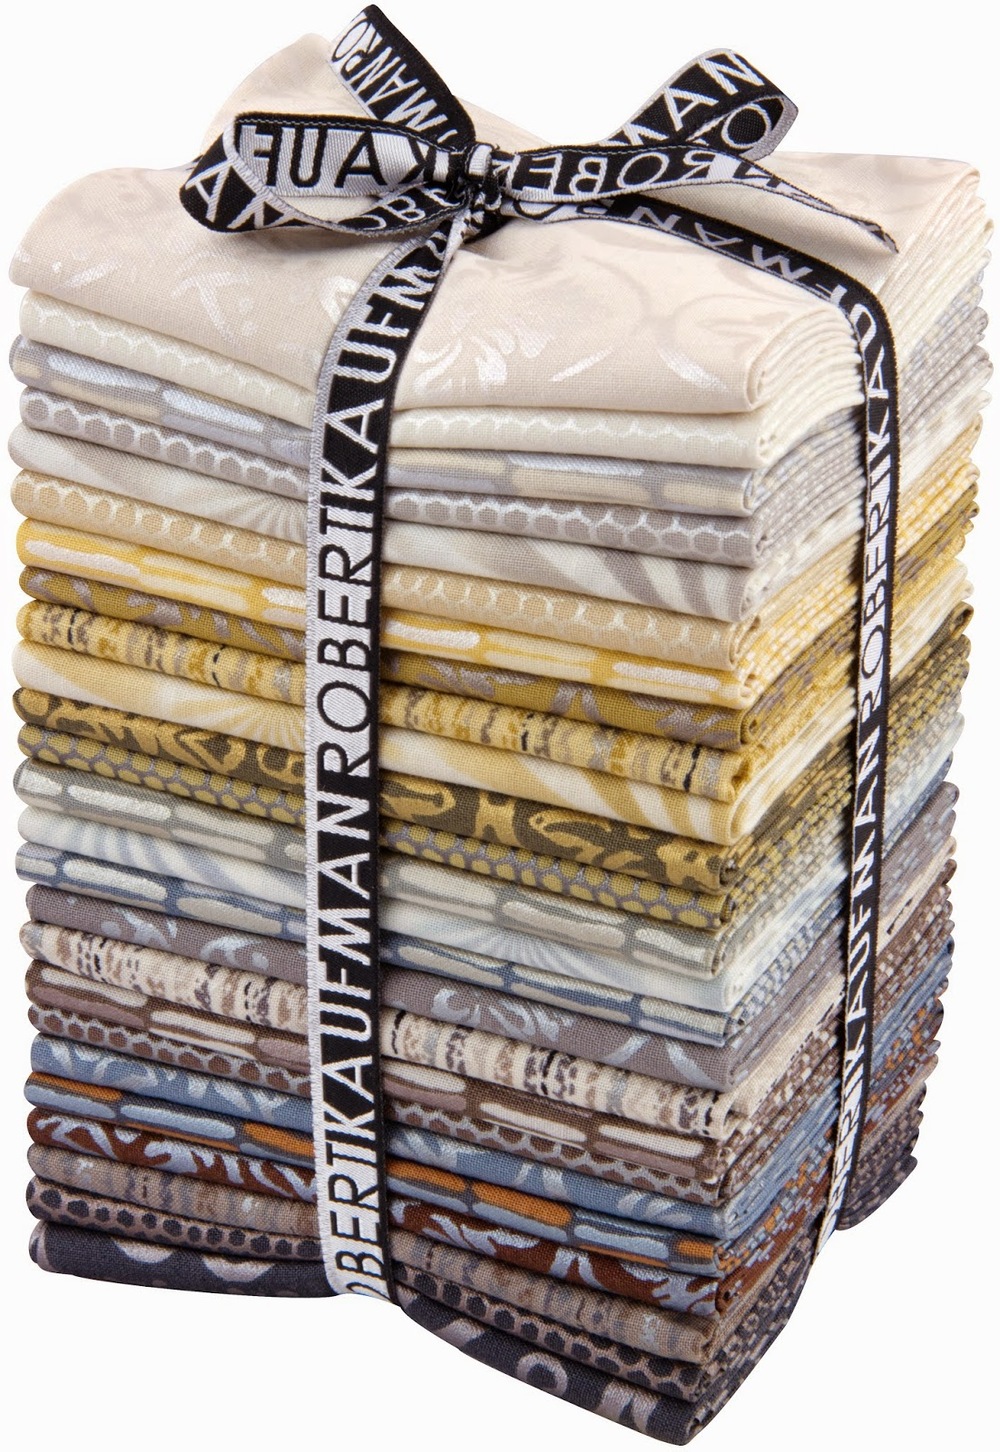
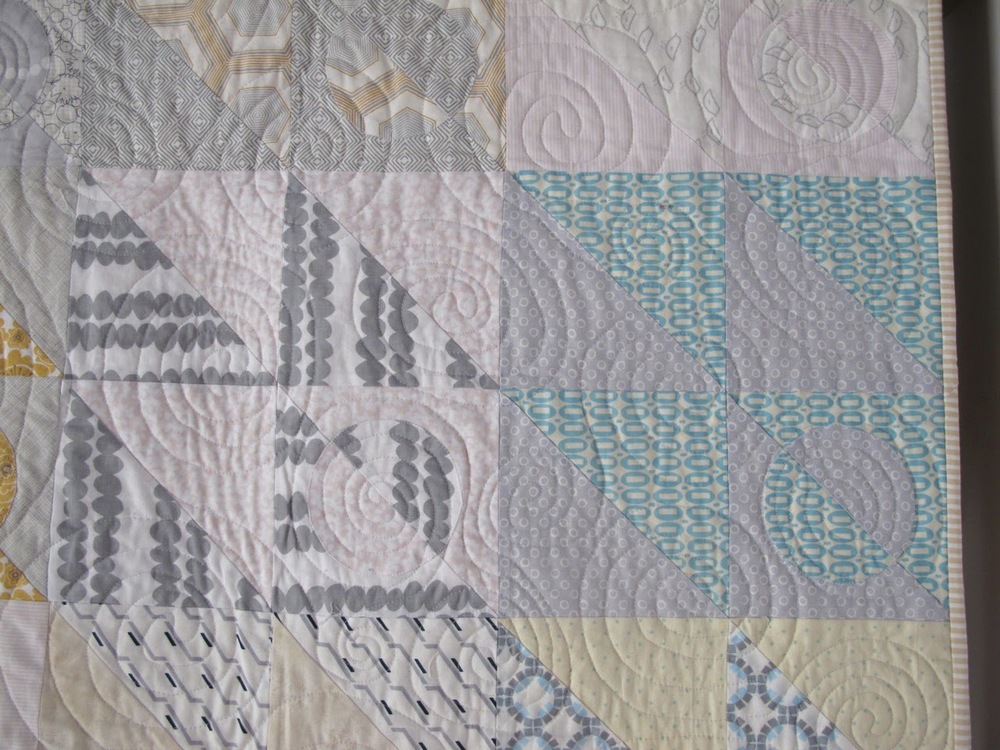
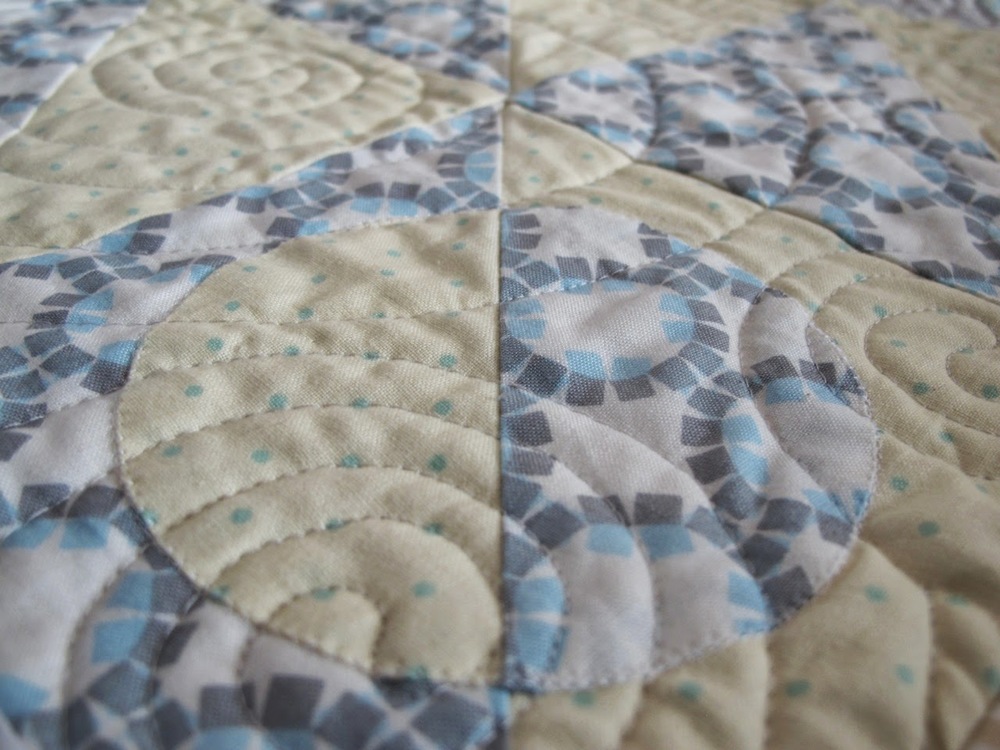
Good Neighbors is the fabric line, available exclusively with Connecting Threads.

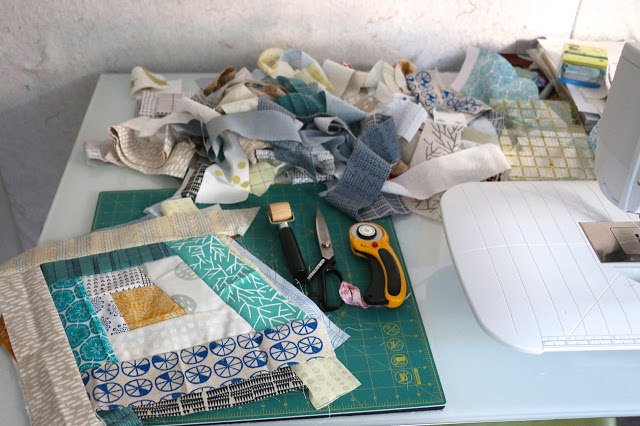
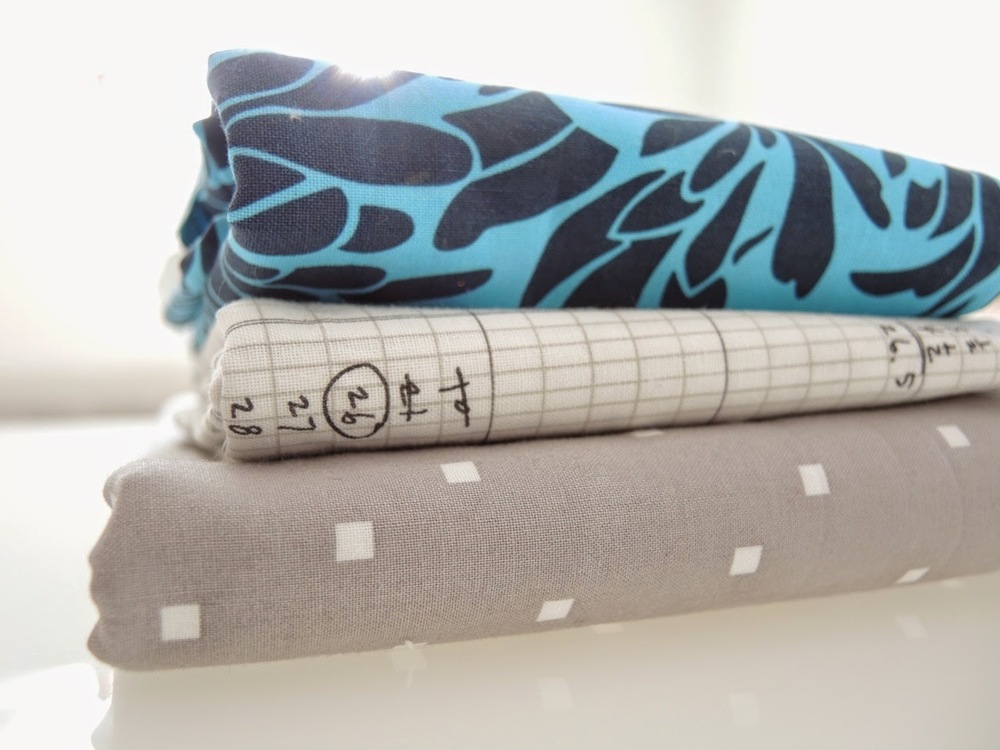
It is a mix of prints in sunny colours and they all play well with each other, and pretty much any other fabric you might have. Simple lines, pretty prints, good colours. Personally, I really appreciate the low volume prints, especially the diagonal stitch line. (Hello binding!) They work so well with others, hence the name.

It's been five years since Amanda Jean and I started working on Sunday Morning Quilts together. Five years. One of the questions I am most often asked at trunk shows is whether she and I are still friends after the process. People, we are better friends. I trust her implicitly, she encourages me like no other, and we challenge each other in healthy ways. Our friendship launched our quilting careers, but it is the friendship that matters more than books sold or classes taught. I would give all that up if I had to just to stay friends with her. (But I won't lie, I am extra happy that I still have it because then the times we get to see each other now are usually business expenses.)

When Amanda Jean asked me to be a part of her launch tour for Good Neighbors I jumped up. Not because I wanted to make a pincushion, but because I want to support this amazing woman. Bonus, I really like my pincushion.

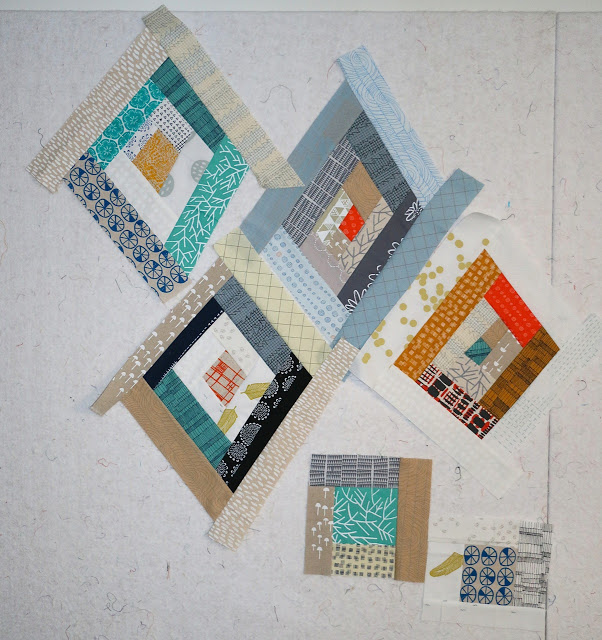
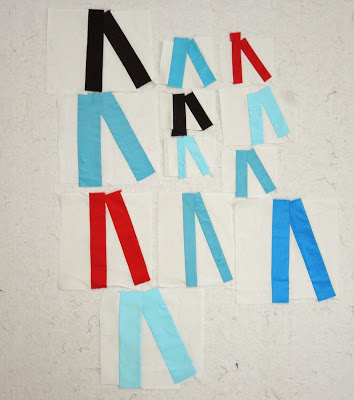
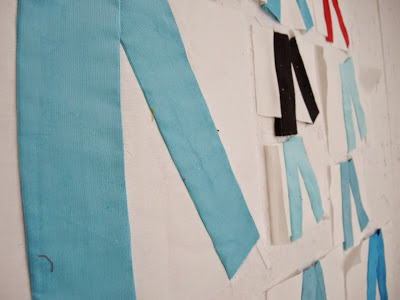
Just a little house. One for now, but there should be another so that I can pretend she is in one sewing away and I am in the other, chatting through our open windows.


Check out all the other pincushions on the Pincushion Party for Good Neighbors fabric.

9/1/2015
Amanda Jean 
9/2/2015
Anna
9/3/2015
Mary 
9/4/2015
Svetlana 
9/5/2015
Debbie 
9/6/2015
Holly 
9/7/2015
Carla 
9/8/2015
Faith
9/9/2015
Vanessa
9/10/2015
Anna
9/11/2015
Krista
9/12/2015
Erin
9/13/2015
Lee
9/14/2015
Alex
9/15/2015
Cheryl
9/16/2015
Penny
9/17/2015
Amy
9/18/2015
Debbie 
9/19/2015
Anne
9/20/2015
Melissa Corry
9/21/2015
Amber
9/22/2015
Nettie
9/23/2015
Adrianne
9/24/2015
Cindy
9/25/2015
Amy
9/26/2015
Chase
9/27/2015
Rene
9/28/2015
Erin
9/29/2015
Nicole
9/30/2015
Teri


And go here to buy the fabric itself. Available exclusively with Connecting Threads.

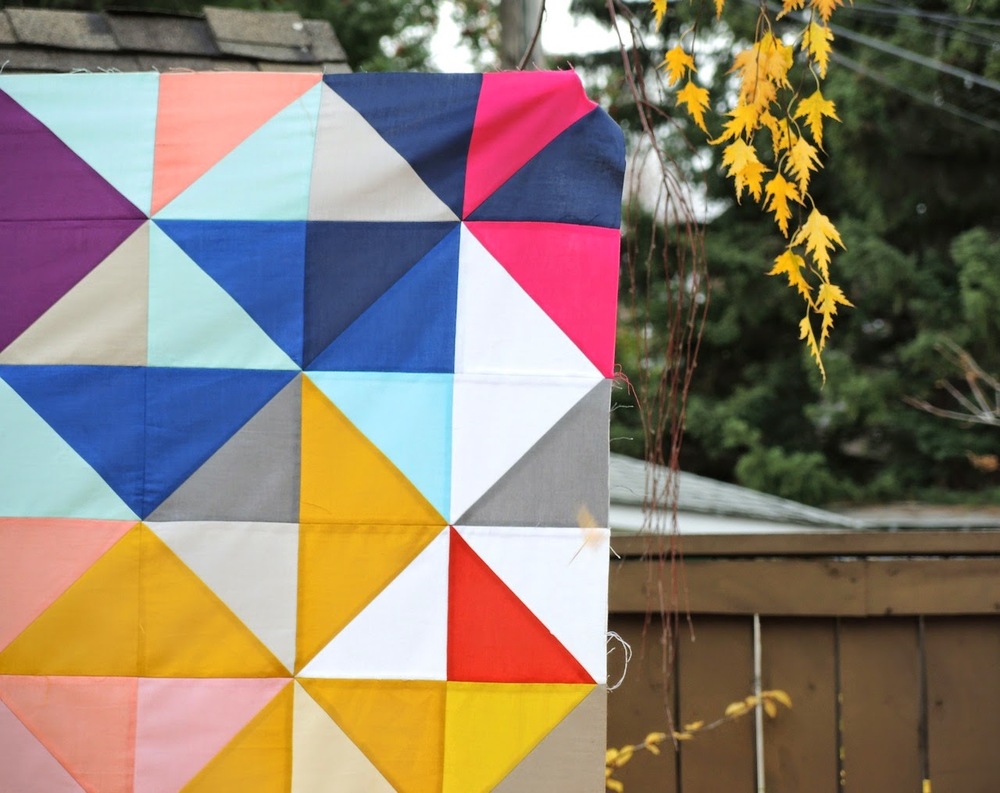
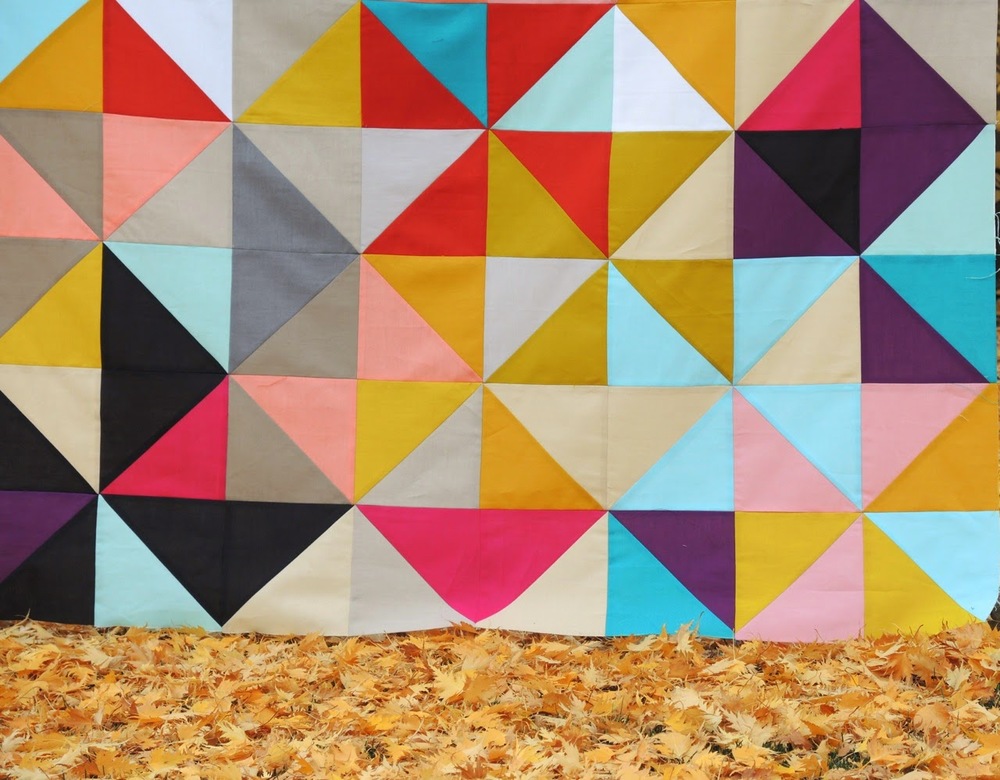
Amanda Jean has also designed a number of patterns that work so well with the fabric. You can buy complete kits - with fabric and pattern from Connecting Threads as well.

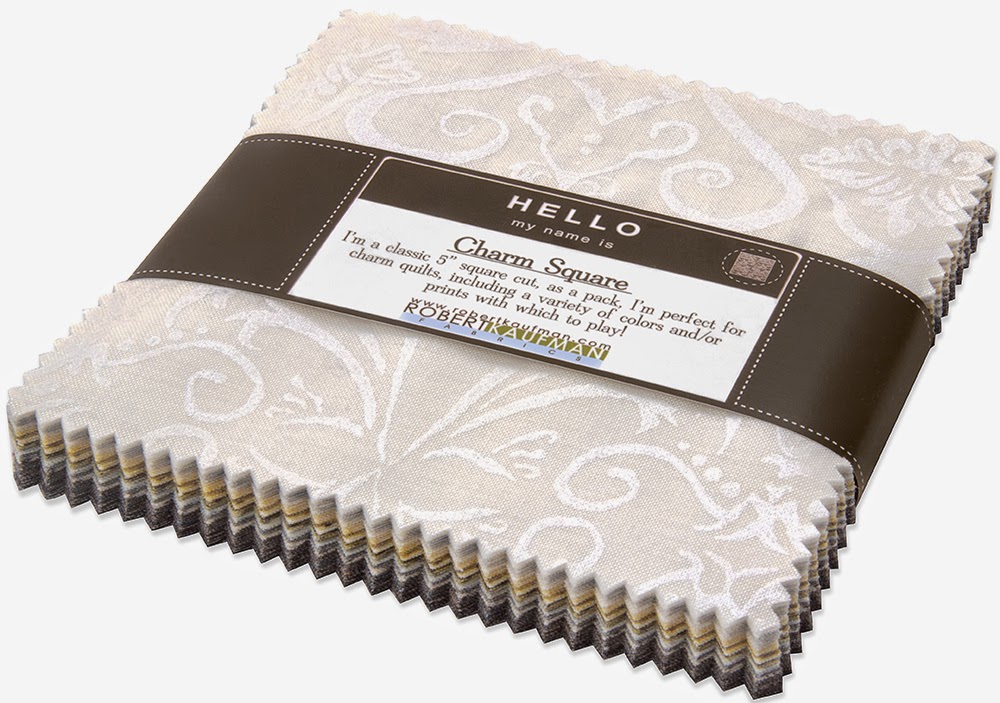
You can also leave a comment here for your chance to win a charm pack of Good Neighbors fabric. Tell me about your favourite neighbour or what makes you a good neighbour.

Open to US and Canadian readers only. Sorry. You can leave an entry until the end of the month.

PS Do you know how hard it is to NOT put that U in Good Neighbors? Then my autocorrect adds it in anyway.

Diamonds, not Squares. Plus, a new Improv Log Cabin Class


There has been a jelly roll of Doe fabric and a stack of screen prints patiently waiting their turn to be used. Every time I opened up my stash closet they taunted me, asking to be used. But I needed to clear space - mentally and physically - before I starting something new. I finally felt prepared to do just that this week.

A few hours of play and experimenting with a new shape and I'm very happy.

Diamonds. Not squares turned on their sides like a certain cereal marketing campaign of a few years back. Actual diamonds. It all comes down to the first shape you start with. Just a slight change in the angles on the corners and a whole new world opens up.


Playing with basic techniques in new ways is a wonderful way to explore improv. Log cabins are one of the oldest techniques in the quilting handbook, but that doesn't mean your log cabins quilts have to look old.

I'll be teaching Improv Log Cabin Variations at the Wonderfil Threaducation Centre next week. Come out to play, explore shapes, and dip your toes into the improv pool.

June 24
6:30-9:30 pm
Call 403-250-8262 or register here.

Even the trimmings are pretty. I have a friend who makes mixed media collage and she periodically takes my little trimmings. She's already got her eyes on these.

The Linden - With a V-Neck and in Double Gauze


To be clear, I've now declared that I will happily sew clothes and it is all the Linden's fault.

Here are two more iterations of this Grainline Studio pattern. I've also made one for a friend, ordered fabric to teach 6 members of my family how to make one (so I don't have to do it for them), and have one more version I want to try on deck.  But this pattern also has me feeling confident enough to make more, sew more clothes. Without the success of the first one and the realization that this is a welcome break from life and work as a quilter I wouldn't be so far gone


There is now a v-neck version. In my regular clothing I love a v-neck. Always have, always will. So of course, I had to try one. No mind that I've never sewn a v-neck and could not find a version of the Linden online in a v-neck. I also made a rookie mistake that could have been fatal - playing with an expensive fabric. Thank goodness it worked out. 

To get through the process I relied on this tutorial from Seamwork.

The neckline isn't perfect. I could have cut the neckband a few inches smaller, it gapes on my shoulders. And my middle seam doesn't lay perfectly flat. But I don't care because I made this and most people can't tell. And those that know, think it is cool. And I have a loose, light sweatshirt/t-shirt that I love.

Another change on this version was to add length. I wanted it to be like a big slouchy t-shirt. So I added 4'' to the length. And I split the cuff. The first crack at the split cuff was good, but I didn't do a top stitch and so pulled the seams when I wore it and stretched it out. I fixed the ripped seams, but unless I gathered it, I couldn't fix the gap. I'm okay with that. More room over my hips.

The fabric is an US organic jersey, designed by Josi Severson. I splurged on it, for sure. But it is worth it for so many reasons. Down the line I might make a more fitted shirt from another fabric from her. Fabric available on Honey Be Good.


The other version I made was one from Nani Iro double gauze. It fact, it was this fabric that got me on to the pattern. I'd seen it online, but when I held it in my hands in the merchant mall at QuiltCon I knew I needed to have it. On a whim, and a distant thought I might make a shirt from it, I picked up 3 yards. Over drinks one night I was telling a friend about it and she told me about someone she saw that day wearing a Linden made from double gauze. As my friend was wearing a Linden at that moment the stars collided and lit the way forward.

This version is the exact same as my first. The only change is that I made it maybe 2'' longer. The first fits well, but I wanted more length. I also wanted, even though I was using the double gauze, to have this still be a sweatshirt. So I hit the local chain fabric store and picked up some pale pink jersey to use for my cuffs and neckband. That was a pain to work with, I picked a super thin one. It all came together for this breezy version.

This is a very good addiction.


Some Crazy Vintage Quilt Top


Have you ever purchased a vintage quilt or quilt top? Generally I can admire them but walk by. I might be sorely tempted, but the reality of the number of quilts in my house keeps me from getting them. Then this one came along.

It is just a quilt top. Machine but foundation pieced. A mess of fabrics from different eras and many different substrates. It sat with the other blankets and quilts at one of the local antique malls. I saw it once, then twice. Quite easily I walked away.

Then, after months of not going in the antique mall I took the girls there on an outing our craft supplies. And the top was still there. For $40 I decided it finally needed to come home with me. Frankly, I may have overpaid. The edges are all uneven  - the blocks are various sizes - and there are quite a few loose threads and repairs needed.


I am sure that someone, somewhere put some good love and energy into this. Maybe they are clothing scraps? Family memories tied up in this quilt? Or maybe someone inherited a bunch of fabric and threw it together. There is some thought to design in the placement of the blocks. They are laid out in what I've seen called a Fields and Furrows setting.

All that being said, I think I might use this quilt top to experiment with indigo overdying.

I know. Feel free to comment.

Every since I saw these quilts I've wanted to experiment with this technique. But, I must admit, I'm afraid to do it with one of my own quilts. I've also wanted to play with indigo, period, so that I would try both fabric dying and quilt overdying. With so many different fabrics in this quilt I predict they will take the dye differently. And I wonder if the value work will still be obvious?

The days are definitely getting warmer and I can look forward to a messy few days of experimenting in the backyard.


Tips for Cutting and Sewing Voile


After posting my Precious - all voile quilt I've had quite a few emails and some comments about the quilt's construction and working with voile.

Voile, while a woven cotton, is not exactly the same as the quilting cotton most of us are used to sewing. It is thinner and silkier. That means it requires some special handling. Nothing fancy, just a bit of care.

Tips for Cutting and Sewing Voile

1. Pre-washing does not make a difference to the feel of the fabric - so go with what you generally do when it comes to pre-washing.

2. Starch or not? I can't say here as I am not a starch user and did not experiment. Again, I think going with what you are comfortable with is going to work for you. But because you pick voile, in part, for its softness, you will definitely want to wash the finished project before using.

3. The ruler will want to slide while you are cutting. Keep your pinky finger of the hand stabilizing the ruler off the edge of the ruler, right next to it. This helps hold it in place.

4. You can cut more than one layer at a time. Voile is much thinner, so I cut with my fabric doubled up.

5. Make sure your rotary cutter blade is sharp. Of course this should always be the case, but the voile seems to snag a bit more.


6. Be careful to keep it right sides up. It can be hard to determine right versus wrong on some voiles, so stack and keep organized accordingly.

7. Use your walking foot for sewing. Or a dual/even feed if your machine has it. This is an absolute necessity. (At one point my dual feed was turned off and I wrecked fabric trying to sew. It took me a lot of swearing to figure out the simple fix.)

8. If pinning, use thin and sharp pins to make smaller holes and not have snags.

9. If you don't already piece with a 75/11 or 80/12 needle do so for this. Personally, I'm a fan of the Microtex Sharps for piecing.

10. You can absolutely mix voiles with regular cottons. They sew together nicely. Use these same tips, even when combining the fabrics.


As for how I put together this particular quilt, it was totally random patchwork. I collected the fabric, cut out a bunch of random triangles, and sewed them together.

Fabrics were gathered from all over. Mostly on-line sources. The selection of voile continues to grow and there are more and more geometric rather than floral options. That gets me very excited and makes me want to make another all voile quilt.


To cut my triangles I used the 60 degree ruler from Marti Michell. You could easily create your own template too. I liked this ruler because while it did give the options to cut different sized triangles it was a larger triangle when used as a template. Frankly, it was the size of the ruler that dictated my own triangle size. Cutting was made a lot easier that way!

Two other things I liked about this particular ruler. One, the little notches on the corners are great. It is so much easier to cut those triangles off before you sew, rather than after. And you do need to cut them off to reduce the bulk in the corners. And two, the guidelines in the centre help you cut the half triangles for the edges of each row, with the correct seam allowance.


Once I had a pile of triangles cut I sat down and sewed. Working on two rows at a time, I sewed one triangle to the next. For the first rows I kept sewing until I thought I was long enough to cover my bed, checked and rechecked that measurement, then finished each row with a half triangle. Once I had enough rows together I used my bed as design wall. Because it was inevitable to have some triangles line up from row to row I embraced that and moved things around for intentional diamonds.

Thank you so much for all the questions and compliments.

Now, as for those giant pencil crayons in the first photo on the post, wouldn't that be cool? Alas, they are just old posts of some sort.


My Precious - An All Voile Quilt


Precious
105'' x 90''

The all voile quilt is finished. When I was thinking of a name for this quilt I kept thinking about how much I did, and still like to, pet this quilt. It is ridiculously soft and I am ultra protective of it. It reminded me of Gollum in Lord of the Rings and his precious crouching over the ring. So this quilt is my Precious.

I used voile for all the triangles. A collection that took me at least a year to amass, as the fabric companies started releasing a print or two along with regular quilting cotton collections. They keep doing that too. After I finished the quilt top I gave away all my scraps. With this finished quilt wrapped around me at night I want to collect them all over again!


Voile is also what is all over the back too. Not to mention the binding. Did I mention how soft this quilt is?

The batting is the same batting I always use - Quilters Dream 100% cotton, in the Select weight. I thought about using a lighter weight batting, to make the quilt even softer. In the end, however, I couldn't find it locally. With the voile you wouldn't think it was the same weight of batting though. It feels very light and so drapey. I can only imagine how much lighter it would have been, but I am not complaining at all.

This is going to be the perfect summer quilt, for those 2 really hot nights we get.


Not having the desire to quilt another king size quilt I happily gave this to Andrea at Urban Quiltworks. She was awesome about accepting the challenge of the voile, calling on her long arm community for advice and tips. We decided on a pantograph because with so many busy fabrics and such a simple construction there was no reason to spend a lot of effort on detailed quilting that wouldn't be seen. She picked this loopy design that reminds me of Fleur De Lis a little. In a turquoise Konfetti thread from Wonderfil it is perfect.

As I said, the binding is also voile, this ric rac print from Anna Maria Horner was perfect. Initially I thought about putting it on the bias, thinking it would look great and be a bit stronger. Unfortunately, I didn't have enough yardage to make that effective. I can always replace the binding if it wears out. For now, it is perfection.

The quilt is already living on our bed. It is so, so girly but my husband isn't saying a word.

I may or may not be collecting voile again to make another all voile quilt. It is just too soft not to. And with less flowery options coming out all the time... And with clothing making scraps finding their way into the collection... This spells trouble, precious and soft trouble.

Playing With Pinwheels in Quilting - On CreativeLive


When was the last time you played? I don't mean get on the floor and play with the kids or grandkids? I don't mean kicking around the soccer ball either. No, I mean going into your fabric and making something for fun; quilting without a quilt a mind?

I'm going to venture a guess that it hasn't been lately. For all the things I start - and I do start a lot - they almost always are started with a finished quilt in mind. I'm not sewing for the sake of sewing. I don't experiment or play much. And this is so, so wrong.

That's because we learn so much when we play. Taking away the play instinct for a child isn't a good thing, we can all agree on that. So why do we think it is okay to do that for ourselves? By playing as quilters we get the chance to explore colour, construction techniques, shapes, lines, negative space, secondary designs, and our own challenges and joys. Instead of trying a new quilt pattern to experiment with just one or two of those things, just play. See what happens when you let go of the idea that everything has to be a quilt.

It is the move past this idea that everything has to be something that has to be tackled first. In this CreativeLive class, Playing with Pinwheels in Quilting, I want to help you do just that. We take a simple, common block - the Pinwheel - and turn it into so many different things. There is one basic way to do it, and then a million other ways. While I preparing for the class I had a hard time stopping. One idea begets another and another. Even while teaching the class on set I had even more ideas. 

Guess what? Playing is FUN!

Now I feel like I could take so many of the ideas from the class and turn them into quilts of their own. The blocks I made may or may not turn into a quilt as they are. I, frankly, don't care. They represent my own little quilty playground. Not to mention design opportunity. For now, they are on my design wall to remind me that play is fun, that exploring an idea or a shape is worthwhile, and that sometimes things are simply pretty.


If you have any questions about the CreativeLive class, don't hesitate to ask. And all feedback is welcome. They are new with quilting classes and constructive comments can only help. Did you know there are free previews of all the classes? 


You can also share reviews and your inspired work with the CreativeLive community. I keep up with the course pages, so please share your work (in addition to blogs and social media if you are active there).


The Third Circle Lattice block


And another Circle Lattice block. Just can't get enough. Once you make two, you might as well make four, right? That is my plan, at least.

It took me longer than I would have liked to finish up the second one, only because there were a lot of quilts to bind. That took up a lot of hand work time and nearly killed my wrist. The longer time, however, doesn't bother me. That is indeed the point - to slow down (and savour each stitch).

This time I switched up the fabric. I still totally love the New York City fabric from Samarra Khaja. Even with all that face time spent with it, I am not at all bored. Lucky for me, I was also able to get more of it. So I have enough for the 4 planned blocks, and then some. This time the great fabric is making the circle lattice instead of being relegated to the background. Instead of unicorns in New York, the city is taking over the forest. Hmm, there is a political message in that...

For those of you new here, the block comes from Carolyn Friedlander's book, Savor Each Stitch. And it has taken me 6 months of hand appliqué here and there to make the 2 blocks so far.

Knits, the Linden Sweatshirt and Thoughts from a Beginner Sewer


If you've read this blog for a while you will remember that I've said many times before that I don't sew clothes. I'm a quilter, not a sewer.

I stand corrected.

Behold my first sweatshirt. When I told my SIL that I was sewing a sweatshirt for fun she commented that she hadn't even seen me wear a sweatshirt aside from a hoodie at the campfire. Quite true. But I picked up this dressy one from J Crew last year and fell in love. Then, at QuiltCon, I finally caved on some gorgeous Nani Iro double gauze I've been admiring for a few months online. Those two loves collided when a friend pointed out to me that they just saw a Grainline Studio's Linden sweatshirt in double gauze. Sold!

Not only was I keen to make this sweatshirt, it was actually serving as my reward. Some selfish sewing after basically 2 months straight of work. Something is clearly wrong with me.


Okay, so this pattern is rated for a beginner. While it is true there are not major technical skills required to make this, it certainly reminded me that I am indeed a beginner when it comes to garment sewing. A few Staple dresses does not make a seamstress. The last time I sewed with knits was a pair of sweatpants in junior high Home Ec.

The pattern is pretty straight forward and well illustrated. It provides a few hints and tips on sewing with knits, like what stitches and needles to use. I felt much more prepared, however, after spending some time on line searching out more tips, tricks, and guides for sewing with knits.

There were a lot of little things that flew under the radar. An experienced sewer would probably just chalk them up to common sense, but it was spots that a beginner would perhaps struggle with. For example:

- Knit is stretchy, this works to your advantage when attaching your cuffs and bands, but against you when cutting.
- When attaching the wrist cuffs, take off the table around the throat of your machine, it pretty much made it perfect for attaching the cuffs. If you don't, you are trying to manage all the material, the stretching, and a good seam allowance without catching the other side of the cuff as you sew.
- If the fabric isn't moving for you under the presser foot, you can raise it a bit.
- There are different settings required for your machine, very different ones if you are used to quilting.

I spent a lot of time trying to figure out stitches, speeds, and settings on my machine. In fact, the machine was my biggest frustration. Rather, my ability to work it with this material. With the help of a strong Campari and Soda I found the patience and the rhythm required.

It really got me thinking about beginners and the assumptions I make regarding terminology and basic skills. I write patterns and assume a certain level of knowledge. Now I realize I can't write for every audience - if I broke absolutely everything down the more experienced quilter would be driven bonkers by the detail. There is likely more of a middle ground, however. Especially when marketing to beginners. Definitely something to think about.


I love, love, love this sweatshirt. I like the fit on me. I went for a size 16 based on the pattern measurements and adjusted nothing other than the length of the neck band piece. (I found I liked the wide opening and wanted less of a gathered feel, so I added a few inches to the band). The sweatshirt is loose, almost blousy.  The bottom cuff doesn't get tight around my hips, which I prefer to the alternative. If you wanted it tighter you would just have to make the band a bit shorter. The arms are pretty much perfect for me. This will be a good layering piece as we head into spring.

The material is from Birch Organics, the Elk Grove knit line. I picked it up at a local store. Selection was limited locally to a lot of cute little prints, but I don't do cute on my clothes. So ridiculously soft, the flowers were worth it. I was paranoid about stretching it out before I finished sewing so I was super careful, then someone else commented on an Instagram photo that it wasn't very stretchy! Perhaps it was just paranoia on my part?

Now I am very excited to tackle a double gauze version. For that one I am going to lengthen it a bit so it is extra slouchy. I need to pick up a knit or a ribbing for the wrist cuffs and bottom band. Hopefully I can find something that coordinates nicely. I may switch out the neck band for a bias binding, but I haven't decided on that yet.

Look out world, I'm a sewer now.

Talking Quilts... Picking Fabric

There was once a girl who only bought fabric as she made a quilt. She only bought the fabric she needed for that particular quilt. I know this to be true because I worked with her for ten years. At first I thought she was kidding. I mean, how is that even possible? But as I watched her make quilts I did not see her stash grow. It was amazing.

I am so not that girl.


Frankly, I was buying fabric at quilts shops long before I even quilted. I could sew and I would buy little fat quarters under the pre tense of making napkins with them. I did, once. They were really, really bad napkins in an odd shape because all I did was turn under the edges to hem the fat quarter. But oh, that fabric!

Fabric is probably the reason 95% of us quilt. Yes, there is the making aspect. But it is the fabric that brought us to our glorious making. And it is the fabric that gets us most excited, provides a level of frustration, and where most of our money gets spent. Fabric is awesome.


Pulling fabric for a new quilt is one of my top treats in the quilt making process. I've been known to pull fabric just because. A little shopping in my stash to create a random pile of fabric itching to become a quilt. Sometimes all its dreams are fulfilled. I find just the right inspiration, block, pattern, or concept and the quilt comes into being. Sometimes the fabric lingers or hovers on the edge of the scene (the closet shelves) slowly being picked through for other projects until I eventually return all the pieces to their rightful colour stacks.


Having a large stash makes this all possible. Never will I add up how much money I've spent on fabric, but I think it is safe to say that if I were to never buy fabric again and quilt for another 30 years I'd likely still have fabric left over. It means I always shop at home first. And usually only. Fabric buying involves getting something new that I love, just for the sake of loving it. Or picking up enough yardage for a backing or something specific for a binding. My stash fits in one normal size closet, with a tiny bit spilling over into scraps bins or the quilts under construction/batting closet. Gone are the days when it fit under a bed in a plastic bin.

When I started quilting nearly 17 years ago the advice du jour when picking a palette for your quilt was to find a large scale print you liked for the colours, then pick coordinating fabric for your blocks, add a little zinger of a border around your blocks, and make a big border of that large scale print. I still see that in action all the time. When I give trunk shows at guild meetings I will take a quilt in the room that I see made that way and fold away the large scale border to show quilters the difference in the quilt. Those large scale prints are often quite gorgeous, but they are doing nothing for the quilt. And all that piecing the quilter did is lost to the large scale border. So let them be your guide for picking fabrics, then set it aside or put it on the back. And if you are worried about the quilt being too small now, make more blocks. Or use whatever background fabric you have to be the border now.


Looking back on my childhood I've realized that I was destined to be a quilter. It wasn't the sewing of the barbie dresses or winning the Home Ec award in grade 8. It was my constant reorganization of my colouring supplies. One day it was rainbow, the next I was making colour combinations. I wrote my notes in colour order and obsessed over 4 colour pens. It was not acceptable to me to have a single box of jumbled up colours. This wasn't OCD, this was playing with colour.

Picking fabric is also playing with colour. Play being the key word there. No one is saying your piles of fabric have to become anything. Pick and repick, dig through your stash and challenge yourself to make a certain ugly fabric play nicely with others, get lost in interpreting a store window through your stash.


For some quilters picking fabric is stressful and hard. I feel for you. Getting to the point of fearlessness and confidence in fabric selection is no different than being comfortable with free motion quilting. It takes time. And practice.

The only way to gain confidence in fabric selection is to just do it. Read or take classes in colour theory, learn about value, stop obsessing over whether this particular green is the same as the green in that fabric, step away from the pre cuts. Pull fabric for the sake of pulling fabric. Leave the bundle be for a little while then put it all away and start again. Make practice blocks in your fabric pull before launching into a full quilt. Ask for advice and actually listen. It should never cause stress, only joy. It should bring excitement and possibly induce a little bit of drooling.

If you've got the inspiration, now you pick the fabric. Fabric is awesome and the root of what we quilters do.

This is the second post in a monthly series on all the steps of making a quilt. Musings and thoughts on the process.

Marching Together


We don't celebrate Martin Luther King Jr. Day here in Canada. As I've said before, we frankly aren't taught much about the civil rights movement. Not because we aren't without our own shameful past (and present) of racism, but the marches and protests of the 50s and 60s aren't much of a topic in our history classes. Until my trip to Birmingham most of what I knew was from pop culture - hip hop, novels, and movies.

When I found myself with an hour of unexpected free time yesterday I couldn't help but pull out my march inspired blocks. It seemed appropriate on the day and all.

My blocks were pressed, trimmed, and a lay out determined. I filled in the blanks with more white. Now this large block measures about 30'' x 32''. It needs to be framed or made part of something larger. I'm just not entirely sure what that next step will be. Right now I'm thinking a Courthouse Steps kind of construction for framing it. But I've also thought of making 4 more similar large blocks and doing something with those.

For now, I will keep this up on the design wall to contemplate the options, and the precious and passionate sacrifices that inspired it.


There is Peace in Pattern


There is Peace in Pattern
53'' x 56''

It kind of says it all for us quilters, doesn't it? Well, it does for me. So, so perfectly. This might be a new contender for my most favourite quilt I've made ever.


This was actually the first quilt I made when I moved into my basement sewing studio. Well, the first quilt I started and the first top I finished. It all started with a bundle of Carolyn Friedlander's first line, Architextures. I pulled out the greens for another project and stared at the remaining fabrics for a bit. Then I picked and pulled from my stash some additional fabrics.

You know what I did next? I hacked it all up! Strips cut randomly from fat quarters, the scrap bin raided, chunks cut off of yardage. I created a giant pile of fabric pieces. One side had a few darker pieces in them, the remainder were all the low volume lovelies.

To make each letter I first sketched out the order of piecing. It was all improvised, but I needed a bit of direction. This is my Improv With Intention concept. Instead of choosing a single fabric for the background of each letter I went wild and grabbed randomly. As each letter, each word, came together I added more and more fabric.

And not a single one was a solid.


It didn't seem like it took a long time to get this top together, but it couldn't have been quick. If I recall I worked on it for a few weeks if not a month. That is, in snippets of time and a hour after bedtime or so. Once I got the words together there was a lot of extra piecing and puzzle work to get it all into a quilt top. When I do this kind of piecing I like to avoid totally distinctive grid lines so it gets fiddly at times. Just a personal preference of mine.

As soon as yardage of Architextures was available I ordered some for the backing and binding. But as the fabric and quilt top sat, I kept sneaking some of the fabric for other projects. In the end I was able to get my back together. And thankfully I'd made the binding already for a photo shoot. Phew. otherwise that awesome navy text print would have been long gone!


The quilting was done on the long arm, with Aurifil 2435. It is a great coral colour that worked wonderfully with all the fabrics. I free motioned a topography pattern. It fills the space wonderfully and totally echoes the main fabric on the back. Instead of doing any ditch work around the letters I actually just took the free motion pattern right to the letter edges, but not over. With the quilt washed the letters just pop now. Call it lazy trapunto. It works for me and I can see using this sort of pattern again.


In a slightly related note, I forgot to tell you something. Crystal from Two Little Aussie Birds interviewed me a few weeks ago. It was great to talk about modern quilting in a totally different way, and include a discussion of feminism in there. She is hosting a series of interviews called Modern Quilting Modern Women. Some great posts in there from some pretty spectacular and different quilters. I mentioned this quilt in my interview and that's what reminded me that I never photographed it. So, here is the quilt and here is the interview.

Corduroy Marching - Inspired by Gee's Bend


With the exception of the odd bit of linen or voile, I've never mixed my fabric when making a quilt. Pure quilting cottons. It wasn't a matter of being snobby, although, maybe? It's just what I was taught and what I'm comfortable with. But after seeing all the quilts in Gee's Bend and talking fabric with Mary Ann, China, and Nancy I was inspired.

Then, when wandering Birmingham on the same trip we came across a little quilt store called The Smocking Bird with quite the selection of corduroy. It was meant to be. I bought a few pieces, mostly blues. Honestly, I had no idea what I would do with it, but I wanted to play.


On the flight home I was writing some notes about my trip. A few sketches emerged too. I honestly thought that's all they would be. Then I was unpacking and realized my corduroy could be quite interesting here. So I pulled out a cotton/linen I had for some additional texture and set about to play.

No rhyme or reason to what I was doing. Just an attempt to mimic the shape I sketched out. I was inspired by the trip and our education on the Civil Rights Movement. The notion of a march as a means of process was front of mind when I set out. So these are legs, of all sizes, marching. I think they worked out quite well.


These blocks aren't even pressed, let alone squared up. I'm not entirely sure where they'll end up yet. They are fun, and poignant, to make. I will definitely make more.

Corduroy is a hot mess to work with though! It sews up fine, especially because most of this is a fine wale from Robert Kaufman. The mess, however, is rather annoying. Just a lot, a whole lot of lint. The softness and texture are totally worth it. I can see using it again.

Mary Ann Pettway was right. She told me it was great to work with and added something to the quilts. I should listen to other people more.


Cirrus Solids at Play


It is a very good day when new fabric arrives. It is especially good when that fabric is the new organic solid range from Cloud 9 Fabrics.

When Cloud 9 contacted me and asked me if I wanted a bundle to play with I totally hesitated. With so many quilts under construction I didn't exactly need more fabric, nor the obligation to make something. But I was intensely curious and I've always been quite impressed with Cloud 9's fabrics. At worst, I thought, I can add them to my Solid Sunday Morning.

Then the fabrics arrived. What glorious colours. Some great greys and neutrals and those deep blues and turquoises. I was smitten. And I had an idea percolating in my head after teaching a Values class in September. The only thing that stopped me from cutting into them right away was my trip to Alabama.


As soon as I could, though, I started sorting piles. Lights and darks, darks and lights, darks and lights and medium. I used the black and white feature on the camera to really get a good handle on the distinctions. My plan was based on the Pinwheel quilt from A Month of Sundays, with a twist. Value distinctions were going to be very important. Instead of the big swath of white triangles as in the original, I wanted more pieced HSTs. But if those didn't look different than the pinwheel section the design would be lost.


In the end, I made all my half square triangle blocks based on the piles above. Just random HSTs. Some with light/dark, most with dark/dark. I grabbed whatever came next and didn't worry at all about the combinations other than my values.

And, it didn't work. There were just too many medium values muddying things up. If I had kept them out it might have worked. The quilt would have been small in that case and that's just not how I work. I'm going to keep the concept out there and maybe play with it again at some point over the winter.

For now, however, it is still fall. A glorious fall. And in the last few days I played with all my HST blocks made for the original idea. The pinwheel concept stayed, but it looks radically different. I shared a few layout options via Instagram and received some great feedback. My initial pinwheels were the typical four patch pinwheel block, but that smart lady Victoria Gertenbach suggested some scale changes. I tried it and it was perfect. Thanks Victoria!


The Cirrus Solids were great to work with. They frayed no more than any other solid, which was nice. The hand on them is amazing! So soft cut right from the bolt. This quilt is going to be a dream to cuddle with when it is all done.

Right now Cirrus Solids are available in these 21 colours. All are cross-weaves, which means it is two different colour threads that make up the fabric. But they aren't obvious cross weaves like the kinds where two very different colours are used. Subtle, but the texture of a cross weave is definitely there.

I do not know what Cloud 9's plans are for these, but I hope they take off at Quilt Market so that more colours arrive. Personally, I would love to see oranges, more lemony/buttery yellows, and grassy/minty greens. Solids aren't generally my thing, but I can definitely see these becoming a go-to source for me.


Beach Days in Fabric


What a sunny, summery pile of fabric. Perfect as fall is in its peak of colours and winter is probably only a few weeks away. Yes, I am pretending I'm in Australia.

What started as a need to create some samples for a class I'm teaching on my Beach Grass quilt has turned into this. This colour combo has been on my brain for a long time. I thought it was because I saw a few colour pins on Pinterest. That certainly was what got me pulling fabric the other day. That's how that stack above came to be.

I always start this way when colour of fabric is the initial inspiration - just a big, big pile of fabric. I have no idea if I have enough that I might need, or if all of these fabrics will stay. But it is all about that initial burst and frenzied search through the stash. I just need to get it all out, then I can stop and regroup.


Once the initial grab is done I take a breath, often sleep on it, then see what I have and don't have. Is there more structure to be found, some order, a running theme in the fabric I chose? At this point I might also look at my pattern, sketch, or examine my influence to see if I think the fabric will well and truly capture it. (Sometimes I start over at this point.)

With this quilt I decided I wanted to make some value distinctions within the colours. So I started sorting my colours by value, to see how much range I had. I don't want huge value jumps, but I did want some distinctions.

As I did this I also thought this pile looked awfully familiar. So I went into the reserves - the stacks of fabric I made and set aside for a specific quilt. And sometimes those piles sit for a very, very long time. That doesn't mean they are forgotten or abandoned. They are just 'in waiting'. And one of my favourite fabric lines of recent years was waiting for the right project. Turns out, this was it.

Sympatico is now being cut and used and I couldn't be happier. It is a gorgeous organic fabric. And the colours in the line - save for the peach - are exactly what I picked out in my initial fabric pull. Serendipity.


I'm quite excited now to see if what I had in my brain for this version of the quilt comes out. It is such a simple design and easy construction that I hope my fabric selection turns it on its head, just a little.


Sign up for the two day class at My Sewing Room. October 14 and 21, 10-4.

Giant Dresdens


How fun to start a new project. It's been a while since I started something brand new, right from the fabric pull. (I have another project that I'll share next week too).

This project is destined for the lap of an almost 90 year woman. I don't usually take commissions, but my closest cousins asked if I would make something for their Baba on the other side. I had an idea I wanted to try and some Allison Glass fabric that has been sitting around forever that I wanted to use. Those two things combined into a yes to the project.


And so I'm playing, experimenting, trying something new. I'm in love. These are giant Dresdens. I had a Fat Cat ruler in my QuiltCon swag bag. I'm not exactly likely to make a cat block, but the same ruler works perfectly for 30 degree wedges for a Dresden Plate. These completed Dresdens measure about 26'' in diameter! And it only takes about an hour to cut and sew each one. Pretty good time investment for big impact. Just need to get some background fabric and sew these down. But maybe I'll make at least one more first.

Playing for Karen


So many people are on Instagram these days and many people credit it with the downfall of blogs. It may be that people love the immediacy of Instagram. Me, I love the inspiration and camaraderie of it.

I follow Karen Lewis on Instagram. She does incredible screen printed fabrics, and even sells bags and such. Not to mention she's got a book coming out called Screen Printing at Home. On Instagram I find her funny and wildly inspirational. If there wasn't a continent and ocean separating us I imagine a good old fashioned catch up with her over challah and tea. And then she would teach me just an ounce of what she does and I would explode with creative joy.

A few weeks back Karen posted pictures of a bee project she has going on. Her contributors are making rows of isosceles triangles, inspired by this incredible antique quilt. Now, I'm not in her bee. I'm quite a bad bee member, if I'm being perfectly honest. But I loved the fabrics and thought this might be a perfect small challenge. Maybe something to pull me a little bit out of my slump?

While I cannot attest to the success or failure of a life changing bit of sewing, I can say that I quite enjoyed a little rustle through my fabric and an hour of sewing in the sunshine.

Shimmer Blog Hop


One of the very first fabric designers I ever actually noticed was Jennifer Sampou. I'd only been quilting a year (almost 15 years ago). My stash shopping was very limited because I was in grad school with limited time and money for quilting. But after a few purchases I started to notice the names on selvages. And what I noticed was that most of the fabric I purchased was from Jennifer Sampou. I filed that fact as interesting and kept quilting.

Fast forward to two years ago and I am at Quilt Market. And guess who has a booth?! It was my first total fan girl moment. I briefly introduced myself and marvelled at the coincidence that Jennifer is married to my publisher. The next Quilt Market I stopped by Jennifer's Booth to say hello and we ended up chatting for well over an hour about everything - motherhood, fabric, creativity, colour, sewing, books, marriage. My first designer crush is truly a kindred spirit.

Since then I've truly enjoyed the opportunity to play with Jennifer's latest fabrics. When you listen to the designer discuss their inspiration for a fabric line the fabric itself takes on a new light, almost quite literally. Jennifer's neutral palate is inspired by her love of things that shimmer - feathers, shells, crystals, and even fools gold. The fabric itself is metallic or pearlescent (depending on your own description).

When my Shimmer fabric arrived in it was a very special shell from Jennifer. Have I mentioned how much I love shells? I have a casual collection of the shells I pick up from every beach I find. Just the interesting ones, the pretty ones, even the cracked and beat up ones. They sit in bowls and jars throughout my house. I had a completely different project in mind before the fabric and the shell arrived. At the same time, my girls took over the table setting duties. Every night they raid my shells and rather carefully place them around the table. They might forget forks, but the shells are always there.

The fabric I requested - shocker - were all the light prints in the line. You know me and low volume. But rather than play with a pattern I already had or even experiment with another inspiration, I had to incorporate my shells.


Each shell is appliquéd on the osnaburg background. I wanted it to feel like a scattering of shells on your feet at the beach. I used the technique I use to create and sew my appliqué circles. The shells come alive, or at least more realistic with the simple quilting. For the back of the table topper I improv pieced the scraps into a slab, with just a bit of aqua added for fun.

It's almost too pretty to use on the table, but my shell loving girls think it is perfect.


This is my stop on the Shimmer Blog Hop. Check out the other posts and all the fun things people have made with Shimmer. Robert Kaufman and Jennifer are sharing no shortage of inspiration with this pretty fabric.

Leave a comment here for a chance to win a Shimmer charm pack. It will be perfect for your own shell project, among others. Tell me about your favourite beach.

Giveaway open until midnight MST on Friday April 18.

Hot, Awesome Mess


Look at that quilt top, floating in a snow globe. Oh wait, that's only half the quilt. Do you know how hard it is to photograph a king size quilt top?

Yes, I made another king size quilt. I couldn't help myself. Last week I needed to flex my improv muscles. Not that I needed practice at improv. No, I needed the therapy of just sewing for the sake of sewing. Mindless, no planning play. It did wonders for my mood (and my cold). And before I knew it I had enough blocks to more than fill my design wall.


Once the blocks were up on the wall I started the puzzle piecing to get it all together. I only went by size, filling in gaps and squaring up as I went. I paid no attention to colour or direction. In fact, the only design decision I made was to make sure the feature fabric was on each corner of the finished top.

Then I made it bigger. At first, it came out to about 83'' by 103''. It seemed like such a funny size, and a few more inches meant it would cover our king size bed nicely, with extra quilt for snuggling. So I added another 11'' on one short end. It seemed totally crazy to make it even bigger, but felt right. And seeing as making this was a form of therapy it only made sense to make it the way that felt right.


This quilt began at Quilt Con last year. I was lucky enough to get a spot in Denyse Schmidt's Improv class. See more about that experience here.

About 6 months ago I made some more blocks with the scraps I had from the class and new fabrics I added at home. Then I packed them all up and they joined my WIPs. My thirty something WIPs. It was such a thrill to pull them out and put them upon the design wall. More of a thrill to get to playing again. Every night last week, after the kidlets were in bed, I entered my studio and exhaled.


Play, play, and more play. Then I totally took advantage of my time with a part time babysitter. Deadlines met for the week, I took a whole day to get the top together. Another couple of hours at night and it was done. Then another hour to add that final strip. 

Sometimes I look at the top and think it is a hot mess. And other times I get giddy with all the little bits that pop out at me. It may be a king size quilt, but there are so many tiny scraps in there. Big and small, they all play together. I do love the way it looks, but I think this quilt's value to me is definitely in the process.

Now, hopefully I can find that value when it comes to basting it.


Modern Paris


Modern Paris
72'' x 72''

Do you remember this stack of fabric? And all these scraps? Well, here is the finished quilt. A pattern published in Quilter's Connection too!


This is one of those quilts that isn't difficult, but it does take a bit of time. Loads of half square triangles and circles. I never get bored of those, even with the trimming. And all with some of my favourite low volume love. It started with the Vanity Fair fabric from Dear Stella and an orphan block from my Craftsy class. Then it all came together as a wedding present for friends of ours.

The name came courtesy of our friends, actually. They honeymooned in Paris. And they let me take these shots at their house.


This is one of those quilts that definitely whispers. The value differences in the half square triangles are quite subtle most of the time. Texture matters more than value in this case. It finishes with a very soft and scrappy look. That being said, I think this design would be incredible in high contrast. So bold, especially with the positive/negative part in the circle blocks.

To accentuate the circles I quilted it with swirls all over. And used my favourite Aurifil 2600. That grey goes with nearly everything, I use it all the time.


Thank-you to Dear Stella for providing the initial inspiration with their fabric bundle of Vanity Fair. It is quite the pretty line and it was wonderful to work with.

And congratulations to our friends, may this quilt keep you even warmer as our winter keeps on.