scraps

More Scrap Sorting By Colour


Sorting scraps is a constant thing. You can't just do it once and expect it to perfectly maintain itself. Unless, of course, you are awesome and put every single scrap away the second it becomes a scrap.

I will always advocate sorting by colour. It is what Amanda Jean and I encourage you to do in Sunday Morning Quilts. By far, it is the easiest method not to mention the most inspiring. We also talk about having a special category or 3 for uniquely sized pieces like strips, little snippets, or triangles.

While teaching a Values Plus class recently I, with my students, decided to try piecing based on colour as well as value. I was so excited by the results I took my scrap sorting to the next level. I took my big bag of strips and started sorting them by colour too.

The process started on the front steps, while the kids rode their bikes in the evening light. My little guy decided to stop his maniacal ride to help me. But he was so, so tired that he had to do it laying down. Hence the piles of colour radiating around him. Awesome kid.

And now I have one more section of scraps all sorted by colour. It really is a good thing.

Sanity Sewing


Sometimes you just have to get 'er done.

This quilt has been in the works for a few years now... And I got on top of finishing it a few months ago (well, finishing the top). I was making good progress with some commitment when I hit a snag. I'd made a mistake. My very last block in the very last row was the wrong one. There are two block styles in this quilt and I used the wrong one in this spot. And all I had to do at that point was sew the rows together to finish the top. Annoyed with myself and frustrated, the quilt top sat for weeks at that juncture. Because all I had to do was make a slab, draw a foundation, sew a new block, remove the old one, attach it, and then sew the rows together. It sounds like a lot of work, but it wasn't. I was just in a mood about it.

This week I found myself in a real need to sew. After a few weeks of a bad cold that wouldn't go away I longed to get to the machine. Those are the moments when I usually start something new or default to random improv. Instead I forced myself to make that last block. And it took me about 30 minutes, if that. Not counting a break for Hot Wheels with my boy.

Then I was struggling to get the rows sewn together. With all those slabs, the angles, and some skinny bits on the edges each row is bulky and lining things up was tough. Not to mention that I kept the freezer paper foundation on each block because of the crazy amount of bias edges. Then I caught Bari J. Ackerman on a Periscope broadcast extolling the virtues of glue basting (a la Christie Fincher). Bingo!

I've used glue basting before for Paperless Paper Piecing in a class with Christie. And I've heard of other people glue basting for regular piecing. It did not occur to me to use it this way. I'm so happy I saw that Scope because it totally made it easy to get this top together. A thin line of glue in the seam allowance instead of pinning (or hoping for the best) holds the fabric in place, once heat set. Then you can go ahead and sew your seam.

And get the quilt top done.

Right now this top has the temporary name of Shh....


A lot of Snippets on Dates. A lot.


All the little bits. All together and everywhere at the same time.

Ages ago I started sewing snippets together. Just two little bits of fabric sewn together randomly. An evening of pressing and I could sew pairs together. And sew more together. Then I put it all aside so a rainy day. Rather, for the motivation to do more.

Motivation hit me last week. It is all due to Amanda Jean and her decision to plan a Scrap Vortex quilt along. I also needed to come down from Market and sew for the sake of sewing. So one day she and I spent some time sewing and chatting. There was a lot of chain piecing and a lot of pressing involved to get what feels like millions of pieces sewn together.


At the beginning the bits come together quite slowly. It feels like you are sewing forever and getting nowhere. Then suddenly you have these big chunks of fabric that look like something. Crazy, wild somethings filled with tiny pieces of fabric! You also have crazy wild somethings all over your sewing table, design wall, and floor. You are covered in threads, more so than at any other time, but deliriously happy.

Then you are not. Because you are covered in threads and there are bits of fabric everywhere. Everywhere. And the fun chaos that you gave order too only seems like chaos. You can square it up, sew them together and have something that looks like a quilt top. Order out of chaos. But there are still load of snippets (are they multiplying at night?).

After a week of sewing I've got a large baby size quilt top together (44'' x 50''), plus loads of slab sections that could be added, and still half a basket of snippets. Not to mention that every single other time I sew more snippets are added. I love the process, I love where I've gotten to, but I need this to go away for a little while. Sometimes the chaos is just a bit too much.


I adore improv, it is my default quilt language. I will never get tired of scraps. Surprisingly though, this past week has been a roller coaster of emotions with respect to this sewing. I got to the point where the mess drove me cranky, where I talked back to the errant threads, and nearly threw out all the scraps. It was just so messy. I'm okay with not knowing where it will go, but the storm before the calm really got to me.

All that being said, I know that this will get bigger, be more. All in good time.


Sarcasm and Orange


We are a sarcastic household. So much so that The Monster's third grade teacher has made a point to comment that most kids don't fully appreciate sarcasm until they are closer to twelve. Not our kids. (She was fully getting it when she was 3.) So when my husband constantly tells the kids "Orange is for nerds!" whenever they wear orange they all know that he is being a smart@ss, not serious. Especially when he says it wearing his own orange jacket.

Not surprisingly, my son's favourite colour is now orange.

After cleaning up my studio this week I set about to sorting out some storage. One of the bins I opened contained a few of these blocks - samples for the Scrapper's Delight class I sometimes teach. With our family conversations and my boy's recent birthday I felt totally inspired to combine everything into one bright quilt for him. I added more fabrics from my stash and the scrap bins to compliment the first few blocks. Each block is currently squared up to 12.5'' x 12.5'', just like the original pattern.

How fun is this quilt? I am having fun making more blocks. That's a good thing, because to get this up to bed size I need to make 49 of these in total. But the blocks are super easy and a great way to unwind at the end of the night.

Vintage Treats for Sale


A few years ago I was gifted with a random box of sewing things. Our of it came a wonderful quilt - well, a top that I finished and gave back to the original owner of the box. Otherwise, the contents of the box sat in my sewing room. Once I took out a zipper but that's it. It's time to move on. There are absolutely wonderful little treasures in the box, but they need to go to a more interested home.

Check out my Etsy shop for a complete listing of items for sale from the box. Listings include vintage quilting fabric scraps, dress making scraps, notions, patterns, and clothing. A few items of clothing are finished, most are not. The unfinished ones generally need waistbands or closures only. And the collection of materials in incredible.

I'll admit, I was tempted to keep some of the clothing and use them for fabric, but I just couldn't do it. So much work had already gone into them that I couldn't bear to cut them up. But if you want to after purchasing then go for it!

After shipping and handling I will be donating 50% of the proceeds to Little Warriors. My neighbours that passed on the box were supporters of that charity so it seemed appropriate.

Speaking of shipping. I know it is expensive. Thank you Canada Post. If you buy multiple items I will adjust shipping based on real cost after purchase (issuing refunds, if necessary). And if you are local and want to pick up, then there will be no shipping!

Now, just a tease of what is available for purchase in the shop.


Round and Round Update


It felt like months since I did any improv. In truth, it was only a few weeks, but it felt like months. After following clothing patterns and drafting quilt patterns my improv muscles were twitching. Not to mention I was having a pretty crappy day. So I cracked an afternoon beer and dove into my scraps.

Seeing as these blocks are 16.5'' x 16.5'' and my scrap strips are anywhere from 1''-4'' wide, it takes a bit of time to get a block done. But in less than 2 hours yesterday I had 3 more blocks done. And my mood was infinitely better. (Of course the mood improvement may have also been because of a random text from a friend telling me that she saw alligator road kill in Florida and it made her think of me. Don't ask why, but that made me giggly.)

So now I am up to 16 of these blocks. I could stop now and have a good lap size quilt. I'm going to keep going though. I'm always thinking bed size now for the kids' beds, so I will make 9 more blocks. That will give me an 80'' finished quilt, perfect for their double beds.

And perfect for all mood improvements.


Values Plus Quilt


Values Plus
36'' x 48''

Such a fun little quilt. And the only reason it is little is because Amanda Jean talked me out of going bigger. She was right, especially considering this is a class sample. Let's face it, it is much easier to travel with a smaller quilt.

I did find myself quite addicted to making these little blocks. It was made purely from scrap strips. The only decision I made in making the strip sets was making sure that I had value contrast in the pairs. After that it was anything goes! The real fun in playing with the layout.


In the end I went with this colour focused layout. Four patches where the dark fabric was all the same colour, forming a wonky plus sign. The result is bold, colourful, and far more organized. Because the blocks are small (3 1/2'' square) finding order was important. It also makes the value contrasts pop a lot more.

This quilt is a sample for an updated Values class. We've all seen - to great effect - the values quilts based on half square triangles. For this I wanted to play with a different shape and show what can happen when the effect is a bit more subtle. Then, how we find order and design in it.


This was the first quilt I quilted using a stitch regulator. Not sure about it yet, it will take some getting used to. But no one is perfect right out of the gate! With all that pattern I went for a simple stipple in Aurifil 2600. You aren't seeing the quilting on a quilt this busy as it is.

I totally lucked out with some leftover binding. There was just enough to get this quilt done. A little bias fun to complete the quilt.

Solid Sunday Morning Top


The nice thing about so many Quilts Under Construction is that I can work on nearly anything, depending on the mood I'm in. Last week I folded up all the quilts in the house. It made me realize just how many low volume options there are here. It made me want to play on something decidedly NOT low volume. Variety is the spice of life.

Not to mention that I want some quilts on the girls' beds that are not light and show every spec of spring mud and dog hair.

That meant I pulled out my all solids version of Sunday Morning. It was also the kind of mindless sewing I needed after tackling some garment sewing.

One night I made a few more sets of blocks. After counting I realized I was only 5 blocks short of making this a full size quilt. Rather than dig out my old machine for the girls I set them to laying out the quilt. They LOVE this part of the process. After bed I got the last blocks made and started assembly.


While they were at school yesterday I finished the top (and back!). It was a lovely nearly spring day that saw us stay at the park for 2 hours after school. Needless to say, it was perfect for photographing the finished quilt. A handful of kids took a break from their play to help us snap the picture. I love that their friends have a tiny hand in the finished quilt now and they got to show it off for them. (Although we couldn't necessarily remember who made what block.)

Working with solids is a challenge, for sure, for me. I adore prints. It is also, however, a welcome break. Exercising my visual cortex in a new way was like trying a new workout or different dish at your favourite Italian place. It's good to break out of the norm once in a while.

I am ever thankful for my Calgary Modern Quilt Guild friends for donating scraps to this project. There is no way I could have collected that variety of solid fabrics. There was no rhyme or reason to the colours chosen or the order they were sewn together. Just grab and sew kind of piecing. I did slow down and become intentional with layout. After the girls did their thing we moved a few things around together, but then I just made sure there were no bars of the same colour next to each other or all the whites or blacks bunched together. I needed to make sure it had a bit of balance.

Now, let's see if I can get them to help we wash the dining room floor so we can baste it together this weekend...


Low Volume Shoeman's Puzzle Update


This week's old project to work on was these Shoeman's Puzzle blocks. I was originally inspired by Denyse Schmidt's version in Modern Quilts Traditional Inspirations. Hers, however, is a two colour quilt.

The low volume prints mean the pattern is quite subtle, but it is there. That's because I used various shades of solid white for contrast. Print will always contrast with solid (as long as it isn't too tiny of a print) so the design still comes through.

I am so in love with these blocks. A lot of the quilts I've finished in the last while I've given away, or they are for teaching. This one, this quilt will be mine. With the slabs it captures the essence of my first book, especially because it is mostly made with the scraps from second book. Most of the slabs get made while I'm teaching - I use these as demo sewing. I feel it represents everything about my quilting as a career to this point. There is no way anyone else will get this quilt.

There are still more blocks to make. How many, however, is still up for debate. In my head I'd always pictured it 70'' x 70''. A generous lap quilt for me. For a brief moment I considered making it 80'' x 80'' so it could go on one of the girls' beds, but thought better of that. When the rows are an odd number the pattern is even. Normally I am all about the symmetry, but I kind of prefer the look with the uneven number. 50'' x 70'' is fine for a lap quilt, but I don't think that is enough to get the full effect of all the secondary patterns formed by this pattern.

So, I guess that means I have at least 21 more blocks to make. At least.

The Need for Bigger Quilts


#gokingorgohome

That's the hashtag I've been using on Instagram whenever someone asks if they should make a quilt bigger or not. I always default to go bigger.

Frankly, that's a bit of a problem. Sometimes I start quilts just to play, to try a technique. There is no good reason to make it a queen sized bit of play. Well, other than then it would be big enough to put on a bed instead of just over legs on the couch. But if I'm just trying something out why do I insist on making it so big? This MAY have something to do with having over 40 quilts under construction...


Take these blocks for example. They finish at 10''. I'd always pictured that I would make 49 of them, to make a 70'' square quilt. But now? I think I might have to go up to 64 or even 81 blocks. Looks like I have a lot more sewing to go as I only have 28 of them so far.

Much like some people find it tremendously difficult to work on more than one quilt at a time, I have a very hard time making a small quilt. Since I said that last week I've been thinking about why that is the case.

I don't know why, it's just what I do. Possible reasons:

... bigger quilts are more functional.
... there aren't as many babies being born in my circle. Although, I think that isn't the case over the next few months.
... I'm a sucker for punishment.
... while I love hand binding, doing so on a small quilt feels silly.
... most of my ideas need to be big to be truly expressed.
... small quilts feel like a cop out on making.

What about you? What size do you tend to make? I'm not judging anyone else's choices, just trying to figure out my own crazy logic.

Lately I've been thinking of even bigger quilts. For my newsletter someone asked me the question about deciding what to make. In my answer I mentioned the need to make bigger quilts. I've noticed that many of my recent finishes fall into the twin/lap world. If they are square they tend to be 70''-76'' finished.

But, we just bought the kids beds for the first time and they all got double beds. Those 76'' square quilts don't quite have enough overhang for my liking. The kids are happy, but I want to see less of their sheets when the bed gets made. (Yes, I am that anal.) So now my brain is automatically going to 80'' square at a minimum.

What's a girl to do? Make more blocks. Make bigger blocks.

Values Plus


We've all seen a million half square triangle (HST) Values quilts. I, for one, don't get bored of them. I think that is because no two are the same - from the fabrics to the layout. However, I wanted to try something different. I was actually prepping for my upcoming class - Values Plus. In that class students will play with values and more than just HSTs. The class is about experimenting, not just creating a HST quilt.

So I dug into my jars of strips and strings. All random fabrics, random sizes, and only paired up by value. That is, as I grabbed strips I made sure that they had a value difference. Sometimes it was subtle, sometimes it was bold. That's generally how I approach pure value work. Subtlety makes it a bit more interesting.

After sewing the strips together I picked a size to trim to. It was mostly dictated by the width of most of the pairs. So 3 1/2'' square it was! And then I kept sewing, and sewing. And trimming and trimming.

I played with a number of layouts. More of a rail fence setting? Totally random? Strips of light/dark? After a long chat with Amanda Jean I went with this final set up. I also decided to create these little groupings on colour, a four patch.

No word of lie, it wasn't until I was posting these photos here that I realized that they looked like plus signs. For my Values Plus class. Get it?

I'm such a nerd.


Modern Meadows Quilt


Inspiration to finished quilt. This is Mountain Meadows. Fully improvised, made with scraps from my own stash and shared by quilty friends and blog readers.

It started with a family hike. The wildflowers were in bloom all over the mountains. Little pops of colour dotting this hillsides. And so many greens. Not to mention the light and shadows dancing across the meadows. I wanted to capture the visual as much as the feeling. 

I think I did it.


Mountain Meadows
52'' x 68''

We went to Banff yesterday, a pleasant afternoon of brunch, a soak in the hot springs, and a little jaunt to take these pics. As you can see, I missed the window of opportunity for photographing this with the real inspiration. Snow has arrived!

But those grasses were still poking through the snow. And the sun played across the field. My kids threw snowballs at each other while Hubby helped me take the pics.


I quilted this one on the long arm. It isn't a big quilt but that quilting is dense. It took me nearly 5 hours straight. I wanted to mimic the movement of grasses. And here and there is a flower. Not difficult, but time consuming to execute. For thread I used Auriful 1147, a perfect olive green. It blends in parts and pops in others.

For binding I went with more green scraps. There was a moment where I thought about facing the quilt instead. I see this quilt, however, as the beginning of a series and part of me wanted it to be very, very clear that it is a quilt. So it needed a traditional binding. I did roughly match the binding with the top. If it was a dark section then there was dark binding, light got light. I didn't obsess about it perfectly matching, but made it work.


How I love a high contrast back! In this case the contrast comes thematically. This fabric is Jay McCarroll's Center City line. He was inspired by urban centres, so talk about contrast with my inspiration. But I had to have it and this quilt sat until I tracked down enough yardage. I'm thrilled with the result because of the contrast and because the quilting blends so nicely.


Remember, if you want to know more about this quilt you can listen to the Webinar I did with the Modern Quilt Guild on Improv With Intent. It's free to all Modern Quilt Guild Members.

In the Webinar I discuss the process of making the quilt - from inspiration to the final top. It isn't as straightforward as one might think. If you are a Modern Quilt Guild Member you can access the Webinar for free now, even if you didn't join me last week. To access it make sure you log in and join the Community site. Then click under Resources and there it is. Not only do you get to see more images and learn about my process, you get to hear my awesome Canadian accent.

Sunday Morning Quilt in Solids


Hello New Quilt! Despite my best intention to forge ahead and finish the stack of quilts awaiting binding, quilting, and more, I HAD to start a new quilt. And I'm totally justifying it because I wanted a new sample for a class.

Do the blocks there look familiar? It may be hard to pick out, but these are the same blocks that are in the Sunday Morning pattern from Sunday Morning Quilts. The original quilt is full of low volume goodness, whispering of Sunday morning delights. I think it might be the most made quilt from Sunday Morning Quilts (after slabs). At least, it is the one I see the most online.

I'm teaching Sunday Morning in a upcoming class at My Sewing Room. While I knew I wanted to make a new sample for the class - to show that you can indeed make it without using low volume fabrics - I wasn't entirely sure what fabrics I was going to use. Then I saw Amanda Jean playing with her solid scraps. Now, if you've been here for any length of time you know that I am not naturally drawn to solids. But her play with scraps got me jazzed. I NEEDED to make something with solids.

So I pulled out my leftovers from the preschool teacher's quilt and 'made scraps'. After making 5 blocks I realized I wasn't going to get very far with just my selection of solids. So I put the call out to my Calgary Modern Quilt Guild friends. When I got to the meeting last week I was handed bags and bags of strips and scraps. I don't even know who all shared with me, but I know that I am extremely grateful!


Now I have practically every colour under the rainbow and all in between. I can tell by feel that there are many different manufacturers in this pile. And it all works so well together.

My initial plan was to just make a small quilt, something easily transportable for classes. It goes against my every nature to work small, but I was determined to make it this time. Portability, portability, portability. But plans change.

While I was making a few blocks the girls sidled into the sewing room. Curiosity and a need for a little snuggle led to a full blown sewing lesson. The week before I'd taught them both how to use the machine all by themselves - with supervision. So when they asked to sew I decided that they could help me make blocks as opposed to starting a new project with them. What began as a selfish desire on my part to not clean up turned into a family project. They are so into making the blocks. They carefully select their next strips, they chain piece and press all by themselves, and yes, they unsew when necessary. There are still some lessons to learn about seam allowance and leaving the iron in the correct position, but we're getting there. 

So now, I don't want to make this just a small quilt. This is well and truly a family quilt and so it must grow to accommodate all five of us. Besides, I think it is getting pretty gorgeous and don't want to stop making.


If you are local and interested in taking the class, call My Sewing Room to register. It runs in the evenings on October 16 and 23. 403-252-3711

Y2K Charms as Leaders and Enders


My oldest UFO is finally turning into something! Serious progress here, folks.

These are the the Y2K swap charms I found in the garage this summer. I spent a lovely day - in between snack making, diaper changing, water balloons, and policing - getting these sorted. I decided to go for a simpler version than my original sketch. In part, because I knew I would never get it done if I got all fancy. And, in part, because the light/dark distinctions became pretty obvious.


There are certainly some special fabrics in the group! Predominantly calicos because that's what we did and what was available even in the 90s. Some novelty prints too. And a few special Australian fabrics in the mix. Anything goes.

That is how I am approaching the quilt making too. Simply sorted by value, that's all. I found a box lid that fits all the charms. It sits on my sewing table, at the ready. As I sew on other projects I grab from the box, as needed, to start and finish a seam. These have become my leaders and enders. So, instead of cutting threads at the end of the seam I feed a set of charms under the presser foot. Then I snip the growing chain off every time I finish another seam and add a charm. I prefer to make whole rows this way, rather than simply sewing pairs. It helps me keep track of the length and nothing is likely to get lost.


Each row will have 40 charms. Somewhere around 25 I switch from darks to light. That's because I have about two thirds dark and one third lights. I change it up and don't worry too much about the exact number. In total there will be 50 rows. That will finish out at an 80'' by 100'' quilt. Pretty big!

I have no idea how long it will take me to get to all 50 rows. I'll just keep at it. That is the good thing about a leaders and enders project, you end up making most of a quilt top without really thinking about it. I can say that these Round and Round blocks end up with me making progress on a row because there is a lot of stopping and starting with each strip added individually. As I make those blocks one at a time (although you could certainly chain piece them) I use the leaders and enders a lot.

Just keep sewing.


Round and Round


Okay, so I didn't get rid of ALL of my scraps. I did hold on to the two big glass jars of strips and strings holding court in the studio. They were overflowing with leftovers from projects, binding, and backing. Augmented by a bag of scraps my students in Nova Scotia gave me last year and a shipment of Botanics strips from Carolyn Friedlander, they were in danger of taking over a certain corner of the studio.

Then I saw this quilt.

It hung out in the recesses of my brain for a few weeks, taunting me with its movement, tempting me to test its construction. I tried to make it go away, to convince it that I had other projects to finish. But it wouldn't listen. And a listless and stressful end to summer for me brought on a need to play. So I decided to make just one block, just to see what happened.

Well, like it is a physical impossibility for me to eat just one cookie or have just one piece of chocolate, I couldn't make just one block. The movement, the energy, the use of these scraps. They all add up to a heck of a lot of fun.

Each block measures 16.5'' square. I probably should have made them on a foundation, but I didn't. So I'm treating them carefully and only making more to add to the design wall. I've started with 4, 5, and 6 sides polygons. Maybe even 7 sides. It goes together, roughly, like a log cabin. Adding one side at a time. Sometimes I add a small bit, sometimes a long strip. Eventually they have to be squared up so I'm getting some odd bits at the end. I'm learning to keep at eye on the edges before I get up to size. Doing so saves me sewing things I will end up cutting off, as well as avoiding skinny bits along the edges.

Round and round I go, where I'll stop nobody knows.


Excuse the horrible photos. It is snowing today. No light in the studio.

Gave Away My Scraps


This summer was all about cleaning up, purging, and moving on for me. I'm almost done a massive garage clean out where only garage related items are staying in there. Slowly but surely we are emptying the house of frivolous crap. And one day last week the need to empty my sewing room hit.

I store all my scraps on the shelves of my cutting table. My storage bins were kind of bursting, my glass jars were unable to keep their lids on, and the floor was littered with fabric. It was kind of insane. An honest craft room shot was required, but when the mood hit me to clean I couldn't even be bothered to stop and go upstairs to get my camera!

All of my colour sorted scraps got put in bags and stuffed into this box. And another bag. I had intended to list scrap bundles for sale, but decided I didn't even want to go through that. Not knowing how many local followers I have on Instagram I posted a pic there, with the words FREE TO A GOOD HOME. The only caveat was that the new owner had to pick them up from me. Within minutes I had a text from a friend who is a preschool teacher and a local quilter who just joined our modern quilt guild. Two days later all the scraps were out of my house.


Some of the fabrics there had been used many, many times. Some of the fabrics were at least a decade old. There were large pieces and small, in the entire rainbow of colours. For the record, that is a box that would fit 30 of my books in it and those are the Large size Ziploc bags.

It's just that I was kind of done with them. I kept seeing the same fabrics when I went in the bins to look for a bit of orange or grey. To be honest, they didn't get me excited anymore. And if I don't want to use my scraps then something is seriously wrong. I so needed a fresh slate. And by giving them away I was able to give someone else new inspiration and even some kids a host of possibilities. And the fabric has new life in someone else's hands. Have fun @quiltcrazy!

Now to get down to the business of creating new scraps.

The Oldest UFO


Generally, I like to call my unfinished projects WIPS, or Works in Progress, not UFOs.  This is because I actually like having a catalogue of things to pick from when I get the chance to sew. It doesn't stress me out - usually.  But this, this project must definitely be called a UFO.

I've been quilting for 16 years now. This project is 15 years old.

Going again into the Way, Way Back Machine this project started in 1999, when people were all up in arms over Y2K. Quilters, of course, put their positive spin on it and started swaps. Put 25 mini charms in an envelope, repeat that 80 times, and swap them out. Bang, 2000 charms!

These days people call it Scrap Vomit. I call it a bag of envelopes I found buried in my garage.

(To find out what else I found in my garage check out my Instagram feed. Oh boy. #thingsifindinmygarage)


The smart people with their Y2K swaps took the charms as they came in and sewed together the 25 into one block. Then they were able to quickly put the quilt top together, and keep things manageable. I, of course, wanted to get all fancy. I have sketches and math on trying to figure out creative ways to put my top together. And that's why they are all still in envelopes.

Now it is time to move this into the WIP stack. But me, being me, I need to catalogue all of this first. Into my sketchbook will go the addresses as I unpack. And then I think this will become my next Leader/Ender project. Let's hope it doesn't take another 15 years to finish this!

Update: I found a book where I wrote down all the people I swapped with! Now to just get these organized in piles.


Did any of you participate in a Y2K swap?

Mountain Meadows Quilt Top


This is Mountain Meadows. A loverly quilt top finally finished. I had to go in the Way, Way Back machine to figure out when I started it. My initial sketch and images were made 3 years ago. And I collected the fabric over 2 years ago to make a few blocks. Then it sat and sat and sat. We had the great fortune of a handful of mountain trips this spring and summer and the original inspiration of the mountain meadows was on my mind.

When The Modern Quilt Guild asked me to do a Webinar this quilt popped into my head. Pulling it out and working on it helped me formulate the presentation: Improv With Intention. So I worked hard to get it done in time for the Webinar. It was well worth the effort.

(It measures roughly 55'' x 75''.)


These were my original inspiration images. Hikes in the mountains on sunny days. Meadows filled with small, colourful flowers. Expanses of grass and weeds and plants in varying shades of green. Vistas so beautiful but little tiny bits of life stealing attention. Just how to capture that in a quilt?

In the Webinar I discuss the process of making the quilt - from inspiration to the final top. It isn't as straightforward as one might think. If you are a Modern Quilt Guild Member you can access the Webinar for free now, even if you didn't join me last week. To access it make sure you log in and join the Community site. Then click under Resources and there it is. Not only do you get to see more images and learn about my process, you get to hear my awesome Canadian accent.


It was actually quite appropriate that this quilt was revealed through The Modern Quilt Guild. All of the green fabric in this quilt was generously given to me by quilters, readers of this blog. I knew I wanted green solid scraps and I had absolutely no green solids. To buy them all would have been impossible. So, thanks to the internet I just asked if anyone was willing to share, and boy did you! Packages arrived for weeks and I had a lot of fun sorting through and organizing by value. Some of you sent pieces larger than 1/2 yard cuts! It was so generous and shows exactly how the spirit and kindness of quilters, not to mention the creativity, is fuelled on line. Exactly what comes to mind, for me, when I think of the Modern Quilt Guild.

Thank you to everyone who contributed. I truly appreciate it.

Friday Favourites - Scrappy Fabric Rug


It's awesome when friends just get you. They know what you need, when you need it, or anticipate the joy they can give you. After the last few weeks it was so perfect to have this awesome rug arrive in the mail.

Amanda Jean made it for me. She is such a generous person and I'm really quite lucky to consider her a friend. Now, she may have finally got tired of me talking about how much I wanted one of her scrap rugs. Or maybe each of her showers had their own already? I'm going to go with she was just being her awesome self. It was quite a surprising birthday present.


Right now I'm not sure where to put it. I actually just did some spring cleaning and rearranging in my living/dining room. So it sits in the now dining room, hosting an up cycled table. It sits, rather like its own piece of art, in front of the picture window. Seems like a pretty good spot for now. That way I get to see it every day and think of my dear friend.


Now, I am no expert in knitting or crochet. That means I don't know exactly which technique she used to make this one (I think it is crochet?). But she has provided tutorials for both crochet and knitting one of these rugs. What an amazing use of scraps!

Inuvik Trip Part 1


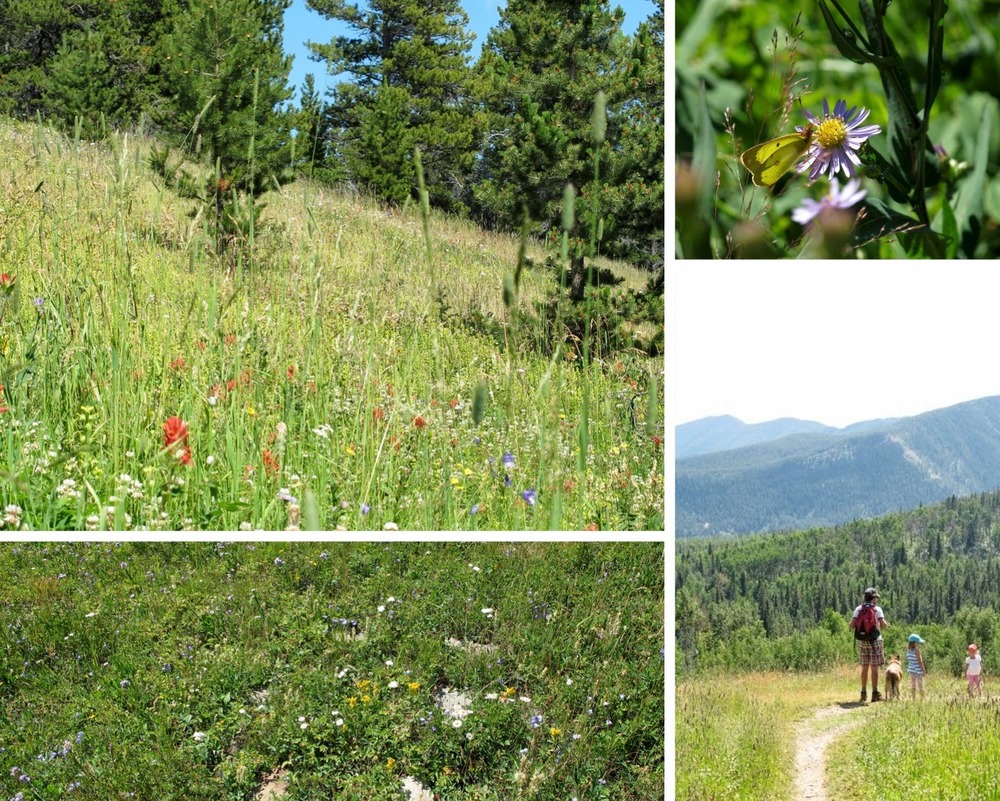
A week ago I was driving the ice road from Inuvik to Tuktoyaktuk. A week before that I was snorkelling in the Caribbean. And this morning I'm sipping tea in slippers and listening to Motown. Have I mentioned before that I love my life?!

One of the things I absolutely love about my life is the chance to teach quilting (and travel to do it). Being in a classroom full of people who absolutely want to be there, whether they are there for a new experience or just a weekend off, is an energy boost for me. You can't help but ride their enthusiasm. And my weekend with the guild in Inuvik was unlike any other.

There is just so much to share about my trip to Inuvik that I have to break it down into two posts. It was such a phenomenal experience. Up first, the class.


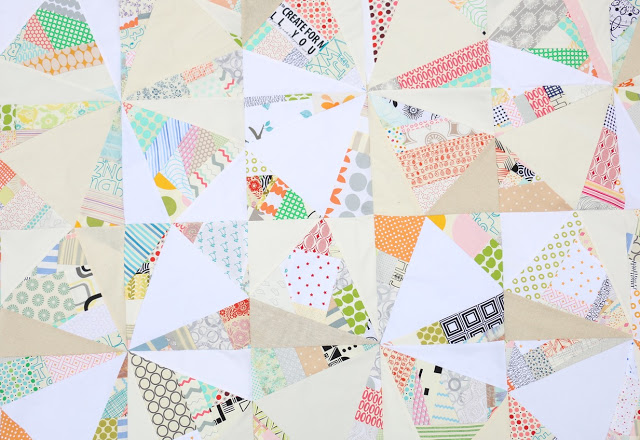
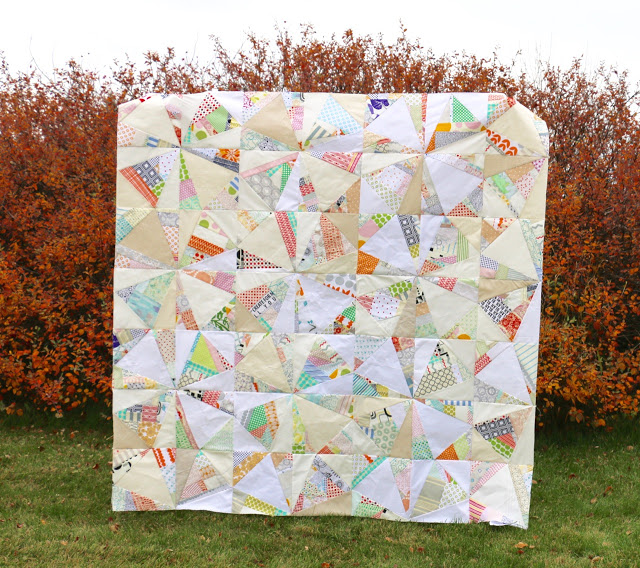
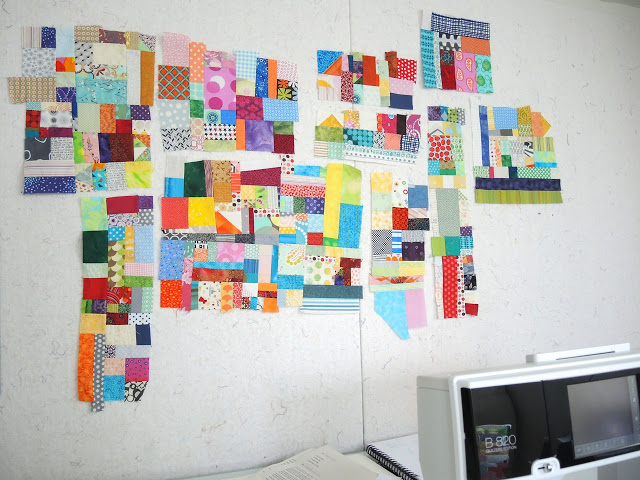
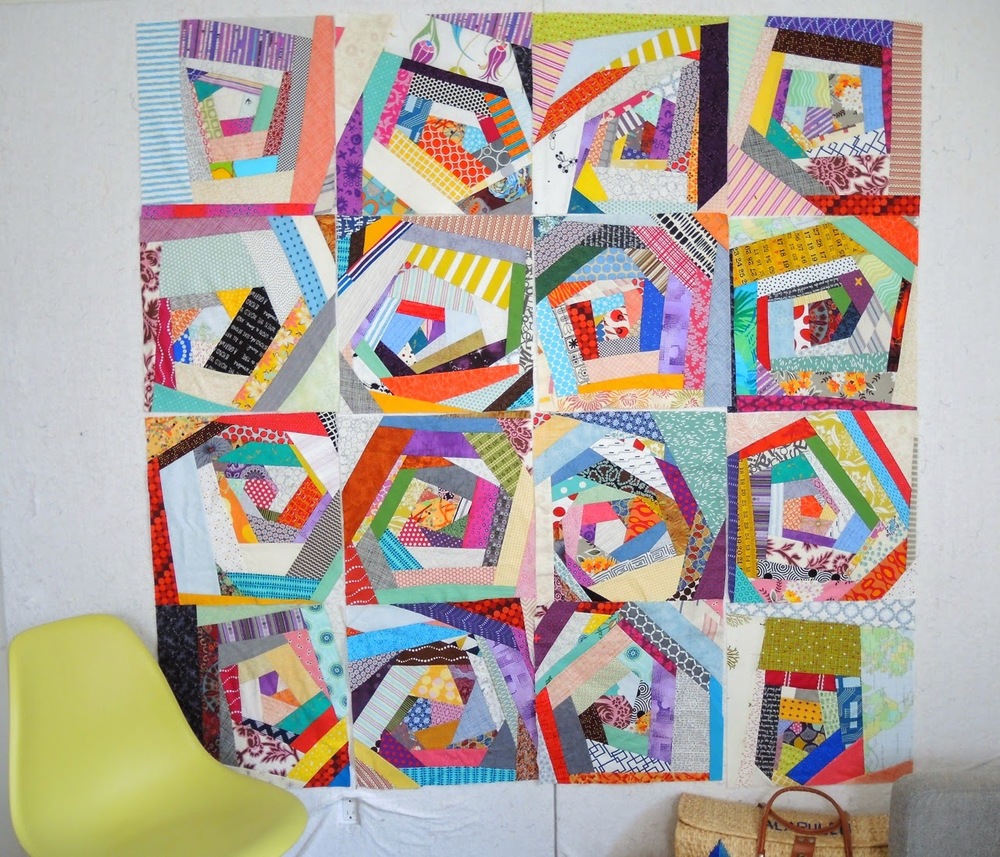
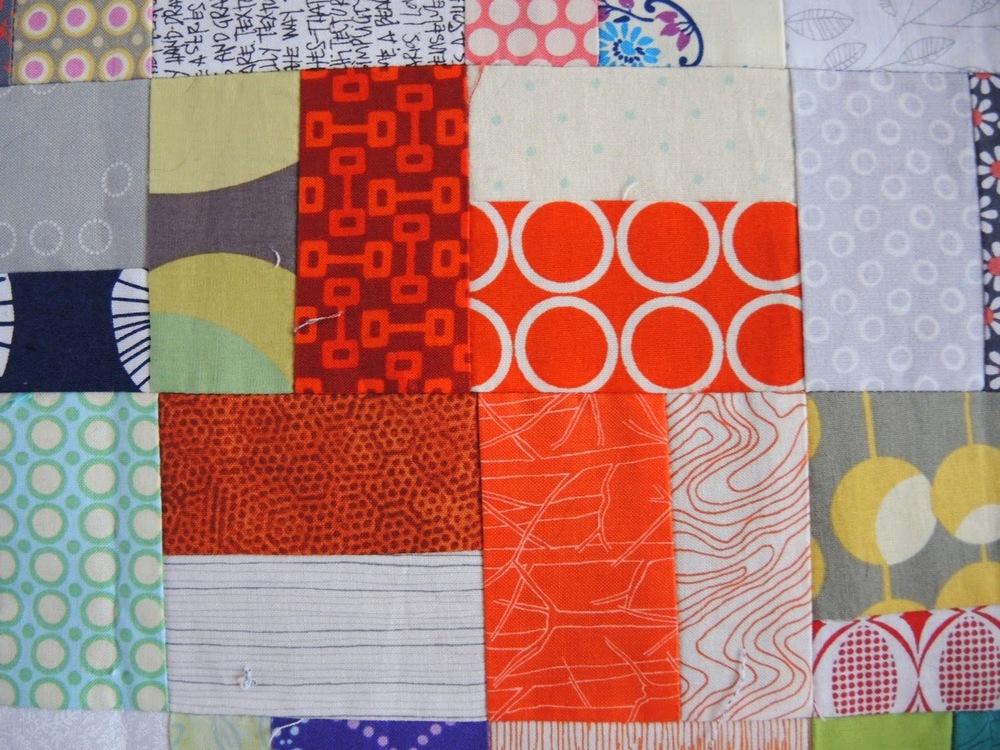
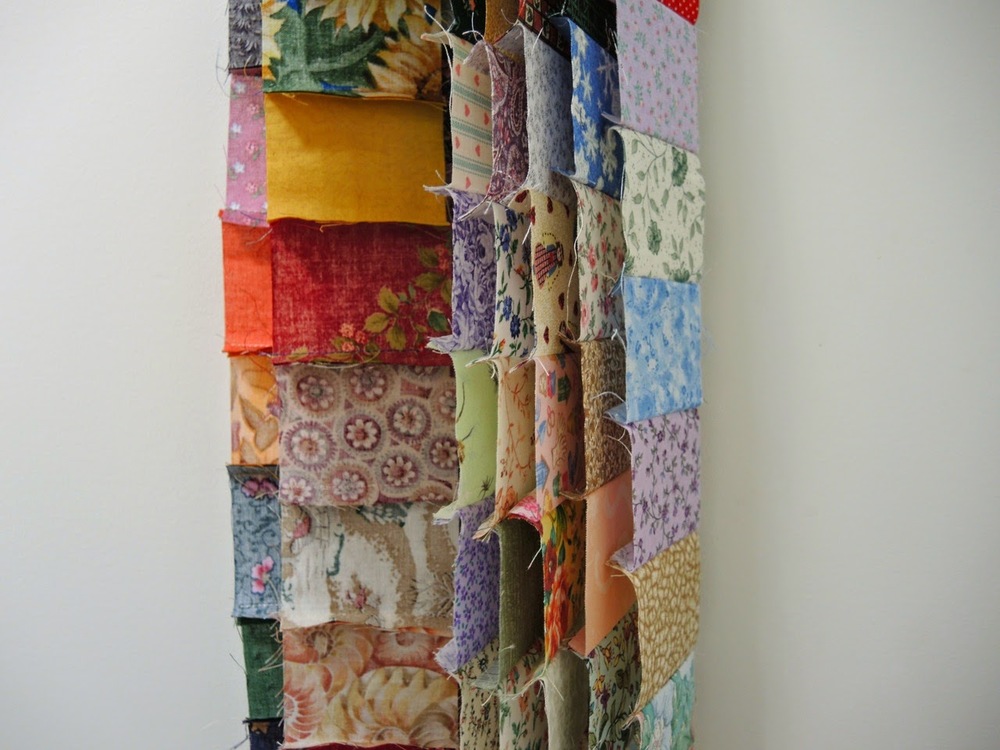
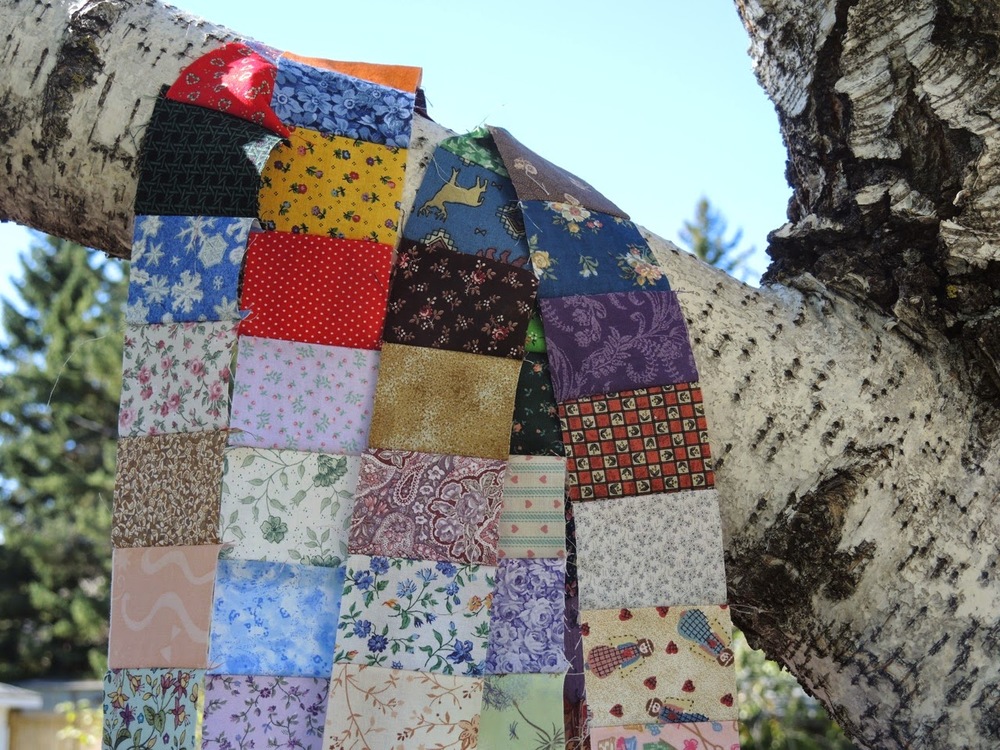
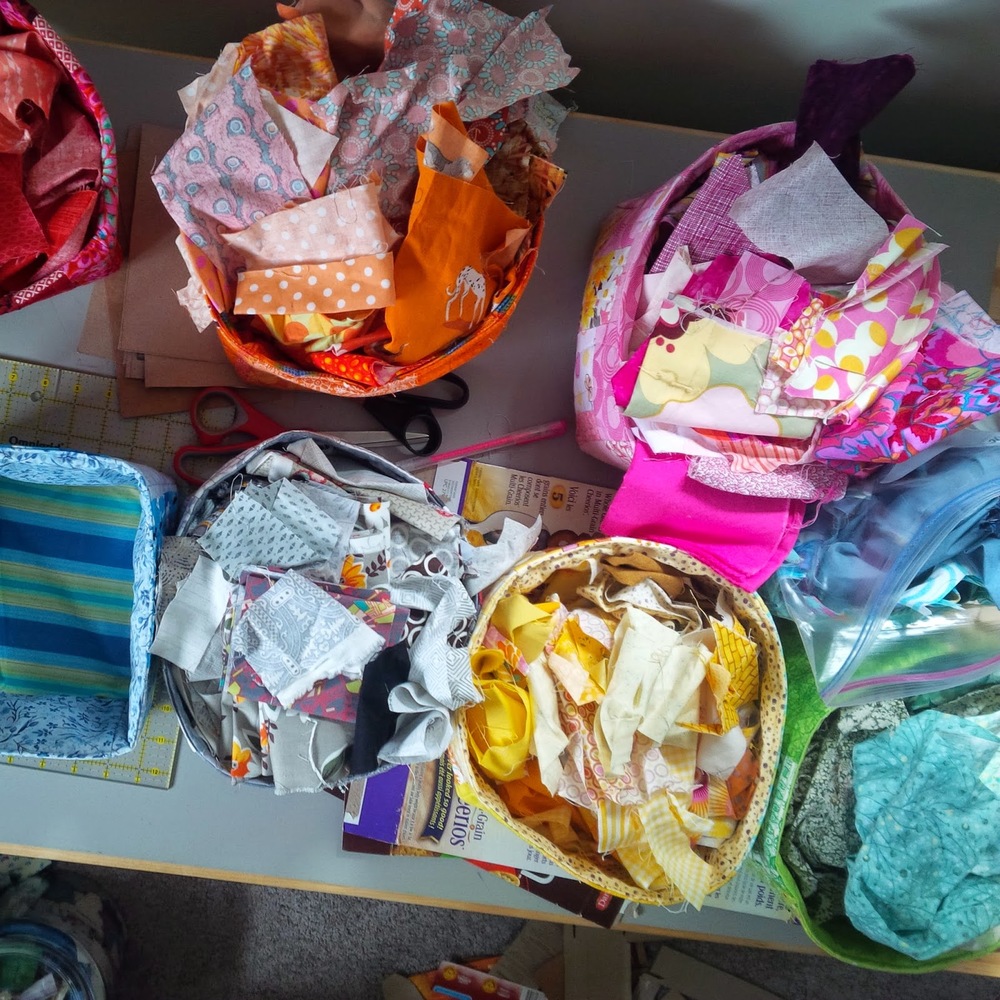
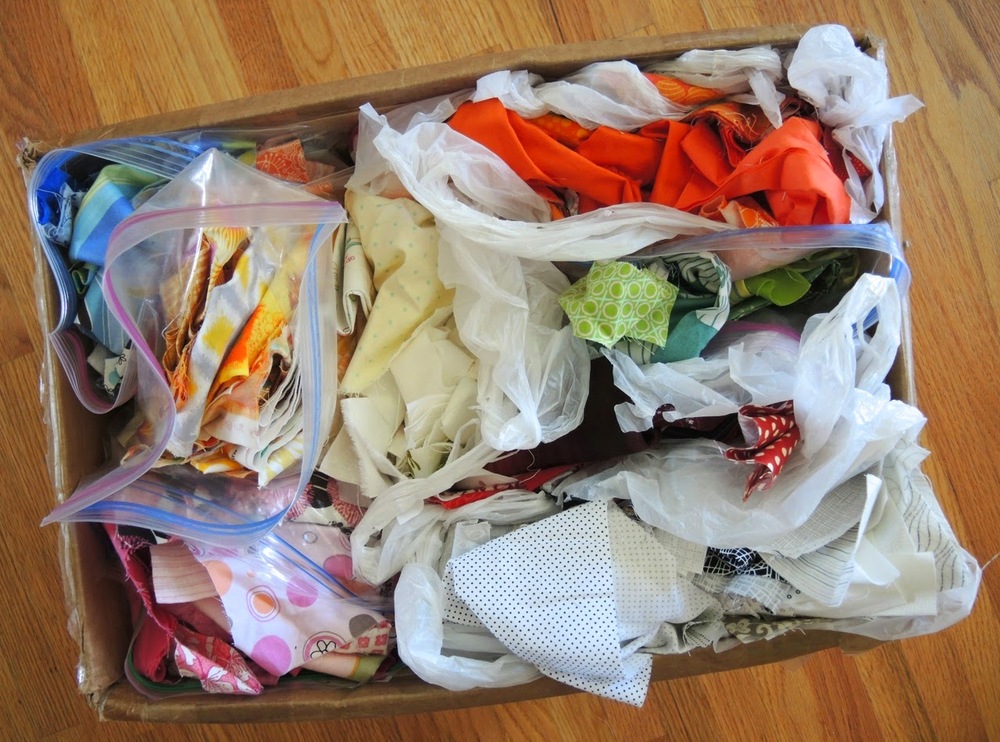
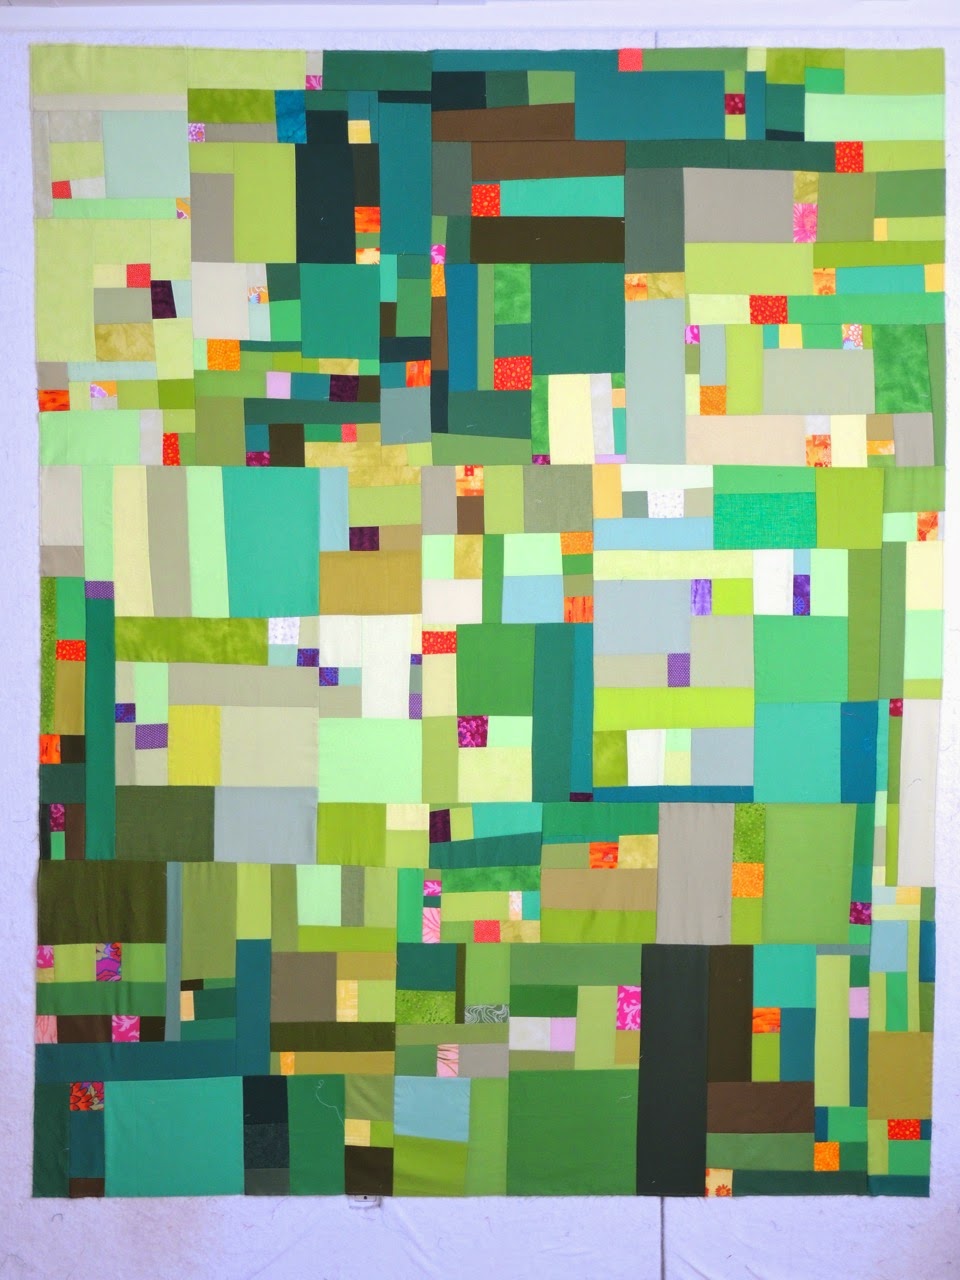
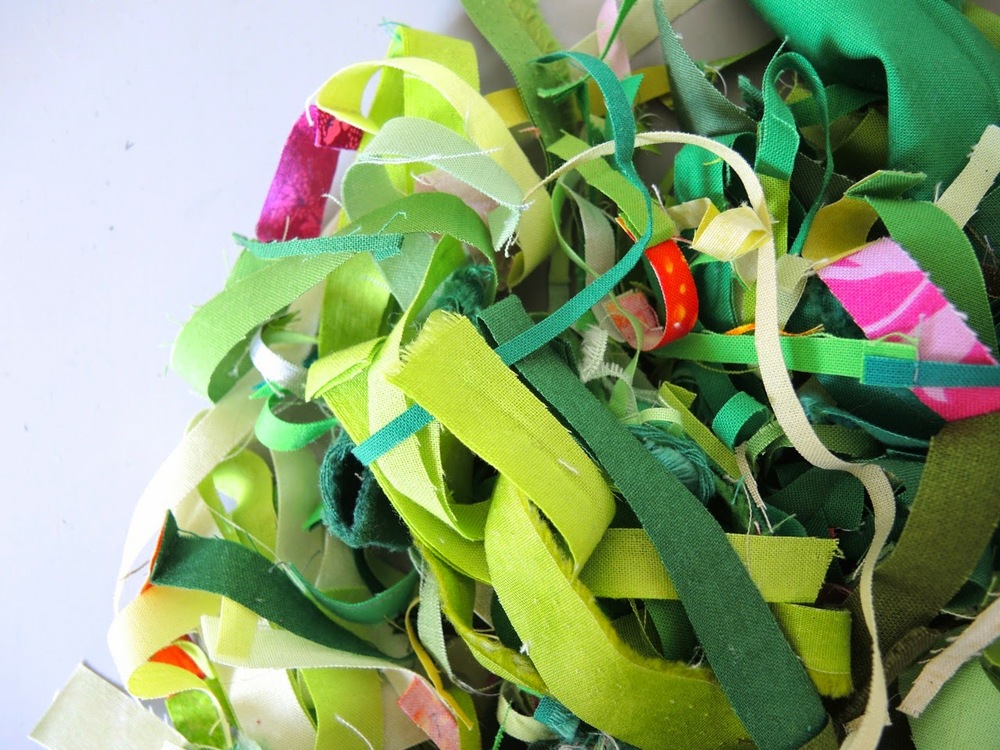
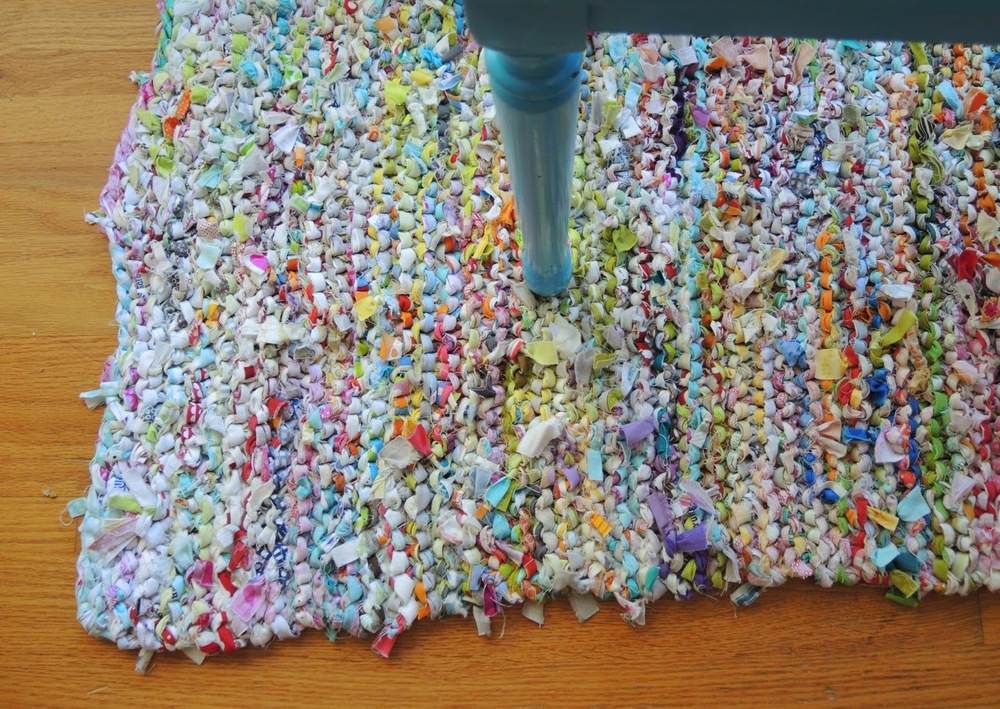
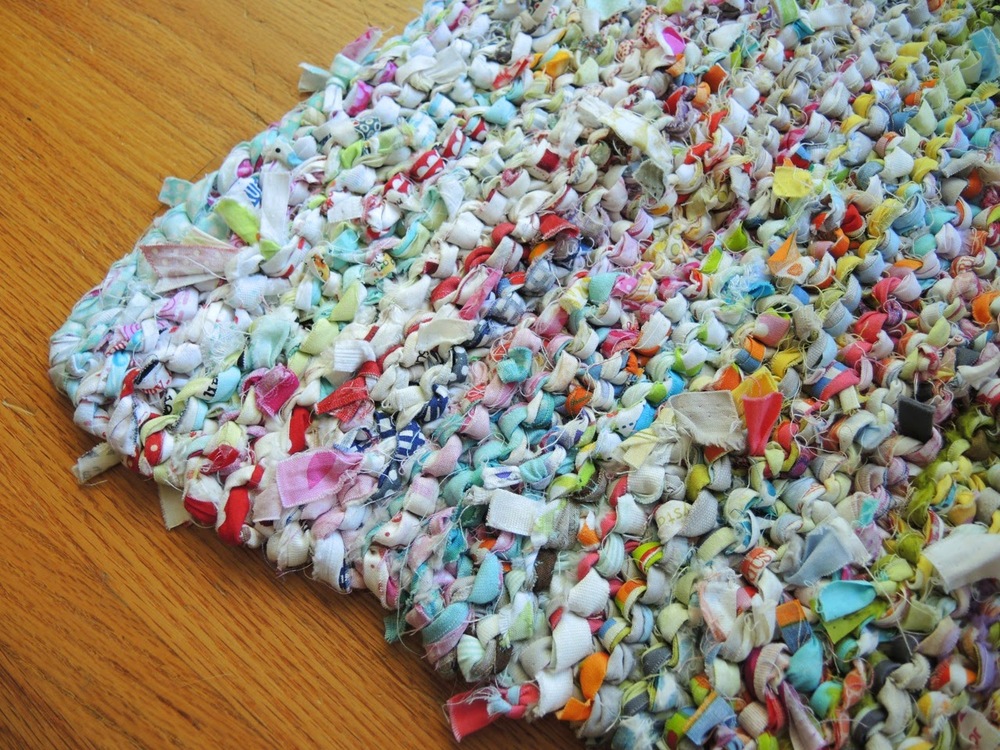
Seeing as Inuvik is located in the far North, we chose to run a Scrap Management workshop. They have to pay a lot to bring in supplies, so I thought it best to get people excited about scraps. And get excited they did! As did I. The days would start at the sun was coming into the sky, peering over the irons as we set up in the morning.

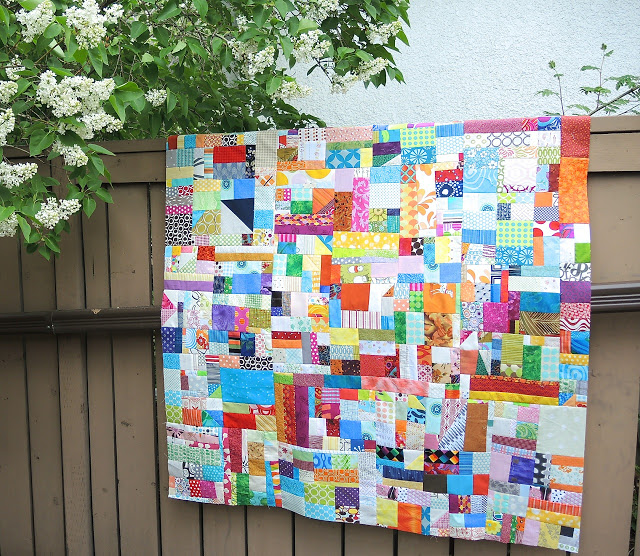
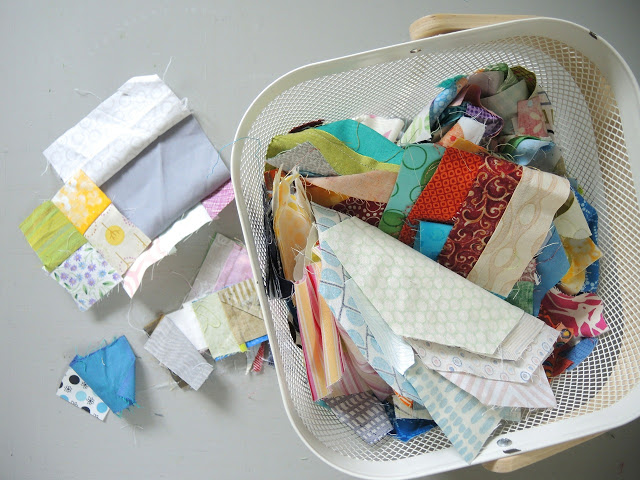
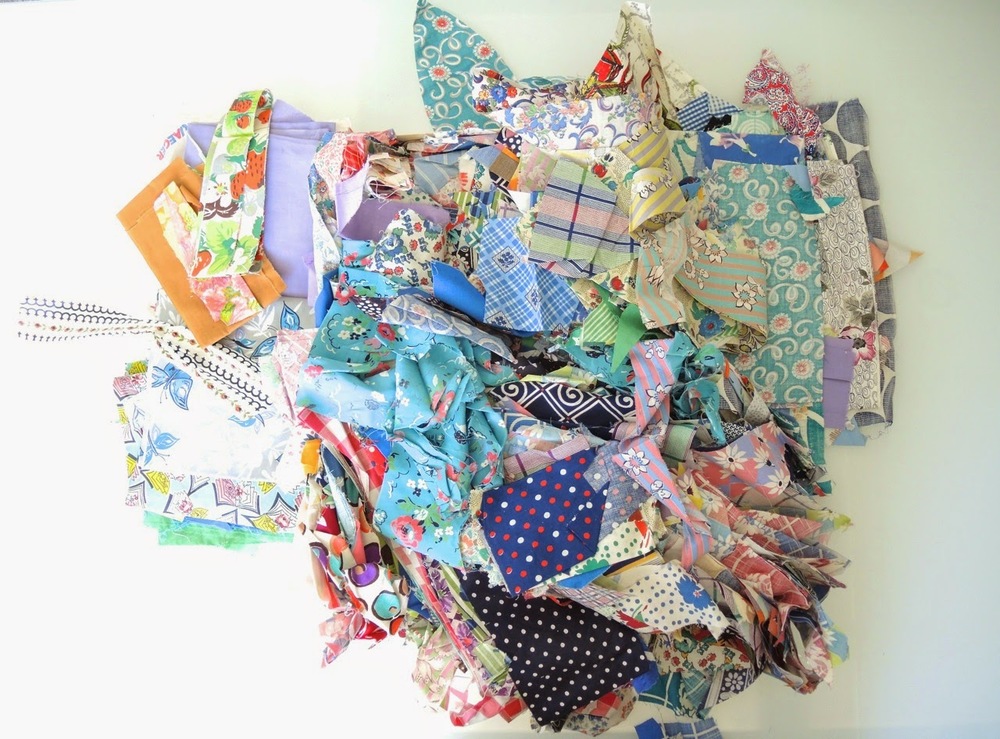
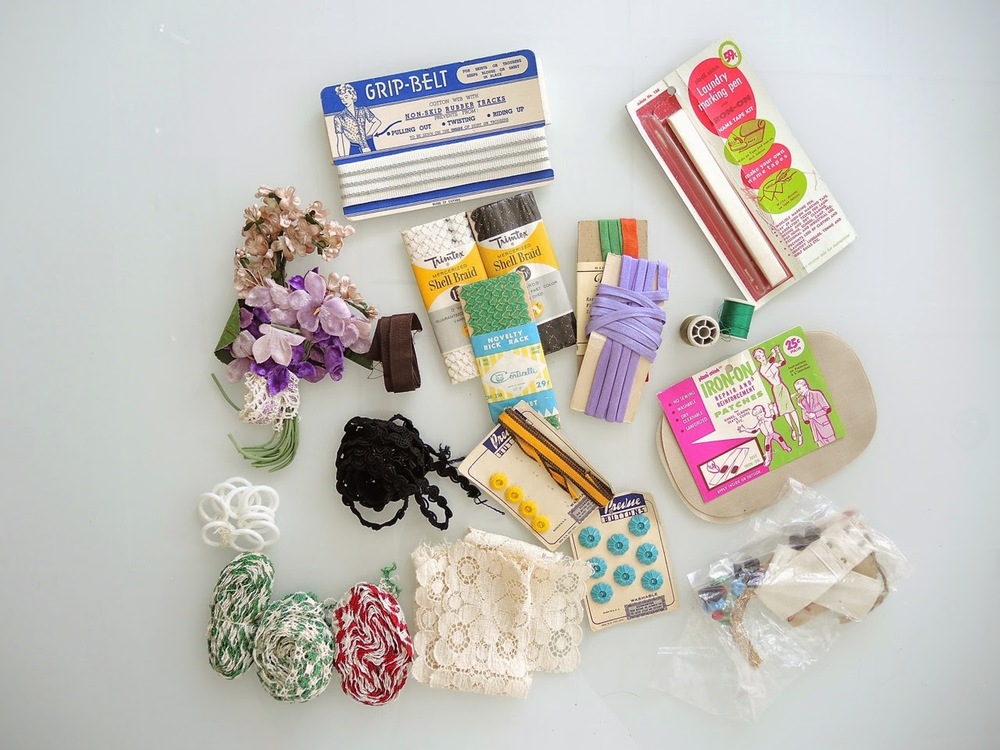
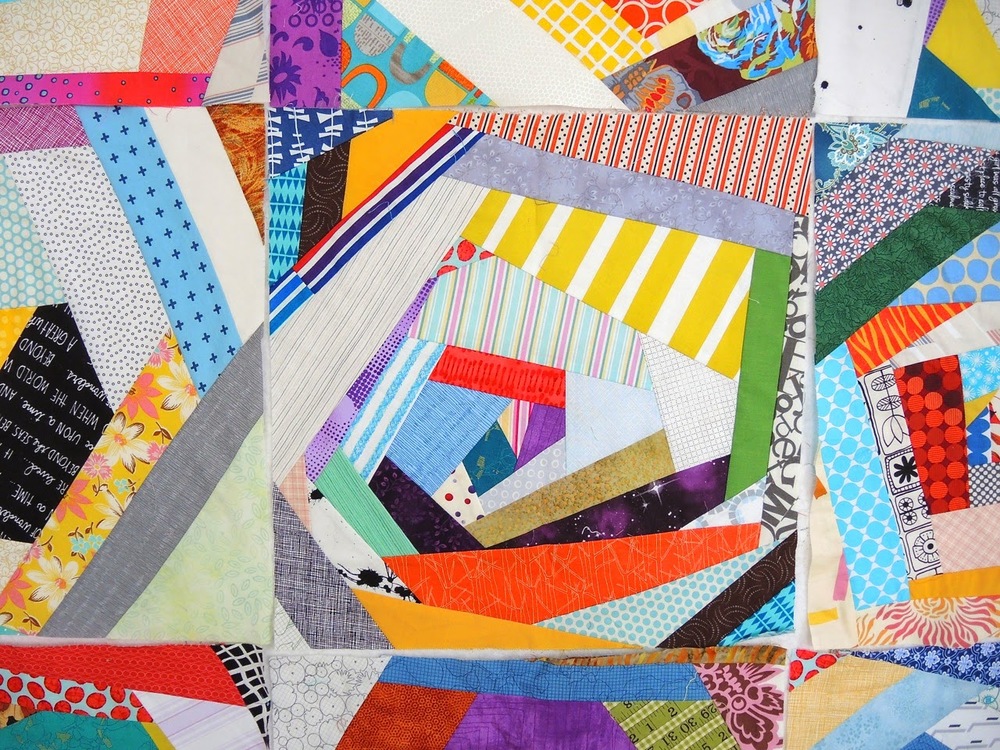
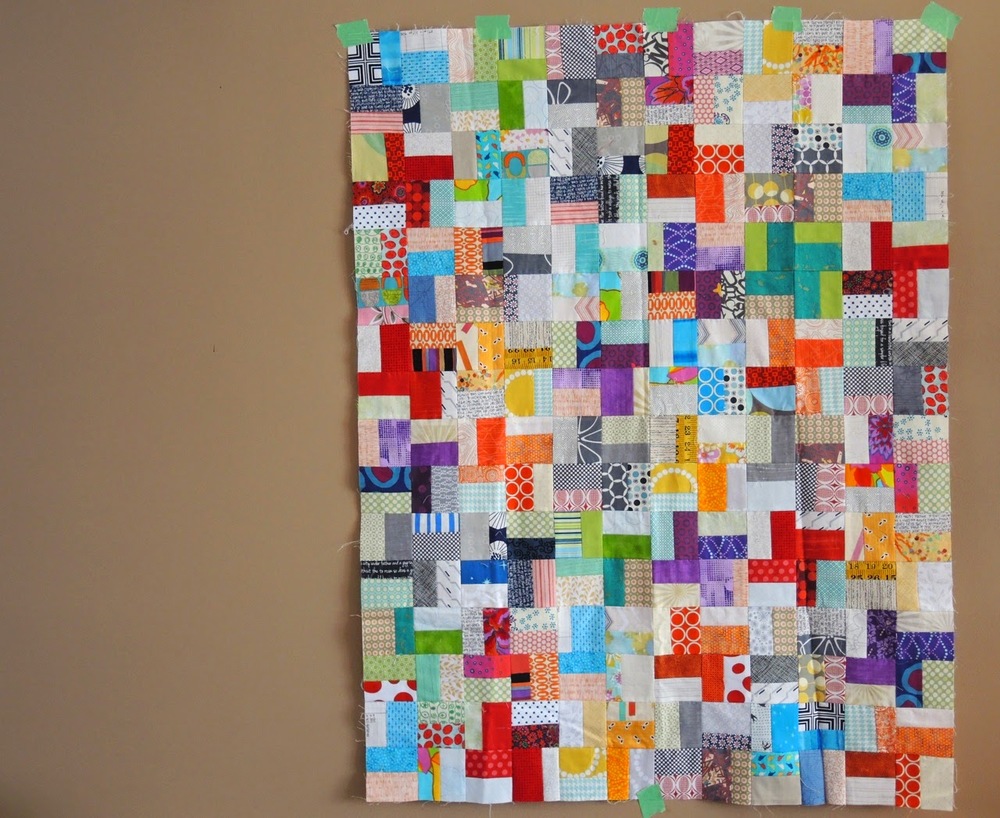
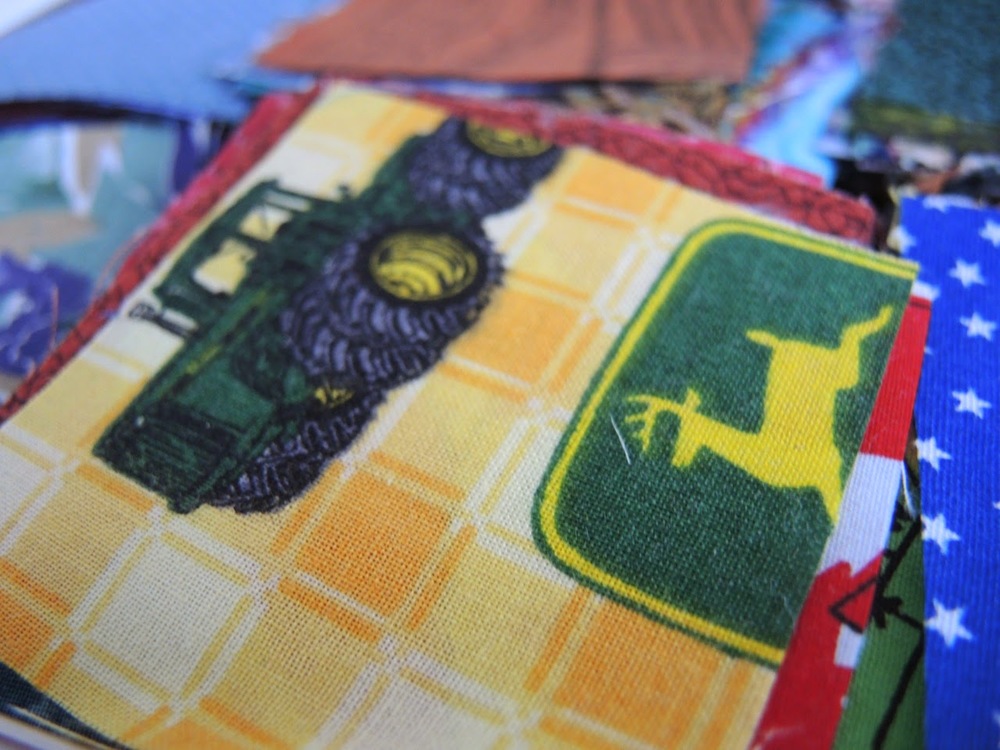
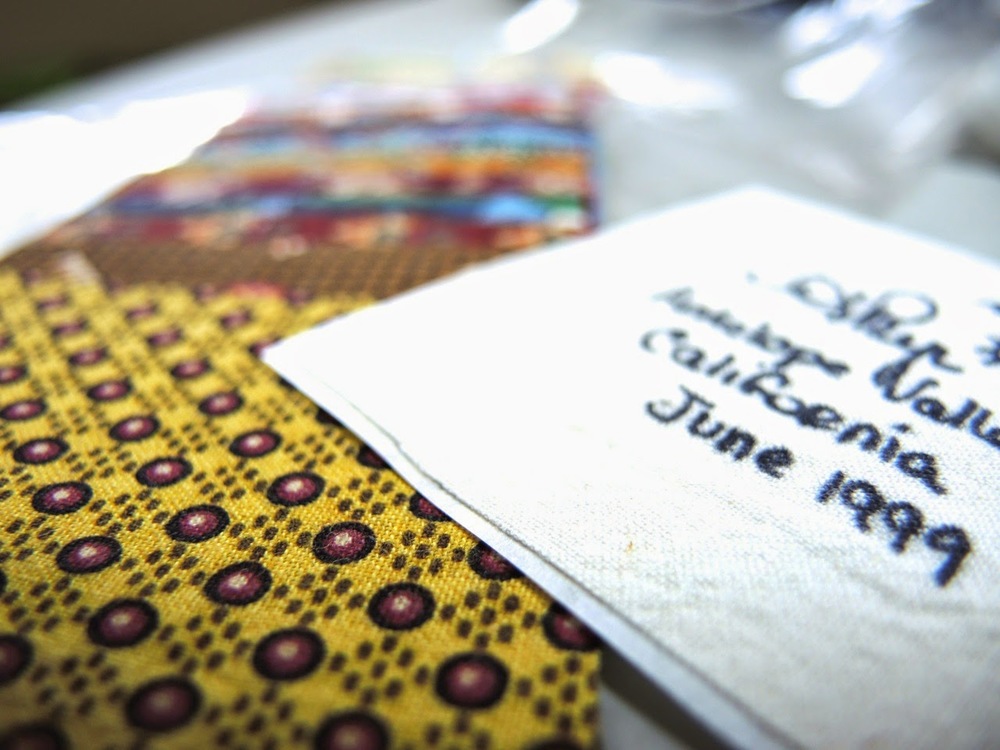
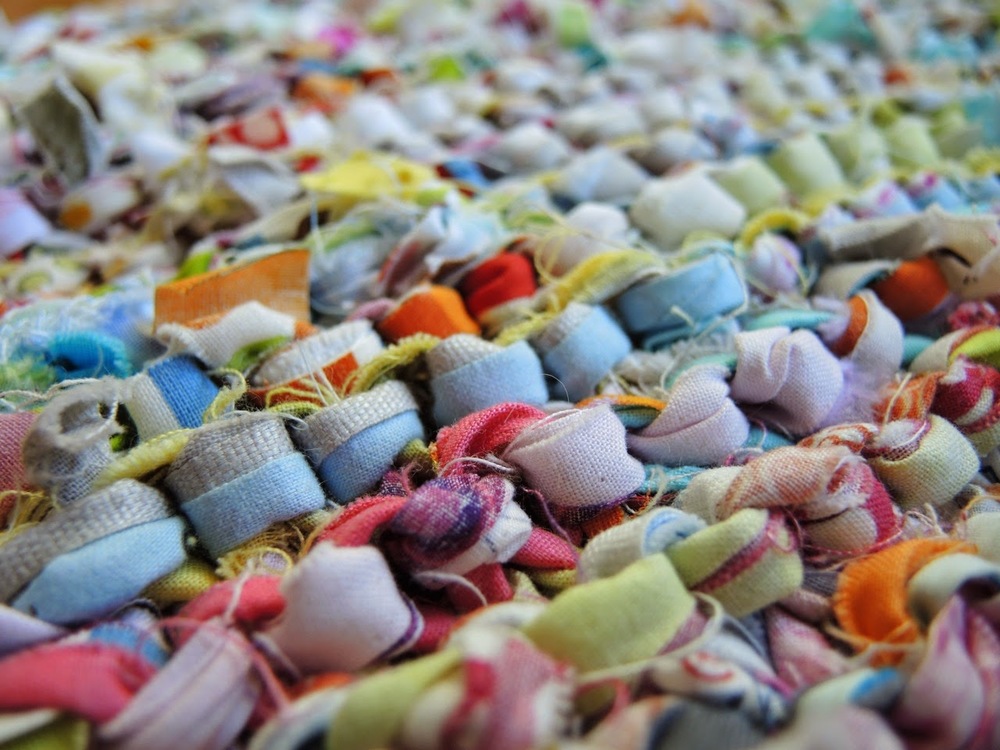
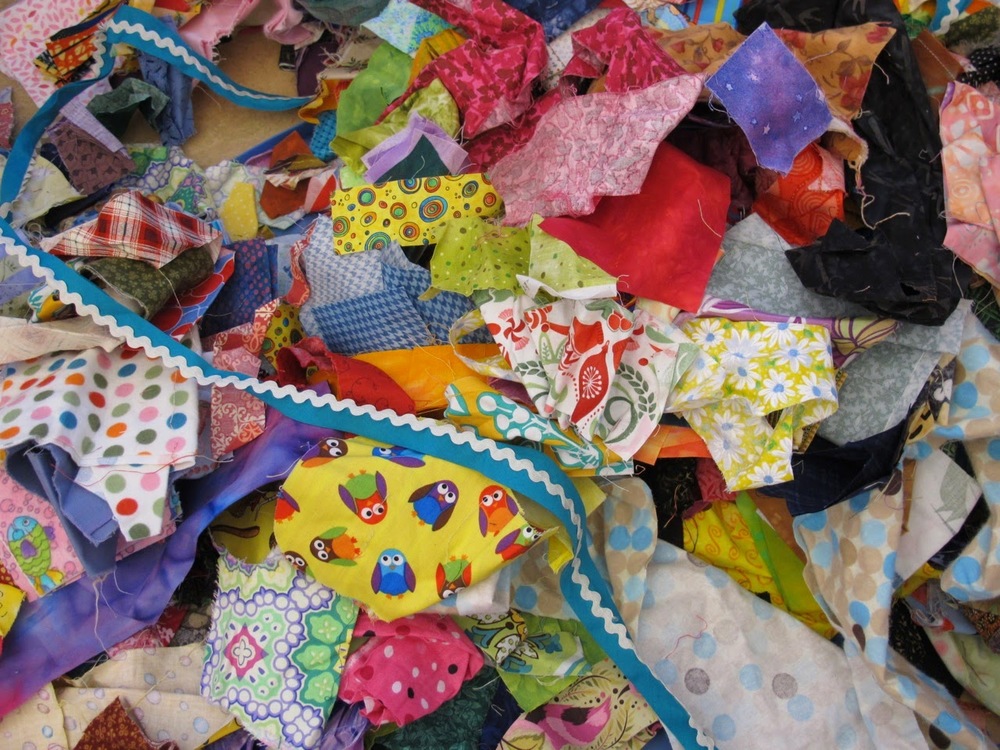
Like most scrap classes I run many people at first think they don't have much that's useful. But after we sort then run through the slab technique eyes are opened. The potential can't be hidden anymore. Some people brought scraps they inherited from mothers and friends. Some seriously cool scraps there. One lady brought scraps an Inuit maker gave her last year at the Great Northern Arts Festival. And like everyone does, it was fun to see the history of their quilting careers, family, and guild projects through the scraps.


One of the great things about teaching with a guild is that most people know each other well. So there is an instant camaraderie. For the teacher it can feel like you are the outsider, but definitely not with this group! They instantly welcomed me in, sharing gossip and stories, and taking me under their wing for northern adventures. You know they are a cohesive group when three of them bring the same kind of muffins for us one day.

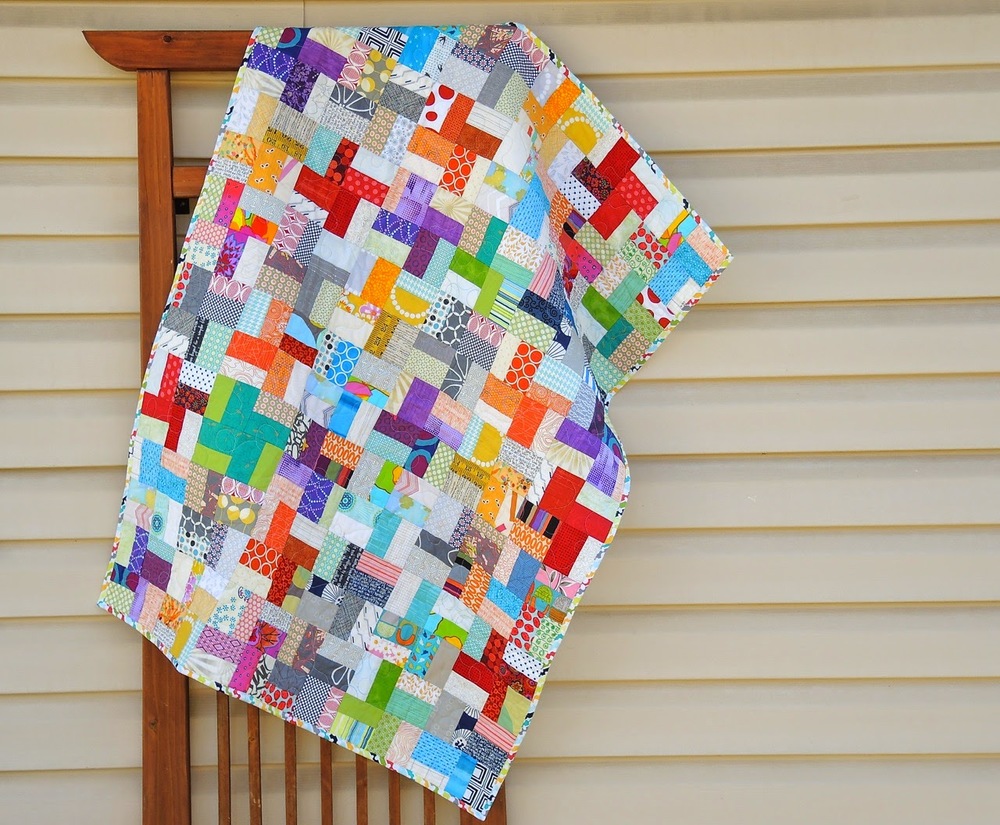
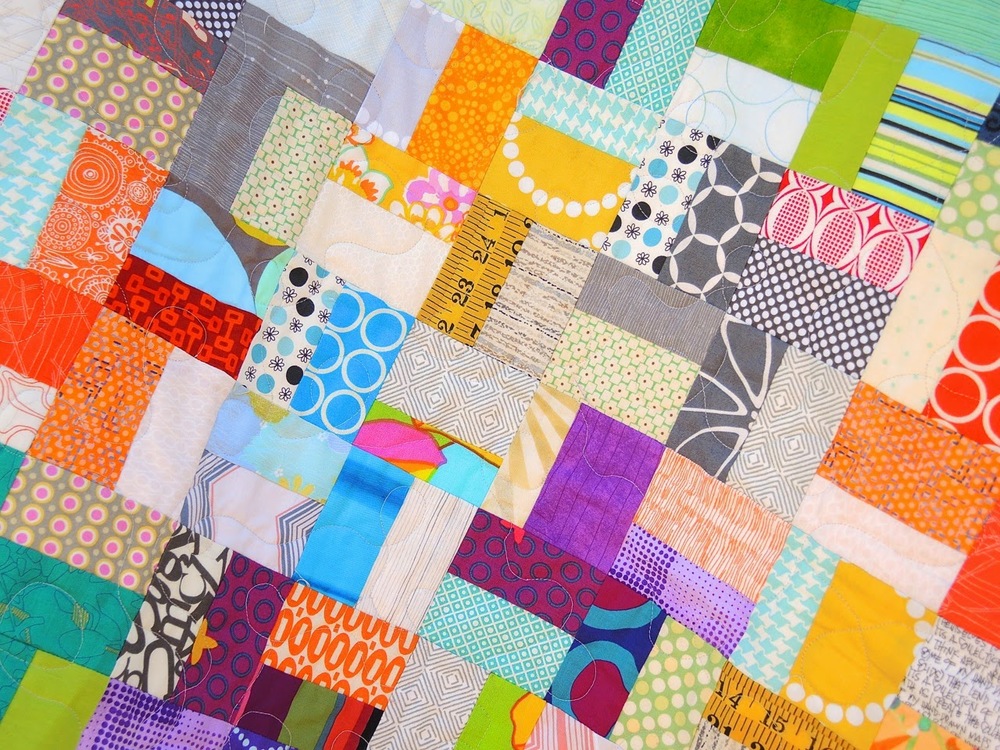
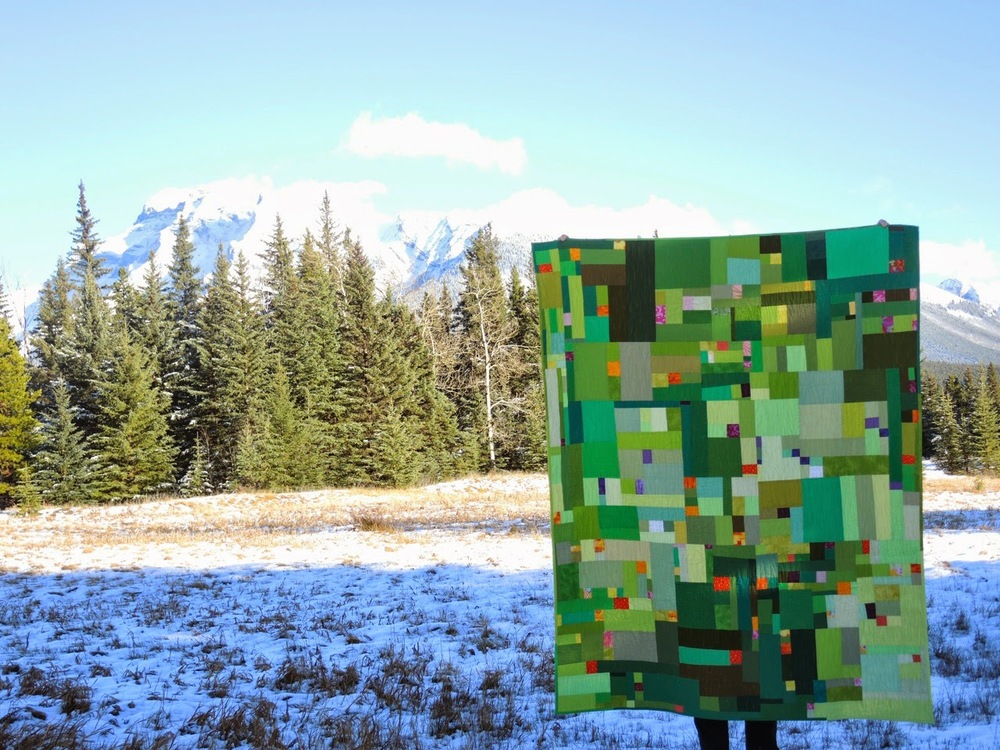
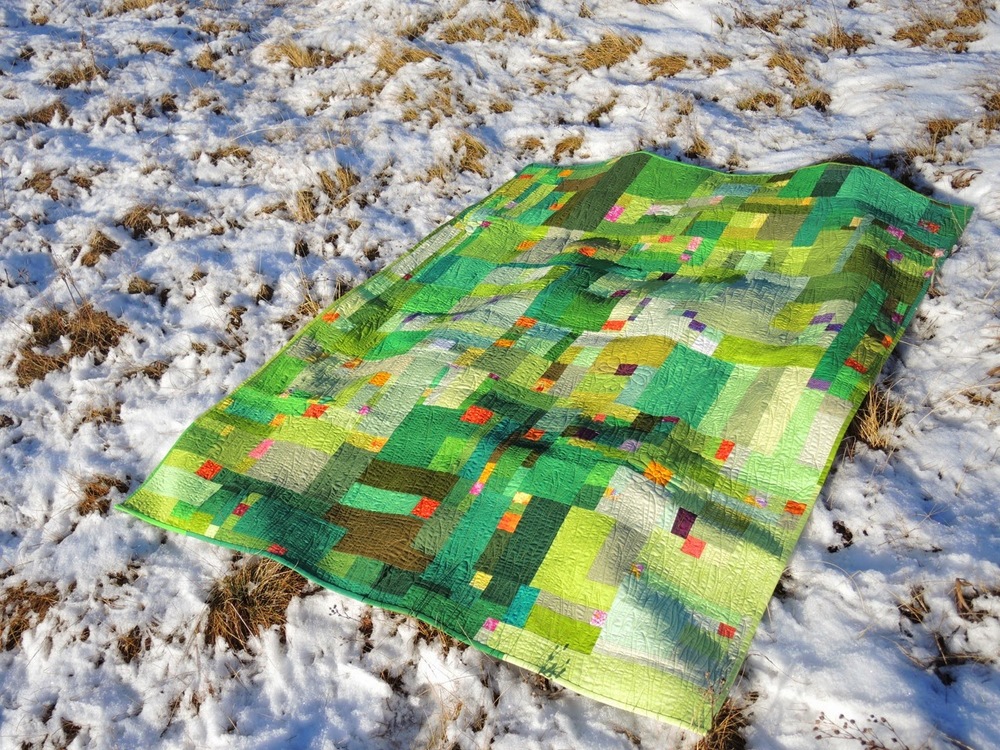
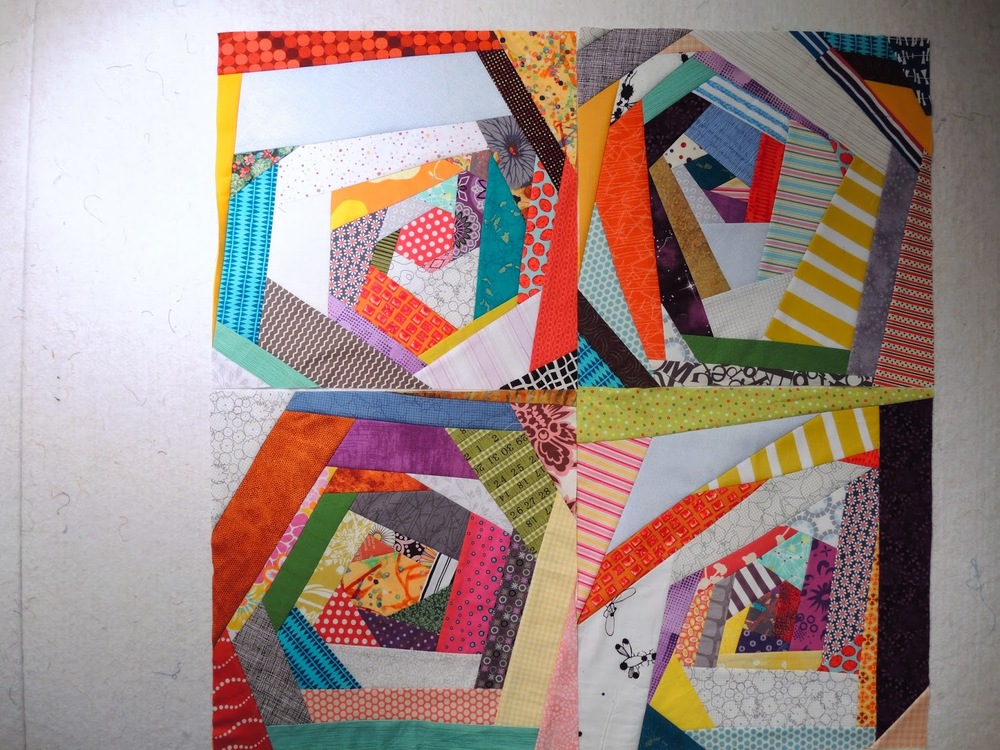
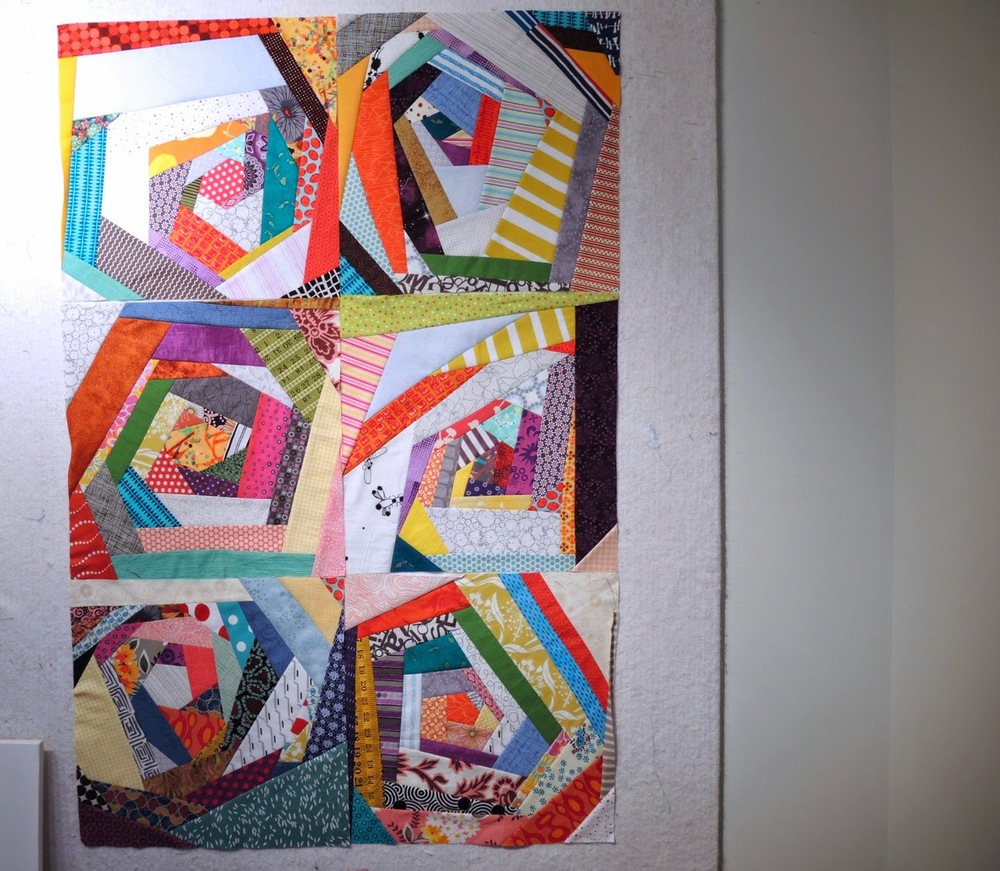
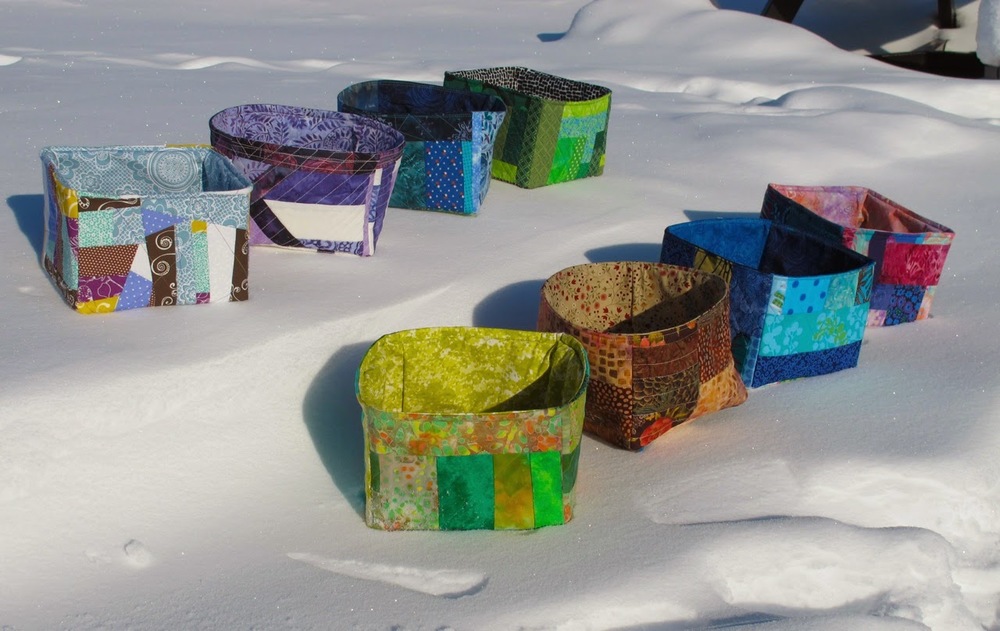
During this two day workshop we explored scraps - sorting, remembering, making slabs and storage boxes, and working on individual projects. Some people choose projects from Sunday Morning Quilts, some take off in their own direction. The important part is that they be excited by what they are working on. I'm just there to guide the process, teach some technique, and troubleshoot, if necessary.


I had one of the best moments ever in my career as a teacher there too. Two of my students were art therapists. They work in the elementary schools - for the kids and the teachers. They have a tough job, seeing the best and worst of these isolated communities. Communities that have most definitely seen the worst of times beyond the weather - addiction, residential schools, relocations, abuse. Coming to guild, for these women, is a break for them, a chance to recharge and put work behind them. Well, on the second day one woman pulled me aside and thanked me for her own creative breakthrough. She was sewing more than she ever does in guild and was recharged personally. Usually I am pretty happy if people have fun and are inspired to sew more once the class is over, but to hear that, from an art therapist no less, was inspiring to me.


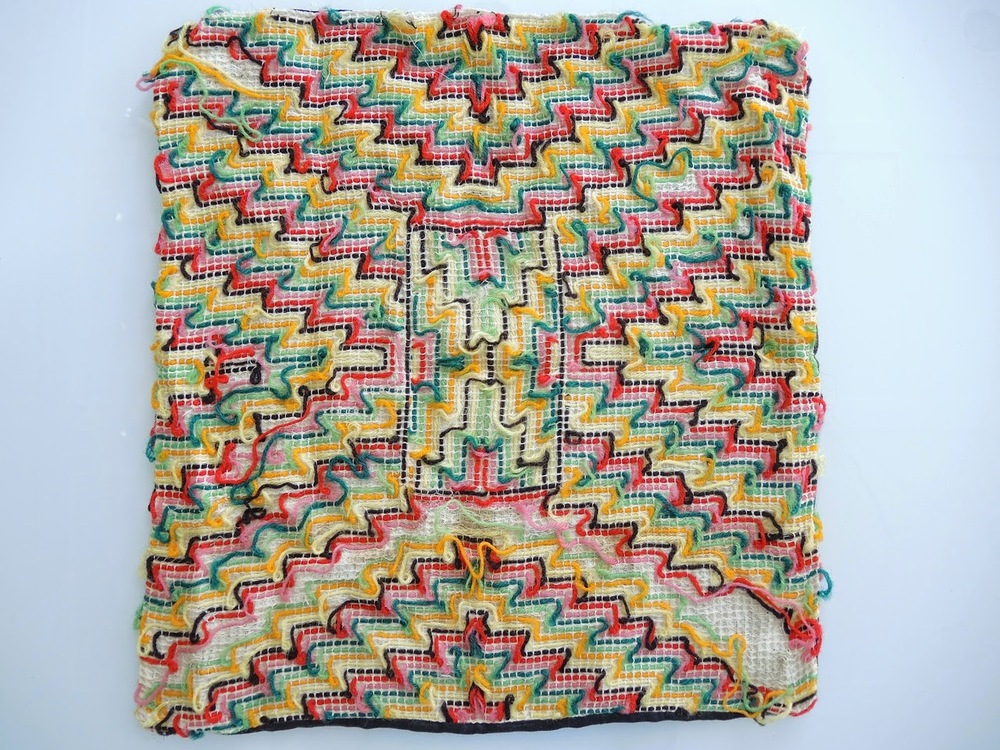
Not to mention this beading. Oh, the beading... (This one wasn't by a student, but a woman dropped by to share it.)

Thank you to the NWT Arts Council for the funding to bring me to Inuvik.