kitchen adventuRes

One Year

I can usually hear the footsteps the second the feet hit the ground. A tiny body sliding out of her giant bed, stepping around the dog sleeping on the floor, blankets and Tiger in hand. She sometimes opens the blinds, the creak of the roller a dead giveaway, just to make sure it's morning. Then she stomps down the hall. It sounds like stomping, even though she barely weighs 30 pounds. Her hand grasps the knob on the door to my room. A short turn and she peeks in. If she sees me awake she quickly pops in the room, slams the door behind her, props her crap on the bed, and climbs in.


She usually doesn't say a word. Not until she is settled and snuggled beside me. Her face is glowing with a morning smile and she practically purrs with delight. We lay like that for a what is probably only seconds. Then she pops her head up.


"Mama, can we bake today?"


*******


One year ago I marked my first day as a stay at home parent. My husband left for work, to return more or less almost 4 months later. I was thrust into the role of full-time parent with no regular paycheque. It was an initiation, almost hazing, that no college student would ever survive. 24 hours a day, alone, with my kids.


Being home with my kids was never a reality I imagined. I was going to either save the world or make a lot of money working hard. For a while I thought I could combine the two. Then these little creatures emerged, growing with me, and encouraging a sense of self I never knew was there. Our family changed and the needs of the whole outweighed my desire to save the world. Instead I needed to work on just saving us.


So, here I am. A year in. Much calmer now - most days - and still working on keeping us all sane. I've had to revise my own expectations about what can be achieved by the family and by me, in our time. I've also blown apart my own thoughts about the pleasure this would bring me and the peace it gives my husband. I still wonder what the hell I'm doing and I don't love it every day. But I like it. A lot.


In this past year I've developed a whole new relationship with the girls, worked to define this new thing with my husband, and searched for a balance to my own desires and goals. It's been HARD. And that's not counting the disappointments, struggles, grief, and disorder that the last year also brought.


And I wouldn't change a thing. As hard as this life is, it is better. Much, much better.


*******


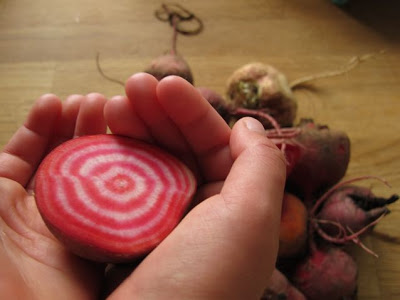
Peach pie, lemon cupcakes, muffins, scones, cookies, bread... We're baking it all. Practically something new every day.


The Monster isn't as thrilled with being in the kitchen as she used to be. If there is the prospect of chocolate she will join us. Otherwise, The Evil Genius pulls up her bright orange chair, rifles through the cupboard for her apron, and says to me, "So, what should we bake today, Chef?"


With the Monster starting Kindergarten this morning I see even more baking in my future. That kid will have the best snacks in her heart covered backpack. Full of love and most likely chocolate.


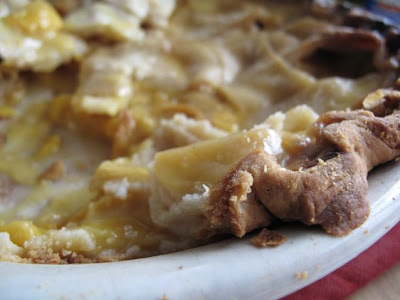
Nectarine, White Chocolate and Cardamom Scones
(adapted from the basic English Cream Scone recipe in the original Five Roses Flour cookbook)
Makes 16-18 kid-size scones


1 nectarine, chopped into 1/2'' chunks
3 ounces white chocolate, roughly chopped
2 cups flour (you can mix whole wheat with regular, but don't go 100% whole wheat)
1 tbsp baking powder
1/2 tsp salt
1/2 tsp ground cardamom
1/4 cup cold butter
2 eggs
1/2 cup heavy cream
1 tbsp sugar


Preheat oven to 450 degrees F. Line a cookie sheet with parchment or a silicon mat.


Make sure your nectarine and white chocolate are chopped. Set aside.


Combine the flour, baking powder, salt, and cardamom in a large bowl. Cut the butter into the flour. Frankly, we use our hands. 3 years olds are very, very good at this. You could also use a pastry cutter. Stir in the nectarine and white chocolate


Reserve 1 tbsp of egg whites in a small bowl, then beat the eggs with the cream. Add to the dry ingredients and mix well. The dough will be wet and sticky. Drop by heaping spoonfuls onto your prepared baking sheet. Leave 1'' between scones.


Brush the tops with reserved egg white and sprinkle with the sugar. Bake for 10-13 minutes until lightly golden.


Community (And Pickled Chioggia Beets)

"Anti-social media."


That's what my husband says when you bring up Twitter, Facebook, Google + or anything that incites or requires interaction through a computer or smartphone. He is, at heart, a huge people person. His business requires near constant contact with people - all of which he prefers to do face-to-face or at least on the phone.


His argument is that people think they have friends that they make or maintain friendships through social media, but that it's just superficial. Indeed, he merely tolerates my stories of people I've never actually met. He's not discounting that, once you've met in person, a friendship can grow.


I'll admit, some days I completely agree with him. Then I get a note from someone who reads the blog that is full of more support than a friend I've had for years has given. Or someone I only know from on-line shows up at my door with food, when no one else does on a bad day. Or I am heavily impacted by a tragedy that rocked the world of someone else.


Always remember, there is a real person behind that on-line presence.


That means you can indeed form a relationship with someone you've never met. Will it be as close as the one you have with your best friend since high school? Maybe. Maybe not. But it will still be valuable and important for its own reasons.


On the days that I do see merit in what he says, I take a step forward into my community. Not my on-line world, but the one that is literally outside my door. I take a walk and chat with the neighbour. I grab a beer with another mom from the preschool. I call my brother or sister to just chat about our kids. Nothing can replace a face-to-face conversation.


Because of those conversations I have beet pickles today.


There we were, minding our own business, devouring my husband's hamburgers in the backyard. Our front door was wide open, the dog was probably sound asleep, and the kids were already performing after dinner hula hoop tricks. Suddenly the back door opens and one of our neighbours walks through. In her hands was a grocery bag full of chioggia beets and a big bowl of apricots.


With family in warmer climates and friends coming through she was left with a pile of produce from her folks' backyard. Too much for her and her husband, she brought them over to share. And she knows I would happily accept because we've actually talked before. We live on a street where most of us make an effort to know each other. So she knew I would tackle the colourful produce with gusto and none would go to waste. (There is an apricot crisp in the oven for another neighbour who just had a baby.)


This is my community. Embrace the friends you have when they need it, whether with a quiet note or the full force of your arms. Embrace the shared journeys. Embrace the beets they bring to your backyard.


This was my first time making beet pickles. Inspired by the Pickling Party, hosted by Shauna Ahern from Gluten-Free Girl, and my neighbour. The recipe is a mish mash of ideas from memory, Aimee from Simple Bites, and the Harrow Fair Cookbook. Even my cooking is an amalgamation of my many communities!


Pickled Chioggia Beets
Makes 3 500 ml jars


2 1/2 pounds scrubbed beets, tops and stems removed
2 cups white vinegar
1 cup rice wine vinegar
3/4 cup water
1/2 cup sugar
2 tbsp pickling salt
1 tsp coriander seeds
1 tsp mustard seeds
3 cloves garlic
rosemary (optional)


1. Boil the beets in a large pot of water for 25 minutes. Make sure a fork will go through the largest beets easily. Drain and immediately place in a sink or bowlful of cold water. Once cooled use your hands and, if necessary, a knife, to trim the skin from the beets. Slice and set aside in a clean bowl.
2. While the beets are cooking clean and process 3 jars and the screw lids in a boiling water canner for 10 minutes. Keep hot in the water while you clean and slice the cooked beets.
3. While you prep the beets combine the vinegars, water, sugar, salt, and seeds in a medium saucepan. Bring to a boil and keep hot, hot until ready to use.
4. Quickly drain your sterilized jars. Keep the water boiling.
5. While they are still hot add a garlic clove to the bottom of each jar, then fill with beets. Stop filling 1/2'' from the top. Carefully pour in the pickling liquid, leaving at least a 1/4'' from the top of the jar of space. Wipe the rim of the jar with a clean cloth and screw on the lid.
6. Process for 20 minutes in a boiling water canner. Do not start timing until the water comes to a boil after you add your jars.


(Why didn't the skeleton cross the road? Because he had no guts!)
(Said skeleton keeping the almost pickles company.)

Interweb Adventures


Today I'm taking you on a little tour of self-promotion. Busy little me has been flying around the interwebs visiting, writing, sharing. This week I am off at a major quilt event, so I thought I would share my internet adventures with you.

Not too long ago I discovered a website that appeals to my heart, especially. Michelle at What's Cooking is working hard to spread a love for cooking to kids, and families. This week she featured my post on making Babka with the girls in a What's Cooking feature on Cooking With Kids.

For Earth Day this week I discussed the joys of visiting farms with your kids. I shared this over at Simple Bites. Making that connection with food starts with knowing where it comes from and who it comes from. As Wade always says, eating local is about eating food you know from people you know.

I also started a new venture guest blogging with Food Network Canada. It's spring, despite the snow storm that hit Calgary last weekend, so I am over there talking asparagus.

Speaking of asparagus, that Simple Bites piece includes a recipe for Asparagus and Feta pizza. Don't forget to check that out!

Now, if only I was actually home to cook this week.

Babka is a Family Affair


It's only fitting that I felt compelled to make Babka on the day of the bake sale at my parents' church. They would have sold Babka by the hundreds there. Not surprising since every single recipe I had seemed to make enough to feed an entire Ukrainian village. 10 eggs! 3 packages of yeast! 10 cups of flour! Oi vey.

So I did what any good Ukrainian would do. I called my mom. Unfortunately, she was at that bakesale, but my dad totally came through for me. He referred me to another cookbook in the family collection, where we found a recipe that could easily be adapted for a normal family size. And he said it looked a lot like the Babka that he was familiar with.

Did I mention that I've never made Babka before?

Traditionally served at Easter, and part of the required items in the Easter basket to be blessed at church, Babka is a sweet, eggy bread. Our family likes our studded with raisins or currants. A lot of descriptions  online call it something between a cake and a bread. Not so in my world. I always think of Babka as a sweet, rich bread, baked tall and best with creamy butter. Keep your cinnamon and chocolate and your Jerry Seinfeld, Babka is for spring, with a touch of citrus.

So the girls and I gathered our ingredients, put on our aprons, and set about to make a big giant mess. The good thing about making Babka is that it needs a lot of eggs, perfect for little hands. And what gorgeous little hands. I adore watching my girls' attack dough in their attempts to knead it. The Monster even has the push - turn - fold technique down now. And so long as we can keep Smilosaurus from snitching bits of raw dough we end up with a nice piece set to rise. And rise. And rise again. Be forewarned, from start to finish this is a full day affair.

This recipe starts out quite wet, what with all those eggs, milk, and a juiced orange. You will have to play with the flour, adding as much as necessary.  Just go slow, adding a few tablespoons at a time. Your dough is ready when it is smooth, aside from the raisins, no longer sticky, and relaxes a little, just a little, when you stop kneading.


Babka is traditionally made into a tall, round loaf. You do this by baking it in cleaned out cleaned tin cans. You could bake it in a loaf pan, but that doesn't seem quite as fun, or traditional. If, like me, you don't have a lot of cans in your house you can ask a neighbour. Failing that, make plans to make sauce later and use the cans from some tinned tomatoes. Just make sure they are washed well. Then buttered quite well. If you are worried about the bread releasing from the can, line it with a strip of parchment paper, and more butter. 

And when you are all done, make sure you call your parents to share your success. Then butter some slices for the next generation and enjoy with tea. Church blessings optional.

Ukrainian Babka
Makes 5 large tin size loaves, more or less depending on the size of container

1 tsp  plus 1/4 cup sugar
1/4 cup warm water
1 package Active Dry Yeast
3 whole eggs
5 egg yolks
1/2 cup melted butter
1 cup warm milk
1 tsp salt
1 orange, zested and juiced
1 tsp vanilla
4-5 cups flour
1 cup golden raisins or currants
1 egg, beaten

1. Dissolve 1 tsp sugar in warm water.  Add yeast and let stand 10 minutes.
2. Soak raisins in warm water. Drain well.
3. Beat eggs and yolks until light - 4 minutes with stand mixer, about 8 minutes by hand. Stir in remaining sugar and beat 30 seconds more. Add melted butter, milk, salt, orange juice and zest, and vanilla. Mix well.
4. Mix the wet ingredients to the 4 cups flour in a large bowl. Mix together well.  Add flour, if necessary, 1/4 cup at a time until you get a wet dough. 
5. Turn out onto a floured countertop and knead.  Add flour in small bits until the dough is smooth.  Knead for 4 minutes or so. In two batches knead the drained raisins into the dough. Knead until the dough is smooth and elastic. Place in a clean, buttered bowl, rub a bit more butter on the dough and set in a warm, draft-free spot to rise.
6. Let rise until double in size.  Punch down and let rise again.
7. Butter cleaned tins, dish, or pans. If preferred, line with a strip of parchment paper, then butter that as well. Form dough into balls that will fill container of choice to 1/3. Place in container and let rise again.
8. Preheat oven to 350 degrees F. Brush the tops of the babka with beaten egg.  Bake for 20-30 minutes, depending on the size of your container. It should be nicely browned and have a hollow sound when you tap it.

Scotch and ...


In a fit of accidental drinking and eating Hubby and I discovered a fantastic food/liquor combo. Scotch and caramel corn.  In particular, peanut and sea salt with my caramel corn and a smoky scotch like Caol Isla. Okay, so the drinking wasn't accidental, but the insane hunger that led us to the Scouts caramel corn was.

Not wanting to repeat ourselves, nor get into that beyond sweet caramel corn again, as well as prep for My "Whiskey for Dinner" class tonight I set out to make my own caramel corn. How refreshing it was to discover that it is so damn easy. Pop some popcorn, make some caramel, toss together, and bake at low heat. That's it. I even encouraged the men in our class tonight that it was dead easy and hopefully they are logging on to get the recipe right now.


One of the surprising things in my research was that 99.99 % of the recipes I found used brown sugar.  Actually, I didn't find any that used white sugar, but I can't conclusively say that there isn't one out there. The first batch I made was with the "best brown" sugar I keep in the house for oatmeal and cookies.  It was good, once I got over the concept of adding baking soda to the recipe. But I knew I wouldn't have enough, plus I wasn't that fond of the colour.

The second batch was with the "yellow" brown sugar I borrowed from the neighbour when I realized that the nanny had used the last of my brown sugar making cookies - not that I was complaining. And, I'll admit it, I was afraid to try white sugar since I found no recipes with it. So yellow brown sugar it was. 

Can you tell the difference in the photo above? Best Brown on the left, yellow brown on the right.


So I had my caramel corn ready to go. Good to go. Loaded up I joined a great group of guys at J. Webb tonight. Where are my single ladies?  Seriously, develop a taste for scotch or an open mind, because there are always a fun, intelligent group of guys at scotch tastings. 

The caramel corn was on deck to serve with those lovely smoky or peaty scotches.  When it comes to scotch and food pairings you don't want to pair smoke with smoke. The sweet and salt of caramel corn matches perfectly with the smoky drinks. Actually, the caramel corn went with almost all the scotches.  As does chocolate, especially the fruity ones from Venezuela and Guatemala.

But pairing scotch and food is more than the sweet stuff. At its most basic level, pairing is pretty straight forward - match the basic characteristics of the scotch to your food. For example, the Lowland scotches are lighter, so they work well with rich cheese, honey, and fruit. Something like a pear and brie tart, or a cream of leek soup. And think about where the scotch comes from, The Island and Speyside styles work really well with seafood and both clean and salty flavours.  Even sushi works really well, or mussels with fennel.  The Lowland and Highland styles lend themselves to the richness of game meat, the sweetness of peppers, and even some spice.

But the star of the night was the caramel corn.  And the Glenfarclas 17 year old.

The caramel corn recipe I used was a slight variation on this one.  I added a bit more salt, used the roasted peanuts I had in the cupboard, and that yellow brown sugar. It isn't cloying, has the burnt sugar saltiness, and the baking soda makes the carmel crackle, but not crack.

Caramel Corn
Makes about 10 cups

1 3/12 ounce package plain/orginal/natural popcorn
OR 10 cups air popped popcorn
1 cup yellow brown sugar
1/4 cup light corn syrup
1/4 cup unsalted butter
2 tbsp water
1/2 teaspoon sea salt (cut this back if you prefer it without the salty taste)
1/2 tsp baking soda
1 tsp vanilla
1 cup peanuts, cashews, or pecans

1. Preheat oven to 250 degrees F. Line a large cookie sheet with parchment paper or spray with non-stick spray. Spray a large bowl.
2. Pop your popcorn and toss in the bowl, being careful to keep out any unpopped kernels.
3. Whisk sugar, corn syrup, butter, salt, and water in a small saucepan.  Melt and boil for 3-5 minutes until it reaches 250 degrees F on a candy thermometer. You need the candy thermometer, so don't try to just eyeball this step.
4. As soon as you reach temperature stir the baking soda and vanilla into the caramel.  Pour over the popcorn, add the nuts, and stir together.  You won't get a complete cover over the popcorn, but stir well and try to get a little on each bit of popped corn. Spread out on the cookie sheet.
5. Let cook slowly in your low oven, stirring gently every 20 minutes, for 1 hour. Let cool completely before enjoying.

Bean Burgers Yum!

If you've been reading a while you know that I was the mom who went crazy anal about making my kids' food when they were little. Or you just know me and that fact isn't surprising at all. But the one thing I did buy was some bean burgers from a local manufacturer. The Monster absolutely loved them. But they were expensive. Damn expensive.

I launched a search to make a good bean burger myself. And I searched and tested and searched and tested some more. And I had no success. Nothing seemed to work.  They were all too dry or too wet, so I gave up.

Then the Blog Aid: Haiti cookbook arrived. Catherine McCord at Weelicious included a recipe for garbanzo burgers in it. The old challenge poked its head out of my subconscious and forced me to make her burgers. And you know what? Success at last! 

Of course, I did adapt it a bit.  But that's because I had a 19 ounce can of chickpeas, not 14 ounces as in the original recipe. To compensate I added some pistachios when I was making the breadcrumbs and threw in some spices. The girls and I happily ate them, as did our vegetarian friend who was visiting. Even Hubby, the devout carnivore, ate them without grumbling. Much. But he did clarify that they were actually patties and did not deserve the name burger.

Garbanzo Patties
Adapted from the Weelicious recipe in the Blog Aid:Haiti Cookbook

Makes 12-15 patties

1 19 ounce can chickpeas, rinsed and drained
1 small carrot, chopped
1 small onion, roughly chopped
1 clove garlic
2 eggs
1 tsp salt
1 tsp cumin
1/2 tsp chili powder
1/4 cup bread crumbs
1/4 cup finely chopped pistachios
2 tsp sesame seeds, toasted
1-2 tbsp oil

1. Blitz the first 8 ingredients in a food processor until it is a consistent mixture.
2. Stir in the bread crumbs, pistachios, and sesame seeds.
3. Scoop about 1/4 cup of the mixture (it will be wet) into your hand and form patties. 
4. Heat oil in a frying pan on medium heat. Cook patties for 5 minutes, flip and cook 3-5 minutes longer.

Particularly tasty with Edgar Farms Asparagus Relish. Or a nice green salad.


Upcoming Event - A True Taste Adventure


This one is not for the kids!

I'm happy to announce a new relationship and upcoming event with J. Webb Wine Merchant Ltd. Lee Hansen and I will be joining forces for a scotch and food pairing class. Actually, there will be two opportunities to enjoy the range of tastes from Scotland and the food we are pairing with it. Think sweet, salty, and meaty. Then think of the scotch!

Join us on March 17 or 18 at the Glenmore Landing location. For sign-up information visit the J. Webb site.

When Hubby is in Charge of Cooking

My mom just left after a weekend of cooking, giggles, and laundry. She came down to help us after I blew out both my knees skiing last weekend. Hubby still isn't fully healed after his broken collarbone so taking care of the three of us girls is a bit much on top of working as well. So mom came down, fixed us up with some great dinners, and put some soup and pyrohy in the freezer.

But before she came down Hubby spent the week cooking.  One night I walked him through a leftover change-up, we enjoyed some meals from the freezer and from friends, and one night Hubby made wiener wraps. Hot dogs, plastic cheese, and the packaged dough in a can. He was in heaven, the girls loved them, and even I ate two. But I did eat most of the carrot sticks I convinced Hubby to prepare. I can't wait to cook again.

Champagne and Truffles


Today's post brought to you by fun things to do to impress others. On tap today is sabering champagne bottles open. Now there is a way to show off at your New Year's Eve event.  Just promise me that you will do it while still sober.

Take one of your bottles of champagne - preferably a cheaper one, just in case - and get it cold. Almost freezing.  So, if you are here in Alberta this means you can just leave it outside for an hour or so. Then you can take one of your solid kitchen knives if you don't have your own sword handy.


With your cold bottle in hand and look for the seam in the glass.  Your target for your knife/sword is just below the lip of the bottle right at the seam. Remove the foil, but you canleave the wire on. With a firm, but not heavy hand slide your blade against the bottom of the lip of the bottle.  Don't hack or whack it. With a really cold bottle the right pressure will simply cause the entire top of the bottle to pop off.  With the pressure of the bubbles no glass falls back into the bottle.  Straight to the enjoyment.


Traditionally, this was done with a sword and on horseback. In the modern world I am thankful for truffled popcorn and a dishtowel to catch the popped cork. We won't be sabering tonight, but we will enjoy bubbly with friends. Thanks for the folks at Sumac Ridge for the demo and opportunity to impress.  And for the champagne/popcorn combo. 

Happy New Year!


At Julie's house for Julie/Julia


Eating in a room full of food bloggers and writers is almost as bad as eating dinner with toddlers, except the conversation is far better.  In the interest of the blog, the en mass photography when five bloggers gather for an impressive dinner is somewhat insane.  Sorry, there were only 4 photographers and 1 illustrator at our Julie/Julia themed dinner party on Sunday. Pierre stood back, secretly laughing I think, while the rest of us pushed buttons and tried to make adjustments for the fact that it was close to 7pm when we started eating, er... photographing.

It's a good thing that our vichyssoise was being served chilled.

The occasion of our gathering was ostensibly to celebrate the release of the Julie/Julia DVD today.  In reality, Julie invited us all together to meet, cook, chat, and celebrate. Most of us knew at least one other person there, and I think Julie knew everyone. (She really does know everyone.) Gwendolyn from Patent and the Pantry, Gail from The Pink Peppercorn and her sax playing husband, Pierre of Kitchen Scraps fame with his love, and then Hubby and myself all descended upon Julie with an abundance of butter, cream, wine, and our best stories.

Our instructions were simple: make something from Mastering the Art of French Cooking.  We each volunteered a course/dish. There was the vichyssoise from Gwendolyn, surprisingly (to me) rich and actually quite refreshing even though it was minus a billion outside. For dinner itself Julie made Boeuf Bourguignon. Pierre made Ratatouile and the most amazing potatoes ever. Gail spent two days in the kitchen to make a Moussaka unlike anything I've ever had in a neighbourhood Greek joint.  Two days! Oh, and I made Reine de Saba and a souffle but I'll save the details for another day.


To start the night we toasted new friendships with French cider and bubbly.  And we watched old episodes of The French Chef.  Correction, we had it on the TV but were too busy talking. That theme continued for the night.  We were so damn eager at the beginning of the night, dutifully taking photos. Then we sat down to eat.  And drink. And talk.  So there might be one blurry shot of the souffle that Gwendolyn and I made together.

Aside from our critiques and comments about the books, cookbook, and movie (enough about Meryl already and how long exactly should I simmer for?) we talked and laughed.  I'm not telling secrets, but I do know about some tidbits about mascots, child actors, and degrees in sex.  But I'm not talking. In fact, I think I might still be digesting.

Simple Things

I'm a little behind this week.  In so many ways I am behind, but no one needs to be reminded of my laziness.  Okay, maybe I need to be reminded of it.

Week four of the The Kitchn Cure ended over the weekend.  I was taking advantage of my mother-in-law's house and babysitting to get a break from the mess and exhaustion of having Hubby away.  The girls and I visited family, celebrated birthdays, and even threw a baby shaker for one of our recently arrived nephews.  And halfway through Hubby returned home, then drove another three hours to spend what was left of the weekend with us.  Needless to say, there wasn't a lot of Cure activities going on.

The focus for this week was learning something new and maybe prettying things up a little. Honestly, I had little motivation for new challenges after a week of single parenting.  So rather than try something new I went back to a kitchen staple that I've been ignoring - vinaigrette.  

In my university days I actually used to just put vinegar on my salads.  It must be the Ukrainian in me, but I preferred the tang and tartness of just vinegar.  I did eventually evolve when I discovered good olive oil, and decided not to ration it as an extravagant expense.  In recent years, however, Hubby has reverted back to his favourite Golden Italian and me to Annie's Goddess Dressing.  The real impetus is that I hate dressing a salad only to have leftovers.  You can't have leftover dressed salad, that's nasty and slimy.

Bring back the vinaigrette, I say!  So simple, and actually cheaper than bottled dressing.  Added bonuses include the variety of flavours and controlling the salt and sugar content.  Buy a pretty bottle and leave it on the counter with your oils  (unless you use fresh lemon juice).  Reach for it as those salad greens start poking out of the ground this summer, on grilled veggies, to marinate chicken, or drizzled over strawberries with some black pepper.

There are an infinite number of recipes for vinaigrette.  I've never followed one.  It is really a matter of oil, vinegar, an emulsifier, and seasonings.  The ratio of oil to vinegar that I like is 2/3 oil, 1/3 vinegar.  Traditionally you often see 3/4 and 1/4, but I find that lacking in tartness. Emulsifiers of choice are often mustard or even maple syrup (or both!).  Just a teaspoon or so will work, more if you want a stronger flavour.  And aside from S &P you can add garlic, fresh or dried herbs, a little bit of honey, some fresh fruit puree, or roasted peppers, to name a few. If you are like me - a condiment slut - you have a ridiculous variety of oils and vinegars.  The flavour combinations are endless.  Try balsamic vinegar with maple syrup.  Raspberry vinegar with walnut oil and chopped walnuts.  Garlic, mint, and oregano with red wine vinegar.  Sesame oil and rice wine vinegar with fresh ginger and lime.

And may I add that this was the first time The Monster ate salad dressing on her salad. Seriously, she is a food snob. No bottled dressings, KD, or margarine for her.

Unmitigated Kitchen Disaster

I'm sparing your the disgustingness of what this photo could be.  Just look at my overcooked, but nicely crimped crust.  You've got to find something nice about it.  Please?

It snowed again this week.  Rain would have been welcome, but snow that we actually had to shovel?  So not welcome at the end of April.  In an attempt to remind myself of what indeed will return - summer - I pulled out one of the pies I made with the last of last summer's peaches.  The promise of sunshine for breakfast was enough to get me through the snow.  I should have stayed in bed, covers over my head, babies calling to me, and no tea in the pot.

The pie was horrible.  Although I faithfully researched different ways to freeze pies before I even attempted things last August, this was an utter failure.  A lot of information simply said to make the pie as you would, but not to cook it.  A little extra flour or starch in the filling would capture the extra juices you would get when you bake it.  So make your pie, freeze it, then bake it straight from the freezer.  Let me now tell you that this was bad advice, very bad advice. There was so much liquid from the fruit that the top crust effectively poached.  This is not an attractive way to cook a crust.  I even drained out some of the liquid, to no avail.  So my filling was nice, but the pie was both overcooked and undercooked.

I still managed to salvage some semblance of my summer dreams by scooping out the pie filling and eating it with yoghurt, but it wasn't the same.  I guess I'll just have to wait until August.

Silly Monday

Have you noticed a trend?  My Monday posts for the past few weeks have included the ridiculous and the humourous.  After the night/weekend we had with tummy troubles there is need to continue.  Besides, it is our anniversary and for the last 3 years we've spent either our anniversary or Easter (or both) at the hospital.  Today might just continue that trend.  Hubby can't get out of bed and a trip to the hospital for fluids may be required if he doesn't get better. Happy Anniversary!

This picture does make me smile though.  I snapped it last week.  Again, I need to keep that girl attached to me when I move dinner making to the stove.  I've mentioned the 'no hands on the cutting board' rule.  And she knows not to touch Mama's knives.  I guess I need to extend that to the knife block too.  But don't the plastic knives from her play kitchen brighten things up a little?

Never Turn Your Back in the Kitchen

Winter storms attacked us again.  Sneaking in from behind they walloped us good yesterday.  It wasn't much of a day for venturing out, although we did that - there is something to be said for the snowsuit overtop of PJs.  Rather, it was a day for the oven.  And really, it was a day for the couch, but unless you want to watch this all day you have to get up and encourage the kids to jump on the beds.  

With a pile of carrots and parsnips in the house stew was on the menu.  Passion fruit ice cream too, but that will come another day.  The Monster and I set about peeling veg while Hubby tried to rest on the couch.  Oh, did I mention that all four of us have colds right now?  So we get all our veg peeled and chopped and I set to browning the beef.  After a quick deglaze of the pan with orange juice (my favourite thing to use when making stew) I turned around to grab all my veg.  As you can see from the above photo I had cause to pause.  We have a 'no hands on the cutting board' rule in the house, but apparently that doesn't apply to rubber duckies.

There are so many reasons to cook with your kids, giggles notwithstanding.