dessert

A Pie for Mikey

You start out with an idea, a concept of where you want to take it. A taste, a feel, a look. A finished product to be savoured and enjoyed. Something to share, to show off, to take pride in.


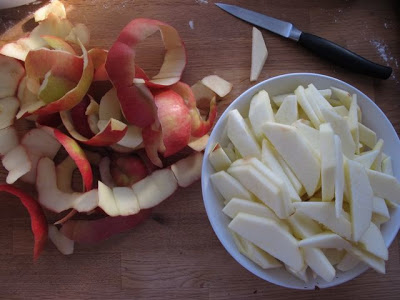
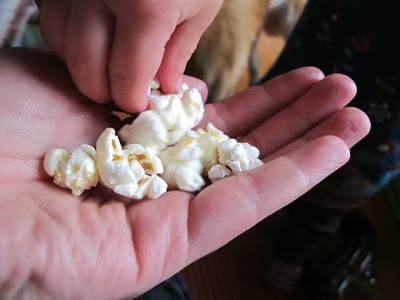
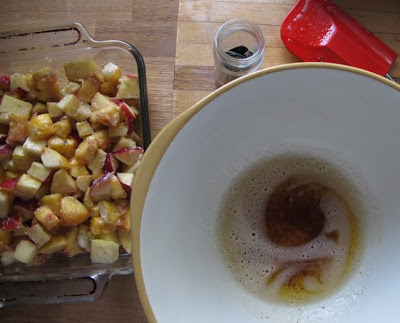
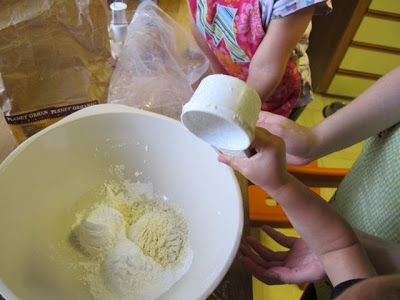
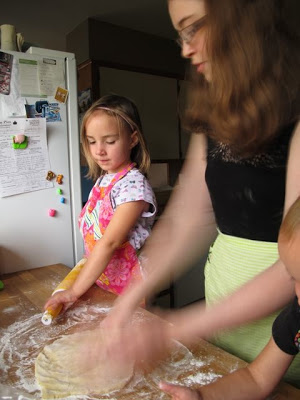
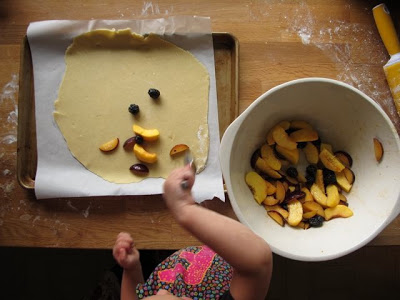
You gather the things to make it, and you bring them close. You handle them, you edit, you cut, you taste. Add heat, maybe some sizzle, and quite often a long simmer. At many times will you season, highlighting the flavours and subsequent adventure.


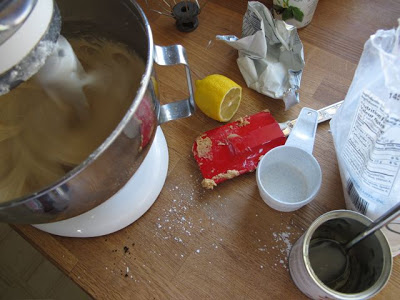
Usually it gets messy. You are either the type of person who cleans as they go or the kind that has a third hand following them washing and wiping as you move. It doesn't matter, as long as you address the mess at some point.


Eventually you sit to enjoy. It isn't necessarily what you expected it to be. Sometimes it doesn't work and you have to start over tomorrow. Quite often it's better. Much better than expected.


One day it explodes. The pleasure is insatiable. The joy immeasurable. On another day it is more subtle, simple. It is good, but not great. The pleasure and peace, however, is there. It's lingering and comforting. Perfect.


At least, this is how my marriage feels.


My husband is my best friend and an incredible man. Kind, generous, a little bit wicked. Committed, driven, and horribly sarcastic. He owns his own business and used to race mountain bikes. But I always thought I'd marry a professor or snooty intellectual. We'd live in an old house filled with books and no kids. Obviously that isn't what I've got.


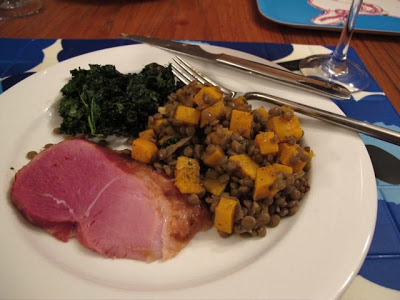
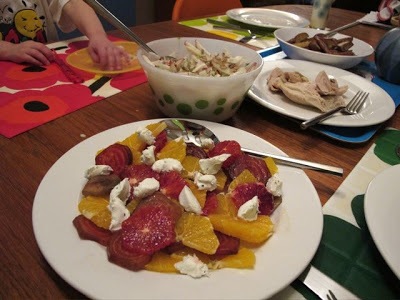
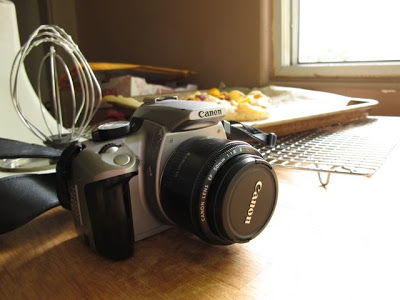
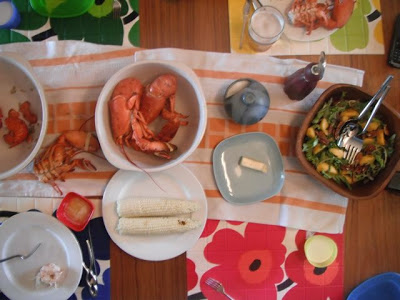
My man in my life and our marriage came about like a farmers' market dinner. One day you find something that looks fantastic and you go with it. And so we have, experimenting along the way. Some days it explodes with pleasure and some days it is lingering and comforting. Perfect.


Imagining a life without my husband nearly stops my breath. Cold.


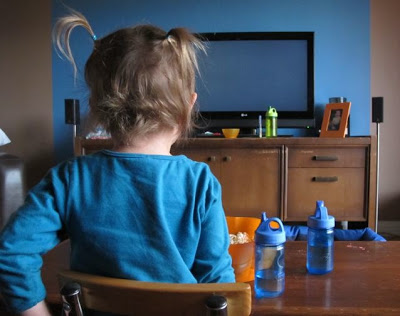
And now there is a colleague, a friend I met through blogging, who is living this fresh hell right now. Her husband, the father of her two little girls, suddenly collapsed and died last week. She is feeling the immeasurable pain of loss, the unimaginable.


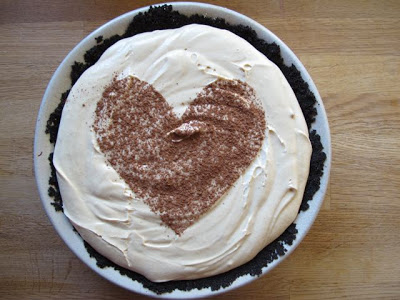
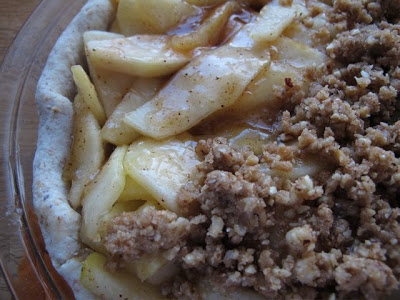
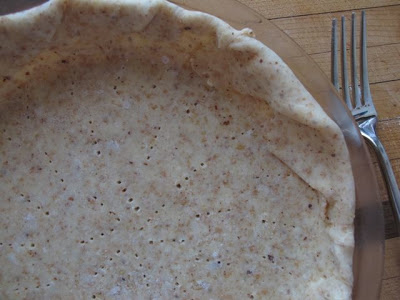
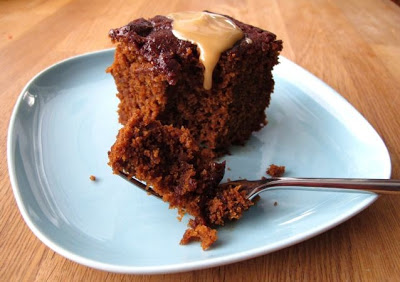
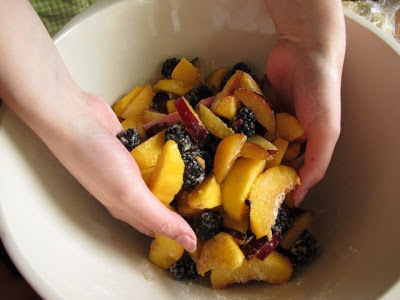
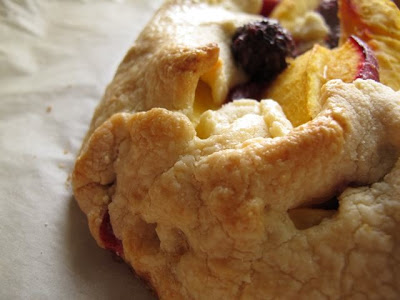
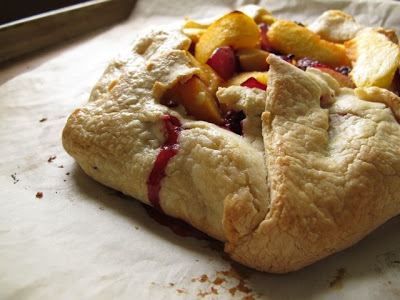
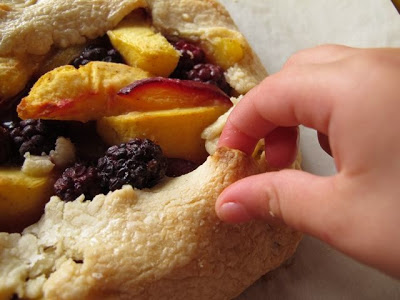
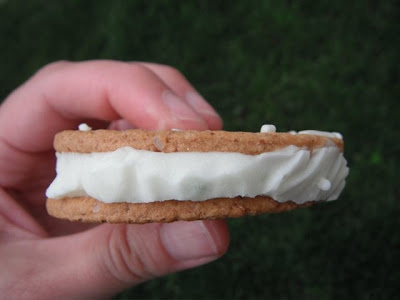
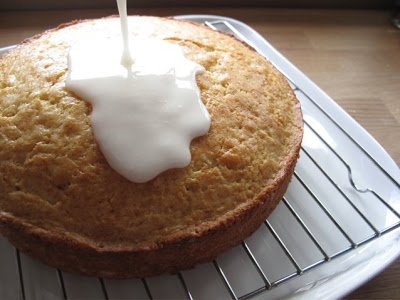
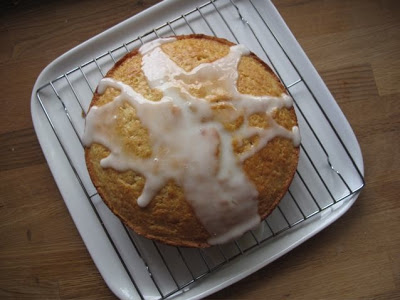
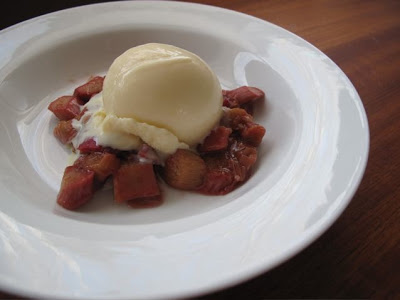
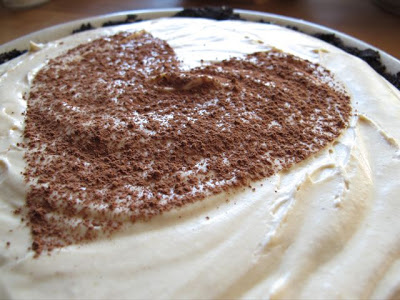
This pie is for Mikey, for her, for their girls. This pie was his favourite and it deserves a celebration. As does he, as does the love he and Jennie shared. Their recipe gave the world this pie. Let's celebrate.


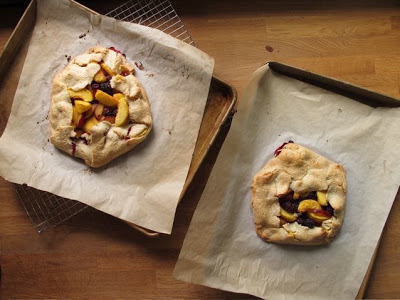
The food blogging community - including those who live close to Jennie and are lucky enough to share a drink and pizza with her - are gathering around her right now. This is community. Today we are making pie. People the world over are taking Jennie and Mike's pie and making it for their own loved ones. They are adapting the pie for themselves, making the recipe for their own loves. In doing so we celebrate a man, relationships, and the spirit of adventure in love, cooking, and life.


Hula Hoops and Strawberry Shortcake


We ate strawberry shortcake for dinner the other night. Not for dessert, but for dinner. Just strawberry shortcake for dinner. And it was awesome.

Okay, I may have been more excited about it than the girls (Hubby was away). They ate their strawberries, picked at the shortcake and licked some of the cream. The Monster thought the macerated strawberries were a fun treat - I can suck out their juices like Jello, Mama!

I may have, ahem, finished theirs as well as mine.

And you know what? I don't feel guilty about this at all. It was a celebration of all that is awesome about summer. Days that involved nothing more than swinging, water fights, and mastering the Hula Hoop for the first time. Days that have your three year old running around the block naked because her clothes got wet and it's too much work to go inside and get new clothes. Days that end with dessert for dinner eaten outside with the sun in your eyes.


Strawberry Shortcake includes fruits, grains, and dairy. If that combo is more than okay for breakfast it is certainly fine for dinner. Of course, ice cream is also fine for dinner. Along with popcorn, pancakes, and cottage cheese with fruit salad. Dinner does not have to involve a protein, a vegetable, and a starch to be dinner.

Dinner has to be the gathering around the table; the moment when we stop, just for a second, to be together as a family. It is the time when we listen to a 5 year stammer through her excitement, the time we discuss pirates, a balanced diet, and why we can't fly to Australia for a day. It's the moment we refuel so the rest of the summer night can be spent with the Hula Hoop.

If I want to serve only dessert for dinner on a nearly perfect summer day, so be it. If you want to, then go for it. And if anyone complains or judges, then send them to me. I'll set them straight with shortcake.


This strawberry shortcake was probably the best I've ever made. I've made the shortcake a few times now, the recipe comes from Baking, by Dorie Greenspan. I've adjusted it to a more reasonable size for our family. It is about the flakiest, most balanced little biscuit cake in the world. Crumbly and fine, but with enough structure to hold up to juicy strawberries and ever so lightly sweetened cream.

Strawberry Shortcake for Dinner
Makes 6 shortcakes

1 cup flour
1/3 cup whole grain flour*
2 tsp baking powder
1/2 tsp salt
2 Tbsp sugar
1 Tonka bean, grated (optional)
1/2 cup (1 stick) cold butter
1/2 cups cream

Preheat the oven to 425 degrees F. Line a baking sheet with parchment or a Silicon mat.

Whisk the dry ingredients together in a large bowl. Cut the butter into 1/2'' cubes. Using your hands, two knives, or a pastry cutter smash the butter together with the dry ingredients. I use my hands and squish it through my fingers. My 3 year old helps. It takes only a minute or two and the dough starts to look like a mix of flakes, crumbs, and tiny knobs of crumbly butter.

Remove your hands from the bowl, grab a fork, and pour in the cream. Stir together. If necessary, use your hands again to get it all to come together. The dough will be sticky.

Spoon into 6 piles on your prepared sheet. Shape a little and press down gently so they are no more than 1'' high. Bake for 12-15 minutes, until golden. Let cool for a couple of minutes on pan, then cool for a few more on wire rack.

To make the shortcakes you also need strawberries. Any other summer fruit would also work. Go with what's fresh and in season for you.

2 cups clean and sliced strawberries
1 Tbsp sugar

Combine the berries and sugar, let sit while the shortcakes and baking and cooling.

1 cup whipping cream
1 Tbsp powdered sugar
1 tsp vanilla

Whip the cream until peaks are just starting to form. Add the sugar and vanilla, whip until lightly firm.

To serve, top a cooled shortcake with a generous scoop of berries and top with a large dollop of whipped cream.

*I used my favourite, Gold Forest Grains, but you can simply use all-purpose flour for the entire amount.


Just Icing

Icing on a spoon.

Having been to my fair share of preschool birthday parties this year I've noticed that very few kids eat the cake when served to them. Sure, they are beyond excited when you take them away from their play with a call for cake. They eagerly sing Happy Birthday and watch the star blow out the candle. Then using fingers or fork or just their tongue all the icing disappears from the cake. All that's left is a soggy, messy pile of crumbs.

It doesn't matter that you stayed up until 2 am to make them the princess or pirate cake they begged for. It doesn't matter that you baked a gorgeous vanilla cherry cake with a recipe from Martha or Dorie Greenspan. All they want is the icing, or frosting, if that's what you call it. And then it doesn't matter if it is a gorgeous buttercream or from a can.

Instead of having wasted cake, get proactive. Just give them the icing on a spoon. Trust me, everyone is happy with this solution. Well, except maybe some parents who get worked up about sugar. But they are counterbalanced by those who are eager for a spoon of their own.

You might still need a cake because I haven't solved the problem of where to put the candles. Besides, they'll always be that one kid who hates icing.

With great thanks to some of my Twitter pals for the influence and egging on my icing only idea.

And Happy Birthday to my Mom, Brother, Brother-in-Law, and Sister-in-Law's Mum this week!

Chocolate Cake for Friends and Neighbours

Do you know your neighbours?

Will they shovel your walk? Will you shovel theirs? Have you had backyard happy hour together? Built a really nice fence? Even chatted with them?

We've got some really fantastic neighbours (and one not so nice one). Once they got past the fact that we indeed were a couple old enough to own a house and not siblings living with our parents we've got along great. They babysit the girls, we watch each other's pets, and generally look out for each other. It is because of our neighbours, in large part, that we are renovating instead of moving.

So when we came home with a new washer and dryer today Poppa came over to help us get it into the house. No, we didn't make him do the heavy lifting! As I was already making dinner we invited them to join us. Besides, how much ham can two adults and the girls eat?

We pigged out, literally, on Spragg Meats ham, sauteed kale, and lentils with roasted squash and caramelized onions. I was going to be all healthy and serve a citrus salad for dessert, but it seemed more special to make a cake. Our neighbours definitely deserved cake.

This recipe was created for the latest issue of What's Up Families. I wrote a feature article on gluten free cooking. It was a great challenge for me. And a great opportunity to interview Lauren over at Celiac Teen and her family for the article. Very inspiring to see her family together and her love for baking. While Lauren isn't quite close enough to be my neighbour (but luckily still close), I would happily share this cake with her. (Check out the issue for more GF recipes.)

Hazelnut Flourless Chocolate Cake

1/2 cup plus 1 tsp cocoa
4 ounces chocolate
1/2 cup butter
3 eggs, separated
3/4 cup sugar
1 tsp vanilla
1/2 cup roasted hazelnuts, finely crushed

1. Preheat the oven to 350 degrees F. Butter an 8'' round cake pan. Cut a piece of parchment paper to line the bottom, place inside the buttered pan, and butter that too. Use the 1 tsp of cocoa to dust the parchment lines pan.
2. Chop the chocolate and melt with the butter in a bowl set atop of a pot of simmering water. Once melted remove from heat and let cool for 5 minutes.
3. While the chocolate is cooling whip the egg whites with an electric mixer until soft peaks form. Add in 1/4 cup sugar and beat until glossy and stiff peaks form.
4. Add the egg yolks, 1/2 cup sugar, and vanilla to the melted chocolate. Stir well. Add the hazelnuts. Fold in 1/3 of the egg whites into the chocolate mixture to lighten the batter. Carefully fold in the remaining whites. Stop as soon as you don't see white. Pour into prepared pan.
5. Bake for 30 minutes. Cool in pan for 10 minutes, then remove from pan. Best served warm.

Rhythm and Apple Pie


It felt good to be back in the kitchen today. An afternoon of crust making, apple peeling, chicken roasting, orange peeling, and even doing the dishes. I honestly can't remember the last time I did that - prepared a proper Sunday dinner.

Today Smilosaurus was very helpful. I'm going to milk that. Her sister was the same way, until she turned 3. Now she isn't as interested in the kitchen. Like all moms, I'm clinging to the adoration of my children while I have it. She helped me rub the freshly roasted hazelnuts in a clean towel, she worked the food processor, tossed the fennel and apples, and stood transfixed as I peeled a blood orange.

Even on the days when I just-want-to-get dinner-on-the-table I'm always happy for her help. Well, except when she decides she needs to salt things. We're used to each other and have already developed our own rhythm. And she's two and a half!

Then today I tried a new recipe - Apple Pie with Chinese Five Spice Powder and Hazelnut Crumb Topping. It was just apple pie, but it wasn't the way I normally make apple pie. It seemed to take forever! A different crust, precooking the filling, and orange juice in the crumble topping?! My rhythm was off, way off. The only part that felt right, felt normal was peeling the apples.

So, it took a little longer. So what? It was damn good apple pie! The 5-spice powder was intoxicating, beyond anything cinnamon every aspires to be. While the crust was mediocre (oh, how I wish I'd stuck with my own pate brisee), the crumble topping was insane. I doubted the orange juice, but that made it sing. No taste of orange, but a heightened hazelnut brightness.

As I followed the recipe to a T, check it out here, from The Nourish Network. Kind of appropriate too, seeing as it was National Pie Day in the US. It fits in with Lauren's Go Ahead Honey series too.

We ate our roast chicken and potatoes, apple and fennel slaw with sunflower seeds, and roasted chiogga beets with oranges, blood oranges, and goat cheese. Before pie The Monster and Hubby went skating. Spazzing was kept to a minimum and she was rewarded with two slices of pie. Okay, maybe I was rewarded too...

Gingerbread Cake

This is the cake that very nearly saved my life. Not changed my life, saved my life.

I have a very bad habit of waking in the middle of the night and snacking. I totally blame the tiny bladder I was blessed with, it wakes me and I'm left with nothing to do but snack before I try and get back to sleep. One April morning I awoke and tried to talk myself out of the extra ten steps to the kitchen for a piece of leftover gingerbread cake. I have no will power when fully awake, let alone at 3 am.

There I found myself, a piece of cake in hand and staring out the window when I noticed an orange glow. It took a few seconds to register that the glow wasn't actually supposed to be there. And a few seconds longer to realize that the glow meant fire.

Hubby's car was parked behind our garage on a parking pad. The car was the 1975 Triumph TR6 he bought a decade before. For years it had been in need to repair. In our garage sat the engine and an extra transmission. We'd moved 6 months earlier and he borrowed a flat bed to transport it all 3 hours down the highway. He knew exactly what he was going to do to the fix that car.

Having it lit on fire wasn't part of the plan.

In that eventual moment when I realized the car was on fire I screamed for him. He came running out, yelling at me to pick up the phone and call 911, then raced outside to grab the fire extinguisher from our daily driver in the garage. The garage two feet away from the burning car. I'm freaking out while the 911 operator is quite calmly and kindly reminding me that cars blow up and perhaps we should not be standing in front of the windows, let alone trying to put it out ourselves. That's when Hubby reminds me that there is no engine in the car and the gas tank would be empty. I'm obviously not very smart when faced with fire.

Fire trucks come and with very little ceremony the flames are doused in just minutes. The facts all point to someone having thrown accelerant on the hood of the car and tossing a match. By the time I'd discovered the fire there wasn't much left.

The garage was also hot and had to be hosed down on one side, siding eventually replaced. If the garage had gone up we would have lost our other car, the one with a full tank of gas, and who knows what else. As sad as Hubby was at losing his car, we were thankful that that was all we lost.

We came in the house as the sun was coming up and cracked a beer, a bit charred ourselves. When I went to put the bottles away I noticed the cake. One piece of cake fallen on the counter, with a single bite taken.

Peterson Gingerbread Cake
This is the recipe of my sister-in-law's mother. Their family likes it with Bird's Custard Sauce or even cream cheese icing. I'm partial to it with some maple butter. It is moist and heady with gingerbread.

1/2 cup shortening (I use butter)
2/3 cup brown sugar
1 egg
1 cup molasses
2 1/2 cups flour
1/2 tsp salt
1 1/2 tsp baking soda
1 tsp ground ginger
1 tsp cinnamon
1/4 tsp cloves
1 cup hot (not boiling) water

1. Preheat the oven to 350 degrees F. Grease an 8'' by 8'' baking pan.
2. Cream shortening/butter. Gradually add the sugar, then the egg. Beat until light and fluffy. Add the molasses.
3. In a medium bowl whisk together the dry ingredients. Add to the batter, 1/2 cup at a time, alternating with 1/4 cup water. Beat until smooth after each addition. Pour into pan.
4. Bake for 45-50 minutes, or until a tester comes out clean.
1 cup molasses

Browned Butter Sunday


After finishing 5 articles in a week (recipe testing included) and single parenting for most of that time, frankly, I didn't care much for Sunday dinner. The fridge was full of food, the girls spent the afternoon munching on late season strawberries, cheese, and a cantaloupe, and we were all getting downright cranky.

That left only one option for dinner - popcorn.

When I told the Monster that we were having popcorn and I would find us a movie to watch she got so excited that she literally burst into song. Then, on her own volition, she start cleaning up the living room to make it ready for dinner at the coffee table. Hell, if that's what it takes I'm thinking dinner like this everyday!

Not all was lost when it comes to a good Sunday dinner though. When we returned from the market and I went to refresh the fruit bowl I had some mealy peaches and sad looking apples and pears to contend with. Then there were the ripe peaches that didn't make it home intact from the market and a few half eaten apples courtesy of the girls. The only option was to make a fruit crisp.

The girls got grains and fruit for dinner. I am not a bad mom.

While cutting up the fruit (just a pile of what we had, peels and all) I had this notion to try browning the butter to the crisp first. I guess some part of me was still able to be creative. The butter melted and crackled away on the stove. Then it occurred to me that I never really know how brown is technically browned butter. Turns out I've not been browning enough all along. So I kept it on the stove and got to the lovely browned bits.

In the end, I could have left it a bit longer, I think, but it had that rich, nutty smell and some good colour. Even though I was making crisp, I must confess that the smell only made me think of lobster. I must still have Nova Scotia on the brain.

Once the butter cooled a bit I made up my regular crisp topping. Frankly, I could have eaten it straight, and did so for a few nibbles. It was rich with a butterscotch goodness and with a slightly lighter texture from using melted butter. I am never making crisp any other way, ever again.

And I refuse to feel bad about taking the time to treat the girls and sit quietly in front of the TV. Roasts and veggies are nice and all, but Sunday is also about family. After such a hectic and trying week sitting down together, this time with snuggles, was a much better option.


Browned Butter Fruit Crisp

Filling
4 cups fruit
2 tbsp brown sugar
2 tbsp flour
1 Tonka Bean/1 tsp cinnamon

Topping
1/2 cup butter
1/2 cup brown sugar
1/2 cup flour
1 cup rolled oats

1. Chop the fruit into 1/2 inch chunks. Peeling is optional. Gently toss with flour, brown sugar, and spice. Pour into an 8 by 8 baking dish.
2. Preheat oven to 350 degrees F.
3. In a small, stainless steel pot on medium low heat melt the butter. Then let it cook , swirling the pot every now and then, until it turns brown. As the colour starts to come to it, watch it closely. It can burn quickly.
4. Once the butter is browned nicely, pour it into your mixing bowl and let cool a few minutes. Admire the colour and dream of lobster. Then add in the brown sugar and stir. Once combined add the flour and oats.
5. Crumble on top of your prepared fruit, trying not to snitch too much along the way.
6. Bake for 30-40 minutes until the topping is crisp and more than golden and filling is bubbling.

Introductions


A photo essay on my first conscious gluten free baking experience. Lauren from Celiac Teen came over this morning, a date arranged shortly after we realized we only lived blocks from each other. Through a rainy walk she brought with her a backpack full of flours. We were going to make pie. 

The girls took to her immediately, probably assuming she was some fantastic creature known as the babysitter. Their excitement was no less once they realized we were all going to bake together. We donned aprons, we measured flour, we drank tea while our pastry chilled. Then we cut up peaches and plums to mix with blackberries and tonka bean. And while our galettes baked the little ones chased us around the house. It was comfort and chaos all at once. Welcome to our home, Lauren.

And the pastry? Fantastic. It tasted great raw, and even better cooked. It was a tender dough to work with, so I worried that it wouldn't be very flaky. I was wrong. To be honest, you would be hard pressed to pick out out from a conventional pate brisee.

We filled it with our fruit, a touch of sugar and millet flour and a whole tonka bean grated in. The crust we brushed with cream. The galettes baked for 30 minutes. And after our conversations we sat silently with our tonka bean sweetened cream on top of our galettes. Silent only as the four of us devoured an entire galette for lunch.


Season by Season

It's been a rough, rough couple of weeks in the Arkison household. Give us a few more weeks and we should be back on track.

This week, however, as been for snuggles, rest, and comfort. But a family can't live on ice cream alone. Is there any other summer comfort food? The other day I was desperate for a peach, I wanted the juice to drip off my chin and the scent to tickle my nose with summer pleasure. Of course, that might have had something to do with the fact that we were driving through Peachland on our way home from a funeral.

In sharing with a friend she mentioned that the only way to get through times like this is day by day, then season by season. As a food obsessed kind of gal, seasons are a strong marker in our lives. We eat by the seasons, therefore we live by the seasons. And I'm someone who is hard pressed to actually pick a favourite season (although I usually answer winter, when asked.) So as we recover from the latest round of flurries to the solar plexus I sought comfort in summer.

This is my Baba's raspberries and cream. Smilosaurus called it ice cream and The Monster declared she didn't like it. To me it was my Baba's old people smelling hug in a stifling house, arms covered in scratches from the raspberry canes. It was the weeks in the summer we were sent to Saskatchewan, which we hated at the time, but now I cherish. It was family, it was generations, it was summer treats.

Oddly, I used frozen raspberries for this. It was what I had. And, to be honest, it was what we usually used if it wasn't that exact berry season.  Strawberries work equally well. If you are using frozen berries, thaw first and drain off excess juice. Baba usually used regular white sugar, but I like mine with brown for that punch of extra flavour.

Berries and Cream

Equal parts mashed berries and sour cream or farm cream
Sugar to taste.

1. Stir together. Eat. Be comforted.

Summer Sunday Dinner


After a weekend of landscaping - well, a weekend of mostly providing snacks, lemonade, and advice while Hubby did some landscaping - I thought I should treat the man with a good dinner. Steak was too obvious. Then I remembered that our old summer ritual has been neglected since the girls arrived. Time to bring out the lobster.

Back story:

Hubby and I met 15 years ago. We started dating once I finished undergrad a year later. He came to visit me in Halifax. See, I was going to keep working at my organic vegetarian bakery cafe job and save money to go to Europe. Then he decided to visit. After spending a week driving around Nova Scotia, eating lobster along the way, I knew there was no way I would get to Europe. 

So, a few days after he left and more than a few boxes of Kleenex later I booked myself a plane ticket West, packed up all my University belongings, and called him. We chatted for a bit, then I asked him what he was doing the next night. When he replied that he had nothing going on I suggested me might want to pick me up at the airport. Like a good man he asked why I was coming to Edmonton. And like a brave, slightly stupid 21 year old I simply answered, "You."

One plane ride, a short soap opera, 14 years, and 2 kids later I still say it was the dumbest and best thing I ever did.

And every summer since we've treated ourselves to a lobster dinner. Indeed, this is more of an anniversary than our actual wedding anniversary. Tonight we brought the girls into our tradition.

That may have been a very, very bad idea. The Monster was all excited to buy the lobsters with me, happily carrying them and showing them off to Daddy. The girls are quite fascinated with the lobsters at the market and are wickedly curious about them. This fact alone could not prepare me for the abject terror Smilosaurus had when actually face to face with a lobster.

I should have been sympathetic to her tears, but I was only reminded of her Dad, on that first trip to Nova Scotia. The last night of his visit we decided to buy lobsters and cook them at home. I pulled them out of the box and held them out for Hubby to inspect. The guy seriously jumped and ran away, screaming, "Get it away! Get it away!" I, being the little snot that I am, then chased him with the lobsters while he threw anything available in my direction. And that was the week I discovered about the only thing Hubby is afraid of - live lobsters (he blames his mother). All I could do was giggle with memory as my baby girl cried and cowered in fear.

Yes, I'm still a little snot.

We thought everything would be fine once the lobsters were cooked. I steamed them (do not ever boil your lobsters) for about 12 minutes. The same amount of time the corn was on the grill. I made a salad of green and baby beets from our CSA delivery, with some peaches, basil, and toasted pecans. We sat down to eat and the terror re-emerged. She couldn't stop screaming. Even when we told her she didn't have to have any and that the lobsters were dead. Terrified was the word of dinner. 

Rather than have her tears destroy what should have been a fantastic dinner we put her in her bed and let her read books while the rest of us ate a very lovely, yummy meal. She joined us for a bit of corn and salad. Lucky girl, because then it meant she was allowed dessert. And that was worth setting the fear aside. Ice cream sandwiches made with this lime ice cream and Digestive biscuits. 

Oh, I guess I should clarify that Hubby is no longer afraid of live lobsters, but he would still prefer I don't hold them anywhere near him.

An Abundance of Limes


On a gorgeous weekend not too long ago, Hubby and I indulged in quite a few gin and tonics. We've discovered a new-to-us gin and are rather obsessed with it. The first time I saw it in our local wine store I asked the purveyor what it was good for, meaning martinis or G&T? His response, "Making Babies!"

Well, I can't attest to that at all - she says as she raises another gin and tonic - but I can say that it makes about the finest drink I've had. Aside from those Negronis. If we ever get some heat again the Old Raj is coming back out.

I will, however, need to buy more limes. You see, we got a little gung ho that one warm weekend and bought about a dozen limes. No, we aren't that big of drinkers. We merely forgot we already had them. Yes, we were sober when we were at the store.

With an abundance of limes and a convenient container filled with egg yolks it really did seem that the only option was to make ice cream. Gin and tonic ice cream? Hmm, not too bad of a concept, but my brain could not figure out how to capture the necessary balance of taste with the custard base. Browsing through the books, I came across a recipe for Margarita Ice Cream in Nigella Lawson's Forever Summer.

Um yeah, sign me up. 

This recipe did not disappoint. I was worried it would be too eggy, but all that lime juice really cuts the richness. Overall it is refreshing without being cloying. Smooth but somehow a bit light. It isn't a Margarita - which would have also been a most excellent use for our extra limes - but the hint of tequila is amazing. I did cut back on the amount of alcohol because I knew the girls would be having some ice cream If you swapped out the tequila for a generous splash of vodka you would simply get something akin to Key Lime Pie ice cream.  Hmmm, there might be a frozen pie idea there...

This is the second ice cream recipe I've made with sweetened condensed milk. I must admit, I'm rather fond of it.  I wonder what David Lebovitz would say? It creates a silkiness to the ice cream without overly sweetening it. I'm always afraid it will be too sweet, but it really works well.

Now, I wonder how good this ice cream will taste with the snow we're expecting? Yes, snow. Don't talk to me about it.

Margarita Ice Cream
(Adapted from Nigella Lawson's Forever Summer)

1 1/2 cups whipping cream
6 large egg yolks
300 mL tin of sweetened condensed milk
1/4 cup tequila
splash of Triple Sec, Cointreau, or Grand Marnier
Juice of 6 limes and zest of 1

1. Heat the cream in a heavy saucepan. Slowly whisk it into egg yolks, off the heat.  Once combined, pour back into the saucepan and cook it, stirring, until thickened.  It should coat the back of the spoon.
2. Pour the custard into a clean bowl and let it cool slightly.  Stir in the condensed milk, alcohol, lime juice, and zest. Cover the surface directly with plastic wrap and chill for 4 hours at a minimum.
3. Churn according to your ice cream maker's instructions. Enjoy.

Birthday Treats


It was Smilosaurus' birthday yesterday. This daredevil, evil genius child of mine is now 2. I'm not at all prepared for it. I don't have a baby any more and that's kind of tough to accept. The only thing that keeps me going is the fact that she is an itty bitty thing, and the thought of cakes on birthdays.

We'd initially planned a low key day.  I was at a conference for work, running into doppelgangers of ex boyfriends and nervously parking behind Ferraris. Hubby was lost in a pile of wood and hardware, putting together our new swing set. But on the way home from work I felt like we simply needed a cake for dinner. 

This cake needed to be more than a carrier for icing. Yes, icing is really the best part, but I was actually craving cake and I was hoping to make the girls like it for once. Knowing that I'd preemptively bought cream so I could make ice cream this weekend I decided I would make a simple butter cake and serve it with cream.  Nothing fancy, but just the right amount of pomp befitting a two year old.

So I turned to a classic recipe in this house, one I've made a half dozen times in the year or so since I've had the recipe. Lemon Glazed Butter Cake comes from a treasured Gourmet before they folded. And yes, the girls helped me make the cake. Is it wrong that that kid had to make her own cake? Maybe.  But in my defense, she wanted to.

In my world, one of the best flavour combos is lemon and white chocolate. So I served our cake with white chocolate cream.

The Monster loved the cake so much she ate two pieces and left most of the cream of the side. And Smilosaurus merely played with her cake, rubbing it into her dirty, bare legs as if it was lotion.  So, I think she liked it too. Happy Birthday Baby Girl!

White Chocolate Cream

4 ounces white chocolate, finely chopped
1 1/4 cup heavy cream

1. Place chopped chocolate in a sturdy bowl.  Heat 1/2 cup cream on the stove or in the microwave until hot, but not scalding.  Pour over chocolate and stir immediately. Chocolate should melt with stirring.  If it doesn't, heat, in bowl, over a small pot of simmering water until melted. Let cool until room temperature.
2. When the chocolate mixture is cool, whip remaining cream with a sturdy whisk and bowl or an electric mixer. Whip until it starts to fluff up and the beaters/whisk leave marks in the cream. Slowly whisk/beat in the chocolate cream, beat until the cream reaches the desired whipped cream consistency.  Serve immediately. Alternatively, you can refrigerate it for a white chocolate mousse.


Cardamom Ice Cream

Save for a few days over Easter and our wedding anniversary I've been single parenting the last two weeks. What I wouldn't do for beer and chocolate every single night. And intravenous caffeine first thing in the morning. But it's just another week in an absolutely crazy month. And all you can do is put one foot in front of another, type another key, cook another meal, and eat another bowl of ice cream.

Yes, another bowl of ice cream. For every day that I remember to buy cream when I steal a moment to buy groceries I dream about ice cream. Okay, that's a slight overstatement, but only slightly.

Once I called my neighbour over to save me by digging through the mess in the basement (I can still can't make my way to the basement yet) to find the base of the ice cream maker I could make my dreams come true. Cardamom ice cream here I come!

And oh, did that ice cream do it for me. It's quite rich. Ridiculously rich. And while I doubted the cardamom taste when making the custard it came through perfectly in the finished product. Adding rhubarb was a way to tease myself into spring (despite the snow storm we got this week) and soften the richness of the ice cream.

Cardamom Ice Cream with Lightly Stewed Rhubarb
(Adapted from delicious March 2010)
Serves 6 (or 1 tired mom over a few days)

Ice Cream
1 cup heavy cream
1 1/4 cup milk
1 cinnamon stick
8 cardamom pods, lightly crushed
5 egg yolks
2 tablespoons sugar
300 ml can of sweetened condensed milk

Rhubarb
6 stalks rhubarb
4 tablespoons brown sugar
2 teaspoons vanilla
2 tablespoons water

1. Steep the cinnamon stick and cardamom pods in the cream and milk. Bring to medium heat in a saucepan. Just before it boils turn off the heat and let it sit for an hour. Strain and discard the spices.
2. Whisk the eggs and the sugar until pale. Add the infused milk/cream, whisking constantly. Pour into a clean saucepan and cook over low/medium heat, stirring, for 5-8 minutes until thick enough to coat the back of a spoon. Remove from heat, add the condensed milk, and pour into a clean bowl or jug. Cover with plastic wrap directly on the surface and refrigerate for 4 hours or overnight.
3. Churn in an ice cream maker according to manufacturer's directions. Pour into a freezable container and freeze until firm.
4. Half hour before serving chop the rhubarb and combine with the other ingredients in a small saucepan. Cook over medium heat for 3-5 minutes until the rhubarb is soft but is still holding it's shape.  Set aside to cool.
5. Serve ice cream on top of cooled rhubarb.

Lemon Frozen Yogurt

For sittin' on the porch and pretending it's summer.

This is about the laziest dessert one could make, aside from cutting up fruit and pretending it's a treat. Of course, it only works if you own an ice cream maker. That's not true, you could just stick a container of yogurt in the freezer, but you'll miss the churning and the joy of soft serve fro yo as it comes out of the ice cream maker.

Recipe:
Take a carton or two of your favourite yoghurt such as Liberte Mediterranee Lemon. Dump it in a frozen ice cream maker. Turn on. Eat when frozen. Dream of green grass, ocean breezes, and blazing sunshine.

Scotch and ...


In a fit of accidental drinking and eating Hubby and I discovered a fantastic food/liquor combo. Scotch and caramel corn.  In particular, peanut and sea salt with my caramel corn and a smoky scotch like Caol Isla. Okay, so the drinking wasn't accidental, but the insane hunger that led us to the Scouts caramel corn was.

Not wanting to repeat ourselves, nor get into that beyond sweet caramel corn again, as well as prep for My "Whiskey for Dinner" class tonight I set out to make my own caramel corn. How refreshing it was to discover that it is so damn easy. Pop some popcorn, make some caramel, toss together, and bake at low heat. That's it. I even encouraged the men in our class tonight that it was dead easy and hopefully they are logging on to get the recipe right now.


One of the surprising things in my research was that 99.99 % of the recipes I found used brown sugar.  Actually, I didn't find any that used white sugar, but I can't conclusively say that there isn't one out there. The first batch I made was with the "best brown" sugar I keep in the house for oatmeal and cookies.  It was good, once I got over the concept of adding baking soda to the recipe. But I knew I wouldn't have enough, plus I wasn't that fond of the colour.

The second batch was with the "yellow" brown sugar I borrowed from the neighbour when I realized that the nanny had used the last of my brown sugar making cookies - not that I was complaining. And, I'll admit it, I was afraid to try white sugar since I found no recipes with it. So yellow brown sugar it was. 

Can you tell the difference in the photo above? Best Brown on the left, yellow brown on the right.


So I had my caramel corn ready to go. Good to go. Loaded up I joined a great group of guys at J. Webb tonight. Where are my single ladies?  Seriously, develop a taste for scotch or an open mind, because there are always a fun, intelligent group of guys at scotch tastings. 

The caramel corn was on deck to serve with those lovely smoky or peaty scotches.  When it comes to scotch and food pairings you don't want to pair smoke with smoke. The sweet and salt of caramel corn matches perfectly with the smoky drinks. Actually, the caramel corn went with almost all the scotches.  As does chocolate, especially the fruity ones from Venezuela and Guatemala.

But pairing scotch and food is more than the sweet stuff. At its most basic level, pairing is pretty straight forward - match the basic characteristics of the scotch to your food. For example, the Lowland scotches are lighter, so they work well with rich cheese, honey, and fruit. Something like a pear and brie tart, or a cream of leek soup. And think about where the scotch comes from, The Island and Speyside styles work really well with seafood and both clean and salty flavours.  Even sushi works really well, or mussels with fennel.  The Lowland and Highland styles lend themselves to the richness of game meat, the sweetness of peppers, and even some spice.

But the star of the night was the caramel corn.  And the Glenfarclas 17 year old.

The caramel corn recipe I used was a slight variation on this one.  I added a bit more salt, used the roasted peanuts I had in the cupboard, and that yellow brown sugar. It isn't cloying, has the burnt sugar saltiness, and the baking soda makes the carmel crackle, but not crack.

Caramel Corn
Makes about 10 cups

1 3/12 ounce package plain/orginal/natural popcorn
OR 10 cups air popped popcorn
1 cup yellow brown sugar
1/4 cup light corn syrup
1/4 cup unsalted butter
2 tbsp water
1/2 teaspoon sea salt (cut this back if you prefer it without the salty taste)
1/2 tsp baking soda
1 tsp vanilla
1 cup peanuts, cashews, or pecans

1. Preheat oven to 250 degrees F. Line a large cookie sheet with parchment paper or spray with non-stick spray. Spray a large bowl.
2. Pop your popcorn and toss in the bowl, being careful to keep out any unpopped kernels.
3. Whisk sugar, corn syrup, butter, salt, and water in a small saucepan.  Melt and boil for 3-5 minutes until it reaches 250 degrees F on a candy thermometer. You need the candy thermometer, so don't try to just eyeball this step.
4. As soon as you reach temperature stir the baking soda and vanilla into the caramel.  Pour over the popcorn, add the nuts, and stir together.  You won't get a complete cover over the popcorn, but stir well and try to get a little on each bit of popped corn. Spread out on the cookie sheet.
5. Let cook slowly in your low oven, stirring gently every 20 minutes, for 1 hour. Let cool completely before enjoying.

Christmas Desserts


It was always my job, from about the age of 13 on, to make dessert for Christmas dinner. So long as I was baking away I was relieved of all other Christmas dinner duties.  As far as I was concerned, that was a good deal, but I'm not sure how my brother and sister felt about it. All would be forgiven as soon as the cheesecake, torte, or even zabaglione came out.  A rich, over the top creation to fill our already overflowing tummies.

Things sure have changed.  Now I do all the work - dinner and dessert - and am stuck with most of the clean-up too.  Not that I'm complaining if it means having a lovely, albeit raucous dinner at home. My desserts have changed too.  Gone are the rich, chocolate affairs.  Those are still good, but after a rich, starchy dinner I've trained myself to want something lighter.

Last year it was Key Lime Pie.  Oh, was it pie!

This year I am opting for Panna Cotta.  Appropriately, the first time I had it was at a Christmas lunch for the office. I have no idea what was served for the rest of the meal, but I can still taste that first bite. While it is not exactly light considering that it is made with loads of cream, the perception is of something lighter.  Still an indulgence, but a slightly more refreshing one.


Panna Cotta is essentially Jello for grown-ups.  Made with cream and flavoured with lovely essences like vanilla, orange, or raspberry is takes jello far beyond any layered, Cool-Whip concoction you've ever had. Oh, and it is so very simple to make.  So simple that after you've made it you wonder why you ever thought gelatin was a scary thing.  Trust me, I can't make Jello, so this was indeed a scary endeavour. But all you do is let the gelatin bloom - a fancy word for get activated by a liquid - and stir it into your sweetened, flavoured cream. Then chill.

In fact, undo your pants, pour yourself a glass of sherry, and definitely chill in the post-feast bliss.

Merry Christmas!

Orange Scented Panna Cotta
(serves 6-8)

3 cups heavy cream
2 oranges
3/4 cup sugar
1 tsp vanilla
3 tbsp unflavoured, powdered gelatin (1 1/2 packets in Canadian grocery store availability)
water

1. Prepare a mold or 6-8 individual ramekins/bowls/glasses by cleaning thoroughly and letting air dry.
2. Zest oranges.  Stir zest into cream along with sugar and vanilla.
3. Juice oranges.  Add enough water to equal 1 cup liquid.
4. Place a few tablespoons of the juice/water into a small bowl and sprinkle with the gelatin. Let sit for about 5-10 minutes. Mixture will feel like a very firm gelled substance.
5. Heat cream mixture until just simmering and sugar is well dissolved. Remove from heat. If you do not want to see the zest in your finished panna cotta strain through a fine-mesh strainer at this point.
6. Stir in the gelatin to the heated cream mixture until smooth and all the gelatin is dissolved. Pour into molds, ramekins, cups, or bowls.  Chill 10 minutes, stir gently.  Chill 3 hours or overnight.

The Last Recipe

There is something immensely appealing about the making the last recipe in a cookbook. Don't ask me why, but I got a little giddy seeing that I was making the last recipe in Mastering the Art of French Cooking.  The occasion was our Julie/Julia dinner party and I was in charge of dessert.  Because I had not seen the movie I was at a bit of a loss for what to make.  

My boss actually gave me the idea to make this cake.  She just randomly mentioned her daughter making a cake that Julia makes in the movies where you press nuts in to the side of the cake. That's all I had to go on. So I read the the cake section (5 basic cakes takes up about 25 pages) and decided that Reine de Saba was the cake in question.


Nowhere does Julia Child tell you why it is named after the Queen of Sheba, but she does think of it is as a quintessential French Cake.  Me?  I'll just refer to it as chocolate and almond cake. I'll also refer to it as one of my favourite chocolate cakes ever.

Chocolate cake can come in many forms - uber moist, dense and flourless, simply chalky or dry, and sometimes perfectly lovely.  This one falls in the last category. Only a hint of almond touches the slightly creamy but rich texture. With ground almonds and whipped egg whites competing between grounding the cake and making it soar, it really lands somewhere in between in an earthly heaven made of chocolate.

The cake itself isn't the last recipe in the book, it is the chocolate butter icing. Officially, this might be my new favourite icing.  It isn't sweet or terribly rich.  Good butter makes this icing because all it really is is melted chocolate with butter whipped in.  Not much fancier than that. Of course, the recipe makes it seem a lot fancier, but don't be fooled. And don't get lost in the instructions.

You should also not be fooled by the small amount of icing the recipe makes.  It seems like such a paltry amount, but it covers the cake and is a perfect compliment to the cake.  Next time I might use that last recipe as a filling, or a crumb coat on a cake I cover with ganache. Or, I'll just follow the recipe again and make The Queen of Sheba as intended.

Cake decorating is not my forte. I sincerely hope that my girls NEVER ask for a themed cake because it will be a sad, sad birthday for them. I can, however, hold a cake and press ground almonds in to the side.  That is not difficult at all, but worth the mess. I strongly recommend that you do not skip this step.

If I drank espresso it would have been a nice accompaniment.  My mind went to scotch. But after more than a few glasses of wine that night, all I could think about was whether it would be rude or not to take one of the last pieces and skip making my souffle.  Alas, Pierre and Gail's husband made the decision for me.  The souffle was good, but I am still thinking about the cake. I just might open the book to the last page and make it again for Christmas dinner.

Blizzards, Banana Cake and Builder Men


December 4th and we're finally getting a good snowfall.  Indeed, it is a full on blizzard of white out there.  The weather folks might call it a winter storm, but we all know that the wicked wind, sandy snow, and a cold that makes you never, ever want to leave your house means that it is a blizzard.  If you're me that means you bake.

Today's recipe comes to you courtesy of The Monster.  When I suggested we bake she informed me that we must bake a birthday cake.  Today, however, is not the birthday of anyone on this house.  That perfect three year old mind remembered that it was her cousin's birthday a few days ago and therefore we must make him a birthday cake.

Now, I have no idea what kind of cake my nephew would have liked, but The Monster decided he wanted a peanut butter cake.  I talked her into a banana cake with peanut butter icing. So we dug through the cookbook shelf and found a recipe for banana cake in the Favorite Family Recipes of Holy Cross Parish cookbook. It's one of those cookbooks where everyone submits the pride and joy of their kitchens. That means it is really hit or miss depending on the recipe instructions. We got ourselves a hit here!

The girls got aproned up, we turned on the Toopy and Binoo Christmas album (oh, thank-you Grandma), and we set ourselves up for a messy old time.  We mashed bananas, creamed butter and sugar, sifted flour, and licked, licked, licked everything. You know, I'm convinced that if I put liverwurst in the Kitchen Aid they would devour it.

This is your basic cake recipe.  There isn't anything fancy about it except for the fact that it calls for the baking soda to be added to the wet ingredients. It bakes in a classic 9 by 13 pan.  In reality it is a simple weeknight dessert.  It isn't overly sweet and it is wonderfully moist, with a good crumb as they say.

While the girls napped I set to making the icing. I'll be honest, it was a bit of a challenge because it turns out I need a few groceries. Did I mention there was a blizzard going on? So I hoped for the best with the bit of peanut butter and icing sugar I had.  I had my fears, but damn, it is good icing! Not at all sweet and as creamy as it can be when you only have natural peanut butter in the house. And just the right amount for a sheet cake.

This is the kind of cake you want after trudging home from a day at school (or work).  It is a cake that makes you feel loved.  It is a cake that mom can feel pretty good serving and also enjoy with a cup of tea.  Ahem, let me refresh my cup.

And tonight it will also be our dessert as we treat our builder men, as The Monster calls them, who've been helping Hubby out with digging, pouring concrete, and framing in the basement. Sunday dinner on Friday night.  Mayhem, new friends, and cold weather comfort at the table.

Banana Cake with Peanut Butter Icing
Makes 1 9x13 pan

Banana Cake
1/2 cup butter, softened
1 cup sugar
2 eggs
1 tsp vanilla
2 cups flour
1 tsp baking powder
1 tsp salt
2 large, ripe bananas
3/4 cup milk
1 tsp baking soda

1. Preheat oven to 350 degrees F and butter and flour a 9x13 pan. 
2. Cream together butter and sugar until fluffy.
3. Add eggs, one at a time, and vanilla, mixing well after each addition.  Scrape down sides.
4. In a separate bowl sift together flour, baking powder, and salt.  Set aside.
5. Mash bananas well.  Combine with milk and baking soda.
6. Add 1/3 of the banana mixture of the butter/sugar/eggs.  Add 1/2 flour mixture.  Continue alternating wet and dry ingredients, ending with wet. Mix until smooth.
7. Pour into prepared pan and bake for 45-50 minutes. Let cool completely.

Peanut Butter Icing
1/4 cup softened butter
1/2 cup peanut butter
2 cups icing sugar
5-6 tbsp milk

1. Cream together butter and peanut butter.
2. Add the icing sugar, 1/2 cup at a time.  Alternate with a tbsp of milk until all the sugar is incorporated.  Mix well until light and fluffy.  If you want a softer icing add a touch more milk.
3.  Frost cake and enjoy.

Uncles are Evil

I'm not sure that the guy who invented caramel apples had kids.  I bet he was an uncle, not a dad. He took evil pleasure in feeding his nieces and nephews sugar on a stick - under the guise of a healthy apple - then sending them home to Mommy and Daddy all jacked up. Mr. Dan Walker, a sales rep from Kraft is the man credited with introducing the caramel apple to the mass market. Someone out there do a geneology search on him and see if he had kids, will ya?

Personally, my first caramel apple was only enjoyed recently because my mom refused to let us have them as kids.  At least this is what I remember, she may argue differently.  It may have been the profusion of sweetness or the gooey mess, but I can tell you that I felt deprived.  I'm over it now, only because I now know how to make my own caramel apples.

There are two ways to go about it.  You can use the brand name kits or buy a bag of premade caramels and melt them.  Or you can make the caramel yourself.  Really, it isn't hard, only 4 ingredients, plus the apples. You do need a candy thermometer, but a basic one can be picked up at the grocery store. Your homemade caramel will also have a much richer flavour and a darker colour.

The alternative to making caramel apples is to make a caramel dipping sauce for apples, brownies, bananas, ice cream, and pretty much anything else that is only better with melted sugar on it.  So, that means pretty much everything. Making a caramel sauce is even easier, taking only three ingredients and not requiring anything but a good pot.

While I generally welcome the girls, ages 1 and 3, into the kitchen regardless of what I'm cooking, this was a task I saved for naptime.  Caramel is liquid sugar.  It is ridiculously hot and can burn.  And my youngest has an innate ability to stand right behind you without you knowing. With me making caramel she really would be living up to her nickname of Death Wish. So I boiled my caramel, cleaned and dried my apples, prepared some yummy toppings, then got to dipping.  By the time naptime was over the girls had a treat to take them through an extra long trip to the park.


Caramel Apples
(6-8 apples)

6-8 apples
2 cups brown sugar
1 3/4 cup heavy cream
2 tbsp butter
1/2 c corn syrup

Special Equipment:
  • candy thermometer
  • bamboo skewers, popsicle sticks, or chopsticks
  • parchment paper or Silpat

1. Wash and clean apples.  If they are supermarket apples wash in hot water and wipe well to ensure that all wax is removed.  Dry thoroughly, very thoroughly.  Insert a stick into the core of each apple.  Set aside.

2. Line a baking sheet with parchment rubbed with butter or a Silpat mat.  Set aside.

3. Fill a large bowl with ice water.  It should be big enough to safely hold the pot with the caramel mixture .  Set aside.

4. Combine all ingredients (save for apples) in a saucepan at least 3 times the size of the mixture.  Set on medium to high heat with the thermometer in the mixture.  Cook until the temperature reaches 235-240 degrees F, approximately 10-15 minutes.  As soon as it reaches temperature remove the pot from the heat and immerse the bottom of the pot in the bowl of ice water to cool.  Stir and cool until the temperature measure 200 degrees F.  DO NOT GET ANY WATER IN THE CARAMEL.

5. Dip your apples, one at a time, in the caramel.  Twirl the apples to coat, then lift and twirl for 10-15 seconds letting the excess caramel drip off.  Hold upright and repeat 10-15 seconds of twirling. Place on prepared cookie sheet to cool.

6. If desired, once the caramel has cooled for a minute or two dip in topping of choice.

Topping suggestions:
  • Chopped nuts
  • Toasted sesame seeds
  • Crushed pretzels
  • Dried fruit
  • Toffee bits
  • Crumbled, cooked bacon
  • Candy sprinkles
  • Crushed Gingersnaps

Caramel Dipping Sauce
(makes approximately 2 cups)

1 cup sugar
4 tbsp unsalted butter
1/2 cup heavy cream

1. In a medium saucepan melt sugar, swirling pan frequently, until amber in colour.  There is no need to whisk or stir, just lift the pan and swirl the sugar until it is all melted and amber.

2. Cut butter into small chunks.  Lift pot off burner and add in butter.  Whisk to combine and return to heat until butter is melted and caramel is smooth.

3.  Slowly add cream.  Mixture will bubble and thicken.  Continue to whisk until soft and smooth.  Remove from heat.

4.  Once cool, store in a glass jar until ready to use.  Keeps for 1-2 weeks in the fridge or 3-4 months in the freezer.  Serve as a dip for fruit, an ice cream topping, or on cake.

For those of you joining me from Breakfast Television, if you are also looking for the salted caramel ice cream recipe you can find it here. Print it now, before they shut down the site.

And for those of you interested in seeing my appearance on BT, you can find it here. Yes, I did indeed use bacon as a topping and it was delicious!

Slightly Regrouped

It wasn't just the pie, but that definitely had something to do with it.  It might have been the four day weekend.  Or maybe staying home with our modern family (our friends) did it for me. Quite possibly it was simply sleeping for more than 5 hours a night.  Whatever it was, I can feel some of my mojo coming back. And yes, this pie had a lot to do with it.

Maple makes me happy.  In a delirious sort of way.  I fully admit to taking swigs of maple syrup from the bottle.  I will find any excuse to include it in a recipe from baked beans to oatmeal cookies to lamb stew with dumplings. The sight of a real sugar maple is enough to make me start salivating. So this Rustic Maple Pecan Pie indeed made me happy.

It made me happy to read about it in the first place.  It made me happy to make it yesterday afternoon while the rest of the house napped.  It made me happy to share it with our close-knit friends after a raucous Thanksgiving dinner.  And it is making me happy to share it with you.  

Thank-you to Aimée at Under the High Chair for letting me share this with you. Use your favourite pie crust, I went with my standard Pate Brisée.

Rustic Maple Pecan Pie
(courtesy of  Aimée's Auntie Lynn)

1 unbaked 9 inch pie shell
2 eggs
3/4 cup brown sugar
2 tablespoons flour
1 cup pure maple syrup
2 tablespoons butter, melted
1/2 chopped pecans (I used a bit more than that)
1 teaspoon pure vanilla
1/4 teaspoon salt

1. Preheat oven to 400 degrees F.
2.  Beat eggs in a medium sized bowl.  Stir flour into brown sugar and add to eggs. Mix well. Stir in remaining ingredients.
3. Pour into pie shell and bake for 40 minutes.
4. Serve with vanilla ice cream or whipped cream.  And more maple syrup drizzled on top.