fruit

Hula Hoops and Strawberry Shortcake


We ate strawberry shortcake for dinner the other night. Not for dessert, but for dinner. Just strawberry shortcake for dinner. And it was awesome.

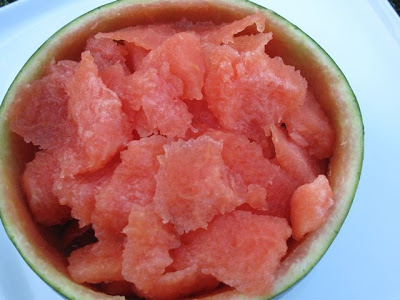
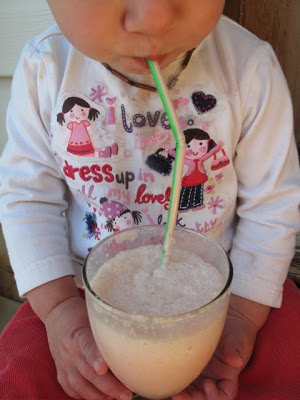
Okay, I may have been more excited about it than the girls (Hubby was away). They ate their strawberries, picked at the shortcake and licked some of the cream. The Monster thought the macerated strawberries were a fun treat - I can suck out their juices like Jello, Mama!

I may have, ahem, finished theirs as well as mine.

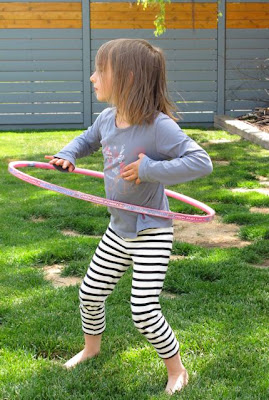
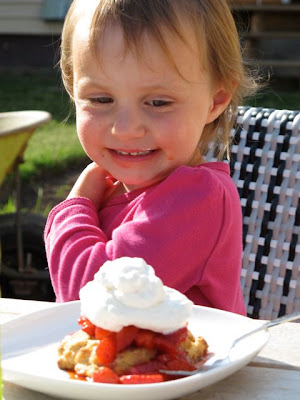
And you know what? I don't feel guilty about this at all. It was a celebration of all that is awesome about summer. Days that involved nothing more than swinging, water fights, and mastering the Hula Hoop for the first time. Days that have your three year old running around the block naked because her clothes got wet and it's too much work to go inside and get new clothes. Days that end with dessert for dinner eaten outside with the sun in your eyes.


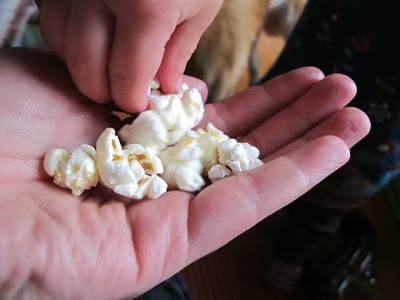
Strawberry Shortcake includes fruits, grains, and dairy. If that combo is more than okay for breakfast it is certainly fine for dinner. Of course, ice cream is also fine for dinner. Along with popcorn, pancakes, and cottage cheese with fruit salad. Dinner does not have to involve a protein, a vegetable, and a starch to be dinner.

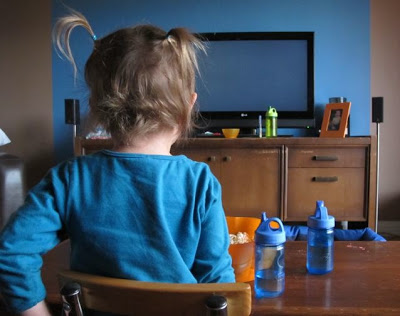
Dinner has to be the gathering around the table; the moment when we stop, just for a second, to be together as a family. It is the time when we listen to a 5 year stammer through her excitement, the time we discuss pirates, a balanced diet, and why we can't fly to Australia for a day. It's the moment we refuel so the rest of the summer night can be spent with the Hula Hoop.

If I want to serve only dessert for dinner on a nearly perfect summer day, so be it. If you want to, then go for it. And if anyone complains or judges, then send them to me. I'll set them straight with shortcake.


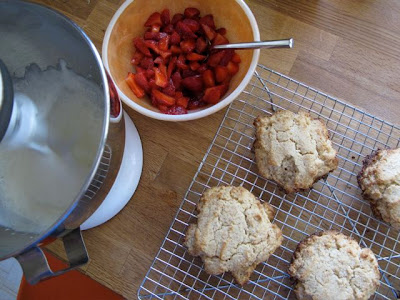
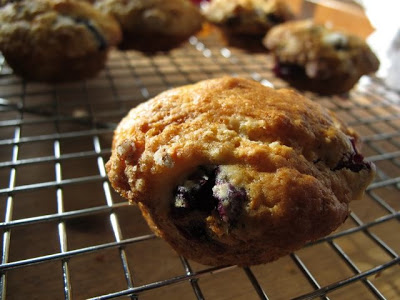
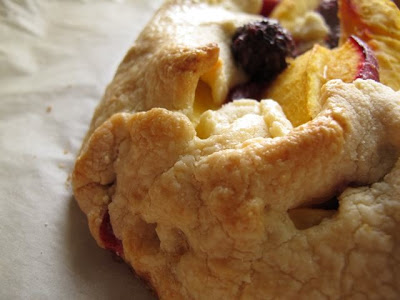
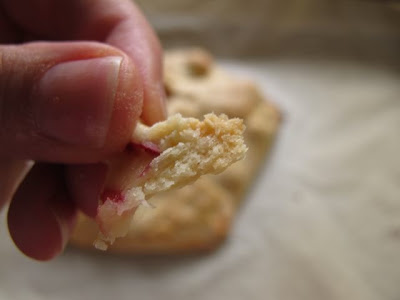
This strawberry shortcake was probably the best I've ever made. I've made the shortcake a few times now, the recipe comes from Baking, by Dorie Greenspan. I've adjusted it to a more reasonable size for our family. It is about the flakiest, most balanced little biscuit cake in the world. Crumbly and fine, but with enough structure to hold up to juicy strawberries and ever so lightly sweetened cream.

Strawberry Shortcake for Dinner
Makes 6 shortcakes

1 cup flour
1/3 cup whole grain flour*
2 tsp baking powder
1/2 tsp salt
2 Tbsp sugar
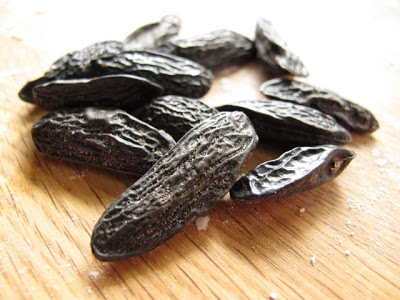
1 Tonka bean, grated (optional)
1/2 cup (1 stick) cold butter
1/2 cups cream

Preheat the oven to 425 degrees F. Line a baking sheet with parchment or a Silicon mat.

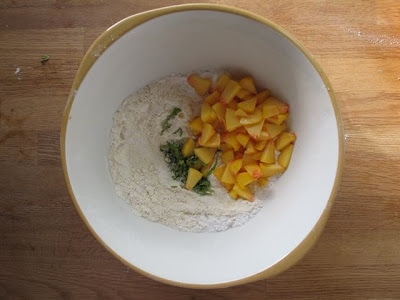
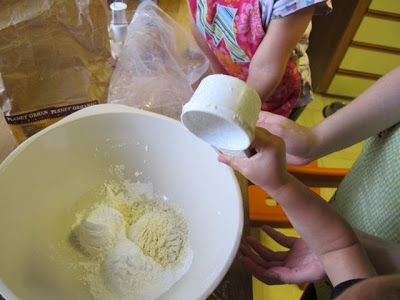
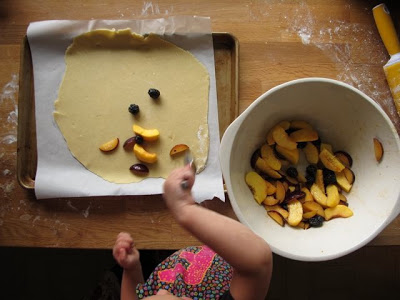
Whisk the dry ingredients together in a large bowl. Cut the butter into 1/2'' cubes. Using your hands, two knives, or a pastry cutter smash the butter together with the dry ingredients. I use my hands and squish it through my fingers. My 3 year old helps. It takes only a minute or two and the dough starts to look like a mix of flakes, crumbs, and tiny knobs of crumbly butter.

Remove your hands from the bowl, grab a fork, and pour in the cream. Stir together. If necessary, use your hands again to get it all to come together. The dough will be sticky.

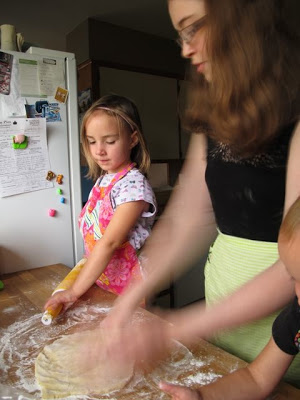
Spoon into 6 piles on your prepared sheet. Shape a little and press down gently so they are no more than 1'' high. Bake for 12-15 minutes, until golden. Let cool for a couple of minutes on pan, then cool for a few more on wire rack.

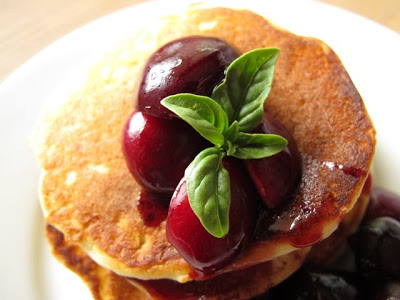
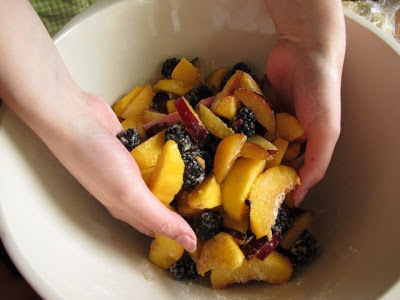
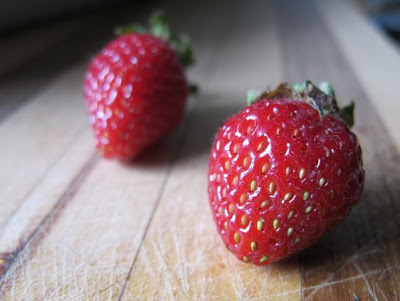
To make the shortcakes you also need strawberries. Any other summer fruit would also work. Go with what's fresh and in season for you.

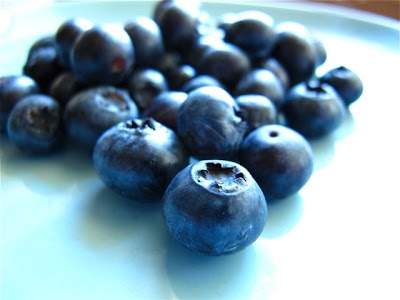
2 cups clean and sliced strawberries
1 Tbsp sugar

Combine the berries and sugar, let sit while the shortcakes and baking and cooling.

1 cup whipping cream
1 Tbsp powdered sugar
1 tsp vanilla

Whip the cream until peaks are just starting to form. Add the sugar and vanilla, whip until lightly firm.

To serve, top a cooled shortcake with a generous scoop of berries and top with a large dollop of whipped cream.

*I used my favourite, Gold Forest Grains, but you can simply use all-purpose flour for the entire amount.


Asparagus with Roasted Rhubarb Sauce


They say that when in doubt, cook foods together that grow together. As we trundled along on our tractor ride at the most recent Asparagus Festival I couldn't help but become obsessed with the idea of asparagus and rhubarb together. There they were, in neighbouring fields and sharing space in my Edgar Farms bag on the way home. They begged to be joined in holy cookery.

The only problem with this idea is that rhubarb, no matter how you cut it, is a rather tart thing. And asparagus is far more mellow and sweet. It isn't always a case for opposites attract. But when it doubt, throw them in a roasting pan together. A little spice, a little sweet and sweat, and beautiful things can happen.

Roasted asparagus, however, isn't that great to eat. The texture is rather, um... pasty with a side of string. Not giving up on this relationship, however, the rhubarb transformed when it became a sauce to slink over and envelope the roasted asparagus. It also did well when covering pork tenderloin, but I'm not telling you about that. The asparagus would be upset to know the rhubarb went behind his back.


Asparagus with Roasted Rhubarb Sauce
Serves 4-6 as a side dish

1 bunch asparagus
2 large stalks of rhubarb (the pinker the better)
5 tbsp olive oil
2 tsp Chinese 5 spice powder
2 tbsp honey
1 tbsp orange juice
salt and pepper

1. Preheat oven to 400 degrees F
2. Clean asparagus. Trim rhubarb into roughly 4 inch lengths. Place on a cooking sheet lined with parchment paper.
3. Combine 1 tbsp olive oil, 1 tbsp honey, 1tsp Chinese 5 spice powder, and season with salt and pepper. Toss the asparagus and rhubarb with this dressing. Roast for 10 minutes.
4. When the rhubarb and asparagus are done roasting, blitz the rhubarb with the remaining 4 tbsp olive oil, 1 tbsp honey, 1 tsp Chinese 5 spice powder, and orange juice. Season to taste.
5. Pour rhubarb sauce over roasted asparagus and serve immediately. Reserve leftover sauce for a pork tenderloin, but shhh.... don't tell the asparagus.

Browned Butter Sunday


After finishing 5 articles in a week (recipe testing included) and single parenting for most of that time, frankly, I didn't care much for Sunday dinner. The fridge was full of food, the girls spent the afternoon munching on late season strawberries, cheese, and a cantaloupe, and we were all getting downright cranky.

That left only one option for dinner - popcorn.

When I told the Monster that we were having popcorn and I would find us a movie to watch she got so excited that she literally burst into song. Then, on her own volition, she start cleaning up the living room to make it ready for dinner at the coffee table. Hell, if that's what it takes I'm thinking dinner like this everyday!

Not all was lost when it comes to a good Sunday dinner though. When we returned from the market and I went to refresh the fruit bowl I had some mealy peaches and sad looking apples and pears to contend with. Then there were the ripe peaches that didn't make it home intact from the market and a few half eaten apples courtesy of the girls. The only option was to make a fruit crisp.

The girls got grains and fruit for dinner. I am not a bad mom.

While cutting up the fruit (just a pile of what we had, peels and all) I had this notion to try browning the butter to the crisp first. I guess some part of me was still able to be creative. The butter melted and crackled away on the stove. Then it occurred to me that I never really know how brown is technically browned butter. Turns out I've not been browning enough all along. So I kept it on the stove and got to the lovely browned bits.

In the end, I could have left it a bit longer, I think, but it had that rich, nutty smell and some good colour. Even though I was making crisp, I must confess that the smell only made me think of lobster. I must still have Nova Scotia on the brain.

Once the butter cooled a bit I made up my regular crisp topping. Frankly, I could have eaten it straight, and did so for a few nibbles. It was rich with a butterscotch goodness and with a slightly lighter texture from using melted butter. I am never making crisp any other way, ever again.

And I refuse to feel bad about taking the time to treat the girls and sit quietly in front of the TV. Roasts and veggies are nice and all, but Sunday is also about family. After such a hectic and trying week sitting down together, this time with snuggles, was a much better option.


Browned Butter Fruit Crisp

Filling
4 cups fruit
2 tbsp brown sugar
2 tbsp flour
1 Tonka Bean/1 tsp cinnamon

Topping
1/2 cup butter
1/2 cup brown sugar
1/2 cup flour
1 cup rolled oats

1. Chop the fruit into 1/2 inch chunks. Peeling is optional. Gently toss with flour, brown sugar, and spice. Pour into an 8 by 8 baking dish.
2. Preheat oven to 350 degrees F.
3. In a small, stainless steel pot on medium low heat melt the butter. Then let it cook , swirling the pot every now and then, until it turns brown. As the colour starts to come to it, watch it closely. It can burn quickly.
4. Once the butter is browned nicely, pour it into your mixing bowl and let cool a few minutes. Admire the colour and dream of lobster. Then add in the brown sugar and stir. Once combined add the flour and oats.
5. Crumble on top of your prepared fruit, trying not to snitch too much along the way.
6. Bake for 30-40 minutes until the topping is crisp and more than golden and filling is bubbling.

Peel Me a Grape


There are times in the kitchen where experimentation fails in a colossal way (note to self: stay away from the curry) and other times where a little 'why not?' turns into 'why have I never?' With a pile of Coronation grapes being snubbed by The Monster I needed that why not.

Why not put grapes in muffins? We put raspberries, peaches, apples, and even pineapple in muffins, so why not grapes? You really don't see it much though. And I'm not sure why.

Hopefully, after you see these muffins you will change your mind. There was some Twitter chatter about this a day after I made the muffins, with Jennie going all out to seed her Concord grapes.  I am far too lazy for that, so thank goodness the Coronation grapes are seedless. 

The base for this recipe is my basic muffin recipe (find it here) with some grapes and roasted, skinned, and chopped hazelnuts added in. With the the girls I have much better luck with muffins when I bake the mini kind. Mama doesn't like that because I eat a lot more that way! This recipe will make 12 regular sized muffins or 24 mini muffins.

Grape and Hazelnut Muffins

1 cup hazelnuts
1 3/4 cups flour
1/2 tsp salt
1 tbsp baking powder
1 tsp baking soda
1/2 cup sugar
1 cup small grapes (I used Coronation)
1 egg
1 cup milk
1/4 cup olive oil
1 tsp vanilla

1. Preheat the oven to 400 degrees F. Spray a muffin tin with non-stick spray or grease with butter.
2. Roast the hazelnuts (unless already roasted) in the oven on a cookie sheet.  Roast for 10-15 minutes, giving the pan a shake every now and then. Be careful not to burn them. Pour them into a clean kitchen towel. Wrap it up loosely and rub the nuts with the towel. The skins should come off easily. Don't worry if not every bit of skin comes off. Aim for most of it. Le the hazelnuts cool while you assemble the rest of the ingredients.
3. Combine the flour, salt, baking powder, baking soda, and sugar in a medium mixing bowl. Combine the egg, milk, oil, and vanilla in another bowl.
4. Chop the hazelnuts coarsely, on the smaller side, but don't worry about any larger chunks.
5. Toss the chopped hazelnuts and grapes with the dry ingredients. Add the wet ingredients and stir until just combined.
6. Scoop into prepared muffin tin and bake for 15-20 minutes, until tops are rounded and golden.

In My Dreams

When I started blogging I had only in mind a medium in which to practice writing, something I hadn't done regularly since I was a teenager. My on-line presence was a chance to share my creativity, getting it out there in the hopes that someone else was inspired. 

About a year ago, however, things changed for me. Writing, creating, and thinking about those things became a compulsion. I attended the Okanagan Food and Wine Writers Workshop last September. And while I was blown away by the food and highly entertained by the company, the experience gave me a clarity and focus to my future. I was driven to find a way to change my life to make this my work, not designing energy efficiency programs. 

Today marks the first day of that life full-time. Over the past 8 months I've been building up a freelance writing base. Have you seen me at What's Up Family yet? Or at Simple Bites?  What about Babble? But it is time to do more, to be more. I've quit my job and my networking chops are already being tested. I will now call myself a freelance writer.

But not only this, I also be home with my girls. You could call me a work at home mom. (In all honesty, I hate that term.) In between bed time and morning, and during the naps that still occur you will find me writing, creating. When my girls are awake you will find us in the kitchen together, or around the table creating, reading, chatting, living.

To celebrate this momentous morning I turned to another of my dreams. Quite literally, this was a dream.  The more I've been on line the more I've found myself dreaming of people I've never met. It seems I'm some sort of unconscious stalker. The last dream I had involved Kim, her in-my-dreams-only rooftop garden in NYC, and these peach basil pancakes.

It seemed only fitting that I pull out everything from my dreams on a day when my dreams are becoming a living reality.

Peach Basil Pancakes
Makes 12 small/medium pancakes

3/4 cup flour
1/4 cup corn flour or light corn meal
2 tbsp brown sugar
1 tbsp baking powder
1/2 tsp salt
2 tbsp chopped basil
1 peach, peeled and chopped
2 tbsp butter, melted
1 cup butter
1 egg

1. Combine all the dry ingredients in a medium bowl. Toss the basil and peaches in with the dry ingredients.
2. Stir together the wet ingredients. Mix the wet into the dry. Stir until just combined.  Let rest while your griddle or frying pan heats up on medium/low heat.
3. Pour the batter into the griddle 1/3 cup at a time. Cook until the bubbles on the surface form and start popping.  Flip and cook on the other side for another minute or so.
4. Serve with cherries or syrup of choice.

Blueberry Maple Ice Cream


Today I'm over at Simple Bites. It's all about taking a moment to just stop. No canning, no thinking ahead to apple pie now that the weather is turning, no worrying about Sunday dinner. Just stopping to take a look around and enjoy what we've got, right now, in front of us.

And right now I have blueberries. Plump BC blueberries are still all over the markets. My girls eat them by the handful. Me, on the other hand, I can be rather indifferent to blueberries. I enjoy them when added to other things or baked, but I'm not an out of hand girl when it comes to the orbs.

My favourite to enjoy blueberries is actually cooked down with a bit of maple syrup, to be served on pancakes, waffles, or yoghurt. I was making a batch of my blueberries when it occurred to me that it might work really well with ice cream. Not on ice cream, mind you, but in ice cream.

It's a good thing I am addicted to making my own ice cream because it means the canister for my ice cream maker is always in the deep freeze when not in use. And, I always keep cream in the house now. So this recipe came together in just a few minutes. And for dinner, we were licking our bowls clean.

Blueberry Maple Ice Cream
Makes 4 cups

2 cups blueberries
1/2 cup maple syrup
2 cups cream
2 tbsp cup maple wine/maple liqueur/creme de cassis.

1. Cook the blueberries in the maple syrup over medium heat until the berries just begin to pop - 3-4 minutes. Put in the fridge to cool, if you've got the time.
2. Blitz the berries in a blender, adding the cream and alcohol. Alternatively, mash the berries with a fork then combine with the cream and alcohol.
3. Churn in an ice cream maker and freeze until firm. Serve drizzled with maple syrup.

Realizations

The Monster is a temperamental child. She will be fantastically fine, happy and cheerful 95% of the time. But then you tell her no to just the wrong thing and not only is she upset, like any 4 year old, but the world ends for her. It is infinitely frustrating and one of the biggest challenges of parenting for me.

Up until a certain point today we were all enjoying a lovely, late summer ease. A quiet morning with bread and jam for breakfast. Our normal Sunday morning jaunt to the farmers' market for coffee and a few groceries. The girls napped while Hubby and I sat on the porch swing chatting and petting the dogs. It was all good.

Then I had to go to the grocery store. And another, and another. And I spazzed, yelling at people in traffic and getting right cranky. Then I had a scary moment of clarity. The Monster is me. Yikes, I made her that way. (I'm sorry Mom and Dad.) 

I was still spazzing when I got home, but then I started cooking. I had tomatoes in the oven, slow roasting. I added some peaches, then popped a pork roast in. Smilosaurus helped me tear kale for kale chips. And my bad mood dissipated as quickly as it came.  Just like we send The Monster for a quiet time when she is being unreasonable, I found my quiet time in the kitchen, making Sunday dinner.

A little while later we welcomed an old friend to our home. We cracked some beers. We caught up on travels, the farm, and the challenges and smiles of parenthood. We devoured the meal in front of us. And when The Monster lost it when Hubby took away the cheetah babies after she hit her little sister with them all I could do was hang my head in laughter at the realization that I indeed made my kid.


Pork Loin Roast with Roasted Tomatoes and Peaches

2 pints cherry tomatoes
4 tbsp olive oil
salt and pepper
1 1/2 tsp coriander seeds
3 peaches
2 pound pork roast, boneless rib end
1/2 onion
1 tbsp fresh mint, chopped

1. Preheat oven to 275 degrees F.
2. Wash and dry the tomatoes. Cut in half. Place cut side up on a large cookie sheet. Drizzle with 2 tbsp olive oil and season well. Grind 1/2 tsp of the coriander seeds and sprinkle over the tomatoes as well. Place in the oven.
3. After an hour cut the peaches into quarters. Tuck them in among the tomatoes.
4. Pat dry your roast with paper towels, keep it tied up as you bought it. Season well with salt and pepper. Get the remaining 2 tbsp oil hot in a roasting pan or dutch oven. Brown the pork on all sides, leaving it for a couple of minutes each time to get good colour. Move the roast to the side, add the onions and remaining coriander seeds (left whole) to the pan. Cook for a couple of minutes, then move the roast back to the middle of the pan. Cover and put in the oven. Increase the heat to 325 degrees F. Roast for 1 hour.
5. Check the internal temperature of the roast. It should register at least 140 degrees F when you take it out of the oven. Keep it covered in the roasting pan, it will continue to cook a bit more as it rests.
6. Place the tomatoes and peaches on a serving dish, top with chopped mint. After the pork has rested 10-15 minutes remove strings and slice. Serve with tomatoes and peaches.

Introductions


A photo essay on my first conscious gluten free baking experience. Lauren from Celiac Teen came over this morning, a date arranged shortly after we realized we only lived blocks from each other. Through a rainy walk she brought with her a backpack full of flours. We were going to make pie. 

The girls took to her immediately, probably assuming she was some fantastic creature known as the babysitter. Their excitement was no less once they realized we were all going to bake together. We donned aprons, we measured flour, we drank tea while our pastry chilled. Then we cut up peaches and plums to mix with blackberries and tonka bean. And while our galettes baked the little ones chased us around the house. It was comfort and chaos all at once. Welcome to our home, Lauren.

And the pastry? Fantastic. It tasted great raw, and even better cooked. It was a tender dough to work with, so I worried that it wouldn't be very flaky. I was wrong. To be honest, you would be hard pressed to pick out out from a conventional pate brisee.

We filled it with our fruit, a touch of sugar and millet flour and a whole tonka bean grated in. The crust we brushed with cream. The galettes baked for 30 minutes. And after our conversations we sat silently with our tonka bean sweetened cream on top of our galettes. Silent only as the four of us devoured an entire galette for lunch.


The Letter S

Pardon me while I get sappy.

You see, this week I've also been recovering from a medical issue. It's made me tired, shaky, and mopey. So this afternoon, after I put some tomato sauce in a slow oven to come together, I took a nap. Wrapped in the arms of my husband. It was the best nap ever.

So tonight's dinner was spaghetti and meatballs, and for dessert, strawberry ice cream. More specifically, strawberry sour cream ice cream. It was the slightly more elegant version of Baba's berries and cream. It was all comfort food.

The ice cream recipe comes from, who else? David Lebovitz. All the recipes in my books were custards and I didn't have many eggs in the house. So a little search led to many, many descriptions of this ice cream from The Perfect Scoop. It seemed like fate considering the pounds of strawberries I bought at the market and my own need for comfort. 

But no amount of comfort food can replace the love of your best friend.


Strawberry Sour Cream Ice Cream
(With great thanks, perhaps literally as I don't actually own The Perfect Scoop, to David Lebovitz.)

1 pound strawberries
3/4 cup sugar
1 tbsp vodka
1 cup sour cream
1 cup heavy cream
1/2 tsp lemon juice

1. Rinse, hull, and quarter your strawberries. Toss with the sugar and vodka. Let sit for an hour or so.
2. Add in sour cream, cream, and lemon juice. Blitz with a hand blender, leaving it as chunky as you want.
3. Chill for an hour. Process with ice cream maker. Freeze until ready to eat.

Season by Season

It's been a rough, rough couple of weeks in the Arkison household. Give us a few more weeks and we should be back on track.

This week, however, as been for snuggles, rest, and comfort. But a family can't live on ice cream alone. Is there any other summer comfort food? The other day I was desperate for a peach, I wanted the juice to drip off my chin and the scent to tickle my nose with summer pleasure. Of course, that might have had something to do with the fact that we were driving through Peachland on our way home from a funeral.

In sharing with a friend she mentioned that the only way to get through times like this is day by day, then season by season. As a food obsessed kind of gal, seasons are a strong marker in our lives. We eat by the seasons, therefore we live by the seasons. And I'm someone who is hard pressed to actually pick a favourite season (although I usually answer winter, when asked.) So as we recover from the latest round of flurries to the solar plexus I sought comfort in summer.

This is my Baba's raspberries and cream. Smilosaurus called it ice cream and The Monster declared she didn't like it. To me it was my Baba's old people smelling hug in a stifling house, arms covered in scratches from the raspberry canes. It was the weeks in the summer we were sent to Saskatchewan, which we hated at the time, but now I cherish. It was family, it was generations, it was summer treats.

Oddly, I used frozen raspberries for this. It was what I had. And, to be honest, it was what we usually used if it wasn't that exact berry season.  Strawberries work equally well. If you are using frozen berries, thaw first and drain off excess juice. Baba usually used regular white sugar, but I like mine with brown for that punch of extra flavour.

Berries and Cream

Equal parts mashed berries and sour cream or farm cream
Sugar to taste.

1. Stir together. Eat. Be comforted.

Cross Country Preserving


It was supposed to be a vacation. Hubby and I travelled, sans kids, to Ontario this past weekend. We attended the wedding of a very special friend in a ridiculously gorgeous location. The weekend also afforded us the time to take leisurely drives, naps, and meals.

I promised myself that I wouldn't worry about capturing every little food related tidbit along the way. A difficult thing when you spend 3 days in the Niagara Greenbelt. So, my camera hardly came out of the bag, I didn't take a single note, and I even left both my laptop and crackberry at home. This girl needed a vacation from it all - kids, the full time job, the part time job, cooking, cleaning, and simply doing for everyone else but me.

So I read a novel, I ate more than I should have, I slept at many points in the day, I cuddled with my Hubby, and even took a spontaneous helicopter ride over Niagara Falls. It is, however, impossible for me to resist a farm stand. Especially a farm stand that declares the sale of sour cherries.

Remember, it was only last year that I discovered the truth about sour cherries. And I only found them that one time. I promised myself that if I ever discovered them again I would buy in bulk and preserve the bounty.

So I made Hubby reverse the rental car in someone's driveway and pull out his cash. After our day trip the cherries were carefully stored in the hotel mini bar. Then packed in a plastic bin, surrounded by gifted books and craft paper. The bin was taped up and made the journey back West in the cargo hold of the Airbus 320.

When we finally arrived home last night I pulled them out and despite my desire to sleep I spent an hour and a half pitting cherries. But when I make that first cherry pie the effort will be worth it. Sadly, the journey resulted in more than a few casualties. But I still got 11 cups of cherries, enough for 2 quart jars and 2 250 mL jars. I figure that is at least 3 whole pies or more than a small army's supply of cherry hand pies.

Cherry Pie Filling
Makes 1 quart

4-5 cups pitted sour cherries
1/3 cup water
1/2 cup sugar
3 tbsps cornstarch

1. Clean and sterilize jar and lid - if you intend to can and not use right away. Keep hot
2. Bring water and sugar to a boil.  Add cherries all at once and let cook for 5 minutes.
3. Combine cornstarch and a few tablespoons of the liquid from cooking cherries. Stir until smooth. Add to cherries and return to the boil. Let boil 30 seconds.
4. Immediately pour into the hot jar. Seal with clean and sterilized lid. 
5. Process for 30 minutes in a boiling water canner.

* Scale up this recipe depending on your total amount of sour pitted cherries.  

Maintaining the Idea of Spring


Biba Caggiano taught me how to make risotto when I was 19. It was summer break during university. In between multiple jobs to save for tuition I found the time to watch PBS on Saturday afternoon. "Biba's Italian Kitchen" was always on. So I would sit in my Dad's office, taking notes, and watching Biba on a 12 inch screen.

When I went back to school and suddenly found myself alone in a basement suite, craving something more than a hearty salad I always turned to risotto. It was the comfort food that got me through my last year of university, in between thesis writing, working, and running a muffin business.

People are always so scared of risotto.  I blame the recipes for this.  Read a recipe for risotto and it is enough to scare off anyone - they are always so wordy and make it sound complex.  But risotto is not complex. Nor does it require endless stirring.

Tonight we returned home from a weekend away, visiting family.  We stopped at Edgar Farms on the way home for Asparagus Fest.  There was a break in the rain and snow, so it worked out perfectly. We caught up with Doug, Elna, Keri, and Randy of Edgar Farms. We chatted with Wade and John. We ate, we pet animals, we jumped in puddles, and we definitely grabbed some asparagus. First from the field and then my mother-in-law treated us to a few bundles to take home (awfully generous of her since she also babysat for us last night!)

When we walked in the door at 6, everyone was exhausted from a busy weekend and an afternoon outside.  To be honest, I was real tempted to give in to Hubby's request for the pizza man delivery. Then I decided we needed to eat more asparagus, but we also needed something warming. Something to fill our bellies but still feel light enough to remind us that it is indeed still spring. Risotto! Lemon Asparagus Risotto to be specific.

I'm not going to give you a recipe. Risotto, I think, is more of a basic technique than a recipe. Now, I've never served to an Italian grandmother, so mine could totally suck.  But we all love it. In fact, risotto is the only way The Monster will eat rice. So, don't be scared, here is my technique for risotto.

1. Finely dice a small/medium onion. Toss in a tall sided frying pan with a generous swig of olive oil or knob of butter. or both. Sweat them out on medium heat.
2. While the onion is cooking mince a couple of cloves of garlic. Add to onions and stir.
3. Immediately add your Arborio rice (available in most grocery stores and definitely in an Italian market). I use about a handful a person. Stir in and get the rice coated with the oil/butter.
4. If you happen to have wine in the house, pour a generous slosh of it in the pan and let it reduce. No wine? So what.
5. Once your wine has reduced, if you've used it, start adding in hot chicken stock, veggie stock, or water.  Yes, I think it is okay to use water, you will just have to season really well at the end. Add in the liquid about a ladle at a time.  Stir well before and after each addition.
6. Add a ladle of liquid every few minutes or so. The goal is to have the liquid be absorbed slowly. So when it looks like you have little liquid, add more. After about 15 minutes, start tasting. Risotto should have a bit of "tooth" to it. In other words, you don't want it mushy, but it should be creamier than regular rice.
7. When it reaches the right consistency, turn off the heat. Stir in some more olive oil or butter - whichever one you used with the onions - another good swig or knob. Also stir in some cheese - parmesan, manchego, asiago - a grated hard cheese is my preference. Serve immediately.

Tonight I also stirred in some asparagus that I blanched for a bit and some lemon zest. Another night I might stir in roasted butternut squash, or sauteed mushrooms, or maybe peppers and zucchinis. Cook's choice. I just recommend that you cook the veggies separately so they don't get overdone or mushy in the cooking rice.

Okay, now that I've written that out it does seem wordy and complex. Trust me, it's not.

After a quiet evening of movie watching we then had a pre-bed snack with the girls.  I also picked up some rhubarb at Edgar Farms so I made this lovely Rhubarb Upside Down Cake.

An Abundance of Limes


On a gorgeous weekend not too long ago, Hubby and I indulged in quite a few gin and tonics. We've discovered a new-to-us gin and are rather obsessed with it. The first time I saw it in our local wine store I asked the purveyor what it was good for, meaning martinis or G&T? His response, "Making Babies!"

Well, I can't attest to that at all - she says as she raises another gin and tonic - but I can say that it makes about the finest drink I've had. Aside from those Negronis. If we ever get some heat again the Old Raj is coming back out.

I will, however, need to buy more limes. You see, we got a little gung ho that one warm weekend and bought about a dozen limes. No, we aren't that big of drinkers. We merely forgot we already had them. Yes, we were sober when we were at the store.

With an abundance of limes and a convenient container filled with egg yolks it really did seem that the only option was to make ice cream. Gin and tonic ice cream? Hmm, not too bad of a concept, but my brain could not figure out how to capture the necessary balance of taste with the custard base. Browsing through the books, I came across a recipe for Margarita Ice Cream in Nigella Lawson's Forever Summer.

Um yeah, sign me up. 

This recipe did not disappoint. I was worried it would be too eggy, but all that lime juice really cuts the richness. Overall it is refreshing without being cloying. Smooth but somehow a bit light. It isn't a Margarita - which would have also been a most excellent use for our extra limes - but the hint of tequila is amazing. I did cut back on the amount of alcohol because I knew the girls would be having some ice cream If you swapped out the tequila for a generous splash of vodka you would simply get something akin to Key Lime Pie ice cream.  Hmmm, there might be a frozen pie idea there...

This is the second ice cream recipe I've made with sweetened condensed milk. I must admit, I'm rather fond of it.  I wonder what David Lebovitz would say? It creates a silkiness to the ice cream without overly sweetening it. I'm always afraid it will be too sweet, but it really works well.

Now, I wonder how good this ice cream will taste with the snow we're expecting? Yes, snow. Don't talk to me about it.

Margarita Ice Cream
(Adapted from Nigella Lawson's Forever Summer)

1 1/2 cups whipping cream
6 large egg yolks
300 mL tin of sweetened condensed milk
1/4 cup tequila
splash of Triple Sec, Cointreau, or Grand Marnier
Juice of 6 limes and zest of 1

1. Heat the cream in a heavy saucepan. Slowly whisk it into egg yolks, off the heat.  Once combined, pour back into the saucepan and cook it, stirring, until thickened.  It should coat the back of the spoon.
2. Pour the custard into a clean bowl and let it cool slightly.  Stir in the condensed milk, alcohol, lime juice, and zest. Cover the surface directly with plastic wrap and chill for 4 hours at a minimum.
3. Churn according to your ice cream maker's instructions. Enjoy.

Cardamom Ice Cream

Save for a few days over Easter and our wedding anniversary I've been single parenting the last two weeks. What I wouldn't do for beer and chocolate every single night. And intravenous caffeine first thing in the morning. But it's just another week in an absolutely crazy month. And all you can do is put one foot in front of another, type another key, cook another meal, and eat another bowl of ice cream.

Yes, another bowl of ice cream. For every day that I remember to buy cream when I steal a moment to buy groceries I dream about ice cream. Okay, that's a slight overstatement, but only slightly.

Once I called my neighbour over to save me by digging through the mess in the basement (I can still can't make my way to the basement yet) to find the base of the ice cream maker I could make my dreams come true. Cardamom ice cream here I come!

And oh, did that ice cream do it for me. It's quite rich. Ridiculously rich. And while I doubted the cardamom taste when making the custard it came through perfectly in the finished product. Adding rhubarb was a way to tease myself into spring (despite the snow storm we got this week) and soften the richness of the ice cream.

Cardamom Ice Cream with Lightly Stewed Rhubarb
(Adapted from delicious March 2010)
Serves 6 (or 1 tired mom over a few days)

Ice Cream
1 cup heavy cream
1 1/4 cup milk
1 cinnamon stick
8 cardamom pods, lightly crushed
5 egg yolks
2 tablespoons sugar
300 ml can of sweetened condensed milk

Rhubarb
6 stalks rhubarb
4 tablespoons brown sugar
2 teaspoons vanilla
2 tablespoons water

1. Steep the cinnamon stick and cardamom pods in the cream and milk. Bring to medium heat in a saucepan. Just before it boils turn off the heat and let it sit for an hour. Strain and discard the spices.
2. Whisk the eggs and the sugar until pale. Add the infused milk/cream, whisking constantly. Pour into a clean saucepan and cook over low/medium heat, stirring, for 5-8 minutes until thick enough to coat the back of a spoon. Remove from heat, add the condensed milk, and pour into a clean bowl or jug. Cover with plastic wrap directly on the surface and refrigerate for 4 hours or overnight.
3. Churn in an ice cream maker according to manufacturer's directions. Pour into a freezable container and freeze until firm.
4. Half hour before serving chop the rhubarb and combine with the other ingredients in a small saucepan. Cook over medium heat for 3-5 minutes until the rhubarb is soft but is still holding it's shape.  Set aside to cool.
5. Serve ice cream on top of cooled rhubarb.

Texas Sunshine


I once smuggled a 10 pound bag of grapefruits on a trip from Brownsville, Texas to Halifax, Nova Scotia. Actually, I'm not sure smuggled is the right word considering that there is no easy way to tuck in grapefruits around your body. I could have gone for the fake pregnancy, but that would have been one lumpy baby. In the end I got through customs without any trouble. The officer probably smelled the citrus on the university student (I also had key limes) and was just relieved it wasn't pot.

How could I not bring them back with me? I'd just spent a week with my mom in Texas. She was living and working there courtesy of the 1990s health care cuts in Alberta. I spent Reading Week there, soaking up some sun, food, mom love, and absorbing the mystery of South Texas culture. Seriously, that is an odd place. Full of Winter Texans on golf and shopping trips, Mexicans coming across the border to have American babies, and every manner of poverty and riches on the same street.

I'd happily eaten grapefruits growing up in cold Canada, a winter staple in our house. But something about buying them from a roadside stand, still warm from the sun ,elevated them to smuggle-worthy status.

Sadly, we aren't in Texas this February. But with the quality of organic produce available in some stores, and the morning light streaming through the white dining room curtains I can fool myself into believing that this half circle of sunshine is actually still warm from the Texas sun. Sort of.

Besides, the fact that my mom used to live in Texas makes it local, right? How about the direct flight between here and Houston? Oh whatever. It's Canada in the winter and if I want a grapefruit I'm going to eat it.

Actually, we usually go through about 3 in the morning because the girls insist on climbing up next to me and sharing the segments as I cut them out of the fruit. I don't mind sharing. And one day I'll take them South to pick the fruit themselves, once my mom moves back. But I'm keeping them away from the crazy people who talk about buying handguns while they tan their feet.

Taste Adventure - Cape Gooseberry

After a very busy morning gluing brown circles to bigger brown circles, building floor puzzles of cats, and dancing to a jazzy version of Spiderman it was time to settle down for snacks. It was our day to volunteer at preschool. As the parent volunteer responsibilities include directing the craft, helping the teacher with all the regular tasks, and cleaning up at the end of the class. Our kid gets to be VIP that day, getting to go first for all activities and bringing something special for show and tell. Oh, and the parent gets the pleasure of bringing a snack.

Now, it should be painfully clear by now that I'm not the apple slice and snack pack kind of mom. I bake cookies and muffins when they ask me to. I don't bring juice for other people's kids. And when it is our turn to bring a snack I think it is a great idea to bring something likely foreign to the average Canadian three year old, like a cape gooseberry. I wonder what the other parents thought when they saw our snack reported on the calendar.

(A total aside, but don't you think having to record you snack is just another form of competitive parenting? Remind me to ask the teacher about that.)

A cape gooseberry isn't a common fruit. I always associate it with hotel fruit trays at meetings. Their distinctive papery coverings serve more as garnish to most of us. But peel that back and taste the sweetly sour fruit with the hint of sunshine. It's kind of like a natural version of sour gummy candy, minus the jelly texture. Personally, I love them. But I wasn't sure about the kids.

I baked cookies as a fall back position.

The cape gooseberries? They went over surprisingly well. In a class of eight kids one outright refused to even have the gooseberry in his bowl, stopping just short of a complete fit over the fact that it even touched his cookies. A couple more sniffed it and merely set it aside. Two more had to be cajoled... er, encouraged to try the fruit. And three happily tried them. One kept asking for more and more, leaving his cookies aside. Way to go kid!

My kid tried hers, declared it too sour, and returned to her cookies.

The kid that loved them?  His dad is a chef.

Uncles are Evil

I'm not sure that the guy who invented caramel apples had kids.  I bet he was an uncle, not a dad. He took evil pleasure in feeding his nieces and nephews sugar on a stick - under the guise of a healthy apple - then sending them home to Mommy and Daddy all jacked up. Mr. Dan Walker, a sales rep from Kraft is the man credited with introducing the caramel apple to the mass market. Someone out there do a geneology search on him and see if he had kids, will ya?

Personally, my first caramel apple was only enjoyed recently because my mom refused to let us have them as kids.  At least this is what I remember, she may argue differently.  It may have been the profusion of sweetness or the gooey mess, but I can tell you that I felt deprived.  I'm over it now, only because I now know how to make my own caramel apples.

There are two ways to go about it.  You can use the brand name kits or buy a bag of premade caramels and melt them.  Or you can make the caramel yourself.  Really, it isn't hard, only 4 ingredients, plus the apples. You do need a candy thermometer, but a basic one can be picked up at the grocery store. Your homemade caramel will also have a much richer flavour and a darker colour.

The alternative to making caramel apples is to make a caramel dipping sauce for apples, brownies, bananas, ice cream, and pretty much anything else that is only better with melted sugar on it.  So, that means pretty much everything. Making a caramel sauce is even easier, taking only three ingredients and not requiring anything but a good pot.

While I generally welcome the girls, ages 1 and 3, into the kitchen regardless of what I'm cooking, this was a task I saved for naptime.  Caramel is liquid sugar.  It is ridiculously hot and can burn.  And my youngest has an innate ability to stand right behind you without you knowing. With me making caramel she really would be living up to her nickname of Death Wish. So I boiled my caramel, cleaned and dried my apples, prepared some yummy toppings, then got to dipping.  By the time naptime was over the girls had a treat to take them through an extra long trip to the park.


Caramel Apples
(6-8 apples)

6-8 apples
2 cups brown sugar
1 3/4 cup heavy cream
2 tbsp butter
1/2 c corn syrup

Special Equipment:
  • candy thermometer
  • bamboo skewers, popsicle sticks, or chopsticks
  • parchment paper or Silpat

1. Wash and clean apples.  If they are supermarket apples wash in hot water and wipe well to ensure that all wax is removed.  Dry thoroughly, very thoroughly.  Insert a stick into the core of each apple.  Set aside.

2. Line a baking sheet with parchment rubbed with butter or a Silpat mat.  Set aside.

3. Fill a large bowl with ice water.  It should be big enough to safely hold the pot with the caramel mixture .  Set aside.

4. Combine all ingredients (save for apples) in a saucepan at least 3 times the size of the mixture.  Set on medium to high heat with the thermometer in the mixture.  Cook until the temperature reaches 235-240 degrees F, approximately 10-15 minutes.  As soon as it reaches temperature remove the pot from the heat and immerse the bottom of the pot in the bowl of ice water to cool.  Stir and cool until the temperature measure 200 degrees F.  DO NOT GET ANY WATER IN THE CARAMEL.

5. Dip your apples, one at a time, in the caramel.  Twirl the apples to coat, then lift and twirl for 10-15 seconds letting the excess caramel drip off.  Hold upright and repeat 10-15 seconds of twirling. Place on prepared cookie sheet to cool.

6. If desired, once the caramel has cooled for a minute or two dip in topping of choice.

Topping suggestions:
  • Chopped nuts
  • Toasted sesame seeds
  • Crushed pretzels
  • Dried fruit
  • Toffee bits
  • Crumbled, cooked bacon
  • Candy sprinkles
  • Crushed Gingersnaps

Caramel Dipping Sauce
(makes approximately 2 cups)

1 cup sugar
4 tbsp unsalted butter
1/2 cup heavy cream

1. In a medium saucepan melt sugar, swirling pan frequently, until amber in colour.  There is no need to whisk or stir, just lift the pan and swirl the sugar until it is all melted and amber.

2. Cut butter into small chunks.  Lift pot off burner and add in butter.  Whisk to combine and return to heat until butter is melted and caramel is smooth.

3.  Slowly add cream.  Mixture will bubble and thicken.  Continue to whisk until soft and smooth.  Remove from heat.

4.  Once cool, store in a glass jar until ready to use.  Keeps for 1-2 weeks in the fridge or 3-4 months in the freezer.  Serve as a dip for fruit, an ice cream topping, or on cake.

For those of you joining me from Breakfast Television, if you are also looking for the salted caramel ice cream recipe you can find it here. Print it now, before they shut down the site.

And for those of you interested in seeing my appearance on BT, you can find it here. Yes, I did indeed use bacon as a topping and it was delicious!

Pears, Pears, and More Pears

While I'm not sure if any food makes me as happy as a warm strawberry plucked right off the plant I must admit that this pear comes deliriously close. It isn't quite right off the tree, but you don't want that anyway. Rather, a pear does better with a few days on the kitchen counter to mellow into its juicy, sexy sweetness. In the case of this pear it excelled with a couple of days in the Mission Hill Family Estate kitchen, a 7 hour drive in the backseat, and a few more sultry days on our kitchen counter.  Then it turned into a TV star.

Before we ventured to the Okanagan last week I booked my first TV appearance on Breakfast Television. The timing was perfect and I spent some of our time at the Penticton Farmers' Market searching for the perfect pears to bring home. The pears at the market were perfect, if I wanted to eat them that day.  Our guide, Matt Batey, heard my lament and offered up some Mission Hill pears.  They'd been picked the day before and would I like to stop by the Estate and pick them up when we were on our way home?

What a no brainer.  Of course, it meant that we didn't get home in time for the girls' bedtime. Ah, they'd hardly noticed we were gone anyway.


After days of touring around the Naramata Bench and visiting people in their homes, garages, and vineyards it was quite a shock to our senses to arrive at the Mission Hill Family Estates sprawling grounds.  From the second you pass through the gates at the end of a residential drive the entire experience is choreographed. You pass through the keystone (above) and enter the grounds.  Your view is filled with the sky, lake, and mountains behind, all framed by the Terrace restaurant, Bell Tower, Visitor Center, and the overwhelming feeling of luxury.

Then Matt greeted us in his chef whites and brought us back to reality with a tour of the gardens, kitchen, and food experience of Mission Hill.  The place may be all about the wine, with gardens and menus built to frame that wine, but the passion in the food and in Matt was evident.  I am dying to go back and try a winemaker dinner or culinary workshop. Another trip...

Here is Matt in the garden.  One of the fascinating things about the gardens here was that they are planted by grape varietal. It was like food and wine pairing for idiot cooks.  Well, probably a bit fancier than that. But in case you didn't know, Chardonnay works with cilantro, lily, corn, beans, squash, mint, and yes, pears.

Then there were the pears.  After pulling out a few crates Matt and I packed out one full crate of Bartletts, Bosc, and Asian pears to take home. Thank-you Matt, you're just lucky that they survived the drive home. He and Hubby seem to share a certain propensity for big, bad cars and heavy feet.


Yes, that is the seatbelt getting good use on the Old Okanagan Highway. No carseats on this trip, but safety always comes first!

So my precious beauties arrived home safely.  They were the perfect inspiration for the some lovely dishes. Hubby watched the girls last night and I baked, kneaded, and chopped to prep for this morning's BT appearance. I made Pear, Gorgonzola, and Carmelized Onion Pizza, Asian Pear Slaw, Upside Down Pear Gingerbread Cake, and Cardamon Hand Pies. The Monster helped me with the ultimate recipe, the Honey Pear Cheesecake.  It was a good thing she helped me last night because apparently she had a fit this morning watching me on TV.  "I want to bake a cake with Mama on TV!"  Maybe next time, Sweetie.

Honey Pear Vanilla Cheesecake
(Serves 10-12)

2 cups graham cracker crumbs (or crushed Nilla wafers, gingersnaps, or plain biscotti)

¼ cup butter, melted

2 tbsp sugar

3 (8 ounce) blocks of cream cheese, room temperature

½ cup honey

3 large eggs

1 vanilla bean

¾ cup pear puree or ½ cup pear nectar

½ cup flour

1 pear, peeled and finely diced

1 cup sour cream (optional)

¼ cup honey (optional)


1. Preheat oven to 350 degrees F.  Boil a full kettle of water.

2. Mix together the cookie/cracker crumbs, sugar, and melted butter until the consistency of wet sand. Press into a 9 inch springform pan, across the bottom and coming up the sides slightly.  Bake for 15 minutes.  Cool slightly and wrap the bottom of pan in two overlapping layers of aluminum foil.

3. Combine cream cheese and honey and beat until smooth.  Add the eggs, one at a time, incorporating after each addition. Slice the vanilla bean in half lengthwise and using the back of a small paring knife scrape the seeds from the bean.  Add the seeds to the cream cheese mixture along with the pear puree or nectar and the flour.  Mix until smooth. Finally, stir in the diced pear.

4. Pour the batter into the prepared crust and place in the springform pan in a larger pan. Transfer to the oven.  Before closing the oven door pour water from the boiled kettle into the larger pan until it comes about halfway up the sides of the springform pan.

5. Bake for 45-55 minutes, until the cheesecake seems firm but still slightly wiggles in the center.  Turn off the oven and close the oven door.  Keep in the oven for another 60 minutes. Remove and cool completely in the fridge.

6. Optional topping: Before serving mix together the sour cream and ¼ cup honey.  Pour over the cheesecake. (A nice touch or a way to disguise surface cracks.)


(Doesn't Dave Kelly look so enraptured by something?  Probably not me or my pears  - although I did manage to call them sexy on morning TV - but the segment went well.)

Don't Judge Me


I refuse to give up yet.  Despite the fact that we nearly had frost the last two nights here in the city, despite the fact that it is already dark when the girls go the bed and the sun was almost eerily autumn-like at the park today, and despite the fact that yes, the leaves are starting to fall off the tree I refuse to accept than summer is over.  At least when it comes to my food.  So I'm still eating peaches and watermelon. I will grill burgers until my fingers freeze.  And I will still serve my kids ice cream for dinner.

We picked up this watermelon on the weekend.  With rind so dark that it looked like it was buried in the forest when it grew. And when we cut it open it was sweet and seedy.  I actually had to look it up, but did you know that a watermelon is in the same family as squashes and gourds?  The cut fruit reminded me of a squash, with ropy strands of flesh combining in a pulpy mass of seeds in the center of the fruit.  We scooped out the seeds rather than cut around them and were left with an inch of the most watermelon tasting watermelon I've ever had. I'm kicking myself that I didn't take note of the variety.

Aside from cutting slices and eating the watermelon straight - which the girls love - I prepared this watermelon the easiest way I know.  I made a milkshake.  Yeah, I said it, a watermelon milkshake.

In my house growing up we had the choice of two summer desserts - a raspberry milkshake and a watermelon milkshake. (Maybe a banana one if there happened to be a banana left behind in a house of three competitive swimmers.) Watermelon milkshakes were my personal favourite. Yet, whenever I mentioned it to friends they all got grossed out.  Like seriously grossed out.  I never understood that. What's wrong with creamy watermelon?  And really, that's what a watermelon milkshake tastes like. And there is nothing, absolutely nothing wrong with that.

It turns out the palest of pink.  A mix of equal parts watermelon puree and vanilla ice cream. That's it. Resist the urge to add more ice cream to make a thick milkshake, you will lose the balance of sweetness and fresh taste from the watermelon.

Oh yeah, and I fed it to my kids for dinner tonight.  Sadly, they only had a few sips and moved on to bread and baked beans.