Do you remember when you were 16 and you finally got that guy you loved FOREVER to notice you and suddenly you were agreeing to go to the movies, without either of your parents driving you? The excitement, the knots in your stomach, the agony over what exactly to wear? And then a zit that appeared on your face the night before.
Or what about the first time your mother-in-law came over for dinner? The fretting over the right menu, timing your dishes so that nothing was cold, and obsessing over whether the house was just clean enough? And then the dog upturns a plant and you have dirt everywhere.
Now, imagine that you've invited over two major foodies and fantastic writers. Oh yeah, and they're bloggers too and you know that they're going to write about and photograph what you made for dinner. Nope, no pressure there.Friday night we hosted Julie and her gang from Dinner with from
Dinner with Julie and Aimée and her family from Under the High Chair. Seriously, no pressure whatsoever.
The Menu:
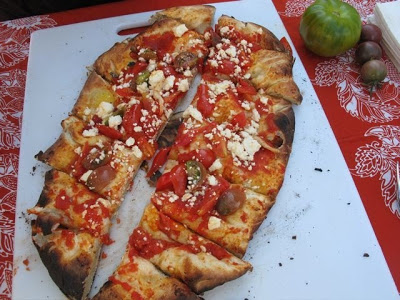
Watermelon and Jicama Sticks with Chili Salt
Hubby' Famous Arkison Burgers
Buffalo Hot Dogs
Cherry Hand Pies
It seemed like a pretty stress free menu. Or so I thought.
Since Julie did such a good job of summarizing our evening together - although she forgot the part where Danny, Aimée's husband took out Willem, Julie and Mike's son - I thought I would highlight the prep. The nerve-wracking everything going wrong prep for when two major foodie bloggers stop by for Friday night dinner.
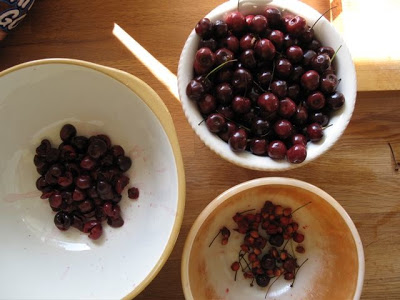
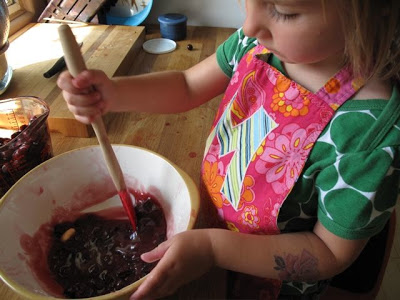
Let's start with dessert, because that's what I worked on first. I lucked into some sour cherries at the market last week, so pie was definitely called for. The Monster and I tucked into pitting the cherries while Smilosaurus had her last official morning nap. Sour cherries are ridiculously easy to pit, no tool required. We just put our thumbs on either side of the pit and pulled the cherry apart. Well, that's what I did. The Monster apparently would start by biting off half the cherry, then picking out the pit. And, ever helpful, she would put both halves of the cherry in the bowl. So, in case I forgot to mention it on Friday night, the cherry pie had a little something extra in it.
Then there was the ice cream. Sour Cream Ice Cream. I was brave and the three of us girls went off to get our groceries. Sour cream? Check. Half and half? Check. Heavy cream? Check. Frozen ice cream canister? Check. Blender? Check?

Coordination and space in the fridge? Uh, no. I dropped the blender on the floor as I was trying to fit it in between a case of beers and some herbs. It went everywhere! In fact, looking at that picture I realize that I still need to clean the sideboard.
The dogs had a field day cleaning the floor and The Monster cried for a half hour straight. Nothing but tears, nay, wailing, over spilled ice cream. Thankfully Hubby came home in the middle of her crying so I could run out and buy more sour cream while she cried herself to sleep.

I also ran out to the market while the girls slept to pick up the corn, avocado, lettuce, beef, and the rest of our groceries for the week. While unpacking I realized that of everything I picked up I forgot to buy peaches. So, no grilled peaches for dessert. Sigh.
Instead I set to making the pies and getting everything else ready. I had my
pate brisee cold in the fridge. It rolled out wonderfully and I made my pies. Then I went outside to get the yard a little bit in order. And promptly forgot about the first tray of pies. I saved them from complete destruction. And Julie even said she loved the idea of the juices oozing out of their pastry hold. I still scolded her for taking a picture of it. We just picked the really crispy bits off the edges.

Finally, and this was by no means a disaster, I ran out of ketchup. No ketchup is not cause for alarm, but I am firmly in the camp that burgers need ketchup. I was also anticipating toddler meltdown if their was no ketchup for the hot dogs. Just as I prepared to call my neighbour who is stocked for the war (I call her my emergency pantry) I remembered a bottle of
homemade ketchup in the cold storage. And the reviews were so positive - except from my kid - that I might consider the effort again.

All was not horrible. Indeed, some things went ridiculously well. I made the chili salt for the watermelon and jicama sticks with my secret stash of dried chili from
Baja. I simple threw a handful of chili in a non-reactive frying pan with a clove of garlic. Let it heat up until I could really smell the chili heat. Then I blitzed the whole thing in a food processor with a little less than a cup of kosher salt. I think we all preferred it with the watermelon, and I'm pretty sure it would be good on mango too. Hubby and I thought that maybe the leftover salt would be good on some grilled chicken, but not too much.
Then there were the burgers. Oh, the burgers. These are the spec-i-al-ity of my Hubby, Morgan. I once made the mistake of raving over a burger in a seaside shack in Digby, Nova Scotia as the best burger I ever had. I swear that if I hadn't recanted the statement right then and there we never would have married.
There's nothing special to the burgers. Just good quality ground beef, lean ground beef. Don't try to be healthy and by extra lean, your burgers will be dry. Lately we've been making them from
Hoven Farms beef. Very flavourful. So take your beef and form it into a patty, preferably a large patty. Do not season the beef, don't add eggs or bread crumbs. This is pure beef. Now you know why I only served a green salad on the side.
After a liberal dosing in
CattleBoyz BBQ Sauce he cooks them slowly on the grill. They stay juicy, they get a great crust, and they are perfection. Meaty, so juicy they drip off your wrists perfection.

So the floor was still sticky, the lawn never got mowed, and I highly doubt I made The Monster's bed after her nap. Oh, and I did indeed have a brand new zit to greet our guests. None of that really matters if everyone is well fed and the company good.
The night was really as good as it gets when you've got 6 tired adults (long drives, gout, sleepless nights, and working too much) and 5 kids under the age of 4 to keep track of. Note to self: build gates for the fence. We photographed our food more than our kids, we chatted and gossiped about other sites we visit, compared horrible neighbours, and we lubricated everything with Prosecco, Moscato, and beer. It would have been lovely to sit leisurely around the firepit and actually have some girl talk among us bloggers, but sadly the Hubby's wanted our help with the kids. I think Julie and I might have to plan a weekend in Montreal, sans kids, to get that!
Make sure you check our
Julie's review of the evening (including the recipe for the sour cream ice cream, and keep an eye on
Under the High Chair for all of Aim
ée's vacation reports. And stay tuned here this week, I will actually share with you the recipe for Cherry Hand Pies.

 {this moment} - A Friday ritual. A single photo - no words - capturing a moment from the week. A simple, special, extraordinary moment. A moment to pause, savor and remember. (from Soule Mama)


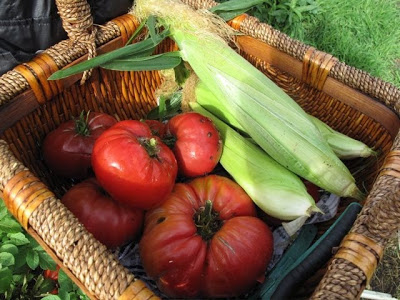

 Kim and John are more than mere gardeners.