vegetables

Corn and Swiss Chard


There was a stirfry contest between myself, an elderly neighbour, and my three year old Evil Genius. I was losing. Taken down even in my dreams.

My stir fry was watery and being taken over by corn and swiss chard. A watery stir fry is unforgivable, but I won't apologize for the corn and swiss chard. It is a tremendous late summer/early fall confetti combination. Even if it meant that my kid beat me in a cooking contest.

The first time I made this it was with the first corn of the season because I wasn't sure the kids would be up to tackling corn on the cob. I've since been proven wrong, but this is also such a popular dish in the house that we've been having it at least once a week since the corn arrived. Technically, I've been having it twice because any leftovers serve as an excellent bed for poached eggs in the morning.

This has been an excellent dish to take advantage of our CSA chard, garlic, and herbs. When I combine it with some Noble Meadows goat feta and use Mighty Trio Organics Flax Oil instead of Olive Oil it makes a completely Alberta dish.

Corn, Swiss Chard, Feta, and Mint
Serves 4 as a side dish

3 cobs fresh corn (0r 1 cup frozen niblets)
1 bunch swiss chard
1/3 cup water
1 tbsp olive oil
1-2 garlic cloves, minced
1/2 cup feta cheese
1 tbsp chopped fresh mint

Shuck the corn, being careful to remove the silks. Standing the corn straight up on a cutting board, slice off the kernels. Set aside.

Remove the center rib from the swiss chard. If they are thin or you chop them small, you can use them here. Otherwise, discard or set aside for another use. Roughly chop the leaves.

In a large frying pan with a lid toss the swiss chard with a generous pinch of salt and the water. Cook over medium heat for 5 minutes, covered. Uncover and add the corn. Toss well. Keep uncovered and cook for another 3-5 minutes until any remaining water is evaporated. Stir frequently. Add the oil and garlic and cook for 30 seconds.

Place in a serving dish and top with the feta and mint.

More and More Asparagus

When it is in season we eat asparagus constantly. Just like we eat corn daily, strawberries, and tomatoes for their short seasons. Needless to say, I'm always on the look-out for ways to enjoy our favourite spring vegetable. Here is a round-up of recipes, both mine and others, that showcase this great green stalk.

--- Asparagus Risotto (Backseat Gourmet
--- Asparagus Soup (Use Real Butter)
--- Pickled Asparagus (Food in Jars)

Go forth, gather, and eat while the eating is good.

Asparagus with Roasted Rhubarb Sauce


They say that when in doubt, cook foods together that grow together. As we trundled along on our tractor ride at the most recent Asparagus Festival I couldn't help but become obsessed with the idea of asparagus and rhubarb together. There they were, in neighbouring fields and sharing space in my Edgar Farms bag on the way home. They begged to be joined in holy cookery.

The only problem with this idea is that rhubarb, no matter how you cut it, is a rather tart thing. And asparagus is far more mellow and sweet. It isn't always a case for opposites attract. But when it doubt, throw them in a roasting pan together. A little spice, a little sweet and sweat, and beautiful things can happen.

Roasted asparagus, however, isn't that great to eat. The texture is rather, um... pasty with a side of string. Not giving up on this relationship, however, the rhubarb transformed when it became a sauce to slink over and envelope the roasted asparagus. It also did well when covering pork tenderloin, but I'm not telling you about that. The asparagus would be upset to know the rhubarb went behind his back.


Asparagus with Roasted Rhubarb Sauce
Serves 4-6 as a side dish

1 bunch asparagus
2 large stalks of rhubarb (the pinker the better)
5 tbsp olive oil
2 tsp Chinese 5 spice powder
2 tbsp honey
1 tbsp orange juice
salt and pepper

1. Preheat oven to 400 degrees F
2. Clean asparagus. Trim rhubarb into roughly 4 inch lengths. Place on a cooking sheet lined with parchment paper.
3. Combine 1 tbsp olive oil, 1 tbsp honey, 1tsp Chinese 5 spice powder, and season with salt and pepper. Toss the asparagus and rhubarb with this dressing. Roast for 10 minutes.
4. When the rhubarb and asparagus are done roasting, blitz the rhubarb with the remaining 4 tbsp olive oil, 1 tbsp honey, 1 tsp Chinese 5 spice powder, and orange juice. Season to taste.
5. Pour rhubarb sauce over roasted asparagus and serve immediately. Reserve leftover sauce for a pork tenderloin, but shhh.... don't tell the asparagus.

Asparagus Pico de Gallo


My Mom used to live in Texas. That isn't useful information to anyone, really. It does, however, explain how I came to know of Pico de Gallo. Until I went and spent my last university spring break with her in South Texas I thought that what you scooped up with nacho chips was salsa. In fact, at that point in time nachos were only served in bars, drenched in cheese, olives, and green onions with a side of insipid salsa and sour cream.

Oh how South Texas showed me the way.

First off, nachos are indeed what they serve in the bar. Fried tortillas are what nachos pretend to be. The tortillas that didn't get eaten that morning get cut into triangles and fried for snacks. Pico de Gallo is a bowl of finely chopped and uncooked tomatoes, onions, hot pepper, garlic, and lime. Pico de Gallo is always served with those fried tortillas. Sit on the beach in South Texas where you can order any beer and it will come with fried tortillas and Pico de Gallo. It is about the most perfect bar food, beach or not.

I'm nowhere near a sandy beach and I'm pretty sure any Texan would shoot me for this addition, but here you go: Asparagus Pico de Gallo. I was craving the spice, I had the fried tortillas, and I was staring at a large bunch of asparagus in the fridge. All that was left was the beer. And, of course, the beach.


Asparagus Pico de Gallo
Makes 2 cups

10 stalks asparagus (choose the skinny ones)
2 plum tomatoes
1/4 medium red onion
1 clove garlic
1 jalapeno pepper
1/2 lime
1-2 tbsp chopped cilantro (optional)

1. Steam the asparagus for 1 minute, if you prefer not to eat it raw.
2. Finely chop the asparagus and tomatoes into 1/2 dice or smaller. Keep the tips of the asparagus intact. Finely chop the onion, garlic, and pepper. Toss them all together in a bowl.
3. Juice the lime and add the juice to the vegetables. Add cilantro if you're using. Stir once more and serve.

Asparagus, Dill, and Feta Quiche


Eggs are always a go-to meal in our house. We always have an abundance from our biweekly delivery from Elmar, the Eggman. With asparagus at its peak right now the two ingredients combine well for a great, easy family dinner. This crustless quiche is perfect for a weeknight dinner or weekend brunch

While asparagus has a unique flavour, it is a mild green taste. That means it pairs well with so many other flavours. You could turn this into nearly any other flavour combination. Try asparagus with lemon, parmesan, and pancetta, or tomatoes and provolone. Perhaps cheddar, ham, and green onions with the asparagus. Or salmon and lemon. This time around I chose feta and dill, family favourites in my house.


Asparagus, Feta, and Dill Crustless Quiche
Serves 6-8 as a main course

1 tbsp butter
1/2 cup bread crumbs
1/2 bunch of asparagus
8 eggs
1 cup milk
1 tbsp chopped fresh dill
1 cup crumbled feta

1. Preheat oven to 400 degrees F.
2. Butter a deep dish pie plate. Toss the bread crumbs into the plate and roll around to cover the sides. Pat in an errant crumbs.
3. Clean and chop the asparagus into 1 inch pieces. Place in a small pot, season with salt, and add about 1 inch of water. Cook on high heat, covered, for 1-2 minutes. Drain immediately. Pour into a bowl and leave uncovered while you prepare the rest of the quiche.
4. Crack the eggs into a large bowl. Add the milk and whisk well. Season with pepper, a little bit of salt (the feta is salty, so you don't have to add that much). Add the 1/2 cup feta, dill, and the asparagus. Pour into prepared pie plate. Top with remaining feta.
5. Bake for 40-45 min until the top is puffy and golden. Let cool for 5 minutes before you serve.

Asparagus Week


It's the quintessential spring time food - Asparagus.

A fern poking from the ground. Fields that look like dirt with some random spikes reaching for the sunshine. The taste of green, of peas, of spring. The marking of the season in a land where winter lasts for bloody ever.

This week I'm going to showcase one of my favourite foods. Asparagus recipes, tips, and links.

Growing Asparagus

Here on the Prairies asparagus grows. Some might even argue that it thrives, if you treat it right and treat it as a perenial. That means you treasure it in the spring then let it rest. It goes to fern, filling the fields with a froth of green, over the summer. It survives the winter, it really does.

It takes 3 years for an asparagus crown to produce edible product. That means 3 years of patience and care. Then, with annual tenderness you have a lifetime of asparagus. Or, if you were my Mom's family, a lifetime of front yard decoration.


Picking Asparagus

Pick the stalks right from the ground. Let them be at least 6-8 inches tall before you snap them.

If you have the pleasure of visiting an asparagus farm, make sure you check out their pickers. These low-riders will take you throw the fields, saving your back, as pickers gather precious bunches for us lucky consumers.


Eating Asparagus

Contrary to expectations, you can easily and enjoyably eat asparagus raw. It tastes mildly of peas when raw (which means that is my least favourite way to eat it).

Often grown in sandy soil, asparagus can carry dirt to the dinner table. Fill your sink with some cool water and swish the stalks around to loosen any sand and dirt. If your asparagus has been sitting around for a bit then cut off the bottom ends and cook away. If your asparagus is fresh then don't bother trimming off the ends and wasting that precious veg.

The most important thing with asparagus, like nearly any vegetable, is to NOT overcook it. Steam it for a few minutes, grill it, roast it, or even boil it. Just don't overdo it.

Asparagus TypesItalic

With a slight tinge of purple on the heads, green asparagus is the most common kind we see.

More frequently, however, we see white asparagus in the markets and on menus. White asparagus isn't actually any different of a plant. It it regular asparagus that grows covered by dirt. That means that the plants are denied light and do not colour.

Sometimes you can find purple asparagus, although it is rare.

The rest of this week I will share with you three new recipes from me for asparagus as well as some links for more gorgeous recipes. Grab a spear and enjoy.

Heart


Kale chips not potato chips. Let's just get that out of the way. But they are better. But sometimes they are worse, way worse.

An old boss of mine had a heart transplant a little over a year ago. He was sick, very sick, for a young man. For awhile he was attached, and essentially kept alive by an obtrusive, loud, cranky machine. An external pump, if you will, that he carried around behind him like a business traveller and his carry-on through the airport.

Kale is one of the dark green, leafy vegetables that 'they' like to tell us to eat, and eat often. Nothing but good stuff in them. Loads of vitamins, beta-carotene, and even calcium. One of the key vitamins in kale is Vitamin K, very good for blood coagulation.

And blood coagulation is very bad for men with external heart pumps.

But now, with a new heart pumping and no carry-on luggage, those dark green, leafy vegetables are back on his plate. And because potato chips are supposed to be off that same plate I am offering up this recipe.

Kale chips are an addiction in this house; a favourite way to use up the abundance from our CSA. Yes, the girls like them too. Kale chips have a crunch that disintegrates as soon as you bite into them. They do taste green (which is a good thing) but they also carry the taste of the salt and spices you toss them with as soon as they come out of the oven.

So, if you are a salty snacker, try adding kale chips to your bowl. Ridiculously easy to make, fast, and full of real flavour that you control. Snacking at its best. And new heart approved.

Kale Chips

1 bunch kale - purple, green, or lacinato (or a combination
Olive oil
Salt
Seasonings (smoked paprika, truffle oil, seasoned salts, cumin, black pepper, chili powder...)

1. Preheat oven to 375 degrees F.
2. Wash and dry the kale very well. Cut out the stiff rib and cut the leaves into 1-2 inch pieces.
3. On a rimmed baking sheet toss the kale with a light drizzle of olive oil. Go easy on the olive oil to have crisper chips.
4. Bake for 10-12 minutes. Give the kale a gentle toss halfway through.
5. Remove from the oven and toss with a generous sprinkle of salt and seasonings of choice. (Smoked Paprika is our favourite.)

BS


Brussels Sprouts. There I said it. The big, ugly, cruciferous vegetable. And one of my favourites.

The only thing that makes me more excited than the arrival of Honeycrisp apples in the fall is the arrival of those thick stalks, heavy with their tiny cabbages.

Truthfully, I'd never had a brussels sprout until I was an adult. What my mom didn't like, we didn't eat. Not so for my girls. They don't start salivating at the sight of green, but they will eat a nicely roasted sprout topped with hazelnuts. And what they don't eat Hubby and I will gladly devour.

With Thanksgiving coming I have a proliferation of CSA veggies to use for dinner. I won't be shopping for any specific dish, just using what my farmer has so carefully grown for us. So I'll pick up my turkey at the market, maybe grabbing some sausage for stuffing. But I cannot, will not, forego my brussels sprouts at dinner.

Our favourite way to cook the sprouts is roasted. Simply cut them off the stalk, trim any errant leaves, and toss with a bit of olive oil. Roast in a 400 degree oven for 15-20 minutes, depending on the size. When they are done drizzle with a bit of good balsamic and sprinkle on some toasted hazelnuts or pecans. Even better when you throw some pancetta in the mix.

Here are some other good brussels sprouts recipes to share. Some I've made, others I just want to get to, maybe this weekend?

Cream Braised Brussels Sprouts (oh wow! these are good)

And speaking of Thanksgiving, I had two other posts this week talking about my favourite holiday. One on survival tips for the big dinner, and another on the second most important side dish (after brussels sprouts, of course), mashed potatoes. Seriously, it is my absolute favourite. What's your favourite holiday?

Stew

It all started with a few turnips. After a number of attempts last summer to like the turnips we got in our CSA delivery I was looking for another way to try them. Gail gave me the motivation after she shared what she did with our CSA delivery. And the weather has made a decided turn towards fall, being chilly and rainy today. A perfect day to have the oven on all day, with meat slowly cooking inside.

In short, a perfect day to make stew. And this is how I did it.

Get some meat. My entire family purchased a cow this summer. Well, my parents bought it and shared it with all of us. (Thanks!) So the beef stew meat came from that cow. And somehow I thought to defrost Italian sausage with it. Not sure why, but it paid off. And I was lucky, our butcher cut the meat into chunks for us.

Spoon a couple of tablespoons of flour in a bowl.  Season it with salt and pepper. Today I also added some ground Ethiopian Berbere spices I have. Go with what you've got. Sometimes it is thyme and oregano, sometimes paprika, sometimes it is nothing. Stir it all together.

Toss your meat in the flour and spices to get well coated. Do it a handful at a time. About as much will fit in your pot without crowding. Make sure all sides are coated. Not only does this help the meat brown, but as the stew cooks, the flour helps thicken the sauce.

Heat up some olive oil or vegetable oil in the pot you will use to cook the stew. For this, I always turn to my trusty dutch oven. In small batches, so the meat isn't crowded, brown the pieces of meat. Most recipes will say to brown on all sides, but some of my pieces were more rhomboid than rectangular. Quite frankly, I can't be bothered to turn my meat 6 or 7 times. So as long as the big sides had colour I was happy.

As your meat browns, put it in a bowl. That way, if any juices run out you capture them.

While your meat is browning, chop up an onion or two. How much depends on the size of onion and how much onion you actually want in the stew. I also chopped up some garlic, roughly.

Because I'd defrosted them, I decided to add the sausage. And because I was lazy, I cooked them whole in the stew. (When I added the veggies later I took the sausages out, sliced them, then tossed them back in with everything else. It beat taking them apart raw.) At this point I browned the sausages and softened the onions and garlic. This is all still in the same pot I where I browned the beef.

By now you can see that stew is about layering flavour. The next step is to deglaze the pan. More than anything I use beer, but sometimes wine. This beer was leftover from a party we had the other night. So I took a sip from the beer, then poured the rest in the pot. When you add alcohol to a hot pan it bubbles wildly and with a few scrapes of the wooden spoon, all those brown bits that look like burnt stuff came off the pot and to flavour the liquid. To this I added two cans of tomatoes. Not the juice, just the tomatoes. And I squished them in my hands as I added them.

After that, the meat goes back in the pan, with any accumulated juices. Then the whole thing goes in the oven at 200 or 250 degrees F for a few hours. Yes, hours. You could also cook it on the stove, but I find the oven requires less attention. And frankly, stew is supposed to be about hands off cooking. Well, once you do all the stuff before this step.

After a few hours it was time to add the veg. You could add it all at the same time, when you first put it in the oven. Perhaps, though, you need to go to the farmers' market and pick up the carrots and potatoes because all you have are turnips in the house.

Cut all the veg into about the same size - 1/2 to 1 inch pieces. Throw them in the pot and let it all cook for a few hours more. At some point you should taste and season it. To mine I added some dried thyme as well as salt and pepper.

When Hubby and I first started dating we actually argued over the best way to eat stew. I was firmly in the with bread camp, and he preferred his over rice. Well, the day he makes the stew he can have it over rice. Today we had it with a loaf of wild rice and green onion bread from The Bakery at the Market. It was a fantastic compliment.

The stew was gently flavoured, with perfectly cooked meat that even my 2 year old could cut with her spoon. The sausage lent a sweetness and another texture. And the turnips? They softened slightly sweet, with just a touch of peppery bite. Just different enough from the potatoes, and about the best way I've ever had a turnip.

Whispers and Screams


Sunday dinner this week was a victory on all fronts. The girls ate soup for dinner and Hubby ate zucchini without knowledge/complaint. Woohoo!

We spent the weekend in Edmonton, visiting family and taking in Alegria by Cirque de Soleil. Surprisingly, we got out of Edmonton at a decent hour so we were actually home to enjoy part of the afternoon. Unfortunately, a storm hit the second we arrived. There went the plan to take the dogs for a walk. So, it was into the kitchen instead.

Smilosaurus and I set to dealing with the two ridiculously large zucchinis we had from our CSA. Rather than go with the typical chocolate zucchini cake, I pulled up this recipe for zucchini cake with crunchy lemon glaze. We grated, we cracked eggs, we sifted, we stirred, we baked with the thunder as our soundtrack.

While the cake baked I had to figure out what the heck to eat for dinner. Standing in front of the deep freeze the last bits of last years summer - slow roasted tomatoes, chard, white beans were staring at me. So I grabbed some frozen stock, the veg, and set to make soup. Except that I didn't look so closely. I actually grabbed soup, not stock. So, dinner was souped up soup.

One of the soup additions was some leftover diced zucchini. And Hubby ate it and didn't complain. I realized when he told The Monster to eat her soup, and pointed out that it has potatoes in it, that he didn't have a clue he was eating zucchini.  Shh, no one tell him.

Maintaining the Idea of Spring


Biba Caggiano taught me how to make risotto when I was 19. It was summer break during university. In between multiple jobs to save for tuition I found the time to watch PBS on Saturday afternoon. "Biba's Italian Kitchen" was always on. So I would sit in my Dad's office, taking notes, and watching Biba on a 12 inch screen.

When I went back to school and suddenly found myself alone in a basement suite, craving something more than a hearty salad I always turned to risotto. It was the comfort food that got me through my last year of university, in between thesis writing, working, and running a muffin business.

People are always so scared of risotto.  I blame the recipes for this.  Read a recipe for risotto and it is enough to scare off anyone - they are always so wordy and make it sound complex.  But risotto is not complex. Nor does it require endless stirring.

Tonight we returned home from a weekend away, visiting family.  We stopped at Edgar Farms on the way home for Asparagus Fest.  There was a break in the rain and snow, so it worked out perfectly. We caught up with Doug, Elna, Keri, and Randy of Edgar Farms. We chatted with Wade and John. We ate, we pet animals, we jumped in puddles, and we definitely grabbed some asparagus. First from the field and then my mother-in-law treated us to a few bundles to take home (awfully generous of her since she also babysat for us last night!)

When we walked in the door at 6, everyone was exhausted from a busy weekend and an afternoon outside.  To be honest, I was real tempted to give in to Hubby's request for the pizza man delivery. Then I decided we needed to eat more asparagus, but we also needed something warming. Something to fill our bellies but still feel light enough to remind us that it is indeed still spring. Risotto! Lemon Asparagus Risotto to be specific.

I'm not going to give you a recipe. Risotto, I think, is more of a basic technique than a recipe. Now, I've never served to an Italian grandmother, so mine could totally suck.  But we all love it. In fact, risotto is the only way The Monster will eat rice. So, don't be scared, here is my technique for risotto.

1. Finely dice a small/medium onion. Toss in a tall sided frying pan with a generous swig of olive oil or knob of butter. or both. Sweat them out on medium heat.
2. While the onion is cooking mince a couple of cloves of garlic. Add to onions and stir.
3. Immediately add your Arborio rice (available in most grocery stores and definitely in an Italian market). I use about a handful a person. Stir in and get the rice coated with the oil/butter.
4. If you happen to have wine in the house, pour a generous slosh of it in the pan and let it reduce. No wine? So what.
5. Once your wine has reduced, if you've used it, start adding in hot chicken stock, veggie stock, or water.  Yes, I think it is okay to use water, you will just have to season really well at the end. Add in the liquid about a ladle at a time.  Stir well before and after each addition.
6. Add a ladle of liquid every few minutes or so. The goal is to have the liquid be absorbed slowly. So when it looks like you have little liquid, add more. After about 15 minutes, start tasting. Risotto should have a bit of "tooth" to it. In other words, you don't want it mushy, but it should be creamier than regular rice.
7. When it reaches the right consistency, turn off the heat. Stir in some more olive oil or butter - whichever one you used with the onions - another good swig or knob. Also stir in some cheese - parmesan, manchego, asiago - a grated hard cheese is my preference. Serve immediately.

Tonight I also stirred in some asparagus that I blanched for a bit and some lemon zest. Another night I might stir in roasted butternut squash, or sauteed mushrooms, or maybe peppers and zucchinis. Cook's choice. I just recommend that you cook the veggies separately so they don't get overdone or mushy in the cooking rice.

Okay, now that I've written that out it does seem wordy and complex. Trust me, it's not.

After a quiet evening of movie watching we then had a pre-bed snack with the girls.  I also picked up some rhubarb at Edgar Farms so I made this lovely Rhubarb Upside Down Cake.

Sunday Dinners

After spending a week away from my family at a Quilt Conference all I wanted to do last week was cook dinner and sit down with my family.  I wanted to chaos of an almost 2 year old emptying her plate on her stylish Marimekko placemat. I wanted Hubby and I to try and talk about renovations, family, and playground sizes over two children screaming, "Mega, mega, mega!" I wanted to have the 'what animals can you kill to eat?' discussion again, and again. And on top of that, I wanted a little kitchen time to set-up this crazy thing called The Family Dinner.

Despite the fact that we have two overly energetic kids it is extremely important that we sit down to dinner together every night.  Yup, every night.  Our kids are too young for the near constant drain on our gas tank as we chauffeur them to a million activities, and lord help us if we become those parents anyway. When we sit down we are there to stay, until every last bite is eaten by every single person. And then you must be asked to be excused before you even think about a foot straying from the table.

It may seem old fashioned to be strict about these dinner time rules, but in the end it makes dinner less stressful and far more consistent in the long run. As an added bonus, it means our kids are quite used to and more than able to sit in a restaurant without being too crazy and disruptive to other patrons, for at least an hour. 

Reminder - our kids are about to be 2 and 4. And no, they aren't angels, far from it. But we've got dinnertime almost settled. You take your victories where you can as a parent.

So I am starting a new feature on Backseat Gourmet. Sunday Dinner. For many of us, Sunday might be the only day of the week where everyone is actually home at the same time. Or at least the only day where that might be possible. So every Sunday, or most at least, I will share some Sunday dinner inspiration.

It was awfully convenient then, that a new crop of cookbooks arrived last weekend. With a cup of tea I settled in for some browsing.  At the top of the stack was Rose Reisman's Family Favourites. I've had some of her cookbooks in the past and never got too excited by them. This one, however, immediately grabbed me because of her emphasis on the family dinner.  And then 40 pages of discussion on healthy eating, cooking with the family, and shopping tips.

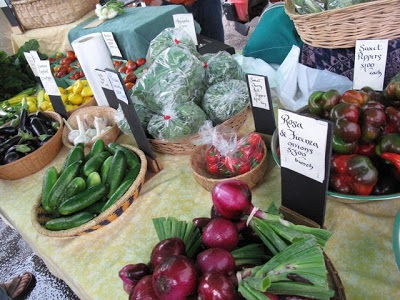
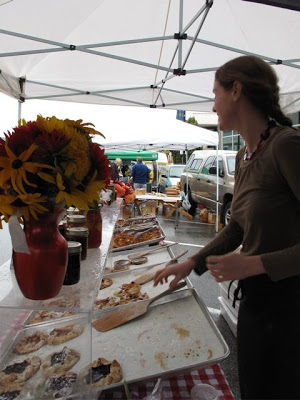
Flipping through the book I can say that I wasn't overly excited by the dessert section - yes, of course I went there first - but the vegetable side dishes and soups had me very, very interested. So I picked up mint and goat cheese at the market.

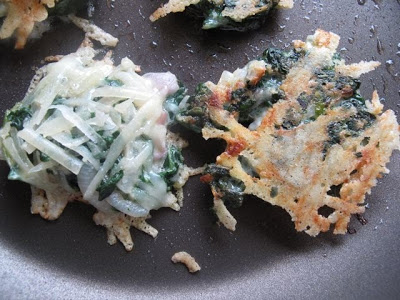
The first recipe I made was mashed potatoes with goat cheese and sundried tomatoes. I wanted this to be so good, and maybe it could have been.  But I didn't have Yukon Golds and I now disagree with the recipe in adding the chopped tomatoes before you mash. So, mine were dry, but still tasty.

But the Molasses-Coated Carrots with Mint? Holy hell, these were good. Flavourful and refreshing, without the overpowering taste of any one ingredient. I used the regular old organic carrots that I can find at this time of year, but cut smaller and adjusted the cooking time. Carrots deluxe, but still fresh with that carrot taste. An instant classic in my books. And it will certainly be making regular appearances at our house, Sunday or not.

Molasses-Coated Carrots with Fresh Mint
Serves 6
Excerpted with permission from Rose Reisman's Family Favourites
Published by Whitecap Books 2010

1 lb thin carrots (about 6 inches long), peeled and trimmed
2 Tbsp molasses
1 1/2 tsp sherry wine vinegar or white balsamic vinegar
1 Tbsp olive oil
3 Tbsp chopped fresh mint

1. Place the carrots in a large saucepan or skillet. Cover with water and boil for 10 minutes or until just tender. Drain well and return to the saucepan.
2. Whisk together the molasses, vinegar and olive oil in a small bowl. Add to the carrots and saute over high heat for 5 minutes or until the sauce is heated through and the carrots are coated. Place on a platter, garnish with fresh mint and serve.

Taste Adventure - Eggplant


If the kid asks you what an eggplant is and in her prettiest voice ever asks you to buy it - pleeeease? - then you buy it. Then hope like hell she'll actually eat it.

Eggplant isn't something I tend to cook. Although I quite like it, Hubby hates it, so I often don't bother. But when The Monster spied it at the market a few weeks back and asked for it I jumped at the chance. Plus, Hubby was going to be out of town.

Because eggplant is not on the usual dinner repertoire in our house I stood there for a minute trying to decide what else I might need to make dinner. Along came Pierre.  Literally. He appeared and we started talking eggplant. After a few minutes we parted with promises of him sending me his recipe for ratatouille. 

Pierre's recipe is a technique more than anything. When I make ratatouille I tend to chop up all my veggies, toss them with some olive oil, herbs, and a load of fresh tomatoes. Into the oven on high heat. And done. Pierre's technique was to chop up onion, cover them with canned tomatoes in a baking dish, and bake for a 10 minutes. Then top with eggplant and our other veggies. Throw in some rosemary and a secret ingredient or two and let it all bake together. I think the term he used was Blap! it together.

It was fantastic. I loved this method of cooking, I loved the ratatouille - rich, tummy warming, and flavourful. And the girls? Not so much.

The Monster refused to eat anything but the peppers, even after her one bite and reminder that this indeed was the eggplant she asked for. And Smilosaurus took this occasion to string together her first 4 word sentence, "I don't like that!"

Any other eggplant suggestions out there? I'm not willing to give up yet.

Bean Burgers Yum!

If you've been reading a while you know that I was the mom who went crazy anal about making my kids' food when they were little. Or you just know me and that fact isn't surprising at all. But the one thing I did buy was some bean burgers from a local manufacturer. The Monster absolutely loved them. But they were expensive. Damn expensive.

I launched a search to make a good bean burger myself. And I searched and tested and searched and tested some more. And I had no success. Nothing seemed to work.  They were all too dry or too wet, so I gave up.

Then the Blog Aid: Haiti cookbook arrived. Catherine McCord at Weelicious included a recipe for garbanzo burgers in it. The old challenge poked its head out of my subconscious and forced me to make her burgers. And you know what? Success at last! 

Of course, I did adapt it a bit.  But that's because I had a 19 ounce can of chickpeas, not 14 ounces as in the original recipe. To compensate I added some pistachios when I was making the breadcrumbs and threw in some spices. The girls and I happily ate them, as did our vegetarian friend who was visiting. Even Hubby, the devout carnivore, ate them without grumbling. Much. But he did clarify that they were actually patties and did not deserve the name burger.

Garbanzo Patties
Adapted from the Weelicious recipe in the Blog Aid:Haiti Cookbook

Makes 12-15 patties

1 19 ounce can chickpeas, rinsed and drained
1 small carrot, chopped
1 small onion, roughly chopped
1 clove garlic
2 eggs
1 tsp salt
1 tsp cumin
1/2 tsp chili powder
1/4 cup bread crumbs
1/4 cup finely chopped pistachios
2 tsp sesame seeds, toasted
1-2 tbsp oil

1. Blitz the first 8 ingredients in a food processor until it is a consistent mixture.
2. Stir in the bread crumbs, pistachios, and sesame seeds.
3. Scoop about 1/4 cup of the mixture (it will be wet) into your hand and form patties. 
4. Heat oil in a frying pan on medium heat. Cook patties for 5 minutes, flip and cook 3-5 minutes longer.

Particularly tasty with Edgar Farms Asparagus Relish. Or a nice green salad.


Soup Kind of Days


Nothing particularly bad has happened in our little house lately - unless you count completely forgetting to give my mother-in-law her Christmas present. Thankfully she's forgiven us and we've promised her a CSA membership. And just in time because she offered us a weekend sans kids for skiing and relaxing as our Christmas present. Hubby and I are escaping to Banff this weekend while Grandma and her girls have some serious bonding time.

Sadly, she won't be serving soup. Well, she can grab some but good luck trying to get the girls to eat it. No Borscht, no Chicken Noodle, not even Mama's Tomato Soup. I have no idea what their issue is with soup. From 9 months on they've insisted on feeding themselves and even The Monster hasn't mastered her knife or spoon skills. That might be it, but heaven forbid you try to feed them!

Soup is my go-to meal for a bad day, for providing a meal to a sad friend or new mom, for bread day from Aviv, and for the days that I feel fat or cold. Maybe because toddlers and preschoolers don't have days like those that's why they don't like soup.

Tomato, Bacon, and Blue Soup
Makes 7-8 cups

4 slices bacon (not maple flavoured)
1 small onion
1 garlic clove
2 28 ounce cans whole tomatoes (preferably San Marzano)
2 cups water or stock
1 bay leaf
3 ounces blue cheese
1/4 cup heavy cream or whole milk

1. Chop bacon cross-wise. Saute in pan on medium-high heat until just starting to crisp up. Remove 2 tablespoons cooked bacon and reserve for garnish. Pour off almost all the grease left in the pan.
2. While bacon is cooking finely chop onion and garlic. When bacon is cooked add the onion and garlic to the pan. Saute until the onions are soft.
3. Add tomatoes with liquid. Stir in water or stock and bay leaf. Turn heat down to medium and simmer for 20-30 minutes.
4. Puree with an immersion blender, food processor, or in a blender. Be careful when blending hot liquids.
5. Stir in blue cheese and cream/milk. Season well.
6. Garnish with reserved bacon and crumbled blue cheese, if desired.

Death By Food - Not Quite


The first time I invited Hubby over for Christmas Eve dinner he fully expected to die from food poisoning of the Ukrainian variety. That is, too much starchy, heavy food that includes grains that were either sickly sweet or mushy. And don't get me started on the pickled fish or sauerkraut and peas.  Death by Food, that's what Hubby called it.

Then he ate the meal, all 12 courses.  Ate would be an understatement.  Devoured is more like it. And he lived to tell the tale. Rather, he lived to tell me that I was crazy and that Christmas Eve dinner was a fantastically delicious meal.

Christmas Eve dinner always starts with Borscht - that classic red beet soup. The next few dishes are, well, something I can't stand (Kutia and Kasha), but the borscht always made me happy.  Except when we ate my Baba's soup and she put peas in it. In honour of Ukrainian Christmas on the 6th I wanted to share this recipe.

This recipe does not include peas.  Thank goodness for that.  Borscht is essentially a beet based vegetable soup.  You can add in other veggies, but I stick to adding beets and a few carrots to onions, celery, and garlic. A browse through any Ukrainian church cookbook will turn up a variety of recipes claiming to be Russian style or Dukhobor style.  I can't speak to them, but potatoes do not belong in borscht as far as my family is concerned. My Baba also often made hers with a ham bone, but to this is easily kept vegetarian by keeping the bone out.

Then there is the issue of exactly how to prepare your beets.  Pre-cooked versus raw in the soup? Chopped, grated, shredded, or sliced? I've settled on roasting, then peeling my beets. And I am firmly in the camp of slicing my beets into matchsticks. It provides a bit of toothiness to the soup, but not as much as you would get if you diced the beets. Yes, it takes longer, but it is a perfect Sunday morning activity with a three year old and a butter knife by your side.


Borscht (Just like my Baba's, minus the peas)
(8-10 cups)

3 pounds beets (6-8 medium)
1 medium onion
2 celery ribs
1 tbsp vegetable oil
4 medium carrots
8 cloves garlic, minced.
19 ounce can diced tomatoes
6 cups water/stock
ham bone (optional)
leaves from one bunch celery
1 tbsp chopped fresh dill

1. Heat oven to 350 degrees F.  Trim ends from beets, toss with a little bit of vegetable oil, salt, and pepper.  Roast in oven for 1 and 1/2 hours. Let cool completely.
2. Peel the beets. Julienne into 1/8 inch sticks, about 1-1.5 inches long. Do the same to the carrots. Set aside.
3. Finely dice the onion and celery ribs.  Saute with vegetable oil until soft.  Add in garlic and saute an additional 30 seconds. Stir in beets, carrots, tomatoes and their juice, and 6 cups water.  If using the ham bone add it now. Let simmer over low heat for about 2 hours, covered.
4. Turn off the heat, stir in the celery leaves and dill. Season well with salt and pepper. You can serve it immediately, but borscht benefits from sitting a day or two.
5.  To serve, garnish with a dollop of sour cream or creme fraiche.  Alternatively, drizzle with some heavy cream.

Another Condiment Obsession

I’ve had a mild obsession with tomatoe marmalade since out weekend in the Okanagan.  After our trip to the market the clouds broke and we ventured to the aptly named community of Summerland.  There we drove up the mountain to the colourful Valentine Farm.  Our hosts, Kim Stansfield and John Gordon, met us in the yard of their compact property, next to their fantastic home and guest house
After introductions we gathered our lunch from the generous garden of Kim and John, under the watchful eye of an odd looking llama, a couple of horses, and a friendly guard dog names Asta.  We picked a half dozen types of greens, beets, radish pods, corn, flowers, and lots of tomatoes (minus the ones Hubby scarfed while picking).  
 
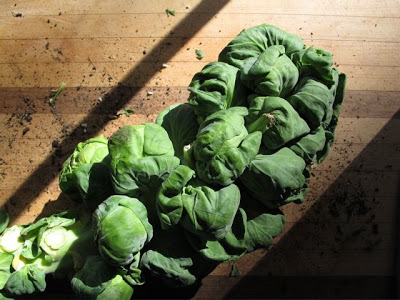
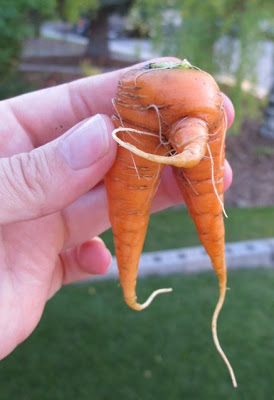
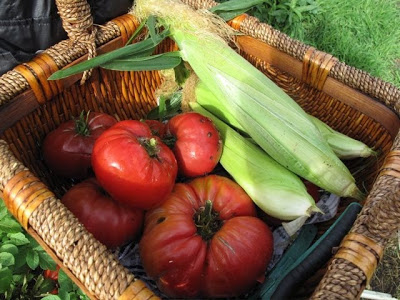
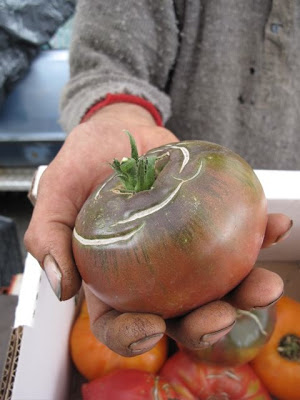
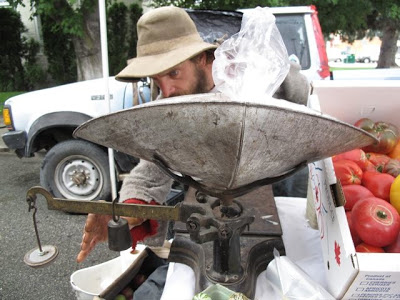
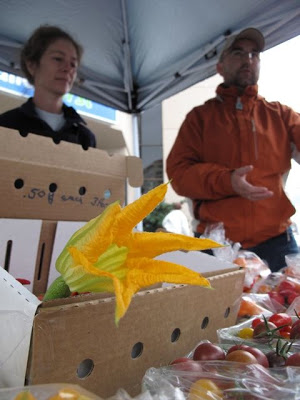
Kim and John are more than mere gardeners.  They are grape growers too.  But unlike every other wine maker or grape grower in the region who fears their wine spoiling), Kim and John intentionally infect their wine with acetic acid to turn it into a pungent and flavourful vinegar John showed us their small production facility (a very nice looking and obsessively clean garage) then set to finishing our lunch in the outdoor, wood-fired oven.

Our gathered items made their way into the most diverse salad I've ever had, dressed, of course, with Vinegar Works organic vinegar. We were also served a large platter of sliced heirloom tomatoes reminiscent of a sunrise.  Smaller tomatoes made their way on to the wood fired pizzas.

Oh, the pizzas.  The most tender yet crispy and somehow bulbous crust (yes, all at the same time) covered with tomatoes, sometimes chard, feta, and my newfound obsession: tomatoe marmalade. Can I just say I will never made a pizza without tomatoe marmalade ever again?  I would love to say that I will only ever eat pizza from a wood-fired backyard oven, but I don't live in Summerland or here to make that happen. But so long as I can hit 450 degrees F on m home oven I will be using this as my sauce.

So when my mother-in-law showed up with 20 pounds of Romas last week I set to work. The girls helped as much as it held their interest.  For Smilosaurus this meant transferring tomatoes from the box to the sink for washing, sampling along the way. She also had a special job of stealing the cloth for cleaning the jars. For The Monster helping meant transferring blanched tomatoes to the ice water, stirring the marmalade as it cooked, and helping label the finished jars. See, you can can with kids underfoot. Okay, it helps if your mother-in-law is around for bike rides and swing pushes when it gets a little boring for the little ones.

This marmalade sweet and just a little bit spicy.  It sets about as much as a runny jam.  I'm saving mine for pizza, but The Monster has already claimed some for dipping fresh bread.  It isn't Kim Stansfield's recipe, but I think it is nearly as good.  Then again, I'm not sure I could ever recreate that lunch and the taste of sunshine in every bite of our meal.


Tomatoe Marmalade
(makes 7-9 250 mL jars)

12 cups peeled, chopped tomatoes (drained of liquid)
9 cups sugar
1 orange, thinly sliced
1 lemon, thinly sliced
1 tablespoon whole cloves
6 cinnamon sticks
1 teaspoon fennel seeds
1 tablespoon coriander seeds
2 green cardamon pods

1. Mix the tomatoes and sugar together in a large pot. Place the remaining ingredients in a bag made from cheesecloth.  Put the cheesecloth bag and tomatoes together in a large pot and set on the stove.
2.  Bring to a strong simmer and cook for 45-60 minutes, until mixture thickens and the juices are syrupy.  Test for gel by placing a plate in the freezer.  When the plate is cold place a spoonful of the marmalade on the the plate and replace the plate in the freezer.  After a few minutes, run your fingernail through the marmalade.  If it doesn't immediately fill the space left by your finger it is ready.  If the liquid runs back on itself cook the marmalade for another few minutes.  Test again.
3.  Meanwhile, wash and sterilize your jars, lids, and screw tops in boiling water. Keep the jars hot until ready to use.
4.  When the marmalade is ready fill the jars to 1/2 inch from the top.  Wipe the rims clean with a hot, clean cloth.  Top with the lids and screw tops.
5.  Process in a boiling water bath for 10 minutes (start timing once the water has returned to the boil after adding the filled jars). Freeze or immediately use any jars that don't seal.


Backseat Adventure - Penticton Farmers' Market

The Backseat Gourmet really took the show on the road last weekend. Well, Hubby and I did. Our little eaters stayed home while we went to the Okanagan Food and Wine Writers Workshop. We lived up to the Eater title, and then some.  Throw in a lot of drinking, laughing, touring, sabering, and foraging and you've got a lovely four day Mommy and Daddy vacation.

The highlights from the trip are many.  Sublime meals, foraging our own lunch, actually learning how to taste and describe wines, and learning from other fascinating writers and editors.  Today I'm going to bring you our rainy morning excursion to the Penticton Farmers' Market.
 
I was eagerly awaiting our trip to the market after a particularly splendid and gloriously special meal on our first night of the workshop. Catered by Joy Road Catering the meal featured some spectacular food - lamb, a ridiculously good Santa Rose plum tart, and the most phenomenal green beans ever to have grown.  I couldn't stop talking about the beans for days. Simply steamed and tossed with pickled cipollini onions they were the pure definition of fresh and tasted like the colour green. When I found out that I could buy them from a vendor at the market I repeatedly told my fellow participants that any and all beans were mine, and only mine.  I'm sure it did little to ingratiate me to them, but I needed those beans.

When we arrived for breakfast the rain was looming.  And by the time we finished there was quite the downpour drenching the streets.  A few brave souls that actually thought to bring umbrellas started the walk while the rest of us remained behind, waiting for our short bus. By the time we reached the market and got underway the anxiety was creeping in. Coffees in hand and introductions made we ventured down Main Street to visit the stalls.  

Vans and trucks parked behind white awnings.  Some vendors without tents with drops of water glistening on the squash and apples.  Water dripping off the hats of grizzled men committed to their product. Two simple blocks of vendors selling their own veggies, garlic, herbs, sausage, coffee, and baking. Nothing fancy, little in the way of crafts, and more organic produce in one section that the largest Planet Organic in the country.

With the Similkameen Valley as part of the catchment for the market the number of organic producers was a significant portion of the vendors.  The Similkameen Valley has a disproportionately large number of organic producers.  I made the observation that there were more organic vendors than conventional in the market. It was a refreshing change.

It was also refreshing to know that of the vendors we stopped at we were actually meeting the producers.  They could tell us everything about each particular tomatoe or apple.   Their hands were dirty from picking that morning, their trucks low on gas from the trip into town. This one tomatoe guy from Naramata knew the name of each and everyone one of his probably 20 different kinds of heirloom tomatoes. He told us about the complex pen pal relationships he and other growers have to exchange and save seeds.  He entertained a curious four year old with trick tomatoes and dancing gourds. And when I went to pay I finally noticed his classic scale. How cool is this?

But what about those green beans? At every stall I thought, "this is it!"  We met lovely farmers and oohed and aahed over persian cucumbers, tiny tomatoes, and juicy pears.  Finally, finally we got to Gabi's stall. I pored over her pretty baskets of cute little veggies, desperate for those beans.  Someone grabbed the last bunch of cipollini onions while my eyes wandered over every basket and bag in the intense desire for those tender strings of green.  It may have been the rain, but I think I cried a little when told that the beans were sold out.

Sigh.  My heart was marginally mended when Julie shared with me one quarter of the last plum tart from Joy Road Catering's stall.  The tart they saved just for her. We joked about our tears of joy having calories that weekend, but mine at that moment was just a little bit sad.

I would be remiss if I did not thank Jennifer Cockrall-King for organizing such a fabulous workshop.  Wow, this Food Girl rocks! She organized a tremendous slate of events, with meals that can hardly be described by my words.  She brought together a fantastic and diverse group of people that were teasing each other and sharing glasses by the end of the weekend.

I also have to thank our host that morning, Mathew Batey, the executive chef at Mission Hill Winery.  More on him to come.

PS  What are you doing on Wednesday morning? I'll be on Breakfast Television here in Calgary, cooking with some lovely pears that I brought back from our trip. I hope you'll join me.

Things I Have Learned as a CSA Virgin

We are about halfway through our first CSA experience.  What have we learned so far?

1. The entire family really enjoys going out to the pick-up spot to picking up our weekly delivery, including the dogs.  Of course, when it is in the parking lot of an off-leash park that certainly makes it easier for our family.  In truth, we really enjoy chatting with the other members and in talking to our farmers, Jon, Andrea, and Manou. And to be honest, as exhausting as it is for them I think they get a bit of energy in talking to us members.  They hear about what we made the previous week, they see the girls eager to grab something out of the basket to try, and connect with the people who really appreciate all their hard work.

2. I've paid attention to the weather more this summer.  Generally I get annoyed with people who complain about it being too hot, too rainy, too cold, too, too, too.  Get over it people, you live in Canada. But I really noticed this year that June was dry and we're getting our good heat late.

3. You can grow some really cool, and really unique things in this climate.  All sorts of Asian greens like tatsoi, edible herbs like Mallow (which even the former Gardening Editor of Martha Stewart Living, Margaret Roach, didn't even know about!), and ten million different kinds of lettuce.

4.  Therefore, you must like salads.  You will eat them everyday, for lunch and supper. I've come up with some fantastic salad combos this summer.  My recent favourite has been baby greens with nectarines, walnuts, sunflower seeds, and balsamic vinaigrette.

5. It is hard to not be tempted by the other goodies you find at the farmers' market. We really do get enough from our CSA share for veggies for the week with two adults and two little ones in the family, especially of late.  But the peas, beans, corn, and cauliflower all look so good! But if I buy them then something may go to waste.

6.  Therefore, you share.  In order not to get overrun with salads I've shared my greens with neighbours and family.  Or at least invited people over to get through it all.  This is really just an extension of the notion of community that a CSA membership inherently promotes. And that is a fabulous thing.

7. Finally, you must really, really like Swiss Chard.  I mean really like it.  We've had it every week for the past five.  And one week Jon doubled up my share when her heard we liked it. Good thing we really like it. Aside from freezing the extra bits for winter soups, we've made roasted chickpeas with garlic and chard (which the girls love), simple sauteed chard, swiss chard frittata, swiss chard with raisins and feta, spaghetti carbonara with swiss chard, and my all time favourite, swiss chard fricos. 

The frico is traditionally a pile of melted cheese, usually parmesan, that crisps up like a cracker as it cools.  This version is a rip-off of a recipe I saw on Lydia's Italy.  The things you learn from PBS when tied to a chair nursing a newborn!  I saw this last summer and they are a staple in this house now.  I find it highly appropriate that Smilosaurus loves them as much as I do.

This version sandwiches the crispy melted cheese around cooked chard and onions.  So you get green sweetness in the middle of crispy saltiness. Pretty much a perfect taste. 

Lydia made hers when she was focused on the Fruilia region of Italy, therefore using a fantastic Montasio cheese. Montasio is nutty and buttery, on the hard side of the cheese scale. I've found both Italian and Canadian Montasio at the Italian markets.  There is a significant price difference, and yes, a taste difference.  Not a bad one, but a noticeable one.  If your budget allows definitely go for the Italian. I've also made this with Parmesan and Asiago.  Either works quite well.

Swiss Chard Fricos
(makes 8-10)

1 bunch Swiss Chard
1/2 small onion, red or white
1 clove garlic
1/2 cup water
olive oil
1 egg, beaten
2 tablespoons flour
1 cup coarsely grated parmesan or asiago cheese

1. Grate the cheese use the large holes on a box grater.  Set aside.

2. Remove ribs from swiss chard and reserve for another use.  Coarsely chop leaves of swiss chard.

3. Slice onion half in half again lengthwise and slice across, creating roughly 1 inch slivers of onion.  Finely chop garlic clove.

4. Place swiss chard and water in a non-stick or cast iron frying pan, salt generously, cover and steam 5 minutes.  Remove from pan and drain well. Wipe pan dry.

5. Place onions in dry pan and drizzle with olive oil and a pinch of salt.  Cook over medium heat until soft but translucent. Add in the garlic and cook for 30 seconds until you can just smell the garlic. Remove from heat and place in a bowl to cool.  Wipe pan clean.

6. When onions and chard have cooled slightly mix together with the egg and flour.  Season with a bit of pepper. It will be wet and sticky.


7. With pan on medium heat, put your cheese on a plate beside the stove. Working one at a time create patties with the swiss chard mixture.  Place the patty on the cheese plate.  Using your fingers push down gently and then cover the patty with more cheese. Carefully lift the patty and place it in the hot pan.  The cheese will start to melt.  Resist the urge to lift up the patty for at least 1-2 minutes.  The cheese will melt, brown, and form a crust.  When it does flip it over with a flat spatula and cook on the other side.  Repeat with the remaining mixture. Serve hot as an appetizer or side dish.