quilts

Brave New Quilts (Weekend Reads)


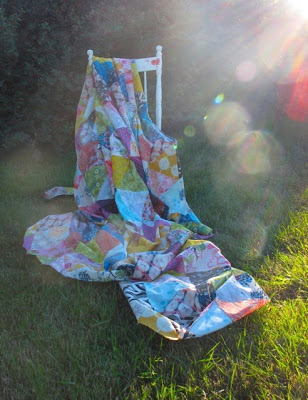
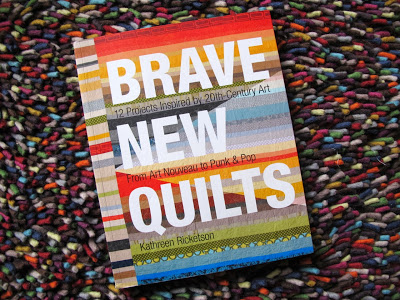
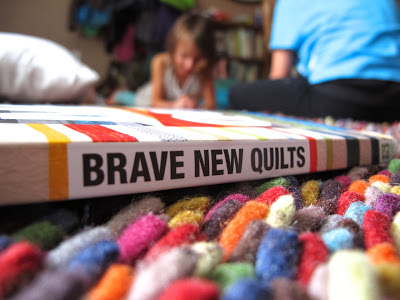
Brave New Quilts is the latest and last book by Kathreen Ricketson. Inspired by Twentieth Century Art movements it speaks to inspiration and translating that inspiration to a quilt.

Kathreen died earlier this year. I woke up to the news one morning during Quilt Market. I'd woken early to actually answer some emails for her, only to get the news. Many others had the same story. And we all walked around in shock. And we were just fellow quilters and writers, colleagues and friends from online, not her family reeling from the tragedy.

Now, her book is out and travelling the world without her. A final legacy to her work.


Kathreen and I were working on our books at the same time, clearly with very similar deadlines. We would exchange tweets and emails about our status on the work. We knew what the other was going through. So, even though our books are quite different from a content perspective, they parallel each other in the timeline of my mind. That leads me to what I want to talk about today on this last stop on her Legacy Tour.

For all the book reviews, Amazon reviews, and social media comments it is important to remember two things. One, there are people behind these books. And two, these books are a creative enterprise as much as a quilt is, they are a work of art too.

The author of any book pretty much gets all the credit, or critique. But they are team efforts (unless self published). But for any and all credit and critiques you have to remember that these are real people. They have feelings, thick or thin skin, and real emotions. It seems easy to think of the book as an independent entity, free from its creator. That makes it easier to dismiss or criticize. I get that, it is a part of human nature to complain. But it is important to remember that these books do not exist without the people behind it.


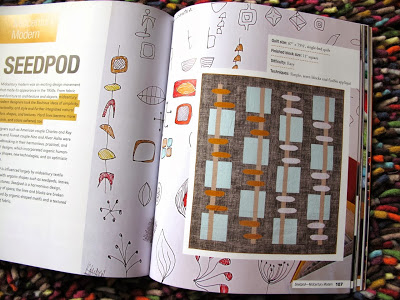
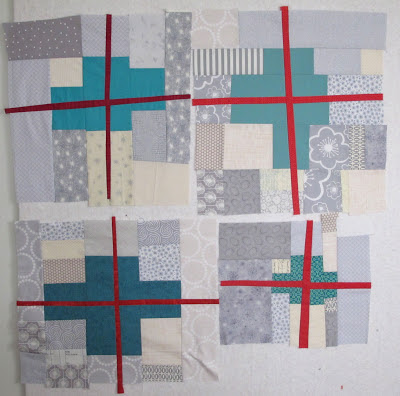
That leads me to the second point: these books are a creative expression of the author and designers. When someone is writing a book they aren't just thinking, "Hey, I'm going to make a bunch of quilts and someone else will take pictures and we'll put them all together in a book and then people will read it." No, we think about themes, and details like illustration style, layout, styling of each quilt photo. We agonize over fabric selection more than you ever have, we tinker and run out of ink on red pens, we obsess over a block that won't lay flat. For the authors and designers, the quilts and their patterns are only just a part of the book, not the be all and end all.

Every author has a different reason for writing a book. Some want to translate their teaching to the written page, some want to share inspiration, some are looking to collate patterns, some love to write. All of them are coming to the book as a form of creative expression. Writing the book is as much that as designing and making a quilt.

Now I'm not saying that we authors are immune to critique and I, personally, welcome comments and constructive criticism. But when you make any comments on a book - good or bad - remember that there are people behind it and we put a lot of personality and creativity into that book. (Keep all this in mind as well if you are contemplating writing a book.)

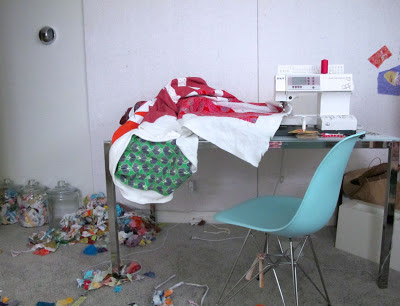
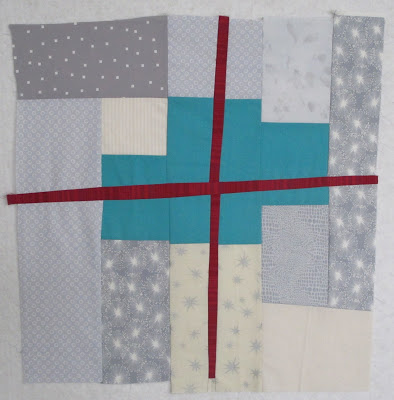
That's why, when I read Brave New Quilts, I think of Kathreen. I think of her frantically sewing to make deadlines, photo shoot styling flying through her head as the stitches go in. I think of her cleaning and organizing just so for the shot to be exactly as she wants. I think of her spending an hour on a single paragraph to make sure her intentions and directions are as clear as they can be. I think of her anxiously anticipating the Pages for review to see how the designer put together everything.

Perhaps I am projecting my own experience onto Kathreen's, I will admit that. But we did speak of the process together. And now that I see her book I have a bigger picture of her own process. More importantly, I have a picture of Kathreen, a glimpse of her inspiration and translation, and of her creativity that goes beyond 12 quilts and beyond the emails and tweets we shared. I'm glad to have this bit of her in the world. A legacy to her creativity indeed.


To read more about the book and other takes on it, make sure you visit the other stops on the Legacy Tour for Brave New Quilts.

Stash Books
Heather Jones
Kristin Link
Maya Donenfeld
Alexandra Smith
Sonya Philip
Ellen Luckett Baker
Andrea Jenkins
Shannon Cook
Mimi Kirchner

Pillow For a Friend


The rumours started flying before Christmas. A new kid was joining the kindergarten class and he was moving from the other side of the world! When would he be here? Where was he coming from? What is his name? The kids were giddy at the thought of a new kid like a vampire would be of virgin blood. I too was excited for the potential of a new friend.

The first day of school came after the holidays and I immediately picked out the new dad. During hearty introductions I found out that they were expecting a baby, as I was at the time. With razor like focus I narrowed in on the mom the first time I saw her on the playground. I know, it sounds like I was stalking. Perhaps I was a lot like that vampire. But sometimes instinct takes over. Then really pays off.

We hit it off immediately, with a similar brand of sarcasm and humour. She is much kinder than I am though. And she lives a lifestyle that not even I can aspire to. On paper we shouldn't click, but in real life we have a great time. I trust her as a friend, as a mother. I know that she's looking out for my kids. I adore her boys and despite his vegetarian eating habits her husband is pretty great too.

It was her birthday earlier this week. Like most of us she deserves special treats. After we'd spent a morning rearranging furniture in her living room (Yeah, we go for long walks, drink tea, then redecorate each other's houses) I decided she needed something else in the room. Something cozy, something that worked with her momentos from travels in the East, something homemade.


I pulled out the Indian cottons and raided the stash. I also grabbed the bits of Carolyn Friedlander's new line, Botanics, that she'd sent me when I was working on something else. They all went together so well. With this quilt in mind from Quilting Happiness I started slashing and sewing. This is a colour combo I've been wanting to play with for a while and now I want to do more with it.

What I forgot is that my friend is on Instagram. So I posted my fabric pull and mentioned I was making a pillow for a dear friend. When I did not get the pillow done in time for her birthday she hid her disappointment. So when I shared the image of my stellar wrapping job she tried not to get too excited. I was happy to share the pillow with her on the playground yesterday (and not worry about keeping secrets from her).


With fabric from family and friends, inspiration from another quilty friend, sewing while chatting with a friend online, and making it for a friend this little pillow is full of love. But it is missing a zipper, I still lack that skill. So a quilted back with an envelope closure, highlighted with a contrasting fabric, is what it gets. And it works wonderfully.

Just like our friendship.


There Was Sewing


While I was away I spent 4 days at the Pictou Lodge with the Mayflowers Quilter Retreat. Three straight days of sewing in log cabins! All meals made for us, cozy cabins with ocean views, and an amazing group of women.

I taught my Improvisational Piecing class. With a three days in front of us we were able to spend a day on techniques and exercises, then each student got the chance to run with it. Everyone started with an idea and some fabric then went to play. And play they did! Seventeen students and seventeen different projects. I love them all!

Thank you so much to all my students and the Mayflower ladies for a great time. I am totally inspired by you all.


And way up at the top there? That great lady was making her first quilt for herself after fifteen years of quilting. The pink and purple blocks are hers. Can't wait to see how it all comes together.

Hugs and Kisses


Hugs and Kisses 
105'' x 90''

The Beast is finally done! I really should call it that instead of Hugs and Kisses. It doesn't seem quite appropriate for something that is supposed to be a romantic gift.

I actually finished it a few weeks ago, but it's taken me a bit to clean up our room and take photos.

For more on the progress of this quilt you can check out these posts.

The fabric stack
In Progress
Admitting Defeat 
Clear the Decks (committing to finishing this and only this quilt)
Been Quilting in progress
Picking Binding (you'll see I went with none of these)

Quilted with Wonderfil, a local thread company. It was a great variegated pink that worked nicely. And Aurifil white on the Xs. As usual, I used Quilter's Dream 100% cotton batting in Select weight.

And now we sleep under it. We can still keep the window open even though fall settled in to a night time chill. With all that quilting it is a heavy quilt that wraps around us.


Friday Favourite - The Kwik Klip


My least favourite part of quiltmaking is basting quilts. It really is the reason quilt tops languish in my closet. I think I'm slow at it, that's part of the problem. And now, with our TV in the basement, I can't rope Hubby into helping me anymore! I baste on the living room floor. When the TV was up here he had no choice - watch me get in his way or get on the ground and help me. Now he runs away to the TV as soon as he sees me pull out the masking tape and pins.

Loving me is not enough, the only reason he was willing to help me is that he was allowed to use the tool involved. Men and tools, right? Man oh man, he can wield a Kwik Klip like the boss.

Honestly, if it wasn't for a Kwik Klip none of my quilts would get basted. I am a pin baster, and I use a lot of pins. (I didn't think it was a lot, but then I saw people commenting on an IG photo of someone else's basted quilt. So many pins! Wow, you sure use a lot of pins! And there I was thinking that it looked totally normal. But I don't get puckers with my quilting. Happy for that trade off.) So the Kwik Klip makes very short work of closing all those pins. And it saves both what is there of my nails and my fingertips.

You simply hold the tool in your dominant hand, lift up the straight part of the pin, and clip it into place. Done. I've heard of people using an old teaspoon to the same effect. That, however, is not as fancy as the tool. And seriously, if a tool is what it takes to get your man to help you with the basting then a tool is what you should get.

I'm sharing this post as part of National Sewing Month, brought to you by The Sewing Loft. Check out a month long list of sewers sharing their favourite tools.


Beanie's Blocks


I couldn't do it. I wasn't quite done the beast of a quilt and I had to start something new. Not just play with fabric, not just sketch, but actually start a new quilt. And oh, it felt good. It had been MONTHS. So far I've only got a handful of blocks done for a baby quilt that needs 20, but it's a start. And the beast of a quilt is done now too! So as soon as I finish some deadline work these blocks will get some more time on the design wall.

These are made from the same pattern I used on the New Leaf blog hop with Daisy Janie. What a totally different look with this low-volume fabric selection. (I also made them 10'', not 12'' finished.)For the centers I used a fun map fabric that's been hanging out in my stash forever. These blocks are intended for a baby quilt for dear friends of ours and they are mega world travellers. 


I'm not going to lie, it felt so good to play with these blocks. Quilting and binding the beast took over my summer almost more than the girls being home did. It felt great to work on something new, with a vastly different range of colours, and on an entirely different scale. I also can't lie about this, I played on another new quilt too. That's for another day.

Friday Favourites: The Social Tote by Carolyn Friedlander


The Social Tote from Carolyn Friedlander is an awesome project. End of story.

You know me and small projects. We get along as well as clothing and zippers and the neighbour that thankfully moved out this summer. But Carolyn gave me this pattern after seeing them in person at Market. They really are pretty cool. And handy. And not difficult to make at all.

What I really love about this pattern is the inspiration behind it and the rest of Carolyn's Slow Sewing Studio line. In her words:

The projects in this group give us an opportunity to slow down and to enjoy the process as much as the result. Not only a back-to-basics program, this is also a program to strengthen our skills and our relationships with each other.

These projects are things we can take with us and enjoy with others. We'll bring them to our guild meetings, on trips, or wherever our busy lives take us. They require no chargers, adapters, or electricity and will allow us to press pause on the realities of everyday life and enjoy what we are making.

It was that inspiration that pushed me to make this little tote. The pattern is a collaboration with Anna at Noodlehead. It is detailed and well written. As I'm not much of a pattern follower, when I do follow one it must make sense and move methodically through the steps. This one does. And if we ignore that I completely missed the fact I was supposed to interface all the fabric for the inside of the tote and the handles I followed the pattern exactly. There is a pin cushion in the pattern too, but I'm waiting for the pet store near me to have crushed walnut shells in stock again.

Already the tote has found a purpose in sorting and holding bits for my latest project, a baby quilt. I'm pretty sure another tote is on the agenda precisely for my ongoing hand sewing project. This is just what I need. And you too, I bet.


(In coincidental news, Carolyn reviewed my book this week. Totally unsolicited by me. And I think she captured it beautifully.)

Ring Tutorial


In my Craftsy class: Inset and Applique Circles by Machine I had a request for a short tutorial on making a ring, instead of a circle. It's an effective design and a great adaptation of a single technique.

1. Gather Your Supplies
Paper scissors, sewing scissors, compass, freezer paper templates, fabric glue, and fabric for the background, ring, and inner circle.
I've made this a 12 1/2'' by 12 1/2'' block. So my background fabric is cut to the same size, as are my freezer paper templates.

2. Make Templates
For this ring I've used an 8'' circle and a 4'' circle. You need two separate templates. From your 12 1/2'' by 12 1/2'' squares draw and cut out your circles.


3. Insert The Circle
For this block we are using the Reverse Circle technique reviewed in Lesson 3. This technique achieves the look of an inset circle with no headaches and consistent results. Use the first template, the 8'' circle, to start the block.
You can see in the photo above that I haven't trimmed my excess circle fabric after sewing it in place. Do so before you move on to the next step.


4. The Second Circle
Apply the template for your smaller circle to the block of the block, after trimming, from Step 3. Prepare for sewing the same way your did the first circle: cut out and opening - leaving seam allowance, fringe the seam allowance, press back, glue, apply fabric, then sew in place. Only this time your background is actually the first circle.


Here is what it looks like from behind, before trimming.


And after trimming.

What a great effect, right? Don't hesitate to adapt this technique. You could try off center rings, circles within ovals or vice versa, and maybe even multiple rings. The design possibilities are endless!


Love the example, but want to learn more about the technique? Don't forget you can sign up at any time for my Craftsy class: Inset and Applique Circles by Machine. Access it on-line, anywhere, whenever you want!


All Voile Patchwork Top


I've been remiss in posting about my at-home retreat a few weeks ago. Those awesome slabs took over! But I did have a highly productive week with my sister-in-law and finished far more than I expected. Let me share some with you.

Up first, my all voile quilt top. I had everything cut, from a random collection of voiles, and ready to go. All my triangles went in a box and I sewed whatever I grabbed. For my first row I kept going and every few pieces I laid the strip on my bed. This quilt is intended for our bed, so I wanted to make sure I had the overhang. Turns out 28 7 1/2'' equilateral triangles is about perfect on our giant mattress.


The resulting quilt is more horizontal than vertical. That's totally fine for me. The finished quilt will be backed with voile (the new Koi from Rashida and Cloud 9) and I plan to use the lightest batting. This quilt is for those sultry, summer nights when it is too hot for the covers. But, if you are like me, no matter how hot it is, you still want a sheet or something on top. So the height of this isn't as important as being able to cover down the sides. 

Of course, by the time this is finished the sultry nights will be long gone for this year. Even if I will be sending this to Andrea


It's all good though, because this is so soft, so silky. I cannot wait to wrap myself in this. It is ridiculously girly and I'm sure my husband will hate it. I have no idea why I was drawn to making this. Yes, the fabrics are gorgeous. I usually go for more geometric than floral prints. 

Note to Fabric Designers and Manufacturers: Can you please make more geometric prints in voile?

The colours are rich and the whole thing has that patchwork chaos that somehow always works.


Been Quilting


All three seasons of Downton Abbey. Almost all the Ted Med lectures, plus a few others. About a dozen beers. And one very sore set of shoulders later and I am done quilting this beast! (Yes, that's a king sized bed up there with a deep mattress.)

No, that's not an earthquake, that's me jumping up and down.

Now, just to bury a million threads, square it up, bind and wash it. Thanks for all the cheerleading along the way!


That's our original wedding quilt underneath.

Decisions, decisions...


Just a bit left to quilt on that giant beast of a quilt. I was at a fabric store the other day and couldn't resist pulling a few new selections for binding choices. Of course, I didn't have the quilt with me, but I think I did okay for what I had in my head.

Contrast or blending?

The entire quilt is red, pink, and orange, with those white Xs. You can see the backing fabric below. That's where the blue/navy came from.


I had a navy binding in my head but couldn't find what I wanted. But maybe one of these works? Or maybe I need to go shopping again? Thoughts?


Oh Canada Pattern Release


Here it is folks: The Oh Canada! Pattern.


Designed in perfect proportions to the original flag, Oh, Canada! pays patchwork homage to this symbol of Canadian spirit and drive. Make one block or make a dozen. Piece the fabric together from scraps to echo the diverse nature of Canada, or make it solid to showcase the fabric. 


Available as a download (Thank-you Etsy for making this an automatic feature now) and a printed option. Also available for wholesale orders if you are a quilt or sewing shop. Email me for those details.

I'm so excited to share this incredible quilt with you. I'm looking forward to seeing your own versions because no two scrap quilts are the same!

Thank-you so much to Jessica at Blue Jay Graphic Design for her work in making this come together.

PS Just a reminder that I am teaching this block as a class on Thursday, June 20 at Traditional Pastimes here in Calgary.

Oh Canada! Quilting Details


Considering that I am heavy into some heavy quilting these days (no rest, no new starts!) I thought it only appropriate to share some details from my Oh Canada! quilting. These details got washed out in the photography when shooting a white background on a snowy day. Hopefully you get the idea here.

Love the way the Aurifil 50W in white made such tiny stitches on that white background. The quilting pattern was completely inspired by Carolyn Friedlander and her intense machine quilting. It was perfect for filling the space around the maple leaf and not difficult to do at all.

The leaves were done with an outline - that also held down the edge of the appliqued leaf - then echoed inside the leaf. The sides of each flag were stitched in the ditch and then covered with wavy lines.

Totally intense and worth every minute of effort.


From the back you can get some idea of the stitching too. I intentionally picked this favourite fabric in hopes that it would hide the changes in thread colour. You see it if you're looking for it, but otherwise things just look quite nice and textured on the back too.


The pattern for Oh Canada! is going to print this week. PDF patterns available shortly. In the meantime, locals can sign up for a class on how to make the block.

June 20, 2013
6:30-9:30 pm
Traditional Pastimes

Clear the Decks


So, remember that WIP list? It grew. I couldn't help myself! But the more I talked about that list the more embarrassed I was. Not so much overwhelmed, but shamed by it. Was I that incapable of finishing something? What was I avoiding by constantly giving in to my impulse to create new things? (Oh the therapy required...) Really, though, I just get excited by new ideas and put all things aside to create. I know I'm not alone in that.

I also know that I was putting off quilting a very large quilt. The literal elephant in my sewing room was my anniversary quilt. King sized, already basted, thread in hand, and the dread of quilting that on my home machine. Totally doable, but daunting in thought. I also knew that finishing it would be freeing, not to mention kind of me since this was an anniversary present for our anniversary last year.


So I grabbed my specially purchased pink thread. (Thank-you Andrea for helping me pick it.) I loaded up my bobbins and some Downton Abbey. And I also cleaned off my design wall and packed away the WIPs I've been playing with. No distractions! I think that was the hardest part. And the most necessary.


So, this morning, after a few hours of quilting I don't feel like I made much of a dent in the quilting, but I started. And I'm not even sitting at the table to type this. I am not taking that quilt off the table until it is done. I swear. No new projects until the label is on this thing and it graces our bed.

Hold me to it.

Circles Inside a Pieced Background


More circles going on here. Shocker!

Someone in my Craftsy class asked about doing inset circles inside pieced backgrounds. I promised to try and let them know how it worked. What a fun experiment! I took leftover blocks from the Denyse Schmidt class at QuiltCon. No one claimed these early improv efforts and I couldn't let them go to waste. I took them with no plan and here they are.

As you can see, the blocks were not the same size. I created a random circle template and used it on both blocks. So the circle is the same size, but that's it. I'll likely trim things down and sew the blocks together. After I make more, of course.

And, for the record, it totally works to use a pieced block as the background. 

Workshop in Progress - Inspired by a Little Boy Painting


Sometimes inspiration hits and you just have to run with it. Regardless of what the to-do list looks like. The moment I saw this photo I knew I would translate it into fabric. There was just something about the energy of his painting, the colours, the shape... It all combined into a flood of Must Make That Into a Quilt Now!

My friend here in Calgary, Katrina, is often inspired by an artist friend of hers, Shimon Kate, so I find it kind of interesting that I was inspired by art in her family. Overlapping circles formed everywhere.


Here's where I'm at now (thanks to a random afternoon with school/playdate and sick baby taking a long nap). When I first started I envisioned it with four blocks. Something about emphasizing the notion of a quadrant. Now that I see these together I still like that. But it needs to be sized up and filled in a bit. Right now this would only make a wall hanging. And I want those red strips to be floating between each other more.

Or, I could make more... or not have such a precise layout. (I am a bit worried about the defining lines that would be created when these become 4 actual blocks. I think I can manage that with judicious fabric placement, but maybe not.)

Any other thoughts? I'm open to any and all suggestions.

Superior Quilt Show


I'm not sure how many people go to Thunder Bay and say they had an awesome time (unless you are from a town in Northern Ontario and Thunder Bay counts as the big city) but I am officially one of them.

Last weekend I spent three days in Thunder Bay. Three very intense and fun days. I met some wonderful people who were incredibly generous of their time and spirit. I taught such an eager group of students that I was jazzed at the end of each day when they were tuckered out. And they all learned to embrace their scraps. I laughed in front of a crowd of over 100 as I told my stories and shared my quilts. I eagerly walked the show floor (and spent money) to take in the full range of quilts from thread painting to modern and everything in between.


(Made and quilted by Wendy Currie)

I walked on the waterfront of a still iced over Lake Superior (at least by the shore) and took pictures of the most awesome public sculptures ever. I drank beer with an air traffic controller/quilter. And all while keeping company with a carousel horse.


Thank-you very much to the Thunder Bay Quilt Guild for bringing me to your city, your show. it was wonderful.

Gum on Concrete


Gum on Concrete
52'' by 68''

Another quilt from Sunday Morning Quilts, done with my scraps in a totally new colourway. This quilt, quite honestly, reflects the journey I've taken since the book came out a year ago.

... It is me, sewing up a pattern Amanda Jean created. I feel a bit of her, her friendship and enthusiasm, in each stitch.
... It is my never ending obsession with grey. And yes, I only 'made' a few scraps to complete this quilt.
... It is a name that came from someone in the audience at one of my first trunk shows, where I shared the quilt top last summer.
... It is the last quilt I finished before travelling across the country for teaching and another trunk show - something I was never able to do before the book came out.
... It is the quilt I photographed at The Workroom, while there teaching and taking advantage of their perfect for photography light and backyard.

Without Sunday Morning Quilts nothing about this quilt would exist. For that, I am grateful. And although the name has nothing to do with the joy the quilt brings me, I do love it too.


Quilted with a combination of Wonderfil Konfetti and Aurifil 50W thread. Swirls and pebbles and squared off spirals making this quilt heavy and dense. Perfect for a cuddle. Helped out with the use of Quilters' Dream Request batting in 100% cotton.


A scrappy binding in grey, so nothing stands out. Just a growing expanse of concrete.


Big's Quilt - Finished and Well-Loved


Big's Quilt
60'' by 54''

With very little fanfare in the house  - more like a giant smile and a tiny squeal - I finished the quilt for my Evil Genius. It came out of the washing machine, all toasty, and was immediately put to use for cuddles, then fort building, then as a veil, then baby wrapping, then sleep. Well loved right from the start.

It's such a crazy mishmash of fabrics, all picked by her. She laid it out, then helped me sew it together by sitting on my lap and guiding pieces through the machine. Well, some pieces. Then she got bored and went back to watching Coraline. I was allowed to baste it without her, late at night, so her baby brother wouldn't get in the way. Then she picked thread for quilting - 6 different ones. No amount of convincing would lessen that amount so I accepted the challenge. Including that the front and back be different! (Oh tension woes! Don't look closely at the quilting.) She even drew me a sketch of the squiggly line she wanted for the quilting. That girl knows how to draw a meander. Finally, she picked her binding fabrics, a blend of purple with a bit of pink, of course. And she even sat with me for quite a bit as I hand stitched the binding down, pulling the needle.

Even I thought I was crazy when we started this project. Here is what I learned:

 - Let it evolve. If you get stuck on things having to get done only you will get frustrated. She could focus on the task, but making a quilt is a big project to a kid so it needs to happen at their pace.

 - Move fast. It was a lot of stop/go. When it was my turn to finish a task she was on me to get it done and get it done now.

 - Be okay if she loses interest. It sat for over a month on my design wall and I was a little bit sad that she'd lost interest. But when she came back to it her excitement had grown.

 - Let it go. Like most of us, the excitement was in the fabric selection and layout. I couldn't take that away from her so I let go of my conventions and perceptions. Would I have chosen that red fabric? Nope, but she loves them.

 - Limit the selection for backing fabric. I gave her stack of fabric I have in big yardage and told her to pick just one. Phew.

 - Do not use 6 different threads from 3 different manufacturers for the quilting. Just don't do it.

 - Be prepared for a blah reaction. Perhaps I'd built up her excitement for the quilt in my head, but a smile and just a tiny squeal were not what I expected when I handed her a warm quilt. But since I finished it a few weeks ago I see that it gets dragged around like her blankies, she wants it at night, and she plays with it. The quilt is not getting ignored and she loves to show it off. So yeah, I'd say she is indeed excited.

 - When you let her direct the photo shoot take, then delete, the photos where she drapes herself over the quilt in a way that no almost 5 year old should be seen. Don't tell her.

 - Smile a lot when you notice her outfits match her quilt.