Itty Bitty Curves Update 2 Years later

Tiny Piecing Improv Curves

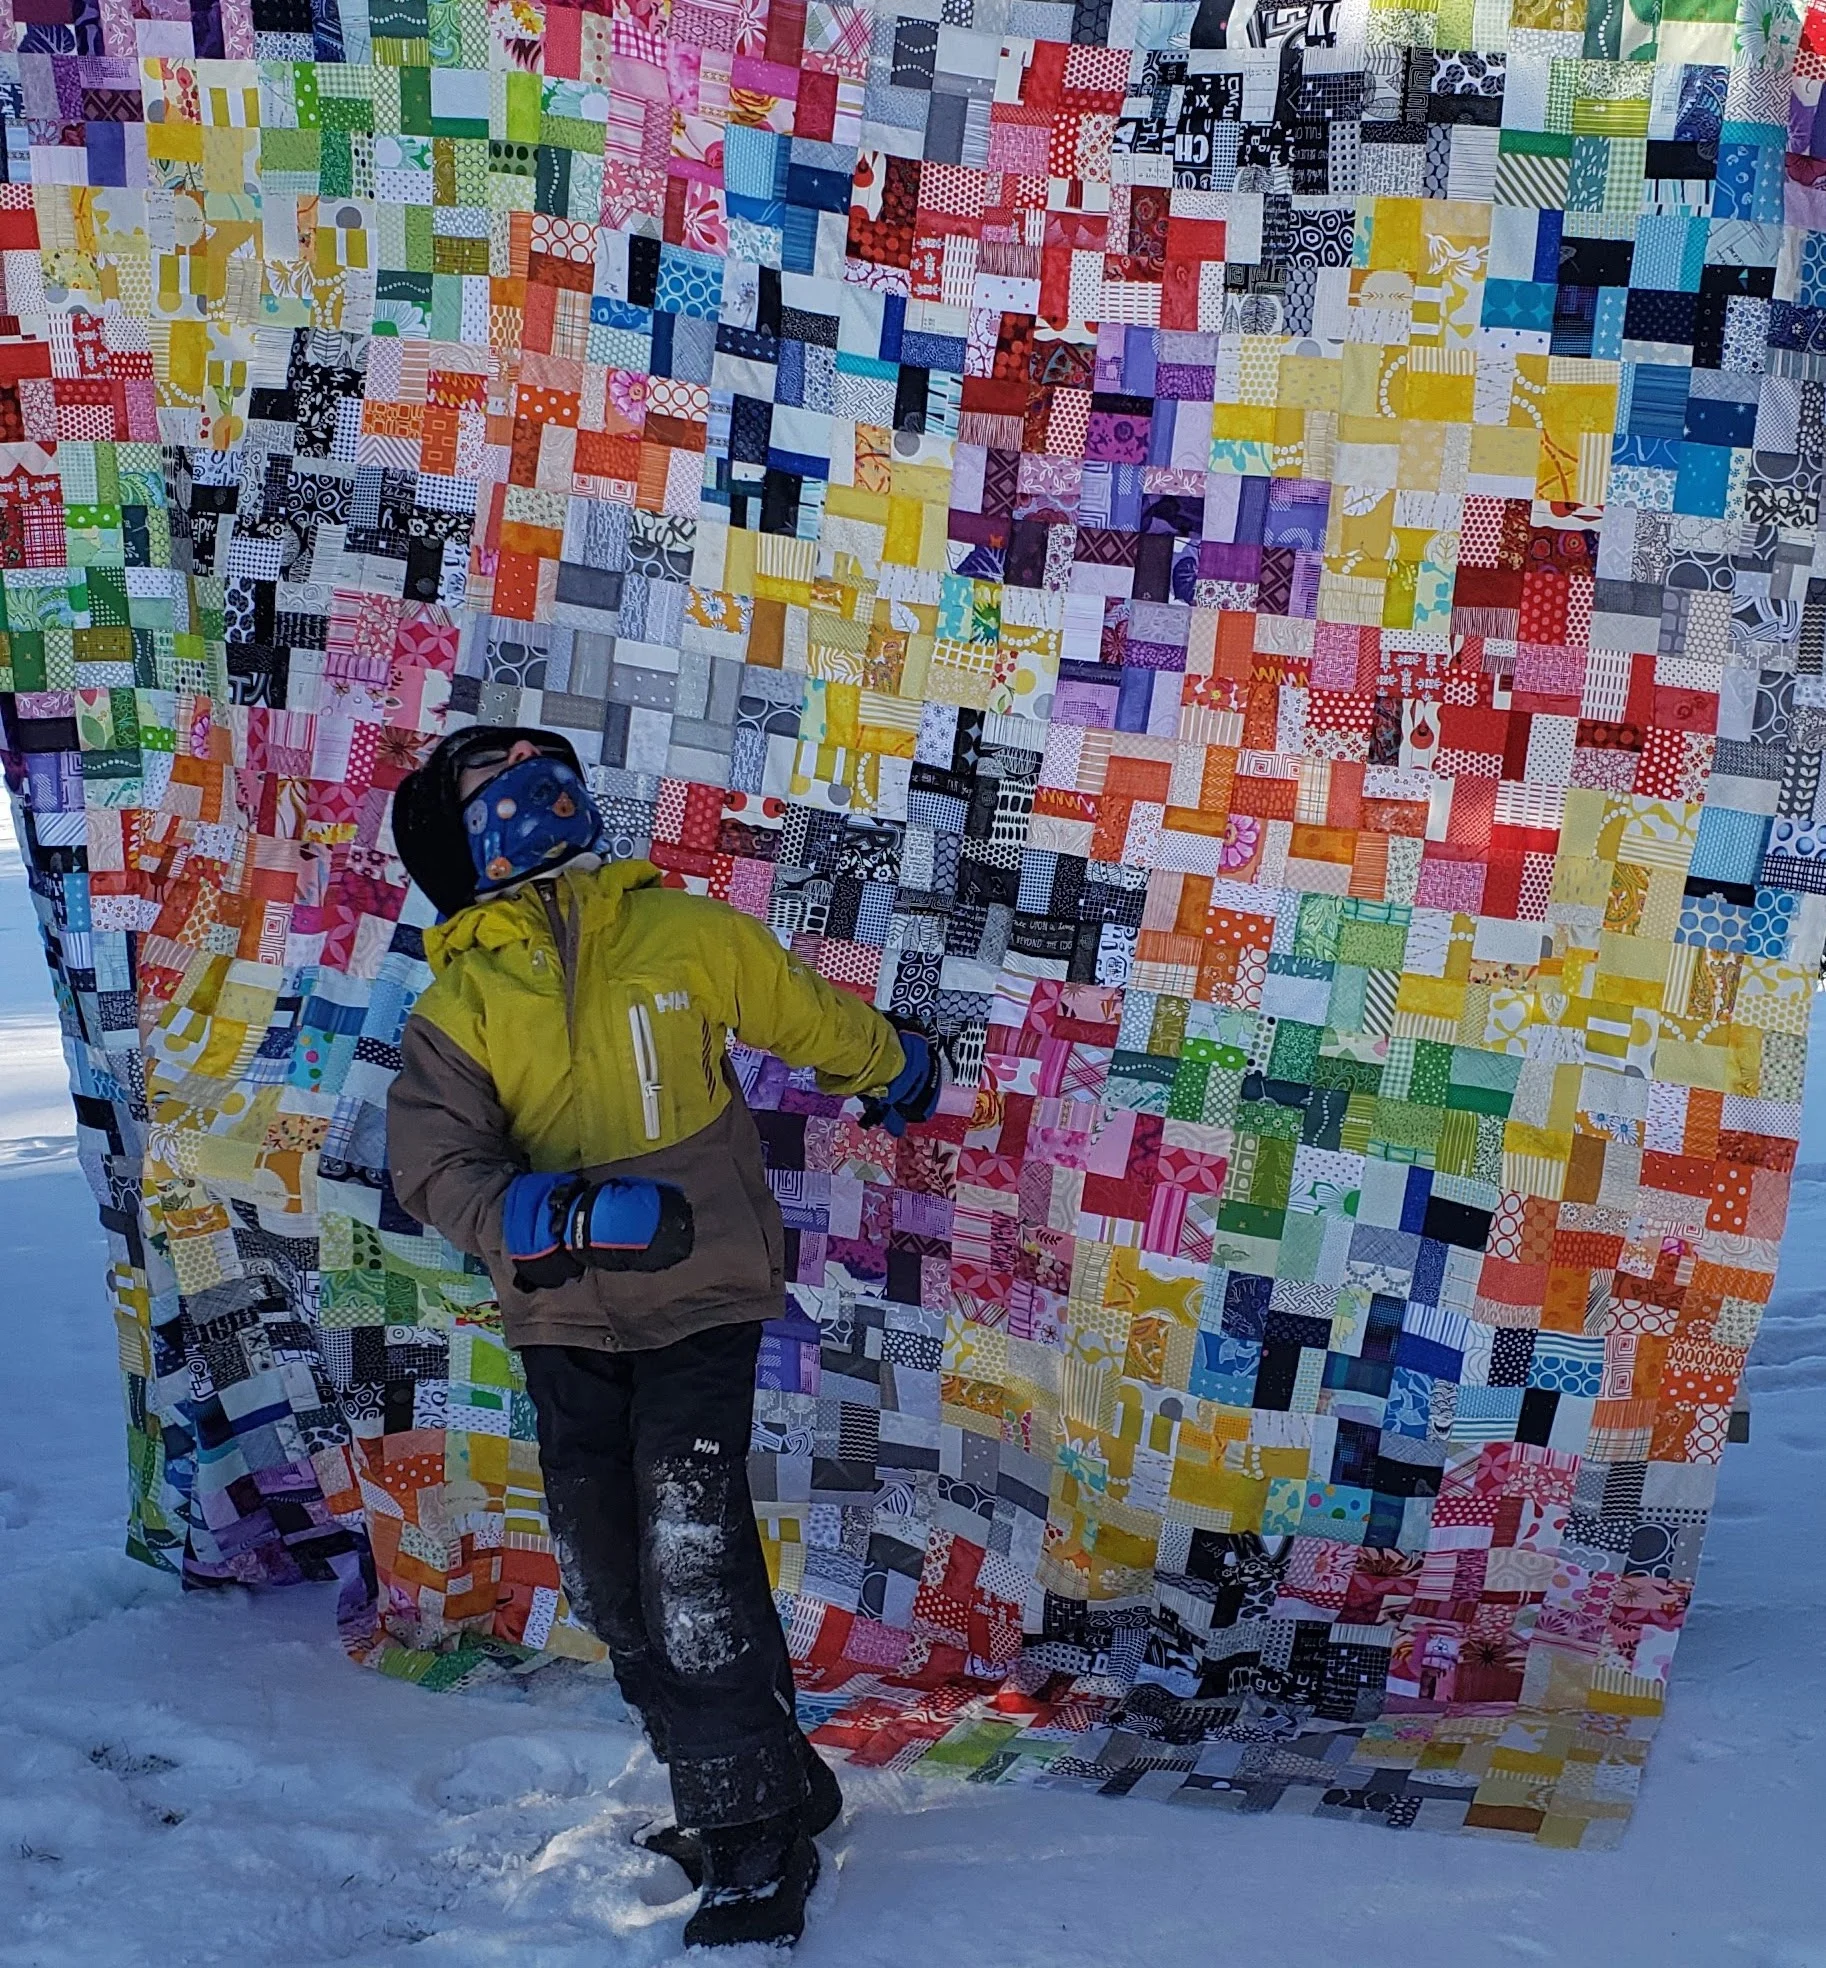
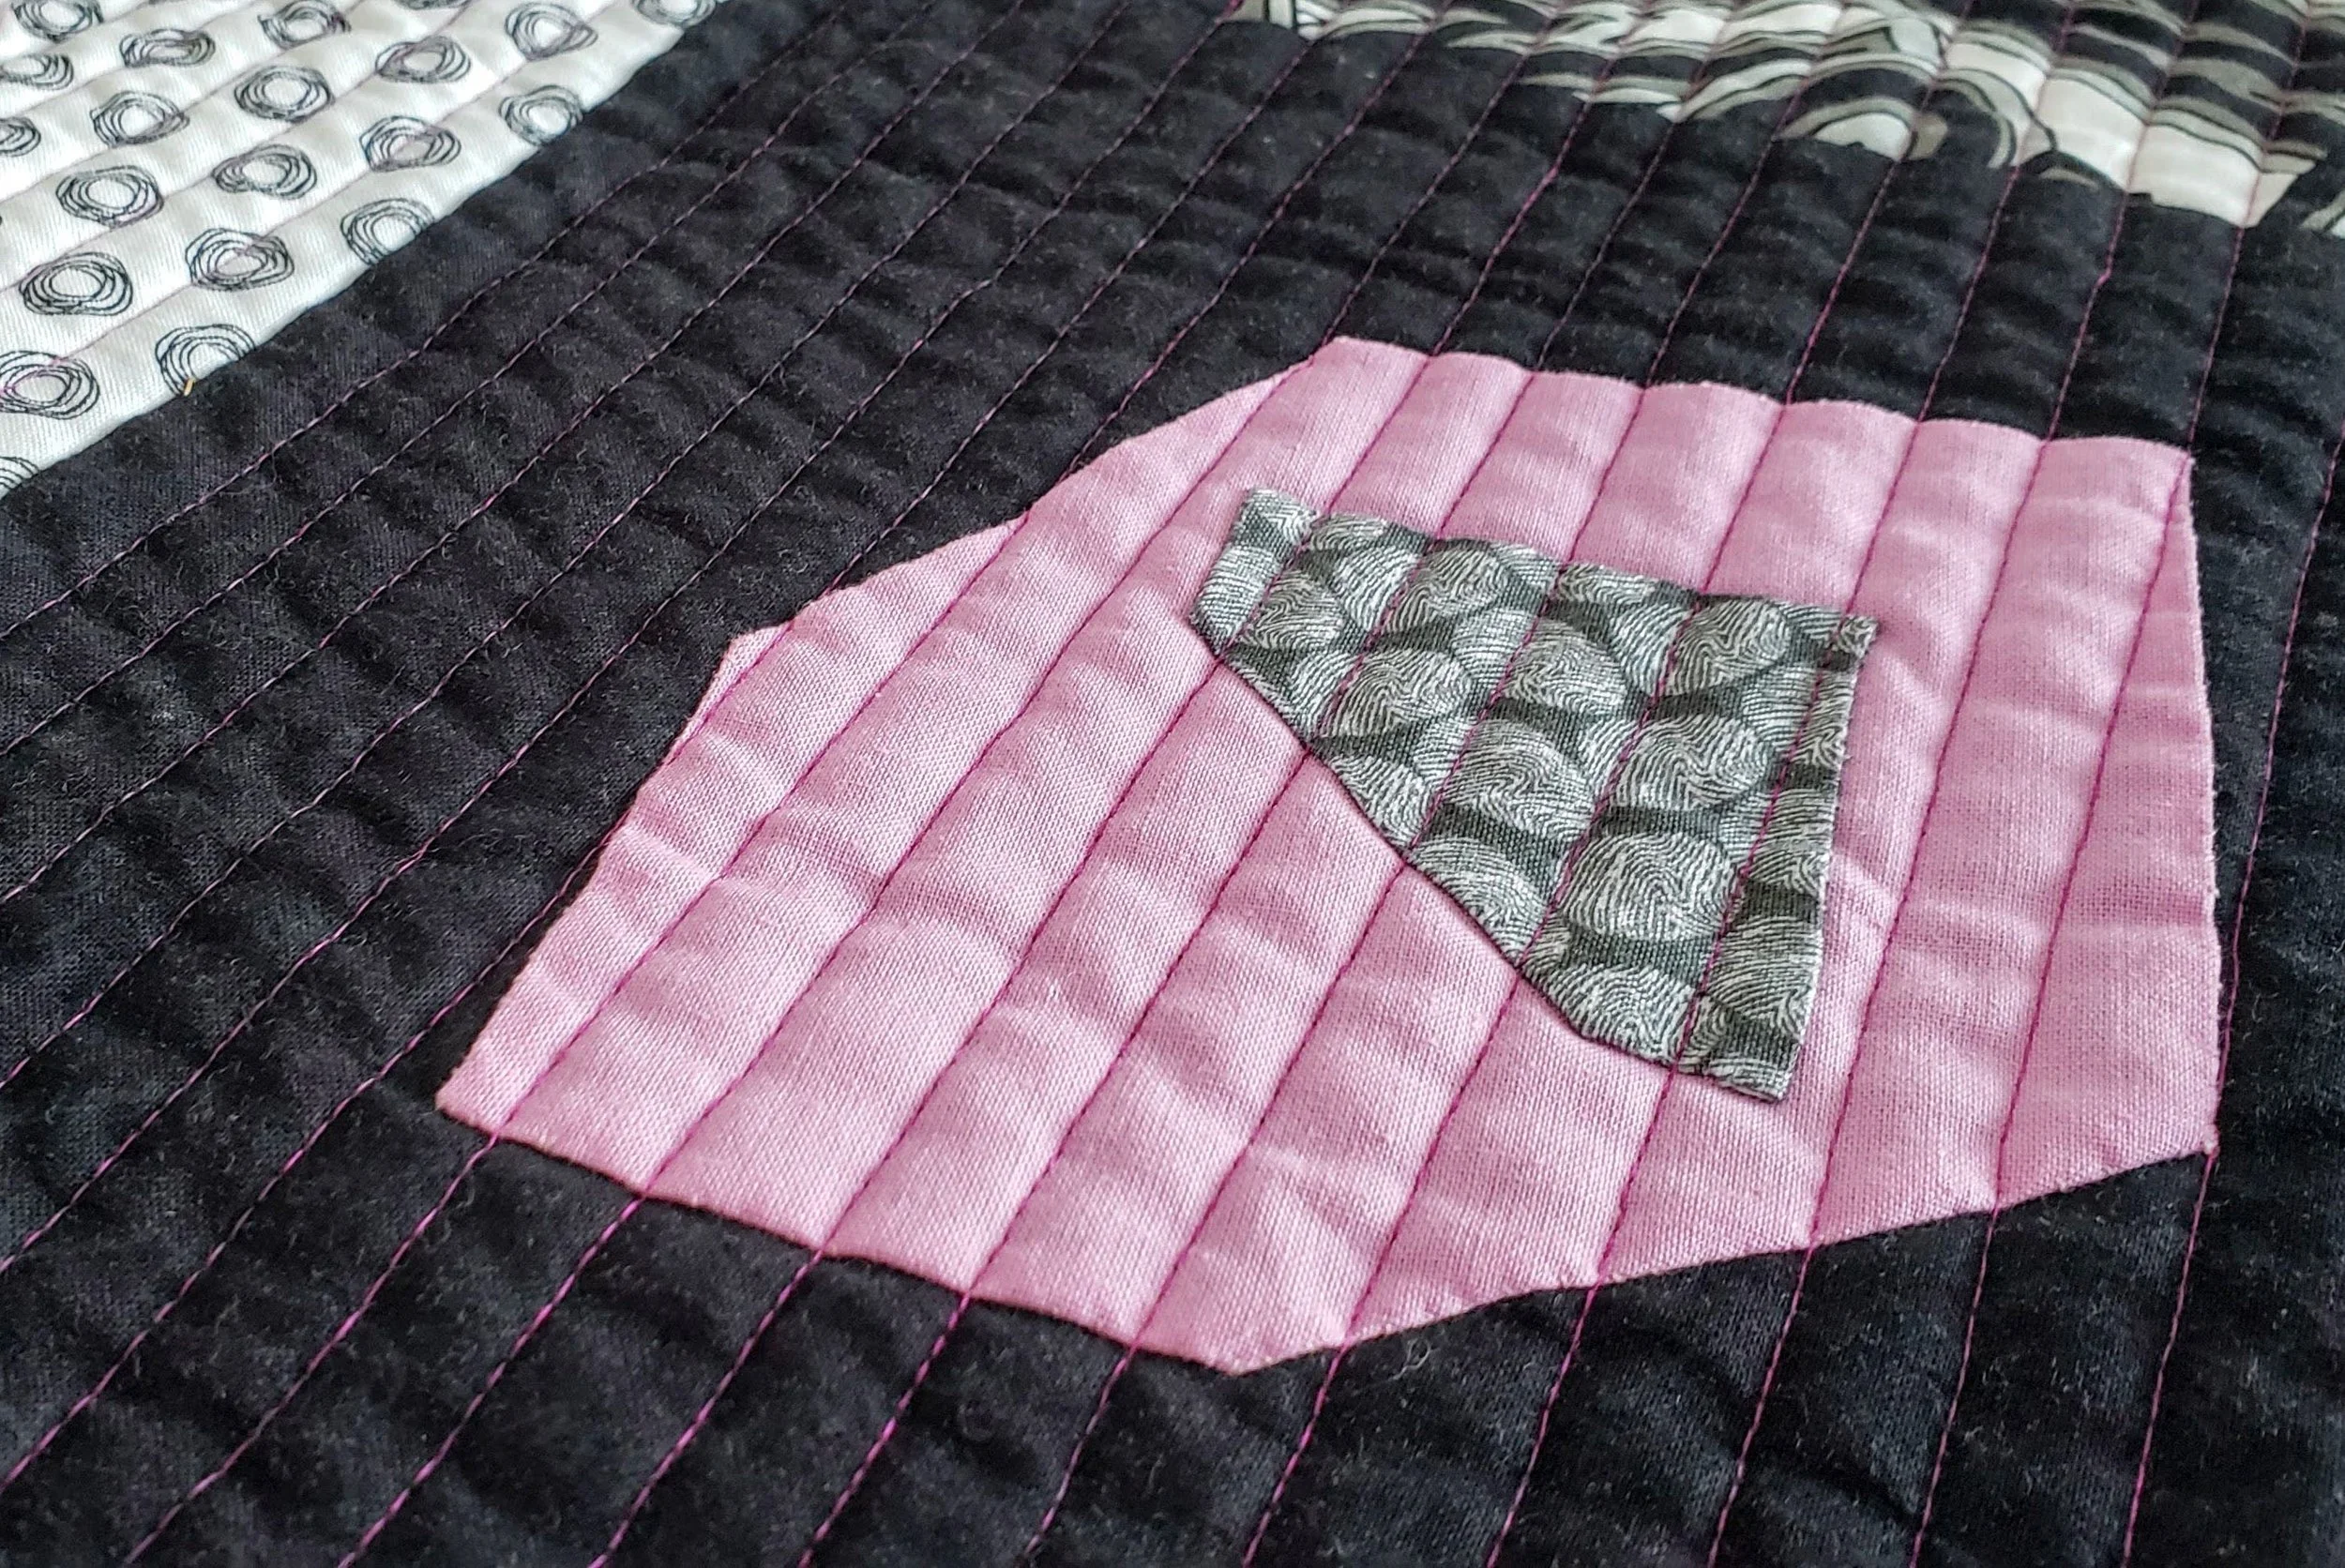
When I posted some photos of these little curves the other day a non-quilting friend asked me if I was making another version of the quilt. Because she remembered me working on them last year. Nope, same quilt. More piecing.

I pulled this project back in to the rotation last week. After so many scrap projects of late it is nice to be working with a controlled colour scheme. Not that the piecing is any faster with these itty bitty curves! I guess this was the itch that needed to be scratched.

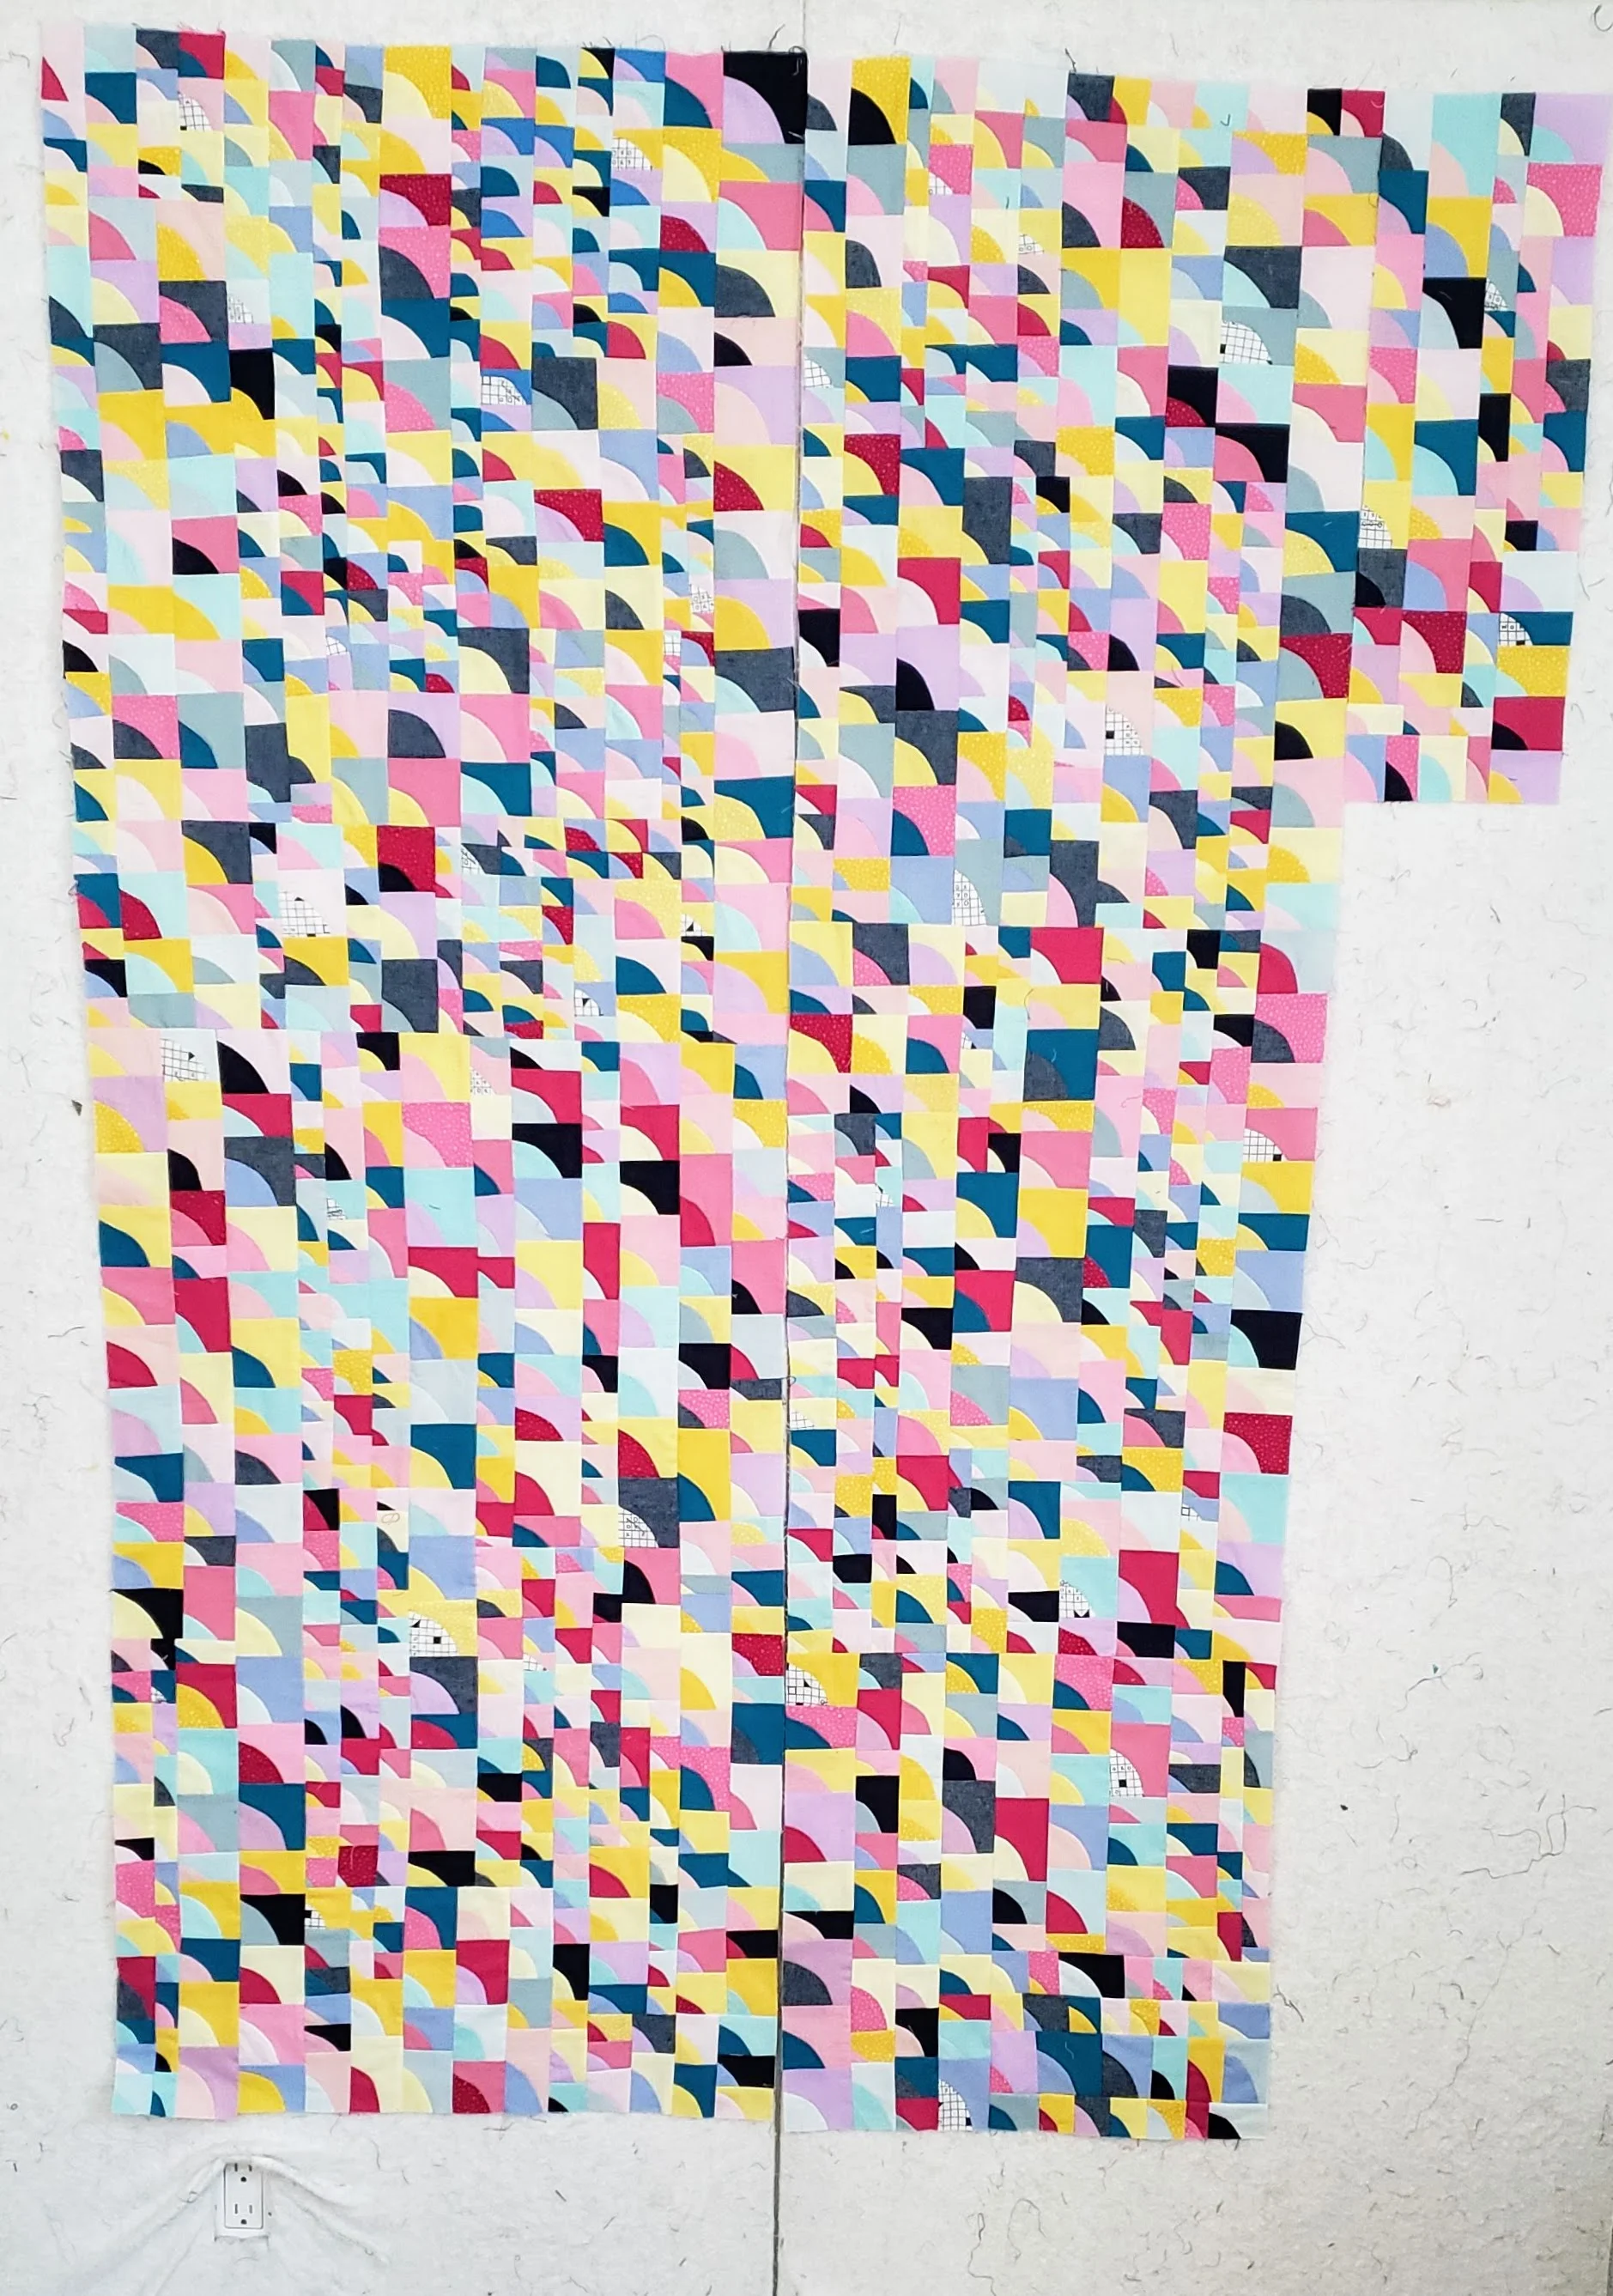
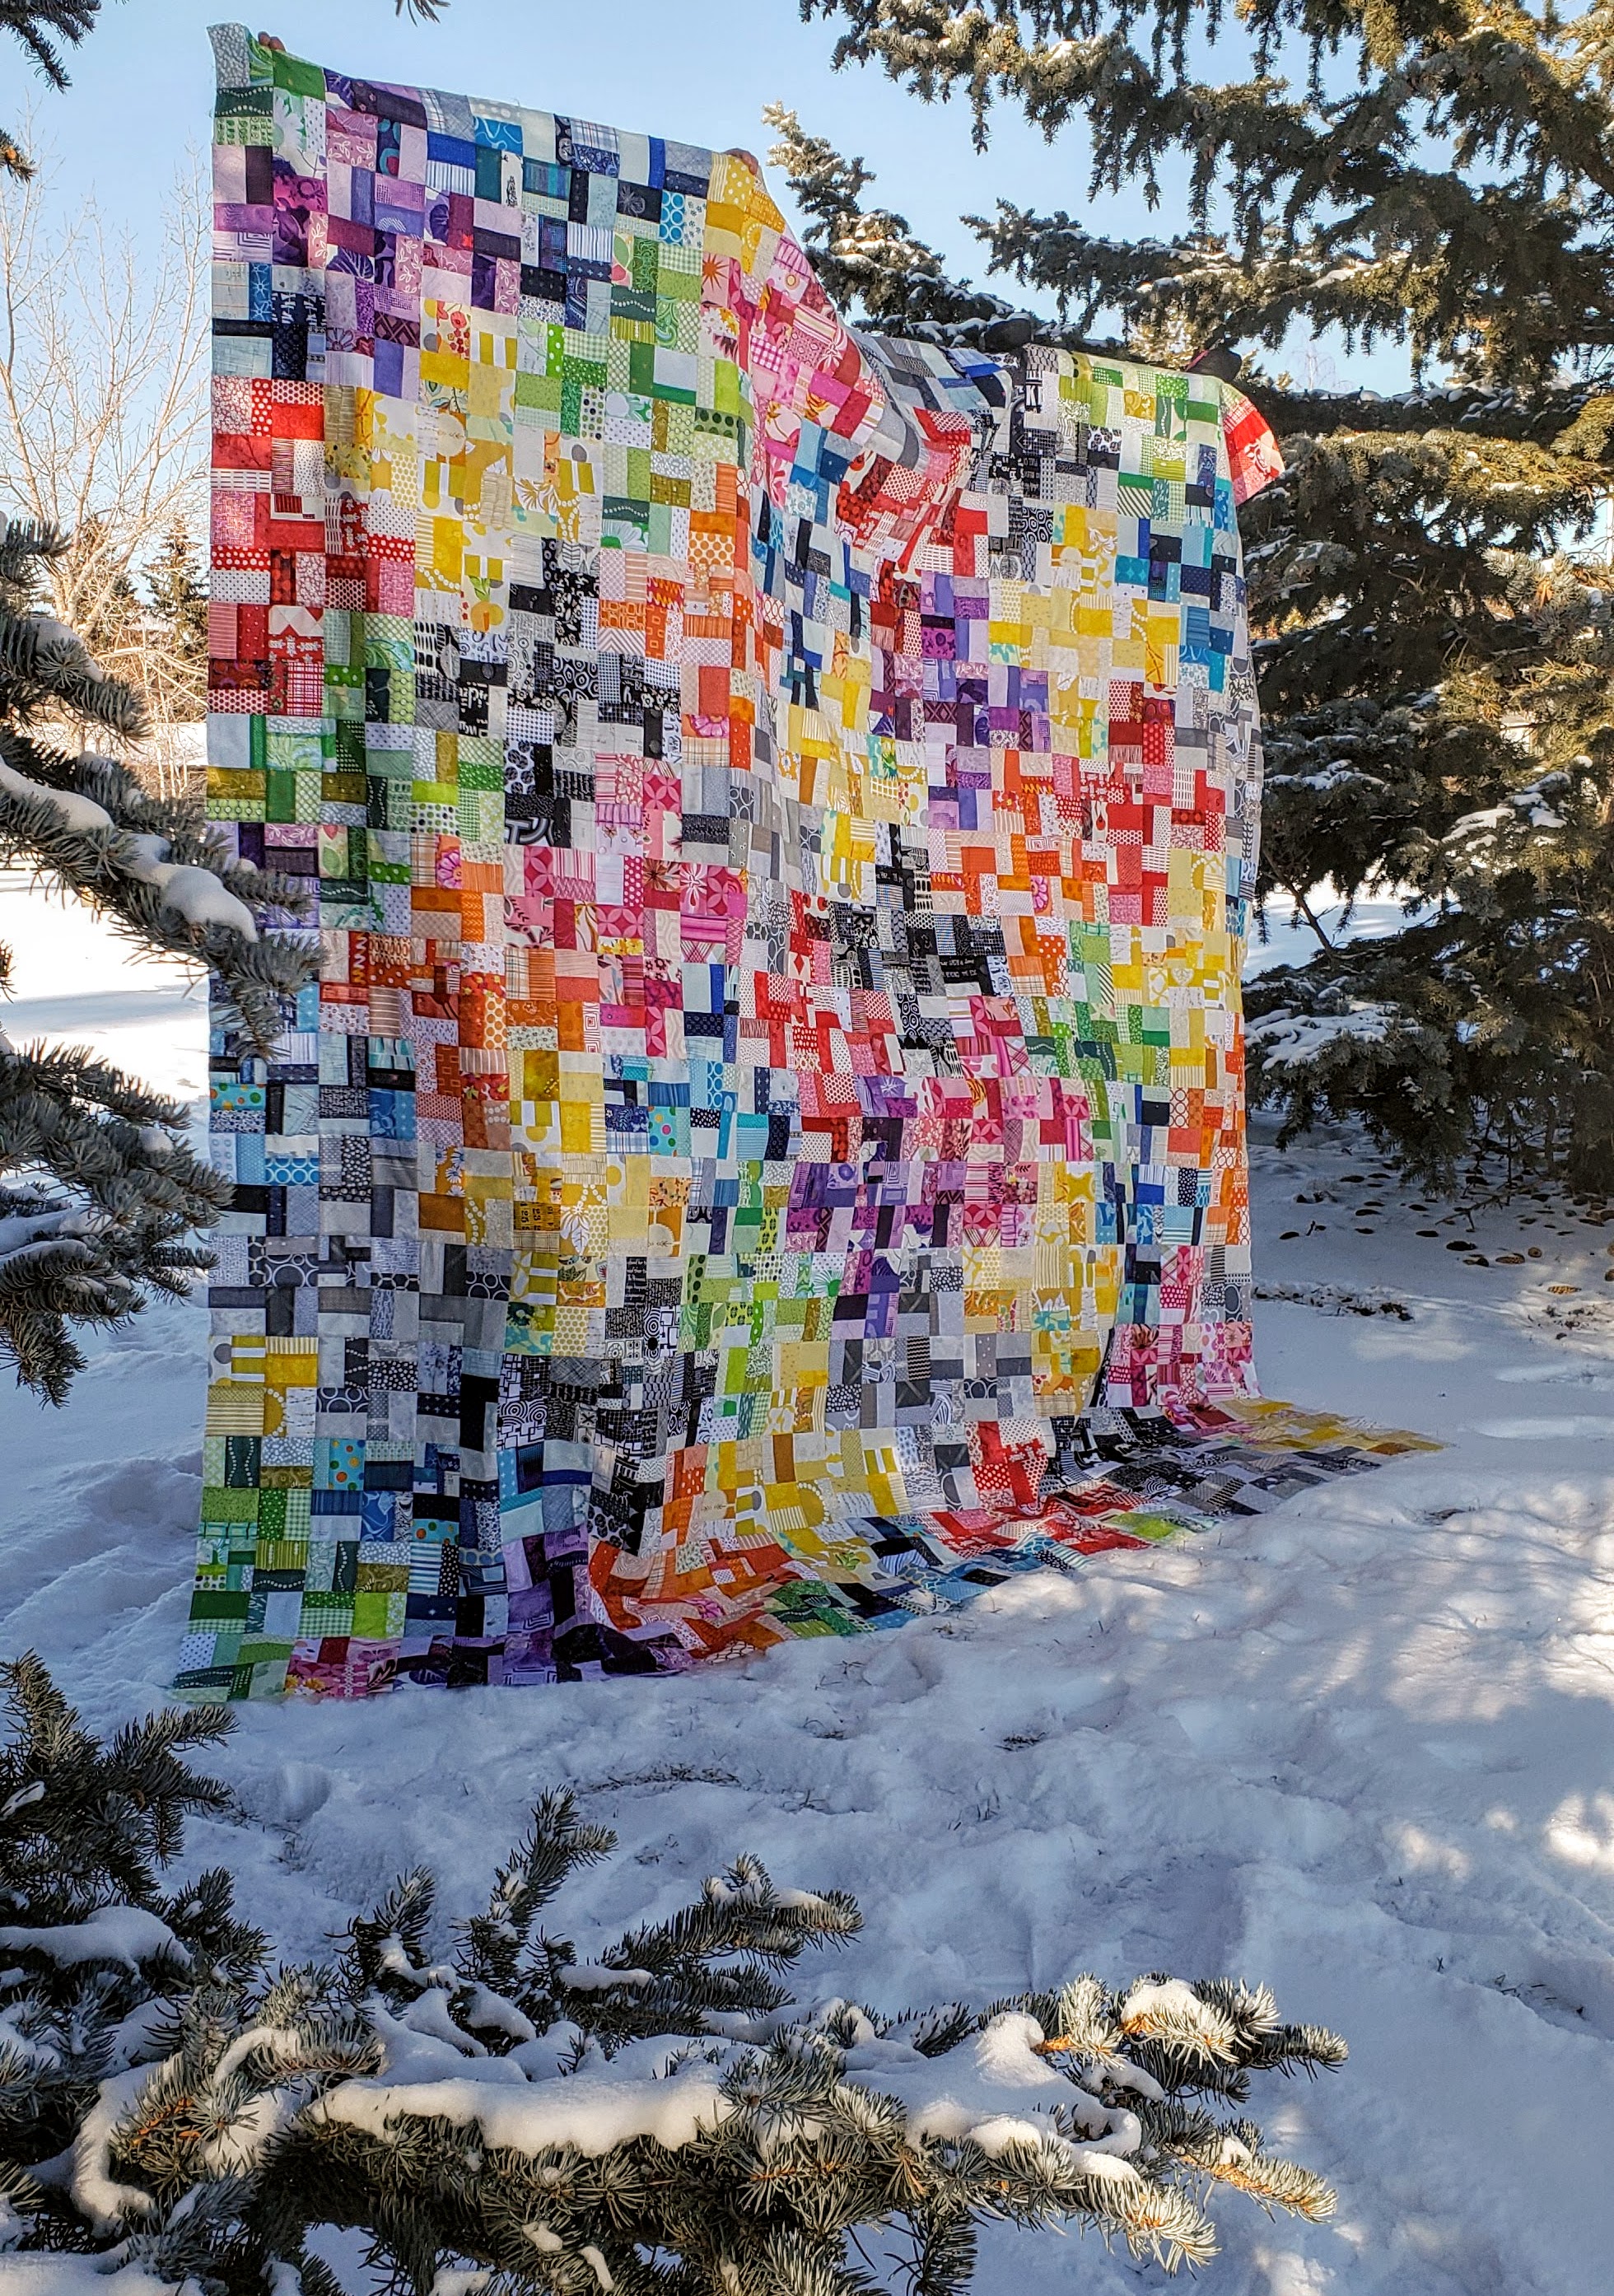
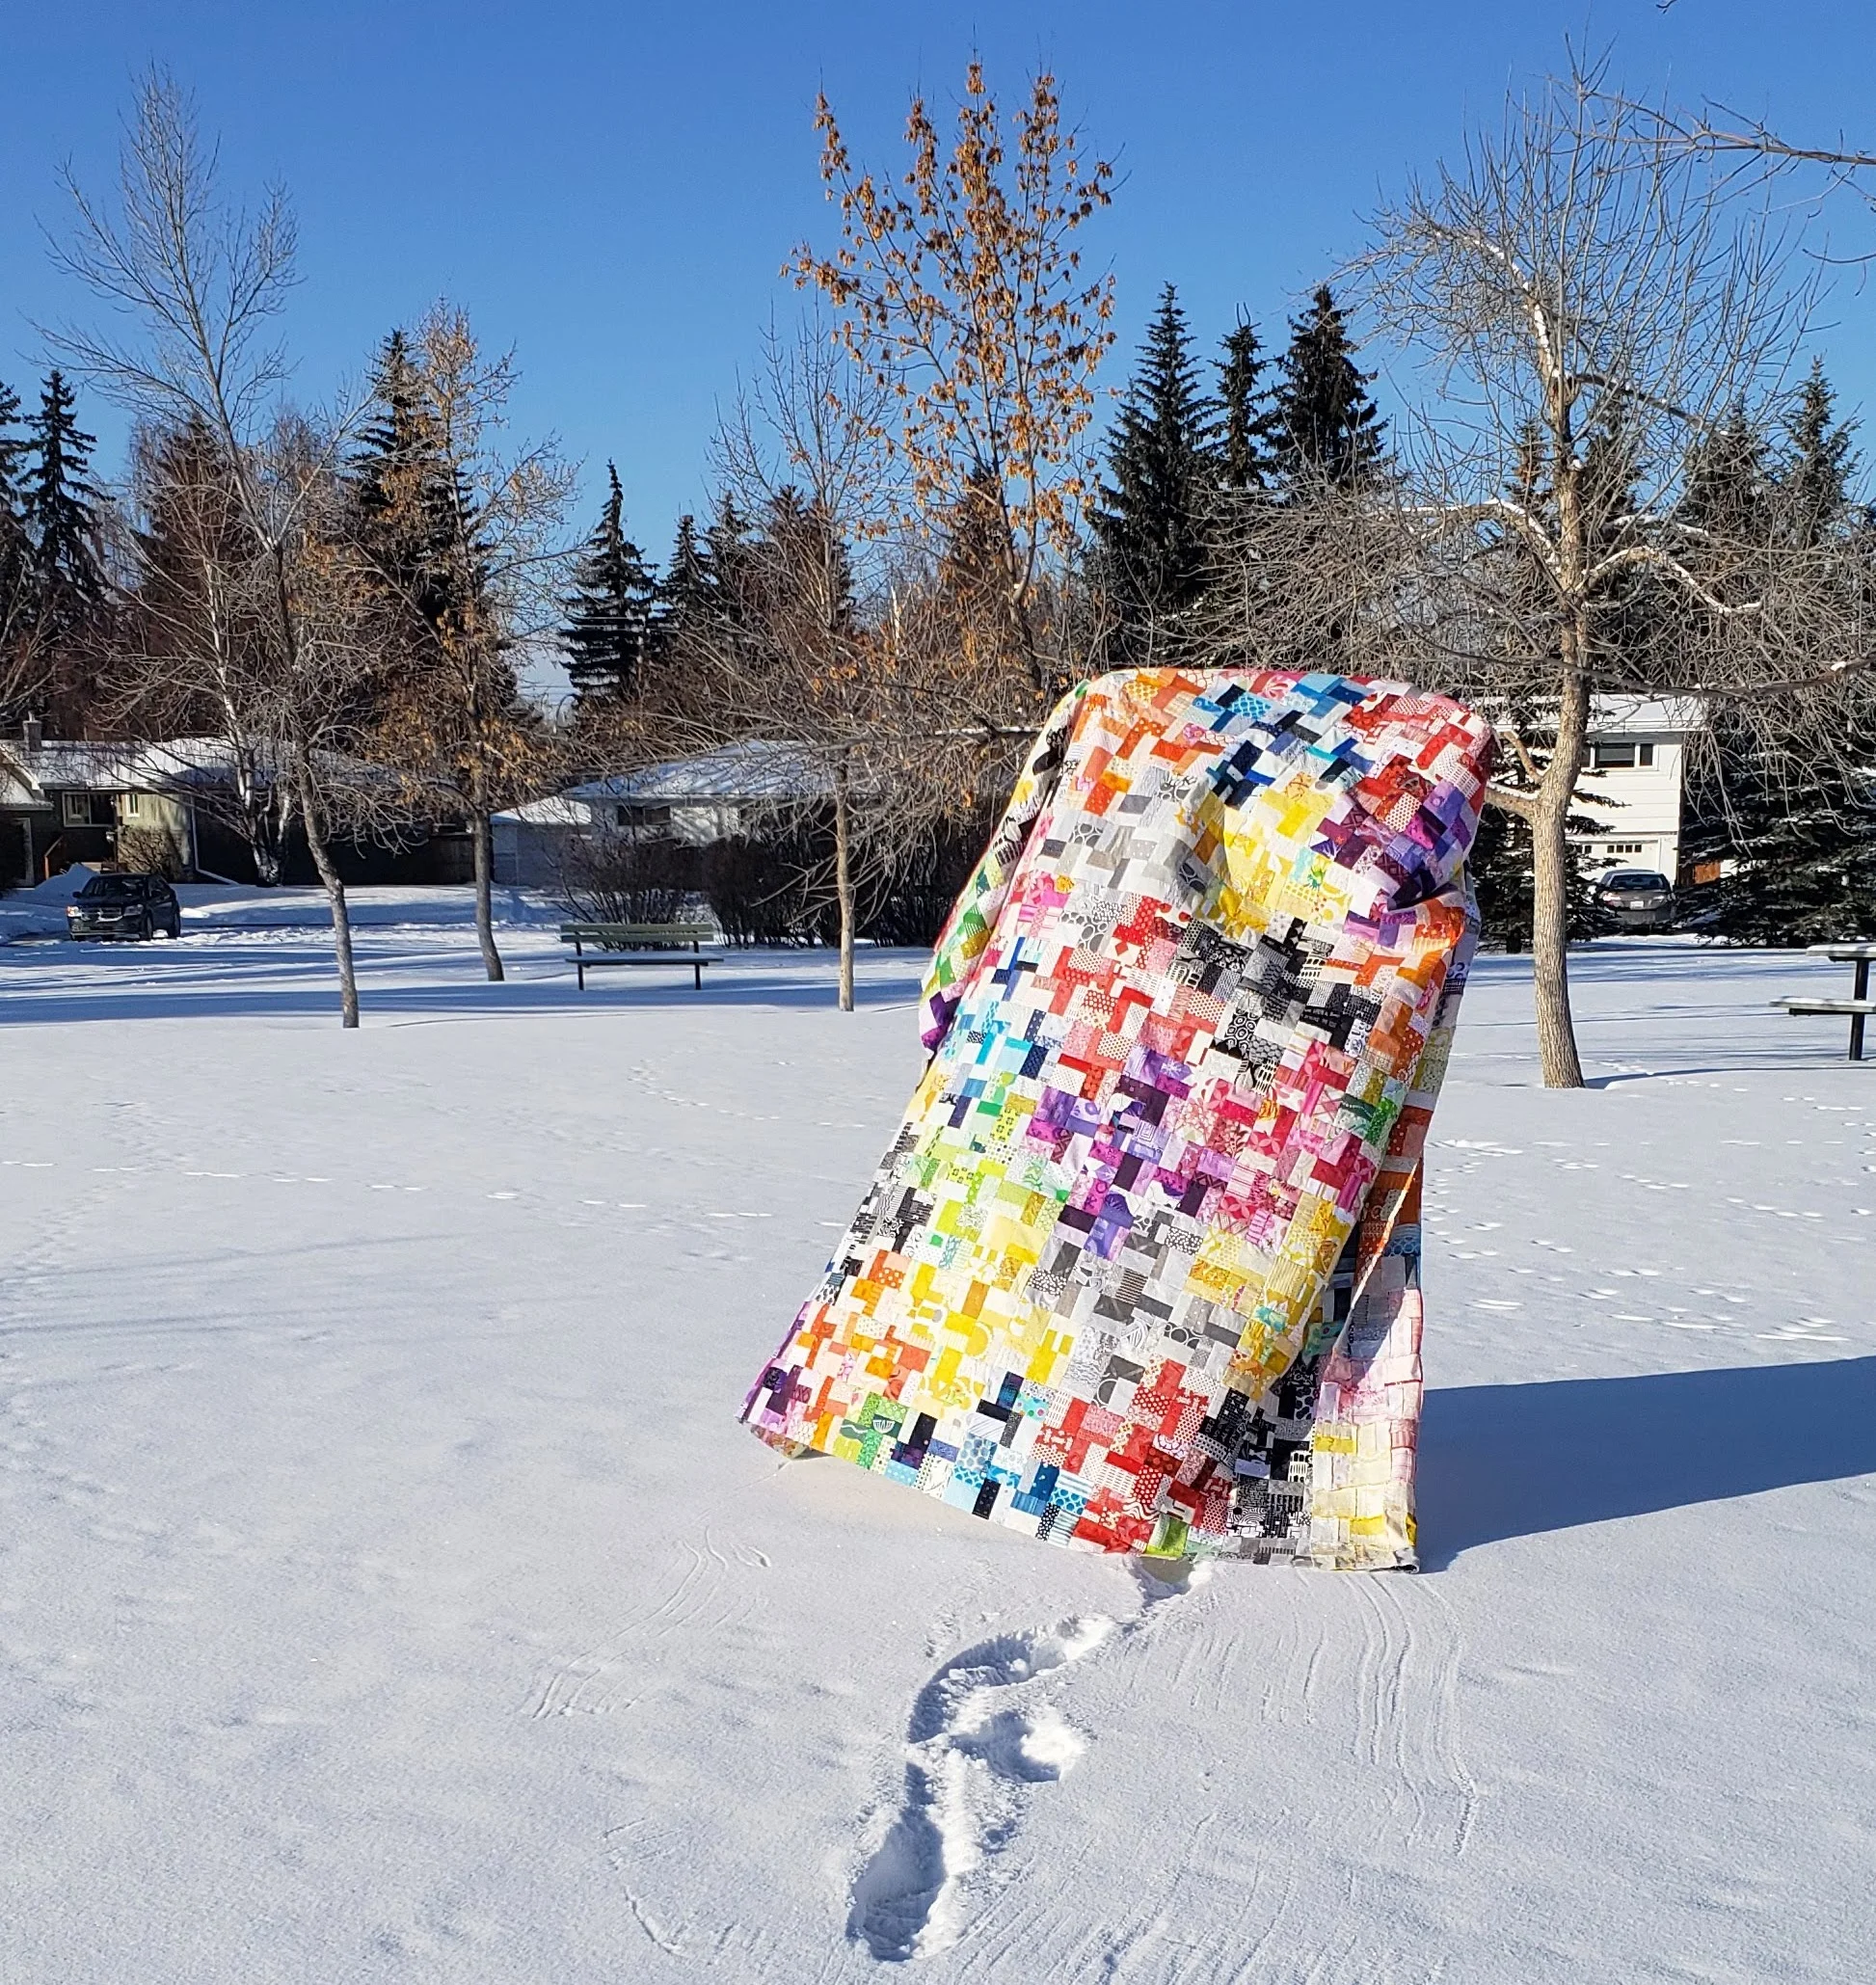
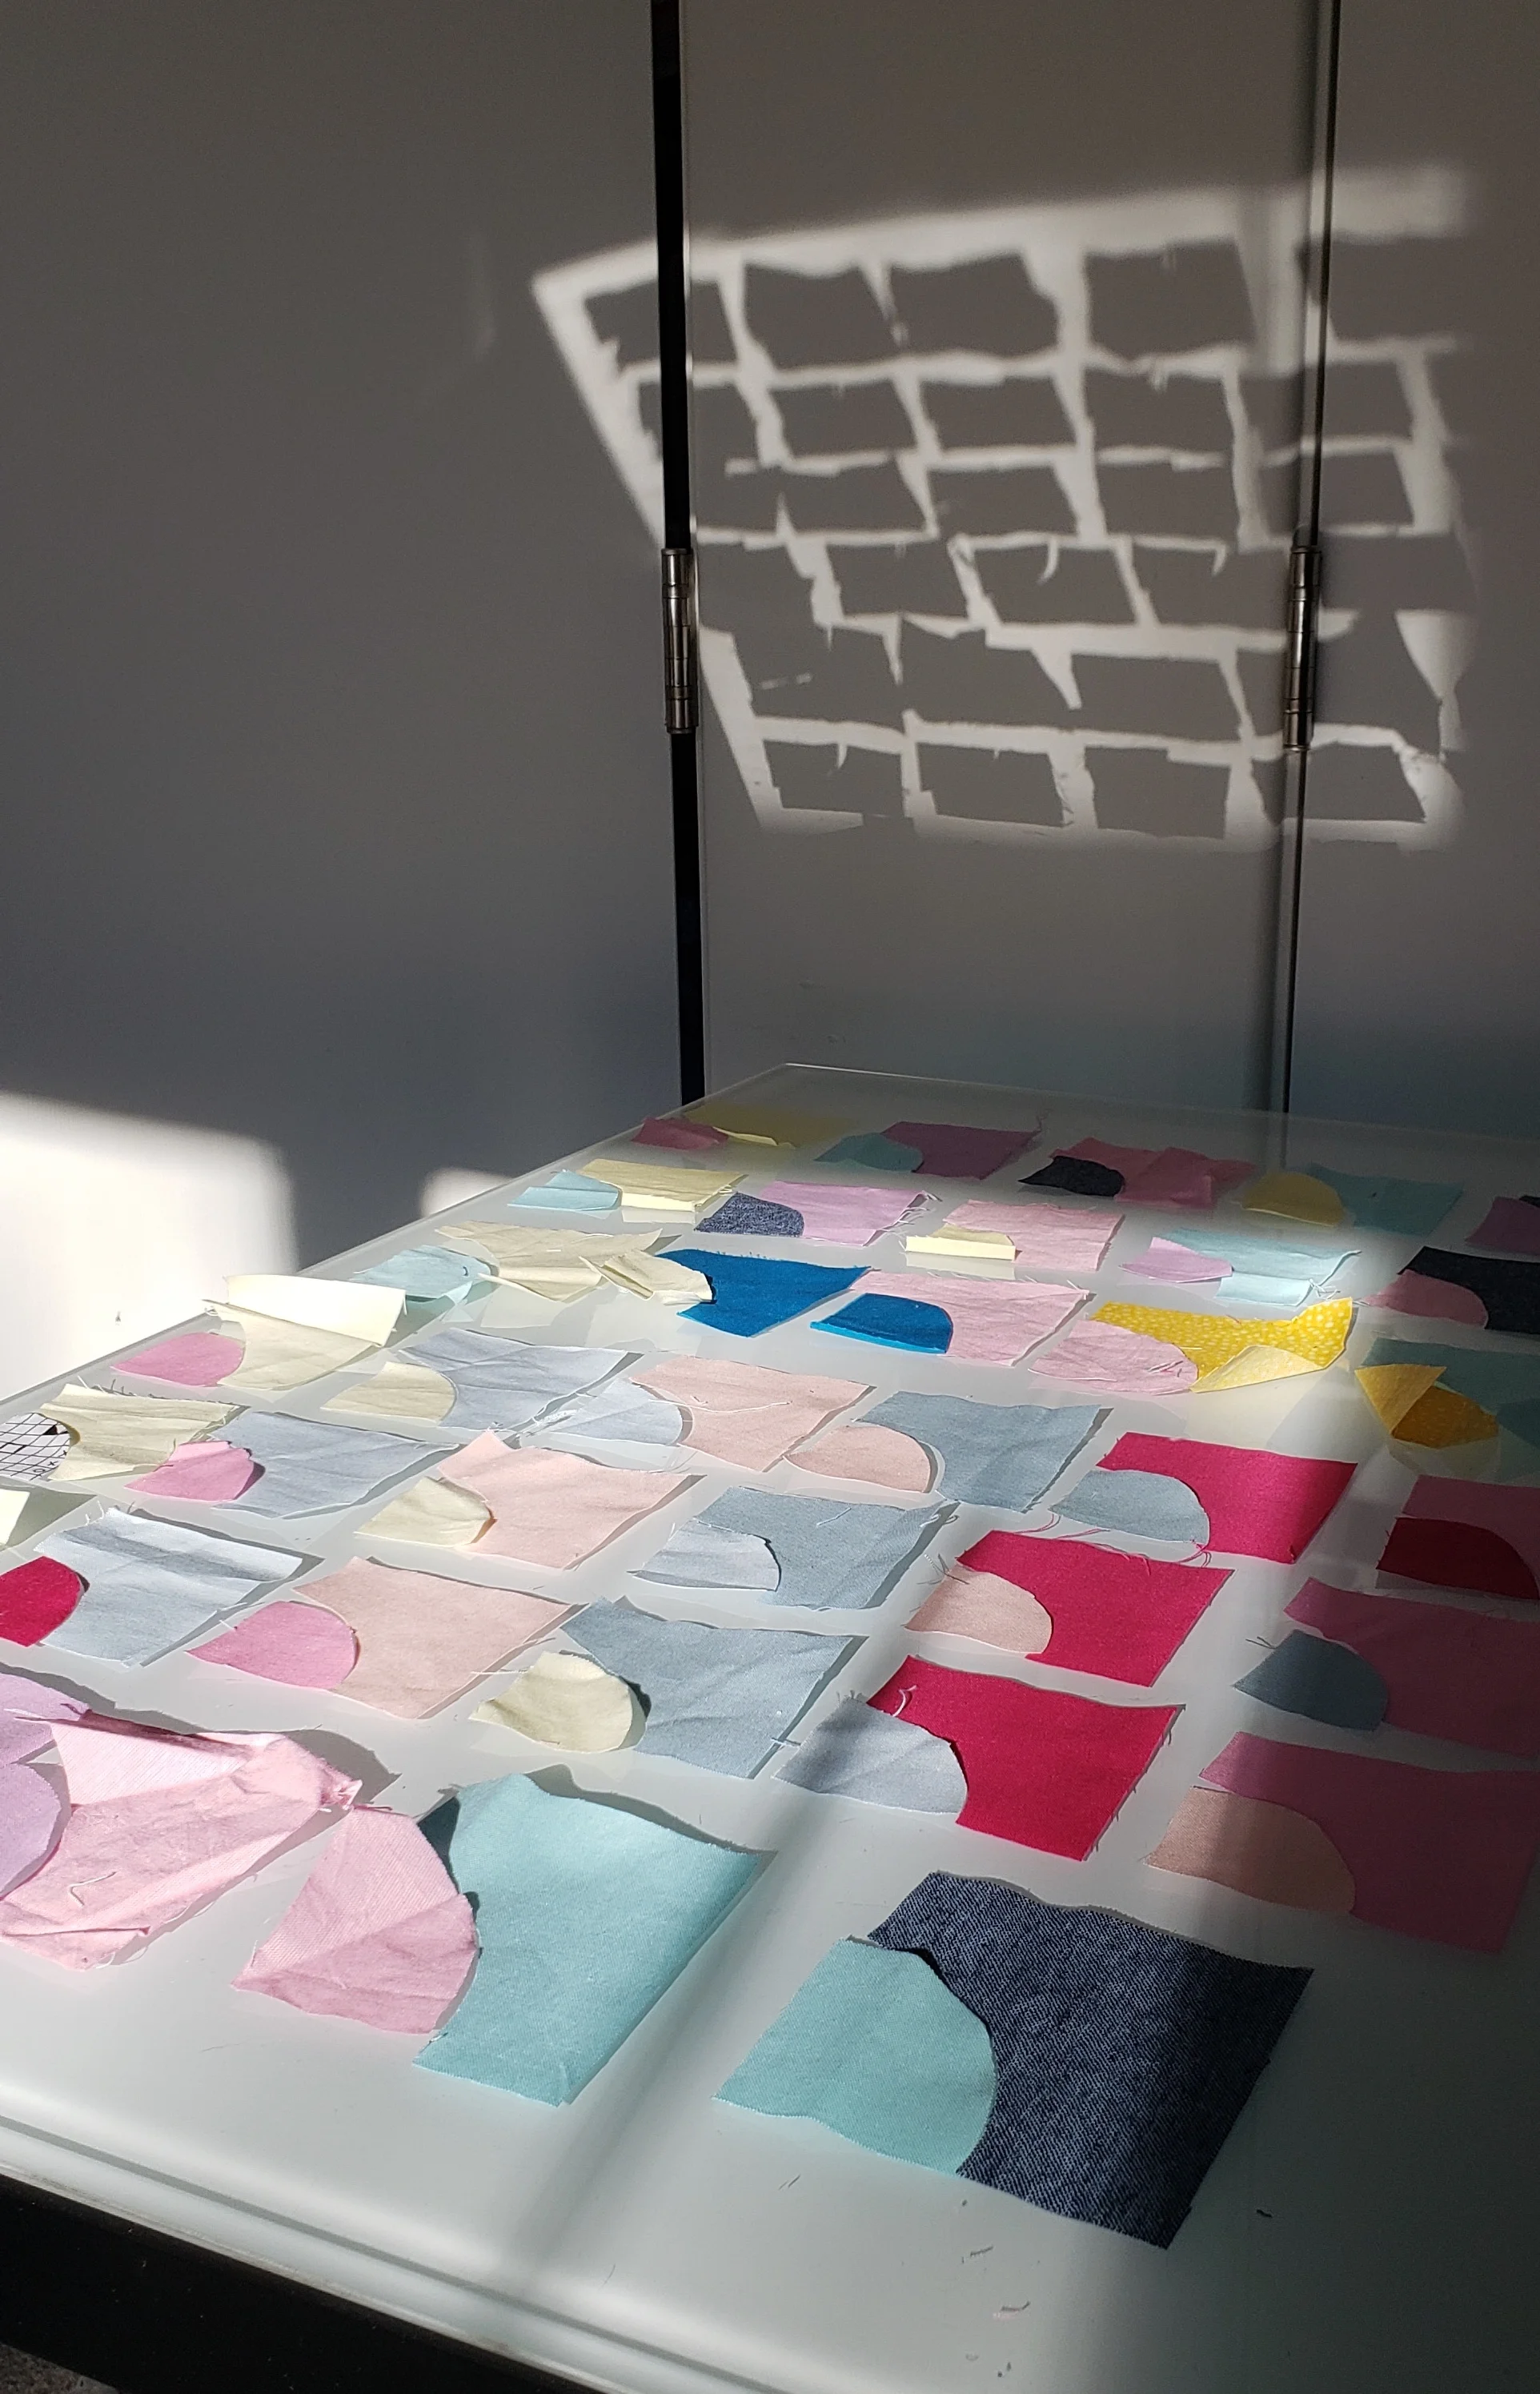
Many times I’ve been asked how big I plan to make this quilt. The answer is always “Until I run out of fabric.” Of course, since I am working with solids I could replace them. Frankly, I’ve done that once already. But even I have limits and will likely stop once this round of fabric is done. In actuality, the supply of yellow fabric is getting low so I guess that will be my limiting factor. As it currently stands, the pieces for the top make it about 40’’ x 60’’ .

Tiny Piecing Improv Curves Quilting

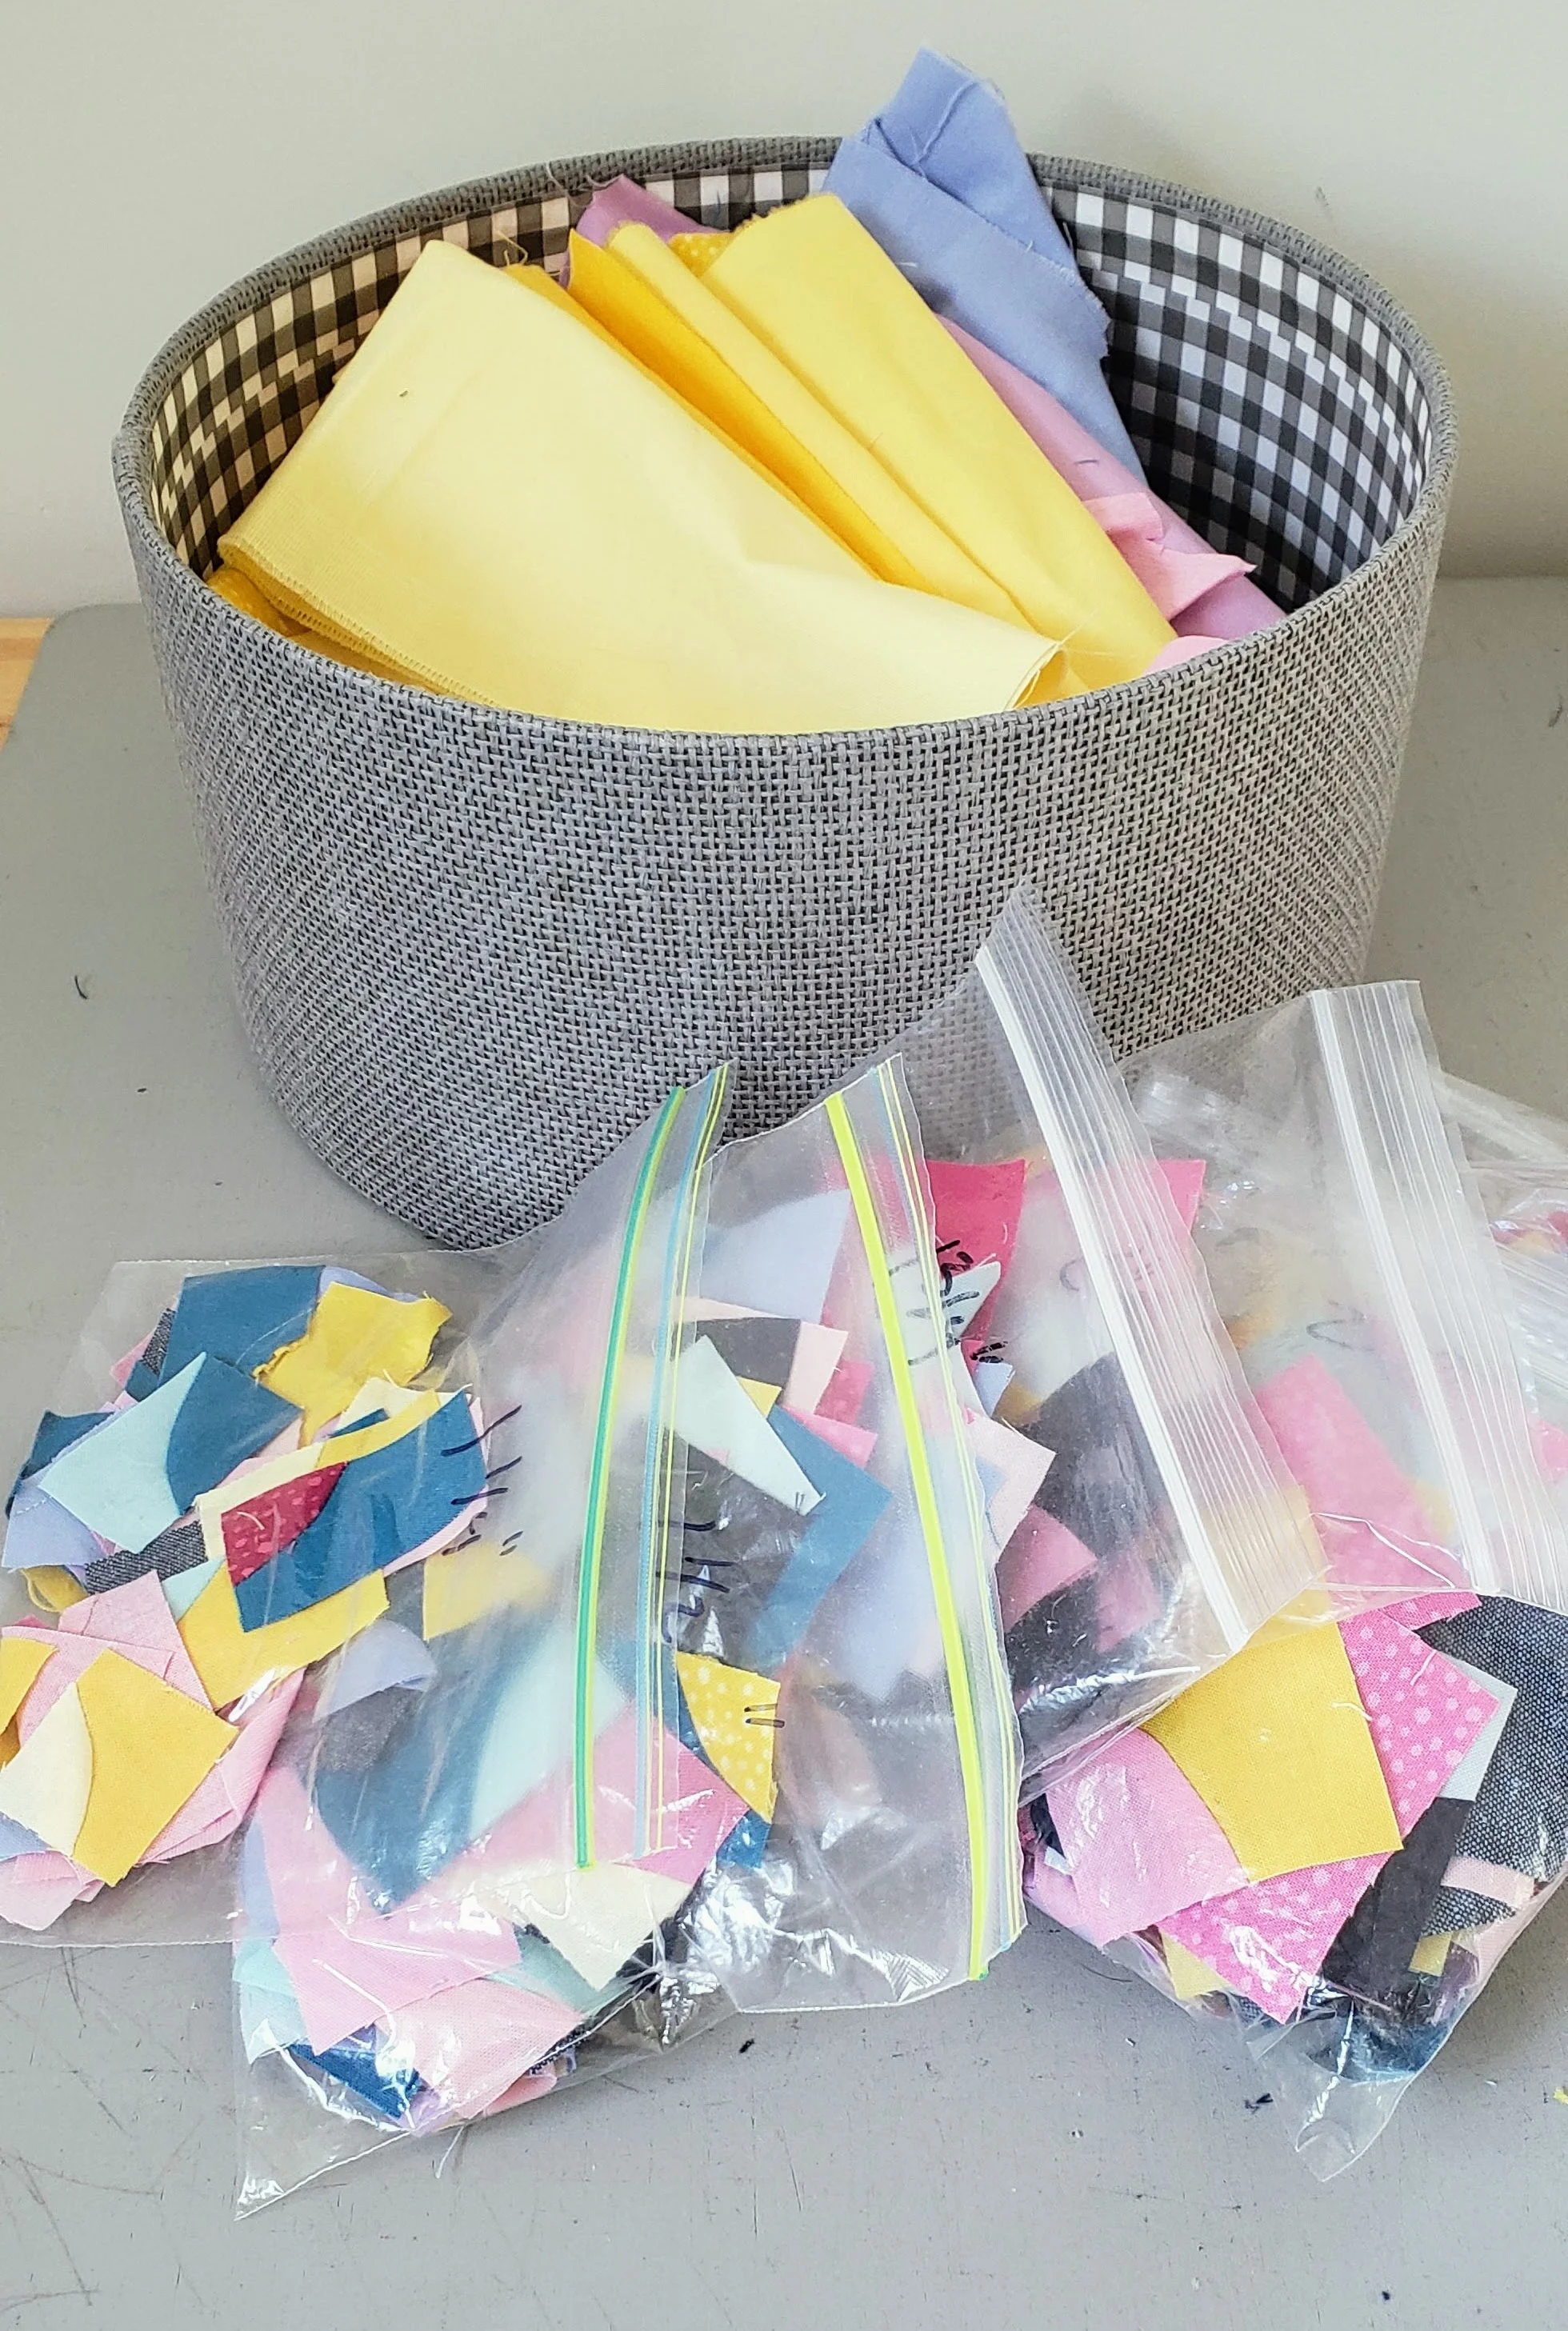
As the fabric supply dwindles I’ve decided to focus on making the little blocks instead of assembly. I have absolutely no idea how much bigger this can and will get. My little plastic baggies are filled with the size sorted blocks, like some sort of quilting drug deal. Every time I sew, press, square up, and add to the collection my potential finished quilt gets an inch or two bigger. By sewing all the blocks now I will ensure that my colours stay balanced across the entire finished quilt and not have a portion where there is no yellow, for example. So I will sew all the blocks first then sew them all together. Fingers crossed this leaves me with a functional sized quilt.

It’s been precisely 2 years since I started this project in a class with Chawne Kimber. At the time it was a fun experiment, a good way to play with one of my idols in the room guiding me. There is no rushing tiny piecing, especially when you want the finished result to be large enough to cover a lap and not just a wall. There is also an inherent boredom in tiny piecing, especially when making something larger. It is a A LOT of repetitive action. If it takes me a few years, it takes me a few years. I am thoroughly engaged in the process when I am doing it and have no problem letting my interest ebb and flow. I’m floating down a slow river and the ride is good.

Chawne Kimber tiny piecing

Stowe Bag - for my Ballet Boy

Stowe Bag Grainline Studios

There is a Ballet Boy in my house. I often describe the same boy as awake or asleep. He’s never had grumpy, only happy or miserable. And he is almost never quiet if he is awake. A natural extrovert he loves to entertain and relishes a spotlight. He is almost perfect, but more than a little exhausting some days. So I was pleasantly surprised (and full of Mama pride) when my girls said they wanted to make him a bag for his ballet stuff as a Christmas present.

I picked the pattern - easy enough for them to sew but practical. The Stowe Bag from Grainline Studios is technically designed as a project bag, more for knitters. But it is just the right size for my Ballet Boy. And seemed to be an easy sew for the girls - with my supervision. They picked the fabrics. It was hard, I will admit, to let go of the green Marimekko but fabric has more value in use than on a shelf.

Granline Studios Stowe Bag

We made the bag in two sessions. I cut the fabric and they got everything prepped and the basics sewn. Then we finished off with the bias tape the next day. It was miraculously done in time for Christmas morning.

As expected the appreciation of the bag was lost on Christmas morning in the face of a Connor McDavid jersey and new Lego. But it’s been in steady use ever since. He takes it to each practice, it carrried his uniform to a gala event where he had a major solo, and it remains perfect in every way. Just like him.

The Blue Gala
Hattori Williamson Ballet

An aside: I could not recommend his ballet school any more highly. He is getting amazing opportunities, the families are wonderful, and his teachers - all former professionals - are incredible and kind.

Pattern notes:

We made the small size.

Pockets ended up being pointless. We did change the seaming to make more sense for things like holding his glasses case and slippers, but they just flop open. Would skip those next time.

We skipped steps 13 and 14 of the pattern because I mistakenly thought that was the bottom gusset creation which we determined we didn’t need. I might go back and do those steps.

Our bias tape is bigger than the pattern specifies. We were on a deadline and this one was in the stash, already made.

Not Even All the Scraps

Scrap Quilts Cheryl Arkison

The weekend I finished this quilt the weather turned and a proper winter settled in. That particular weekend I did not leave my house, preferring to stay in and sew. Hence the finished quilt. It hasn’t really warmed up much since then, so no photos. But today it is a balmy -17C so I made my kids help me take a few pictures.

Unfortunately, or fortunately, this ended up being a queen size quilt so even my freakishly tall 12 year old had a hard time keeping it out of the snow!

Cheryl Arkison Scrap Quilts

Every single fabric in here is a scrap. In November of last year I decided to listen to my own teaching advice. It really isn’t that big of a deal to sort scraps, once you just decide to do it. All of my strips, and those gathered along the way, had made their way into this big blue IKEA bag. Not the little ones, the big bags. It was just short of overflowing. So I sorted those strips by colour and then by value. Then I sewed.

I did a lot of sewing. Mind you, this is mindless sewing. So perfect for Morning Make and holiday stress and snippets of time to myself. The girls came in and helped periodically, especially once I got a new iron. Then I cut.

I did a lot of cutting. The sewing is sewing long strips together. Well, whatever length they may be. Then I have to cut them and square them up to 3.5’’ square. More sewing after that to make 4 patches of each colour.

The design work, interestingly, I did on the computer. My design wall is not big enough for this many blocks. And to colour on graph paper would be an exercise in patience because of making changes. Each changes means a new drawing. So I went as low tech tech as you can go. I used Excel. Super fancy, right? But it helped me sort out a basic plan, which I then refined on the design wall.

Cheryl Arkison Scrap Quilts

Part of the challenges of turning scraps into blocks into a quilt is that there is one giant limitation - you get what you get. My process is to design as I go. That means I did not plan it out and pre-determine how many blocks of each colour I needed. Rather, I used the scraps and, at some point, figured out how many blocks in total I would need. Then I worked on a layout for what I had. In the end, a few blocks were re-scrapped and I raided the colour sorted scrap bins for a few more pieces to make additional blocks.

This is how it ended up. It is colourful! It is bold! It is fun! It is -17C worthy for sure.

Pocket Squares - Improv Applique with Tag Fabrics

Pocket Square Improv Applique Quilt

Pocket Squares

40’’ x 50’’

So many of my quilts start with random ideas. Some times the ideas come to a full quilt, other times not so much. Happy to say that after a few years this quilt is now fully done.

It started with mini charm packs of my Tag Fabrics that I cut for giveaways. I had one left over. Enter the need for a hand work project. The mini charm pack made friends with a charm pack of Kona solids sitting on the cutting table. I snipped a corner off each minicharm and appliqued it to the charms. Each one has slight variations - improv in hand applique!

After finishing all those I decided that I would do another layer of applique, bringing Tag fabrics back in to it. Each fabric in this collection of mine is represented in the quilt twice - once small and once as the background.

Aurifil Straight Line Machine Quilting

NOTE: This is why I am no good at promoting fabric collections. I started this quilt 2 years ago when my first collection came out and I am only just finishing it.

It isn’t a fancy quilt. I’m not breaking any design barriers either. But it sure was fun to make! Another great example of the process being as important, if not more so, than the finished quilt.

Because it’s been a long time since I quilted anything myself I got back into the swing of things with some straight line quilting. Originally, I thought I might do a grid, but at first pass my lines are 1/2’’ apart. That would have been a tiny grid! With chronic pain plaguing me these last 9 months I didn’t want to push it too much. I was just happy to have got through basting the thing. The Aurifil thread in this purple ended up perfect.

If you’ve ever seen me talk or paid attention to my quilts you know how I love to throw contrast into the whole thing. In this case, I introduced a completely different colour with this teal and white binding. Which brings me to my first finish of 2019 and my first finish since May of last year.

Cheryl Arkison labels Tag  Fabric

Oh, and full naming credit goes to my friend Sharon at Color Girl Quilts. Every time I posted a picture of this quilt on Instagram she said it made her think of pocket squares.