Little Feet, Pins and Needles (Part 3)


This week on the Little Feet, Pins, and Needles series we're going to talk about getting your kids actually sewing with you. This can be on either their own projects, sewing side by side, or getting them directly involved in what you are working on.

Kid as Paper Bag
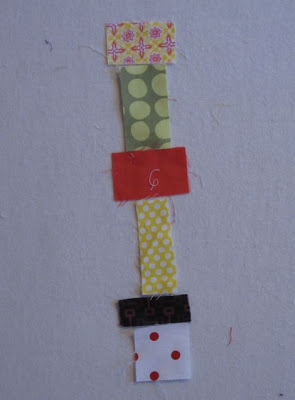
The famous paper bag technique for Improv piecing (how Denyse Schmidt teaches) is quite a good method. Without looking, you grab your next piece and sew it. Once you've got things together, then you make it work. Kids work just as well as a paper bag. They will pick and choose for you, taking your thought process and judgements out of the Improv work.

Now, if you've got a kiddo who is obsessed with pink or stripes then expect to get mostly that at first, but it does even out. You can also control what they choose from, limiting the propensity for bubble gum blocks.


Use Their Eyes
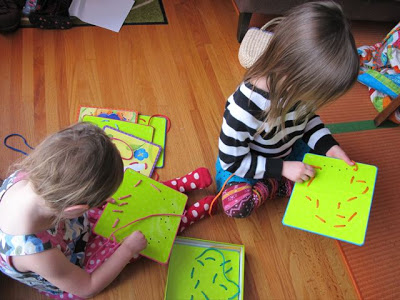
It might be because the fabric is stored in their room, but my girls love to pick fabric for a new project. I pull out the bins by colour and we all make a great mess. It isn't that I'll always go with their picks - they would pick every fabric given the choice - it is that they are involved in the process. And, I'll be the first to admit, their take on combinations can be quite refreshing.

You can also ask their opinion on layouts or get them to help you place blocks as your play with layouts.

Yes, this will get messy and you will be required to refold and organize every time you do it. This isn't for the highly anal.

Put Them on Your Lap
With really little ones (toddlers and preschoolers) you can put them on your lap and get them used to the motion of sewing. Feeding the fabric through, keeping it straight (seam guides are great when you do this), and watching their fingers. Soon enough you will have them working on a machine and it will feel natural.


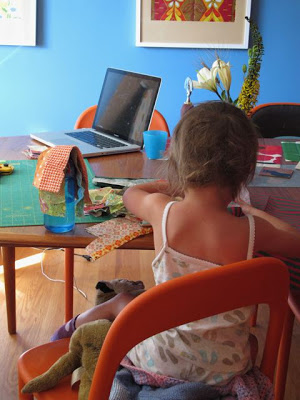
Red Light, Green Light
I'll admit, other than messing up my fabric, this is my girls' favourite way to sew with me. They sit under the table and push the foot pedal for me. I tell them Green Light to GO and Red Light to STOP. Yes, it makes the progress go slow, but I love that they are so excited about it. You do need to think ahead and anticipate that they won't exactly stop when you are needing them to. Don't try this when you are working on Y-seams, but it is great when you are strip piecing.


Needle Pulling Thread
It is one thing to give them their own scraps to start sewing - and that's a great thing - but it is also great to get them helping you with hand sewing your own projects. The girls, especially my younger one, will curl up with me while I handstitch a binding. I place the needle and they pull. It also works with my handquilting and applique. On some projects I should definitely be putting their names on the label because they help so much!

There are two very important things to keep in mind when you decide to pull the kids into your sewing projects.

Number 1, being patient is key. If you expect to burn through your sewing at your normal rate you will be painfully frustrated and disappointed. And the younger ones won't always get what you are trying to get them to do. But be patient and enjoy the process (you've heard that from me before!)

Number 2, keep in mind that they probably won't want to help forever. Take what you can get, when you can get it.

As parents we always hope our kids want to do the things we love to do. It makes our life easier and saves us from driving to hockey practice when you don't know how to skate or spending your sewing time on dance costumes. Taking small steps to bring your children in to the quilting fold can help, but it isn't a guarantee. It is, however, a great way to encourage their creativity, foster your own, and spend some useful time together.

A Pie for Mikey

You start out with an idea, a concept of where you want to take it. A taste, a feel, a look. A finished product to be savoured and enjoyed. Something to share, to show off, to take pride in.


You gather the things to make it, and you bring them close. You handle them, you edit, you cut, you taste. Add heat, maybe some sizzle, and quite often a long simmer. At many times will you season, highlighting the flavours and subsequent adventure.


Usually it gets messy. You are either the type of person who cleans as they go or the kind that has a third hand following them washing and wiping as you move. It doesn't matter, as long as you address the mess at some point.


Eventually you sit to enjoy. It isn't necessarily what you expected it to be. Sometimes it doesn't work and you have to start over tomorrow. Quite often it's better. Much better than expected.


One day it explodes. The pleasure is insatiable. The joy immeasurable. On another day it is more subtle, simple. It is good, but not great. The pleasure and peace, however, is there. It's lingering and comforting. Perfect.


At least, this is how my marriage feels.


My husband is my best friend and an incredible man. Kind, generous, a little bit wicked. Committed, driven, and horribly sarcastic. He owns his own business and used to race mountain bikes. But I always thought I'd marry a professor or snooty intellectual. We'd live in an old house filled with books and no kids. Obviously that isn't what I've got.


My man in my life and our marriage came about like a farmers' market dinner. One day you find something that looks fantastic and you go with it. And so we have, experimenting along the way. Some days it explodes with pleasure and some days it is lingering and comforting. Perfect.


Imagining a life without my husband nearly stops my breath. Cold.


And now there is a colleague, a friend I met through blogging, who is living this fresh hell right now. Her husband, the father of her two little girls, suddenly collapsed and died last week. She is feeling the immeasurable pain of loss, the unimaginable.


This pie is for Mikey, for her, for their girls. This pie was his favourite and it deserves a celebration. As does he, as does the love he and Jennie shared. Their recipe gave the world this pie. Let's celebrate.


The food blogging community - including those who live close to Jennie and are lucky enough to share a drink and pizza with her - are gathering around her right now. This is community. Today we are making pie. People the world over are taking Jennie and Mike's pie and making it for their own loved ones. They are adapting the pie for themselves, making the recipe for their own loves. In doing so we celebrate a man, relationships, and the spirit of adventure in love, cooking, and life.


Little Feet, Pins and Needles (Part 2)

Welcome to Part 2 of the Little Feet, Pins and Needles series. Last time we talked about setting up your space and bringing a relaxed attitude to quilting when you've got young kids around. This week I want to talk about some ways to encourage creativity and an interest in quilting with your little ones.

This is about more than encouraging the with needle and thread or getting them literally involved in your quilting. (That's next week in the series!) Getting your kids thinking about colour, about the motions of quilting, and the aspects of design is a great way to foster an interest in your hobby/work without ramming it down their throat.

Here are a series of activities, games, or toys you can bring out to get your kids playing. You can always have these set up beside you as you sew. You could also get down on the floor and play with them. That's a great way to play yourself and find some inspiration along the way. Its always a welcome break for everybody.


1. Lego
As a kid, my favourite way to play with lego was to build houses. House after house, one day blue beds, another day red. Space lego was really out there for me. Now that my girls are getting into Lego I am struggling with do more than that. If they aren't asking me to make something specific I find myself defaulting to shapes and lines. My youngest took over my thought process and now she makes Lego quilts, working fastidiously to cover the entire green slate with colour.

2. Paper Quilts
We have a bit of a scissor issue in this house. To direct that habit I put coloured paper and recycling in her path. That leaves us with bits of paper everywhere. Everywhere. Now we take those bits and I hand them a glue stick. Voila! Paper quilts.


3. Sewing Cards
A kind reader of my blog sent my girls sewing cards. (Thank-you Nanci!) When they asked me to teach them how to sew this is the first thing I pulled out. We patiently work on front-to-back and back-to-front concepts with these cards. I let them explore the where to sew next question rather than guide them. This way they learn the rhythm. Or they don't, but then they love the end result more.

4. Embroidery Hoop
This was actually the first thing we did together. Thread, some linen, and a hoop. Go to town! They weren't getting the concept entirely, but they loved the feel of needle pulling thread. I believe the important part is them enjoying that feel and loving what they created. As they get older we can work on stitches. This will be an age/development aspect that you can adapt to your own kids.

(Put together by Abby, Amanda Jean's little one, while I was visiting.)

5. Their Own Design Wall
If you've got a big design wall, or even a small one, letting the kids go wild with their own designs is great. I'll admit, it can be stressful when they want to "help" you lay out a quilt. By giving them a space with some fabric or blocks of their own they can explore on their own. And who knows? It may end up inspiring you! When I was visiting Amanda Jean her little girl was always making creations in a corner of the design wall. It was great to see her determination at times, an her abandon at conventions we might hold close.


6. Mess Up the Scraps
Because I sew in a very shared space there is fabric everywhere. If I kept it all precious and off-limits then I would spend more time being stressed. So the girls have free reign of my scraps. Actually, they have free reign with my fabric stash too, so long as I'm with them for that. My youngest, in particular, loves to organize, stack, fold, and play. She makes sculptures, presents, and generally, a mess. And she loves it. It will keep her occupied for quite a while for a 3 year old. Her pride in her creations is immeasurable.

My goal isn't to create future quilters - although, that would be nice. Rather, my goal is to foster a playful energy towards colour and creating. My medium happens to be quilts and so I can encourage development through my medium.

Community (And Pickled Chioggia Beets)

"Anti-social media."


That's what my husband says when you bring up Twitter, Facebook, Google + or anything that incites or requires interaction through a computer or smartphone. He is, at heart, a huge people person. His business requires near constant contact with people - all of which he prefers to do face-to-face or at least on the phone.


His argument is that people think they have friends that they make or maintain friendships through social media, but that it's just superficial. Indeed, he merely tolerates my stories of people I've never actually met. He's not discounting that, once you've met in person, a friendship can grow.


I'll admit, some days I completely agree with him. Then I get a note from someone who reads the blog that is full of more support than a friend I've had for years has given. Or someone I only know from on-line shows up at my door with food, when no one else does on a bad day. Or I am heavily impacted by a tragedy that rocked the world of someone else.


Always remember, there is a real person behind that on-line presence.


That means you can indeed form a relationship with someone you've never met. Will it be as close as the one you have with your best friend since high school? Maybe. Maybe not. But it will still be valuable and important for its own reasons.


On the days that I do see merit in what he says, I take a step forward into my community. Not my on-line world, but the one that is literally outside my door. I take a walk and chat with the neighbour. I grab a beer with another mom from the preschool. I call my brother or sister to just chat about our kids. Nothing can replace a face-to-face conversation.


Because of those conversations I have beet pickles today.


There we were, minding our own business, devouring my husband's hamburgers in the backyard. Our front door was wide open, the dog was probably sound asleep, and the kids were already performing after dinner hula hoop tricks. Suddenly the back door opens and one of our neighbours walks through. In her hands was a grocery bag full of chioggia beets and a big bowl of apricots.


With family in warmer climates and friends coming through she was left with a pile of produce from her folks' backyard. Too much for her and her husband, she brought them over to share. And she knows I would happily accept because we've actually talked before. We live on a street where most of us make an effort to know each other. So she knew I would tackle the colourful produce with gusto and none would go to waste. (There is an apricot crisp in the oven for another neighbour who just had a baby.)


This is my community. Embrace the friends you have when they need it, whether with a quiet note or the full force of your arms. Embrace the shared journeys. Embrace the beets they bring to your backyard.


This was my first time making beet pickles. Inspired by the Pickling Party, hosted by Shauna Ahern from Gluten-Free Girl, and my neighbour. The recipe is a mish mash of ideas from memory, Aimee from Simple Bites, and the Harrow Fair Cookbook. Even my cooking is an amalgamation of my many communities!


Pickled Chioggia Beets
Makes 3 500 ml jars


2 1/2 pounds scrubbed beets, tops and stems removed
2 cups white vinegar
1 cup rice wine vinegar
3/4 cup water
1/2 cup sugar
2 tbsp pickling salt
1 tsp coriander seeds
1 tsp mustard seeds
3 cloves garlic
rosemary (optional)


1. Boil the beets in a large pot of water for 25 minutes. Make sure a fork will go through the largest beets easily. Drain and immediately place in a sink or bowlful of cold water. Once cooled use your hands and, if necessary, a knife, to trim the skin from the beets. Slice and set aside in a clean bowl.
2. While the beets are cooking clean and process 3 jars and the screw lids in a boiling water canner for 10 minutes. Keep hot in the water while you clean and slice the cooked beets.
3. While you prep the beets combine the vinegars, water, sugar, salt, and seeds in a medium saucepan. Bring to a boil and keep hot, hot until ready to use.
4. Quickly drain your sterilized jars. Keep the water boiling.
5. While they are still hot add a garlic clove to the bottom of each jar, then fill with beets. Stop filling 1/2'' from the top. Carefully pour in the pickling liquid, leaving at least a 1/4'' from the top of the jar of space. Wipe the rim of the jar with a clean cloth and screw on the lid.
6. Process for 20 minutes in a boiling water canner. Do not start timing until the water comes to a boil after you add your jars.


(Why didn't the skeleton cross the road? Because he had no guts!)
(Said skeleton keeping the almost pickles company.)