"Anti-social media."
That's what my husband says when you bring up Twitter, Facebook, Google + or anything that incites or requires interaction through a computer or smartphone. He is, at heart, a huge people person. His business requires near constant contact with people - all of which he prefers to do face-to-face or at least on the phone.
His argument is that people think they have friends that they make or maintain friendships through social media, but that it's just superficial. Indeed, he merely tolerates my stories of people I've never actually met. He's not discounting that, once you've met in person, a friendship can grow.
I'll admit, some days I completely agree with him. Then I get a note from someone who reads the blog that is full of more support than a friend I've had for years has given. Or someone I only know from on-line shows up at my door with food, when no one else does on a bad day. Or I am heavily impacted by a tragedy that rocked the world of someone else.

Always remember, there is a real person behind that on-line presence.
That means you can indeed form a relationship with someone you've never met. Will it be as close as the one you have with your best friend since high school? Maybe. Maybe not. But it will still be valuable and important for its own reasons.
On the days that I do see merit in what he says, I take a step forward into my community. Not my on-line world, but the one that is literally outside my door. I take a walk and chat with the neighbour. I grab a beer with another mom from the preschool. I call my brother or sister to just chat about our kids. Nothing can replace a face-to-face conversation.
Because of those conversations I have beet pickles today.
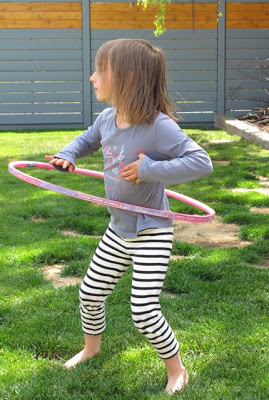
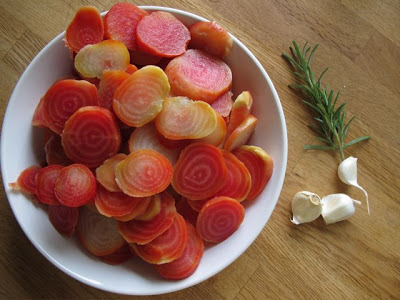
There we were, minding our own business, devouring my husband's hamburgers in the backyard. Our front door was wide open, the dog was probably sound asleep, and the kids were already performing after dinner hula hoop tricks. Suddenly the back door opens and one of our neighbours walks through. In her hands was a grocery bag full of chioggia beets and a big bowl of apricots.
With family in warmer climates and friends coming through she was left with a pile of produce from her folks' backyard. Too much for her and her husband, she brought them over to share. And she knows I would happily accept because we've actually talked before. We live on a street where most of us make an effort to know each other. So she knew I would tackle the colourful produce with gusto and none would go to waste. (There is an apricot crisp in the oven for another neighbour who just had a baby.)
This is my community. Embrace the friends you have when they need it, whether with a quiet note or the full force of your arms. Embrace the shared journeys. Embrace the beets they bring to your backyard.
This was my first time making beet pickles. Inspired by the Pickling Party, hosted by Shauna Ahern from Gluten-Free Girl, and my neighbour. The recipe is a mish mash of ideas from memory, Aimee from Simple Bites, and the Harrow Fair Cookbook. Even my cooking is an amalgamation of my many communities!
Pickled Chioggia Beets
Makes 3 500 ml jars
2 1/2 pounds scrubbed beets, tops and stems removed
2 cups white vinegar
1 cup rice wine vinegar
3/4 cup water
1/2 cup sugar
2 tbsp pickling salt
1 tsp coriander seeds
1 tsp mustard seeds
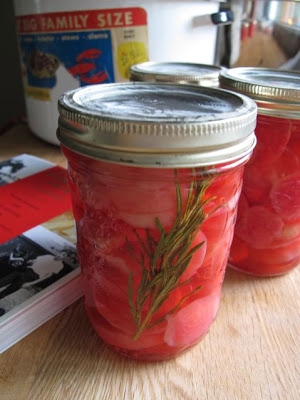
3 cloves garlic
rosemary (optional)
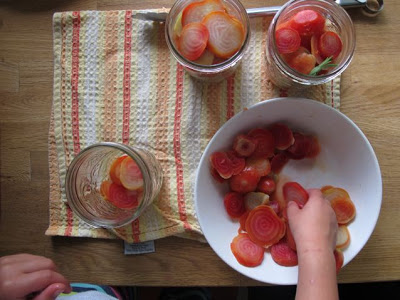
1. Boil the beets in a large pot of water for 25 minutes. Make sure a fork will go through the largest beets easily. Drain and immediately place in a sink or bowlful of cold water. Once cooled use your hands and, if necessary, a knife, to trim the skin from the beets. Slice and set aside in a clean bowl.
2. While the beets are cooking clean and process 3 jars and the screw lids in a boiling water canner for 10 minutes. Keep hot in the water while you clean and slice the cooked beets.
3. While you prep the beets combine the vinegars, water, sugar, salt, and seeds in a medium saucepan. Bring to a boil and keep hot, hot until ready to use.
4. Quickly drain your sterilized jars. Keep the water boiling.
5. While they are still hot add a garlic clove to the bottom of each jar, then fill with beets. Stop filling 1/2'' from the top. Carefully pour in the pickling liquid, leaving at least a 1/4'' from the top of the jar of space. Wipe the rim of the jar with a clean cloth and screw on the lid.
6. Process for 20 minutes in a boiling water canner. Do not start timing until the water comes to a boil after you add your jars.
(Why didn't the skeleton cross the road? Because he had no guts!)
(Said skeleton keeping the almost pickles company.)