"cookies"

If It Wasn't For Her

Today it is all about my Nanny. And in two weeks it will still be all about my Nanny.

It may come as a big surprise to you, but I am not so independently wealthy that I get to do nothing but make ice cream and write blog posts. I only wish. Alas, I am in the office 4 days a week, freelancing and teaching on the side, and oh yeah, raising my two little ones. I could not do any of this without my Hubby, of course. And none of it would be possible without our Nanny.

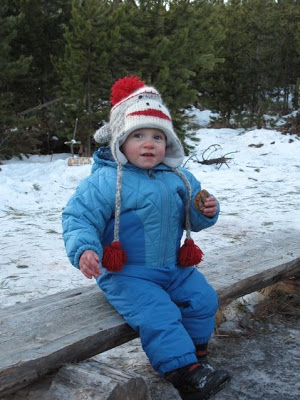
Emily watches the girls while I'm at the office.  She is outside with them everyday, regardless of the weather, she brings them treats like ice cream bubbles, she cleans the house (even taking out the garbage), and most importantly to me, she bakes. Not only am I happy that my girls get even more time in the kitchen, but it is glorious to come home at the end of the day and have fresh cookies waiting for you.

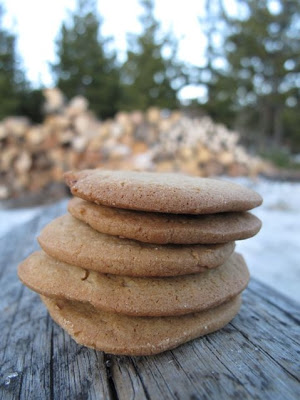
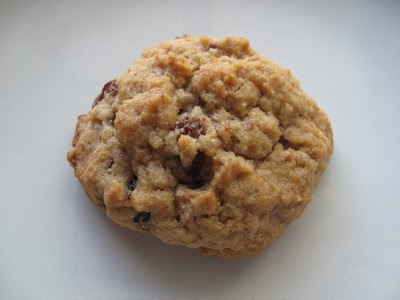
The two most used cookbooks for cookie recipes are good ol' Martha and, more frequently, Julie's One Smart Cookie. The girls are never afraid to try a new recipe, despite The Monster's usual request to bake chocolate chip anything. When I came home the other day though, these raisin cookies greeted me at the door. My first question was which book they came from?

No book, it was Grandma's recipe.  And Emily has made it so many times she has it memorized. She graciously allowed me to share it here.

To be honest, I'd never thought I would obsess over raisin cookies. But these are moist, sweet, and chewy, with a hint of spice. A chocolate chip fan myself, I can safely say these are one of the best cookies I've ever had. Thank-you Emily, and thank-you Emily's Grandma.

Ridiculously Good Raisin Cookies
makes 4-5 dozen

2 cups raisins
1 cup water
1 tsp baking soda
1 cup butter
2 cups sugar
3 eggs
1 tsp vanilla
4 cups flour
1 tsp baking powder
1 tsp cinnamon
1/4 tsp nutmeg
1/2 tsp salt

1. Preheat oven to 350 degrees F.
2. In a small sauce pan boil water and raisins together for 5 minutes. Cool slightly and stir in baking soda.  Set aside.
3. Cream together butter and sugar. Add in eggs and vanilla.  Combine well. Stir in raisins then add in dry ingredients.
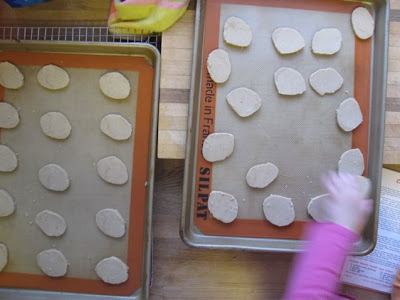
4. Drop by teaspoonfuls on a greased cookie sheet. Bake 12-15 minutes.

Things That Make Me Tired and Happy

This blog was only meant to be a hobby. A few recipes snuck in on my quilting blog, but I wasn't really thinking of going back to the food world in any way other than as a dedicated home cook and mother. And what was I thinking, a working mom maintaining two blogs in my copious amounts of free time? Apparently, I was thinking of the future without even knowing it.

After a year or so I started to think about writing, especially food writing, as a career option. Despite working in catering kitchens, running my own muffin company, and dropping out of journalism school it wasn't something I considered before. But the more I wrote here the more I wanted to write.

Insert some amazing mentors, loads of inspiration, and a serious lack of sleep and I am now a two job lady. A tired, but happy two job lady. I am now writing as Food Editor for What's Up and doing a little freelancing and teaching on the side. The day job stays, and I'll always be a mom, but my little hobby is turning into something exciting. And I couldn't be happier.

And when I'm happy (or sad or mad or glad) I like to bake. That's why I'm sharing this cookie recipe for you. The combo of chocolate and dried cherries is better than any chocolate box cherry, and guaranteed to fix any emotion you've got. (This recipe actually appears in the Spring issue of What's Up, along with more on Litterless Lunches.) So come on, celebrate with me!

Chocolate Oatmeal Cookies with Cherries
Makes 2 1/2 -3 dozen, depending on the size of the cookie

3/4 cup butter
1/2 cup white sugar
1/2 cup brown sugar
1 egg
1 tsp vanilla
1 cup flour
1 cup oats
1/4 cup cocoa, sifted
1 tsp baking soda
1/2 tsp salt
1 cup chocolate chips
1 cup dried cherries

1. Preheat your oven 350 degrees F. Grease your cookie sheet or line it with parchment paper.
2. Cream together butter and sugar for a few minutes. Add egg and vanilla, mix well.
3. Stir in the flour, cocoa, oats, baking soda, and salt. When it is all together as a dough add in the chocolate chips and cherries. 
4. Drop by teaspoonfuls on a prepared cookie sheet. Bake for 10-12 minutes until lightly firm around the edges. Let cool a few minutes on the cookie sheet, transfer to a wire rack, and let cool completely.

Backseat Adventure - Chopping Your Own Christmas Tree


You would think that after a trip where we got lost in the forest and ran out of gas on the way home in minus 30 I would be smart enough not to want to ever chop down my own Christmas tree ever again. You would think that after not checking the Junior Forest Warden's site and mistakenly assuming that the chopping spot was in the same location you've been to three times to discover it is an hour away we would take the girls and dogs back home. That would be a safe conclusion, but our annual Christmas tree chop is the one holiday tradition that I simply can’t do without.

The tradition is an inherited one from my husband’s family. They would load everyone into the classic Aspen Wagon and trek out to the forest on the last weekend before Christmas. Following a romp through the woods there was the inevitable debate over just the right tree. Was it full enough? Were the branches strong enough for all the lights and ornaments? And, most importantly, was it tall enough?

With more than a few years experience of tree chopping under my belt, and subsequent decorating, I can safely tell you that the answer to those questions in the forest always seem to be no, but they are a resounding yes once you get home.

Your first clue that the tree is just a bit too big is when the branches hang over the sides of the car when you strap it down and you are required to put a fluorescent orange strap to the end of the truck so the cars behind don’t hit it. Oversize Load.

Then you get it home. And it’s at least 6 feet too tall for your living room and you have to remove more than the side table to just find a spot for all the branches. So you cut off about half of what you brought home (from the bottom so you preserve the integral shape of the tree) and plunge into decorating. And if it’s my house you eat cookies and watch Will Ferrell in Elf while you do it.

Even if you do run out of gas and are left running from farm house to farm house to call the other party – hey, this was a few years before everyone had a cell phone – the exuberance of running through the forest on a single-minded mission is worth it. It is worth it for the long-standing and memorable family tradition. It is worth it for the freshest and most local tree you can get. And it is worth it for the hot chocolate and cookies that come at the end of the journey.

Aside from a few new and old favourites I tried the trendy Butterscotch cookies I've been eyeing in my original Five Rose Cookbook. To me, they were a perfect dough and a lovely fireside and snowsuit compliment to our day.

Butterscotch Cookies
(Adapted from Five Roses Flour Cookbook)

1/2 cup butter
1 cup brown sugar
1 egg
1/2 tsp vanilla
1 1/2 cup flour
1/4 tsp salt
1/2 tsp baking soda
1/4 tsp baking powder


1. Cream together butter and sugar until fluffy. Add egg and vanilla, mix well.
2. Sift together dry ingredients. Add to wet and mix well.
3. Roll into a log and chill in fridge 1 hour - overnight.
4. Preheat oven to 375 degrees F. Slice cookies from log roughly 1/4 inch thick.
5. Bake for 8-10 minutes.


In The Zone

This past week was the second one in the Kitchn's Kitchen Cure.  Our task this week was to organize kitchen equipment.  A rather large task in most cooks' kitchens.  For me that meant two drawers of utensils, a drawer with pots and lids, a plastic storage container drawer, my baking supplies spread round the kitchen, and one random corner cupboard filled with extra spices, a colander, our turkey frier pieces, and a bunch of other crap.

The first step was to pitch any and all duplicates.  After that I got rid of supplies I never use, like the old cookie sheets and pots that were broken or had no matching lid.  These went into the pile for Goodwill.

My second step was to take anything out of the kitchen that isn't used on a regular basis - springform pans, lobster eating utensils, and the aforementioned turkey frier accoutrements.  These all went to the cold storage section of the basement.  That has to be another organizational task before we frame the basement, but not for now.

After the purge and the subsequent clean it came time to reorganize things.  With PBS Kids on for The Monster and The Smilosaurus napping I took a step back to evaluate how I really use the kitchen.  Truly, I have zones that I work in: baking/prep, clean-up, stove, and serving.  Sure, the kitchen isn't designed this way and it takes some creative thinking, but my brain thinks it works.

The stove section includes the pots, cooking utensils, all our oils and spices on open shelves.   Clean-up includes the sink and recently installed dishwasher, with dish storage right above. The serving section is the countertop below the dish and pantry storage.  And by serving section I mean a space of uncluttered countertop closest to the table.

Finally, I created a baking station.  We bought some freestanding cabinetry a few months back. Smilosaurus started crawling and was getting into everything on our open storage units.  When the dishwasher went in we also lost some existing cabinetry.  These new units were great - large, sturdy, and full of storage potential.  But I just dumped stuff in them without really thinking about it.  This exercise forced me to take a step back and think about how to use them most effectively.  

It's no secret that I love to bake, as does The Monster.  So I took one unit, filled it with all the baking utensils and pantry ingredients, and parked the little chair she stands on next to it.  Now everything is in one spot.  We have a large countertop space, only interrupted with the knife block, cutting board, and the Kitchen Aid.  It is still my prep station, after all.  But we can mix, roll, cut, and generally making a mess and it all stays confined.  Hubby can be at the sink, Smilosaurus can crawl around, and none of us are falling on top of each other.

One of the changes I made was taking my baking pans from the tall cabinet by the sink.  It always made sense to have them there, standing up.  There was, however, this stupid hook thing hanging from under the counter.  Pans were constantly getting caught on it.  Yes, I could have taken it out, but that wasn't the only problem with the cupboard.  There was just too much stuff it and it wasn't easy for The Monster to get things from there.  Considering that our baking generally revolves around cookies and muffins, I needed a better option.

With the focused baking center I got that.  I took one drawer and put in all the well-used baking supplies.  And yes, the largest item - the cookie sheets are on top.  Who wants to pull out all the pie plates, measuring cups, loaf pans, and spoons to get to the cookies sheets?  So much easier now.  Of course, after all this I need to giving Hubby an orientation.

Well, PBS Kids is nearly over and its time to bake.  I think we are going to try oatmeal cookies with cranberries and the white chocolate chips I found while cleaning.