Sharp Knives, Boiling Oil (Weekend Reads)


Cooking with my kids is something I do almost daily. I started when they were toddlers, more or less as soon as they could stand beside me in the kitchen. We've included knives from the beginning, and so much more. I thought I was pretty great, cooking with them. I wrote about it many times, I spouted off advice to anyone who would listen. I thought I was a bit of a rock-star mom. Then I read Sharp Knives, Boiling Oil by Kim Foster.

If I am a rock star mom then Kim is the royal family, the Queen Mum. She makes potato chips from scratch and then volunteered to teach a preschool class in a Harlem public school how to cook. Then she lived to write about it.

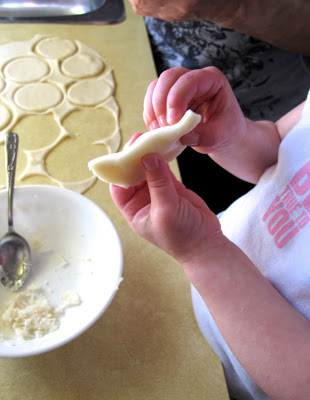
And by teaching these kids to cook I don't mean she set about to mix up some chocolate chip cookies or press the button on the food processor to make hummus. She made dumplings and spring rolls, pastry, cheese, stocks for soups, and all this after starting with meatballs. She is equal parts brave and insane.

I love her so much.

Sharp Knives, Boiling Oil is her self-published e-book documenting her year with the kids in the Harlem public school. But it also about documenting her changing relationship with her oldest daughter and her own relationship with cooking and enjoying food.

Kim is honest, funny to the point of downright hysterical, and speaks what the rest of us only think when it comes to personal criticism and relationships. I would kill to drink wine with her if only to hear her voice. And get all the stories that didn't make the book.

This book also includes recipes and some intensely personal admissions. I literally laughed and cried - what a cliche - through the book. But I did and so will you. And then you will want to make Chocolate Kumquat Spring Rolls and sit around the table with your family and a roast chicken. Because that is what Kim does, she makes cooking and people real, so real that you need to become a part of it too. Just like the kids she worked with did.

Friday Favourite - The Family

Seems rather silly, after the week the world is having, to post something about a favourite tool or gadget or pretty thing. I know we all need those things and they are a welcome distraction.

I also know that many of us create in times of stress and distress. We take comfort in our pretty things in progress and made. They give us hugs right back when we embrace their beauty, their imperfections. They are the shoulder when no other shoulder is available for the cry. They are the moments in time where peace - even when there was a struggle to make it - is readily available.

After last week and this one, both ups and downs I am sharing my ultimate  favourite thing today. My family. These 4 people make me smile more than anyone else can, while also infuriating me more than anyone else can. And I wouldn't trade them for the world. So, I'm holding them close.


We are likely to be found under a quilt. Send popcorn and scotch.

Announcing My Craftsy Class - Inset and Applique Circles by Machine

Do you remember my necklace inspired quilt? It is now finished and I can share it with you. I can also share with you the rather exciting reason I was making the quilt. 

I am thrilled to announce that I am now a Craftsy instructor! Have you heard about Craftsy? The fastest growing craft community on-line is full of courses from top instructors on everything from cake decorating to knitting, from costumes to quilting. My class - Inset and Applique Circles by Machine - is now available. Sign up now with a 25% discount!

The Craftsy platform is quite cool. Once you purchase the class it is available to you at any time forever. The HD video quality is great. They've filmed so many close-ups so you don't miss a thing. And you can take the classes from the comfort of your home - no lugging a machine across town or missing out because you can't find a local store or babysitter.

One of the best parts about a Craftsy class is the interactive forum. You can ask instructors questions, participate in class discussions with other students, and share your projects. I will be there the whole time, encouraging and helping you along the way. Stuck on a particular technique? You can ask for help and share the problem and we'll make sure you get it sorted.

And that necklace inspired quilt? It is a free pattern that comes with the class! Incorporating all the techniques learned in the class you can make this bold sampler. I've made it here with prints in colours pulled from the necklace itself and a mix of text prints for the background.

I do hope you'll join me over at Craftsy!


Austin Circle Sampler
76' by 96''


I've got more that I want to share about my Craftsy experience. Look for that in the coming weeks. It has been an incredible experience so far. Now that the class  - Inset and Applique Circles by Machine - is available I'm looking forward to seeing circles pop up everywhere!

Inset & Applique Circles by Machine

How Do You Finish Your Quilt Bindings?


Okay, I've got a question about binding. In between finishing up my daughter's quilt and some surfing I've been thinking about binding a lot the past few days. Plus, it was a nice distraction from the real world.

Machine Binding
- Can finish on the front or the back.
- Very fast.
- Clean look, but with a very visible seam.
- Great for quilts that live primarily for trunk shows.

Hand binding
- I actually enjoy hand finishing.
- It feels like a very personal touch on a quilt.
- More or less no seam line on a finished edge.
- It does take some time.


Personally, I've tried a few methods for finishing binding. My preference is for hand-finishing, but I've got nothing against a completely machine bound quilt. I do machine binding on quilts that are not gifts - class samples, trunk show quilts, even some book quilts. Hey, when faced with a looming deadline a girl does what a girl has to do!

Let me be clear. I do not feel guilty about machine binding, nor do I judge anyone's method for binding.


One thing I have noticed, however, is that for those who hand finish, stitches seem really far apart. I see these perfectly flat binding edges that are stitched down. It's one thing to not see any stitches because the quilter is just that good. And there are many, many techniques for hand stitching a binding. But people, you need to put a stitch closer than every half inch! When we quilt we call those big stitches in the quilting itself "toe catchers". On a binding I would call that a disaster. That is the place a quilt wears the most and having large, maybe loose stitches is asking for a finger to pull it out at the first chance it gets caught.

I'm perfectly willing to admit that I'm rather anal about my own hand finishing  - having my stitches come in between 1/4'' and 1/8'' apart. So yes, this takes me some time. But I've also never had a binding come loose. This is my most common method for finishing, but I've used the ladder stitch and been pleased with the results. And I recently tried switching up my needle in placement - through the binding instead of the quilt back and liked the look and stability of that.


What about you? How do you finish your bindings?