Tag Fabric

Tag Fabric + Improv Applique = Fun

Improv Applique Kona Cotton Tag Fabric Connecting Threads

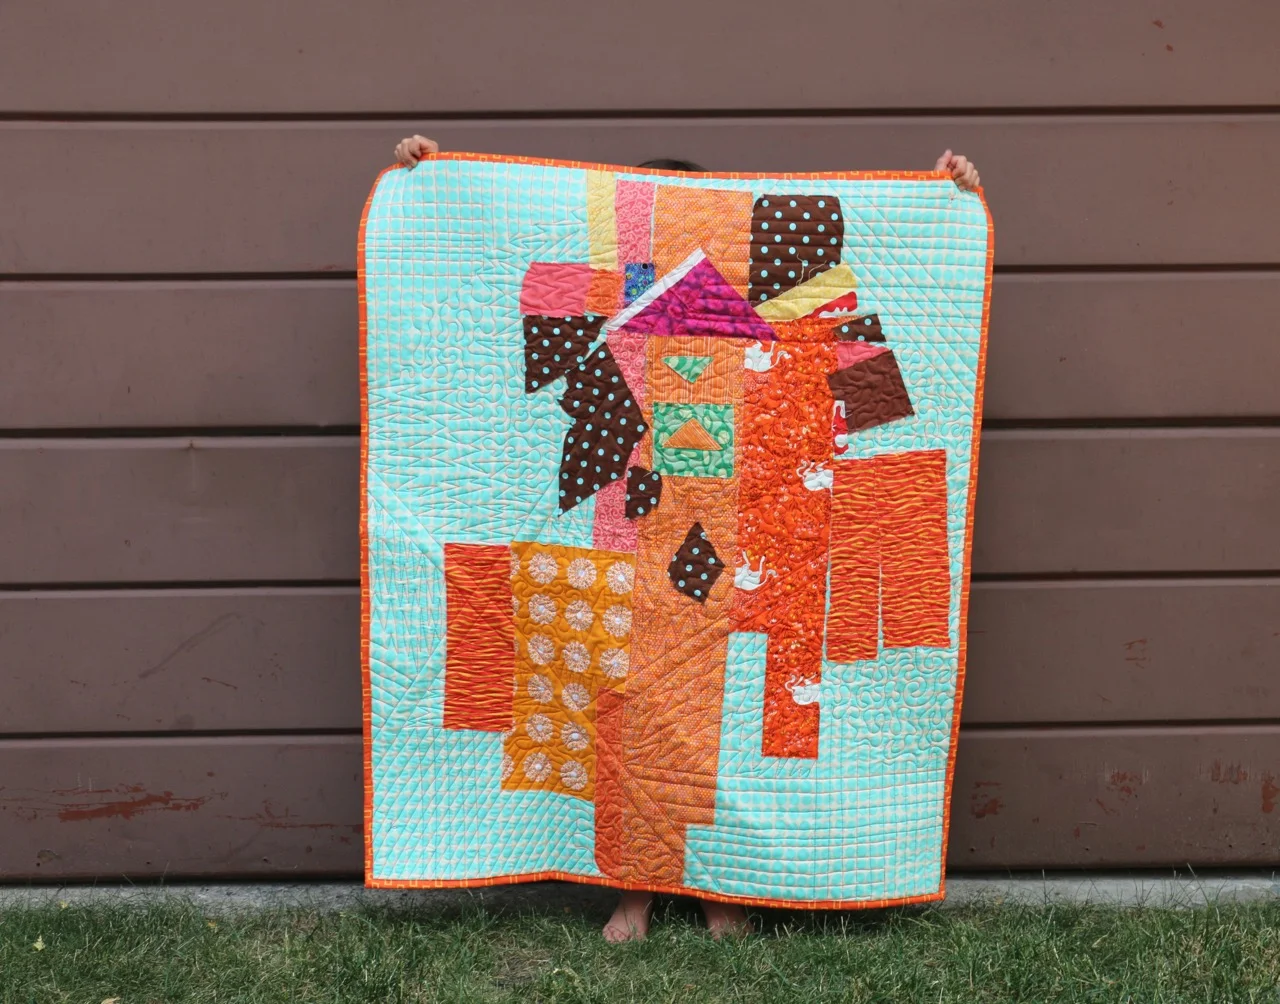
Seriously, I might just call this quilt Fun. It's nothing precious and doesn't take itself too seriously. It was just some play time that resulted in a finished quilt top - shocking!

I started with a bundle of mini charms of my Tag fabric. It was one left over from a guild trunk show where I gave them away. I also happened to have a bundle of Kona Cotton charm squares. One day they landed on the table together. It happened that that day I was sheduled to teach Improv Applique. So I grabbed to two bundles and they became friends. And well, you know me, I don't like mini quilts all that much so I couldn't very well just sew 20 charms together and call it a day. So the solids got attacked by the scissors too and then those got sewn to more Tag Fabric.

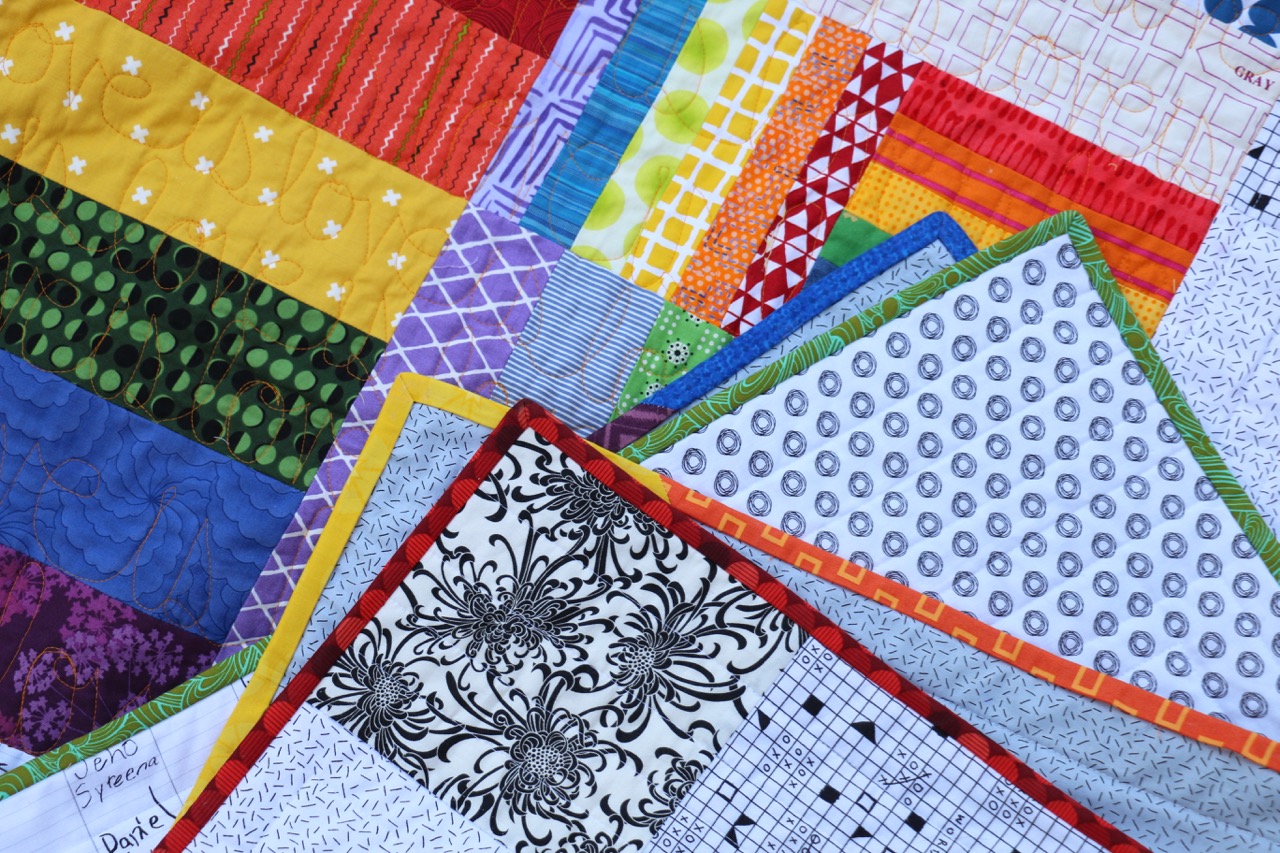
True confession: there was intense debate with my daughter about what shapes I should cut. She said the initial shapes I cut out of the mini charms reminded her of Alberta so the other ones should have been too. I argued that it would get too meta, even for me. So now we have gems/envelopes/whatever you might see. 

That's the joy of Improv Applique. Take some scissors to the fabric and see what happens!

Improv Applique Kona Cottons Tag Fabric

Pride Quilt - Now More Than Ever

Pride Quilt Quilts for Pulse

Pride Quilt

78'' x78''

Finished in time for the Pride Parade in Calgary. Finished to celebrate, to share, to show love, to be supportive, to care.

Every year we take our family to the Pride Parade. My kids love it, we love it. Sure, it is a lot of fun. There is dancing and candy and dogs and loads of free trinkets. But it is also about showing the kids that we love no matter what, we support with love, we respect, we talk. This quilt is no different. Wrap more love around the world.

(See the whole story behind the quilt.)

I worked hard to get this quilt done in time. It's been a while since I finished a quilt! But I really wanted to share it there so I worked feverishly. It's a small, tiny thing in the world but if it makes one person smile, shows one person they are not alone then it is worth it. If it reminds my kids that we look out for others, no matter what then it is worth it.

Statement quilts have a place in quilting, Pride has a place in our life.

Love Is Love

Now for the quilt details.

In the rainbow section I quilted is the words Love is Love is Love is Love over and over again. I did this on my domestic Bernina with an orange Aurifil thread. Let me tell you, it felt great to be stitching these words!

Pride Quilt Rainbow Quilt

The backing has another rainbow. I made one large rainbow that spreads across the back of the quilt, with some of my Tag fabric from Connecting Threads on either side. Simple and effective. And if you don't mind the words of the quilting being backwards you could use this quilt from either side.

Rainbow quilt binding

Finally, I finished off the quilt with a rainbow binding. All the colours wrapped around. It ties the center portion of the quilt together. 

There are rainbow quilts, and then there are Pride quilts.

What My Son Taught Me About Letting Go and Quiltmaking

Quilting With Kids

Here lies a very proud boy.

At some point last year my son asked me to teach him how to hand sew. We started with a basic running stitch and scraps in his favourite colour. Moments at a time - the attention span of a normal 4 year old boy - we stitched some triangles on squares and sewed them together. Then they sat. And sat. Then one day in the winter he asked to sew more. 

What ended up happening is he placed his one block on the design wall and started pulling scraps. He played and played and played. I loved watching it come to life one piece of fabric at a time. The next day it would change and again the day after that. In all honesty I thought it would stop there.

Boy, was I wrong.

Tips for Sewing With Kids

Soon he started pushing for us to turn those scraps on the wall into a quilt. Hmm... now how exactly was I going to do that? He was quite adamant that it literally be what he laid out. I thought about doing some planned improv - using his fabric and sizes but puzzling it together to make it a solid piece, a quilt top. Well, that, and some applique.

He shot me down. The boy knows nothing about quilting other than watching me but he knew exactly what he wanted. So we picked a background fabric and carefully, with his sisters' help, he transferred the design to the background fabric. Then he glued each piece down. Just so.

This is where I had to take some deep breaths. But, but, but... He picked a busy background fabric and it could be seen through some pieces... He didn't cut selvages off... All those raw edges... those unicorns are upside down...

You see, when I am teaching a new person - child or adult - I am a firm believer in basic, solid technique. Good 1/4'' seam allowances, pressing, colour work, squaring up. It's what I've done with teaching my own kids all along. Know the basics then riff all you want. But here was this boy completely making up his own process, his own rules. 

I thought about the articles you read where kids remember being told they aren't creative and they stop making art. About adults coming back to art after feeling shunned due to rule breaking. I thought about those things and didn't want to do that to my boy. I had to let go of constrictions and rules and supposed-to-dos. I had to embrace the way he saw the quilt and the process.

So I followed his instructions to the letter, even when they made me cringe a little as a quilter. Better to make a 'not proper' quilt than kill the spirit of a child. That made me feel better as a mother. When it came to finishing he made all the decisions - backing, thread colour, even the quilting pattern, and binding. He has the label even designed, but that's waiting for a picture with him and Daddy and the dog. 

Tag Fabric and Sewing With Kids, Quilts

We will make no mention of the fact that the quilt is effectively a baby sized quilt. He thinks it is perfect for Daddy. And so it is, son, so it is.  

Instructions - Tag plus The Maker's Panel Quilt Kit

Instructions Quilt Tag Fabric Makers Panel

Can you believe that when I designed the Maker's Panel as part of the Tag fabric collection this quilt did not occur to me? A bed quilt with the words "Make Every Single Day" right on them. How did that not occur to me? So, of course, when it did I HAD to make up a bed quilt for it. 

My sketchbook was filled with pages of ideas until I settled on this one. I wanted the panel and its instructions to be the centrepiece, obviously, but it needed to be framed just right. In addition to the panel there are only 3 other fabrics in the quilt top. Almost a record for me! And that yellow! I love a yellow quilt.

Makers Panel Tag Fabric Bed Quilt

Now you can get a complete kit for this quilt from Connecting Threads. All the panel and fabric you need (minus backing) plus the pattern. It is a quick and easy quilt, I promise. If you love the pattern but maybe want to change up the yellow you can still get the Makers Panel and the Tag fabric from Connecting Threads, pattern purchased separately

Perfect for the child moving in to their first big kid bed or the almost adult moving into their dorm room. Not only is it a perfect reminder for each of us to make the most of every day, but the perfect reminder to make your bed every day. 

Twin Quilt Bed Quilt Pattern

I promise I won't complain either if you decide to replace the Maker's Panel with your own block or panel too. I love to see creativity when it comes to my designs. Go ahead, make it your own

Shout out to my friend Kourtney with Agnes in August for lending me her home and wickedly adorable daughter for the photo shoot.