
Quilt Along Week 6 - Finishing Up

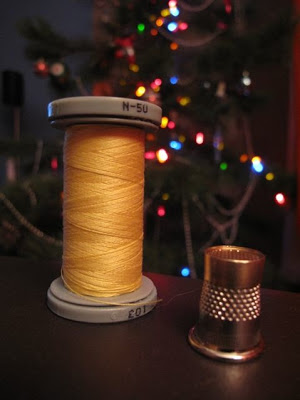
The finishing stitches are going into my second version of this wonky rail fence. I've been sitting by the still up Christmas tree (Happy Ukrainian Christmas everyone!) and stitching for a bit each evening. I love handstitching the bindings, but it seems to take me a long time. I see it as a good meditation at the end of the process.

Where are you at this point with the Quilt Along? When we last spoke we focused on assembling our blocks together into a completed top. All that's left are the finishing details, right? Yes, because making a back, basting, quilting, squaring up, and binding are just minor details! Well, they don't make for particularly exciting Quilt Along material.

Backing
Many of us default to a large print with similar colours to our front. I've been known to use the fabric that maybe inspired the quilt top's fabric choices but didn't make the final cut. Use what works for you. If you want more ideas, check out this great Flickr group on Quilt Backs.

Basting
I pin baste my quilts. If it is a small quilt I can manage on my kitchen floor. For larger quilts I use the boardroom tables at work. Never have I used a spray, they kind of scare me (more chemicals) but I've heard lots of people have success with them. To baste I simply tape my back taut on the tables, smooth out my batting on top, then lay my top over the batting. I pin every 3-4 inches. To close the pins I use my favourite tool: The Kwik Klip.

Quilting
So much can be said about quilting this design. I think you can emphasize the notion of line with grid quilting, lines in any direction, or in the ditch work. With both my quilts I've chosen to contrast the top's design with swirly or loopy quilting. It is a personal preference. Don't get too hung up on picking the perfect design, go with what you are comfortable with. This is a busy quilt and detailed quilting will likely get lost.

Squaring Up
Many, many of us skip this step - including me some times. But it really does help with your overall finish and is quite useful when you haven't cut everything on grain as is the case with this quilt. See my tutorial for how I do this. I do it after quilting but before attaching the binding. And cutting all the excess off the quilt is the step where I can see my quilt as a quilt, I love this step.

Binding
99% of the time I use a double fold binding. 100% of the time I attach each side individually and still mitre the corners. And it works everytime. Here is a tutorial on creating your bindings and one on attaching and finishing them.

So this is where I am at right now. Next week I will share with you the completed second quilt.

At this time I also want to announce a prize for those who participated with me. All you have to do is leave a comment on this post, or email me directly, and let me know where you are at in your quilt. Even if you've just picked out your fabrics but haven't make a single cut, I want to hear about it. If you have a blog or Flickr account, show me what you've done - I have to have some proof of progress. Besides, I would love to be able to share your work with others.

The prize will be 3 1/2 metre pieces of fabric - for stash or to start you on your own wonky rail fence - and some coordinating Presencia thread (my fave). I have some specific fabric in mind, but I am willing to cater to the winner's preferences (within reason). All you have to do is comment or send me an email by Tuesday January 12 at midnight MST.

Death By Food - Not Quite


The first time I invited Hubby over for Christmas Eve dinner he fully expected to die from food poisoning of the Ukrainian variety. That is, too much starchy, heavy food that includes grains that were either sickly sweet or mushy. And don't get me started on the pickled fish or sauerkraut and peas.  Death by Food, that's what Hubby called it.

Then he ate the meal, all 12 courses.  Ate would be an understatement.  Devoured is more like it. And he lived to tell the tale. Rather, he lived to tell me that I was crazy and that Christmas Eve dinner was a fantastically delicious meal.

Christmas Eve dinner always starts with Borscht - that classic red beet soup. The next few dishes are, well, something I can't stand (Kutia and Kasha), but the borscht always made me happy.  Except when we ate my Baba's soup and she put peas in it. In honour of Ukrainian Christmas on the 6th I wanted to share this recipe.

This recipe does not include peas.  Thank goodness for that.  Borscht is essentially a beet based vegetable soup.  You can add in other veggies, but I stick to adding beets and a few carrots to onions, celery, and garlic. A browse through any Ukrainian church cookbook will turn up a variety of recipes claiming to be Russian style or Dukhobor style.  I can't speak to them, but potatoes do not belong in borscht as far as my family is concerned. My Baba also often made hers with a ham bone, but to this is easily kept vegetarian by keeping the bone out.

Then there is the issue of exactly how to prepare your beets.  Pre-cooked versus raw in the soup? Chopped, grated, shredded, or sliced? I've settled on roasting, then peeling my beets. And I am firmly in the camp of slicing my beets into matchsticks. It provides a bit of toothiness to the soup, but not as much as you would get if you diced the beets. Yes, it takes longer, but it is a perfect Sunday morning activity with a three year old and a butter knife by your side.


Borscht (Just like my Baba's, minus the peas)
(8-10 cups)

3 pounds beets (6-8 medium)
1 medium onion
2 celery ribs
1 tbsp vegetable oil
4 medium carrots
8 cloves garlic, minced.
19 ounce can diced tomatoes
6 cups water/stock
ham bone (optional)
leaves from one bunch celery
1 tbsp chopped fresh dill

1. Heat oven to 350 degrees F.  Trim ends from beets, toss with a little bit of vegetable oil, salt, and pepper.  Roast in oven for 1 and 1/2 hours. Let cool completely.
2. Peel the beets. Julienne into 1/8 inch sticks, about 1-1.5 inches long. Do the same to the carrots. Set aside.
3. Finely dice the onion and celery ribs.  Saute with vegetable oil until soft.  Add in garlic and saute an additional 30 seconds. Stir in beets, carrots, tomatoes and their juice, and 6 cups water.  If using the ham bone add it now. Let simmer over low heat for about 2 hours, covered.
4. Turn off the heat, stir in the celery leaves and dill. Season well with salt and pepper. You can serve it immediately, but borscht benefits from sitting a day or two.
5.  To serve, garnish with a dollop of sour cream or creme fraiche.  Alternatively, drizzle with some heavy cream.

Footballs of Destiny

The oval quilt is finally finished and delivered.  Little James, the recipient, is only 2 months old now. And it wasn't for lack of excitement for the project, I loved making this quilt.  I was just slow.  The little guy with the biggest, juiciest cheeks ever now has it so I can share it here.

I made this quilt using the 6 minute circle technique courtesy of Dale Fleming. Sure, I've got my circle technique down and I'm pleased with it, but when I decided that I wanted to try ovals with this quilt I also decided that I didn't want them to be appliqued. Then I came across this quilt and knew I'd found the solution to my dilemma. I made a test block for an oval with great success.  In truth, the hardest part of this quilt was figured out how to make the two ovals.

The internet is a wonderful source of information.  One evening I searched and searched on how to draw an oval.  Hubby and I conferred and his woodworking knowledge paid off.  Then I remembered that I could simply draw a shape in Word. Two evenings of research and discussion, and five minutes on the laptop.

Each block really does take less than 10 minutes, so I was easily able to bang out a few blocks an evening.


The quilting on this is quite simple.  At first I had some grand plans, but they never seemed right with. Hubby pointed out (he really did contribute a lot of this quilt) that the ovals already popped and it probably wasn't necessary to quilt them so the stood out more. Again, the internet saved me.  Thanks to Wanda and Exuberant Color I saw this technique and found my solution.  I didn't make my lines as wavy as hers, but I love the outcome. And it was fast!

Usually I put a hanging sleeve on the back of my baby quilts.  Not everyone wants the quilt to be used on a daily basis, but they still want to see it. My girlfriend's husband did this with the last quilt I gave them. I assumed that would happen again, but my girlfriend is hoping that her little man adopts the quilt as his lovey.  I wish her luck, even my girls have chosen crocheted blankets over the quilts Mama made.

Don't you love that Mingle fabric on the back?

Another Hubby contribution to this quilt is the name.  Yes, it is called Footballs of Destiny. So, so cheesy, but we love it. The label is printed on Printed Treasures sheets and I tried to double layer the oval.  Not as good as the ovals on the front, but it still works.

The binding is a lovely Lecien.

I am so happy to share this quit with James and his family. They are dear friends and I'm looking forward to seeing the little guy grow.


Champagne and Truffles


Today's post brought to you by fun things to do to impress others. On tap today is sabering champagne bottles open. Now there is a way to show off at your New Year's Eve event.  Just promise me that you will do it while still sober.

Take one of your bottles of champagne - preferably a cheaper one, just in case - and get it cold. Almost freezing.  So, if you are here in Alberta this means you can just leave it outside for an hour or so. Then you can take one of your solid kitchen knives if you don't have your own sword handy.


With your cold bottle in hand and look for the seam in the glass.  Your target for your knife/sword is just below the lip of the bottle right at the seam. Remove the foil, but you canleave the wire on. With a firm, but not heavy hand slide your blade against the bottom of the lip of the bottle.  Don't hack or whack it. With a really cold bottle the right pressure will simply cause the entire top of the bottle to pop off.  With the pressure of the bubbles no glass falls back into the bottle.  Straight to the enjoyment.


Traditionally, this was done with a sword and on horseback. In the modern world I am thankful for truffled popcorn and a dishtowel to catch the popped cork. We won't be sabering tonight, but we will enjoy bubbly with friends. Thanks for the folks at Sumac Ridge for the demo and opportunity to impress.  And for the champagne/popcorn combo. 

Happy New Year!