To review, I use a double fold binding. Simply put, I iron a strip of fabric in half - wrong sides together - sew it down by machine on the raw edge, flip it over the edge of the sandwiched quilt, and stitch it down by hand through the fold. I do not do a continuous binding. Rather, I attach each side individually and mitre each corner once all the binding is attached.
In this tutorial I will show you how to attach the binding, especially at the corners, mitre the corners, handstitch the binding, and finish the corners and binding. Sit back and get a thimble, this one's picture heavy.
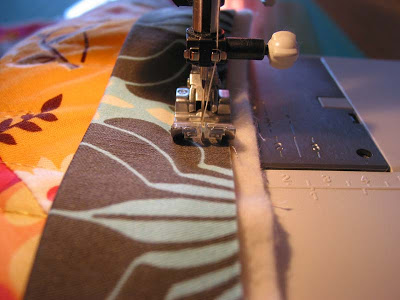
1. Sew down your binding, from corner to corner. Overhang the binding by at least an inch at the top and bottom - check your length before you start sewing. Line up the raw edge of the binding with the edge of the quilt top. Start sewing 1/4 inch from the top edge, thus leaving 1/4 not sewn down. Backstitch for a stitch or two. Using a walking foot or an even feed (like my Pfaff has) sew down with a straight stitch, using a scant quarter inch seam allowance. I don't pin the binding before I sew, preferring to hold it down and line it up as I go.
Stop your seam 1/4 inch from the bottom of the quilt top edge.
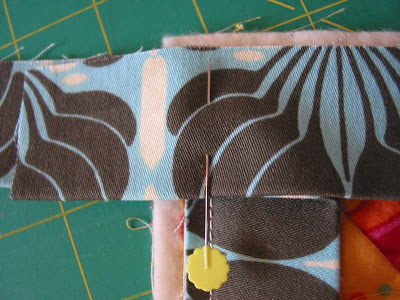
2. Go around the quilt, sewing all the bindings down. To attach a new piece, take the already attached piece and fold back the end at a 45 degree angle.
Pin the new piece to be attached, with overhang, on top of the folded back piece. I like to put the pin in at 1/4 inch from the edge so I know where to start sewing.
Start sewing 1/4 inch from the top and 1/4 inch from the edge. Sew down the binding as you did your first piece.
Finish the final seam the same way you started. Fold the underneath piece back at a 45 degree angle and sew to 1/4 of the edge.

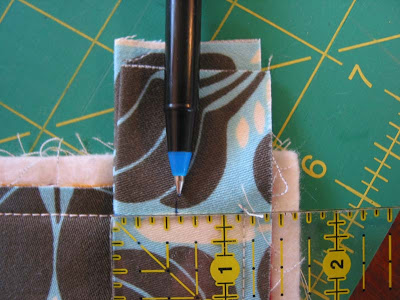
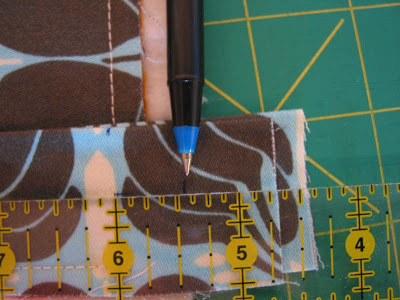
3. Mitre the corners. Measure from the folded edge of the binding to the seam. This measure will change from quilt to quilt depending on the thickness of your fabric and how large you cut it. Divide that measurement in half and make a mark. Don't worry about what you mark it with because these marks won't show. Well, don't use black felt on a light coloured fabric, but otherwise don't worry about it.
From that mark measure the same distance straight up. By up I mean perpendicular from that first mark towards the dangling ends of your binding strips. Mark this spot as well. For example, my overall length was 9/8 of an inch. I made the first mark at just over 1/2 inch. From that mark I measured and made a mark at just over 1/2 inch up.
Now, draw a line from the folded edge of the binding, in line with the seam, to the second mark you made and back to the seam. It should look like a right angle triangle.
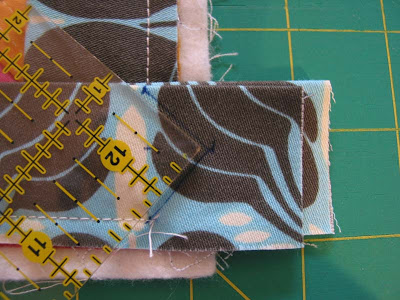
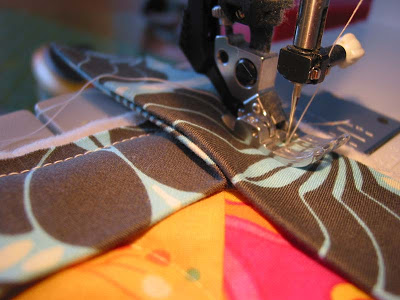
This is now your sewing line. Stitch on this line, backstitching for a stitch or two on each end. When you get to the point of the triangle stop with your needle down, lift up your pressure foot, and pivot the quilt. Be sure to fold back the quilt itself so you don't sew through that.

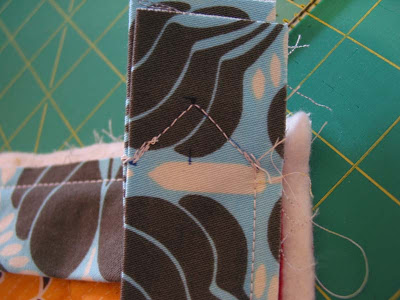
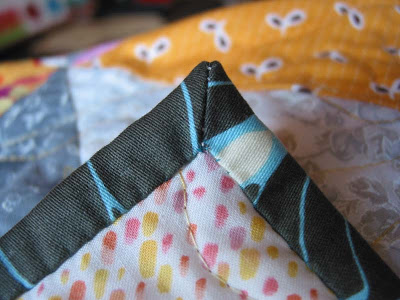
This is what it looks like when you're done. Repeat with all four corners.
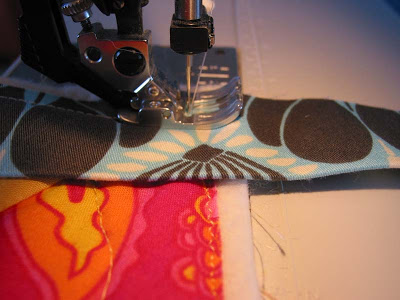
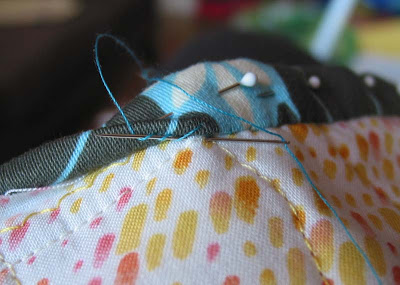
4. Handstitch the binding down. First, thread your needle.
This is the best way to do it, leaving you with a single strand thread on your needle. The goal of your first stitch is to hide the knot underneath the binding. I make the stitch inside the seam line of my binding - the straight stitch in the picture below. (The zig zag stitch is from
squaring up the quilt).
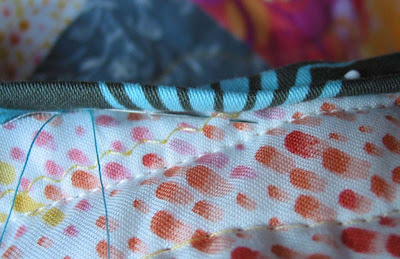
Pull the stitch through the fold of your binding. First stitch done!

It goes without saying that you should pin your binding down. Do not pin the whole way around, rather pin a few inches at a time. Move the pins as you go.
Here is where it might get confusing for some. I do my hand stitching (and hand applique) backwards from most. I sew right to left. I was taught left to right, but it never felt natural to me. If you are having troubles with handstitching try switching directions and see if that helps.
Put your needle in the backing fabric, at an angle, just catching a few batting fibres. Come out in the fold of the binding. I keep my stitches small, so they are about 3 millimetres apart. Start the next stitch directly below where your previous stitch ended. In other words, right below where the thread lies.
Continue around the quilt, moving the pins as you go. I like to have at least an inch pinned down in front of where I am.
5. Sew down the corners. First, trim the excess fabric. I tend to trim to about 1/8 of an inch seam allowance. You want to minimize bulk in the corner.
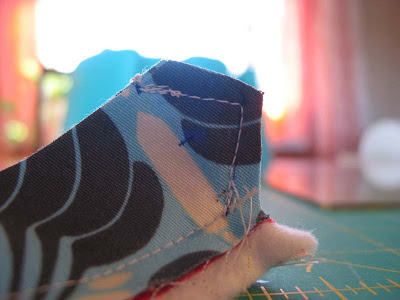
Now you need to turn the corner right side out. I take my small applique scissors, but anything with a blunt point will work, like a pencil or a stick. Place it in the point of the corner and push it through, turning the fabric right side out. Use your turning object to ensure all the fabric is flat and the corner is as sharp as you can make it.
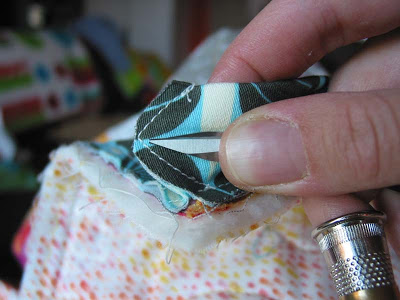
Pin the corner down and sew down as you've done the rest of the binding. I put a few extra stitches right in the corner.
 6. Last stitch. For the last stitch - and every time you finish a length of thread - this is what to do. It hides your knot yet is quite secure.
Start your stitch as normal. Before you pull it through wrap the thread around the tip three times.
Pull the needle through, holding the thread against the binding fold. The knot should end up snug against the fold. Clip the thread right next to the knot and it will end up being virtually invisible.
And you're done! Personally, I find putting to the binding quite satisfying. The quilt will still need a label, but it is effectively finished at this point. Beyond the relief of finishing a project, it is about realizing the vision I've had and the excitement of passing it on or snuggling under it that night.