The end of summer always meant two things in my house when growing up. One, a trip to Saskatchewan to visit grandparents, the farm, and pick up more food than we could possibly need. And two, canning and freezing to deal with all that food.
My parents are both Ukrainian. That means food is central to our lives, as is the garden where it is grown. Now, as city kids and parents ourselves we still garden, but it isn’t on the same scale. My dad’s parents had a one acre garden. It was lovingly handwatered daily with pails filled from the slough at the front of the property. My garden is in containers so the dogs don’t dig it up.
Poppies lined the edges of my grandparents’ garden, and yes, my Baba dried the poppy seeds every year. The sloughs were on the front of the property, split by a long driveway. At the end of the driveway was the yard, with the house on the West side, and the original summer house right at the back. These were tiny houses, built by hand in the 50s and 60s. Originally they had no running water, no heat other than the wood stove, and no electricity. Over time my dad added a furnace, plumbing, and electricity to the main house. It made it a lot more enjoyable to visit, as kids.
On the West side of the yard the house essentially stood in the middle of the garden. All the vegetables were to the South, strawberries to the West, and raspberries and the clothesline to the North. On the East side of the driveway was another strawberry patch, a small grove of trees, and the corn patch. Finally, at the back of the property was another, larger grove of trees that had a bench and some old wood swings. It was a great place of imagination for us.
Baba and Dido grew the aforementioned strawberries, corn, raspberries, and poppies. They also grew onions, potatoes, cauliflower, broccoli, lettuce, dill, tomatoes, beets, peas, beans, cucumbers, garlic, and more cabbage than 5 families could possible ever eat – even if you make cabbage rolls almost weekly.
The end of summer trip always meant harvesting the garden, setting things up to dry in the attic or the cellar, and loading up coolers and boxes with food. Like all good Babas mine thought we were in perpetual danger of starving to death. As such we were sent home with a couple of coolers full of frozen strawberries, raspberries, peas, beans, and wild mushrooms. This was in addition to the jars and jars of pickles, beets, sauerkraut, head cheese, cherries, and juice. I can’t forget the bags of cucumbers, onions, and potatoes. Finally, there was the cabbage. Oh so much cabbage. An unbelievable amount of cabbage. The heads were always enormous and we never left with less than a dozen, more if my parents had made arrangements with friends to give it away.
The entire trip took place over a weekend and required two vehicles. Our big boat of a car carried the family and some stuff. And my dad would bring his truck so he could take all the food home. As we got older not all of the family made the trip. We also got smarter and only took one vehicle so there was less to bring home. “Sorry Baba, there just isn’t room,” we would slyly tell her to avoid all the cabbage.
Once we got home everything had to be dealt with. That meant canning and freezing. This was added to the canning my mom wanted to do of the Okanagan fruit. We always had dozens of jars of peaches and pears to provide summer treats all winter. And don’t forget the jam – strawberry, raspberry, chokecherry, and crabapple.
Now that all of us kids are older, and Baba and Dido’s garden is no more, we rely heavily on the farmer’s markets. My parents still can a lot but they’ve strayed from their Ukrainian roots. Aside from pickles the most requested item is my Dad’s salsa.
I’ll admit, I still defer to their efforts most of the time. And now, with my Monster underfoot it is a bit harder to find enough time to get the job done. That being said, I was looking at the shelves in the basement and decided I needed to take advantage of the last of the peaches this summer. I will be enjoying summer goodness again this winter.
 Homemade Canned Peaches
I like to clean my kitchen counters before I start. That way if I put something down without thinking about it I don’t have to worry about re-cleaning it. Anal, I know. Then I gather all my supplies and wash everything with hot-as-I-can-stand-it, soapy water.
Supplies:
Jars (size is a personal choice)
Rings and new lids, or rings with glass lids and rubber sealers.
Canner and tongs for placing and removing jars
Sharp knife
Wide mouth funnel
Dry and wet measuring cup
Large bowl, small bowl
Sharp paring knife
Large, heavy pot
Clean dishtowel
Clean rag (I found a baby washcloth to work best)
Ingredients:
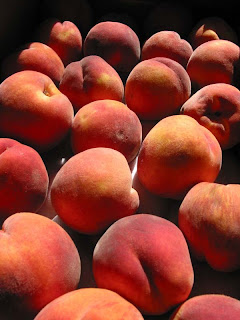
Just rip or slightly under-ripe peaches
Sugar
Water
Clean jars in hot soapy water, then let them sit in just boiled water for 5-10 minutes. Drain and dry the outsides with a clean cloth. Do the same things with the rings.
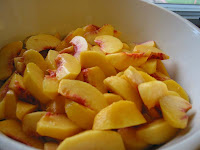
Peel and cut peaches. Reserving pits. (some people blanch them but I prefer to slice and peel as I go – I would rather have knife marks then the mushy edges of blanched peaches)
Put the lids in a bowl of just boiled water. Let sit until ready to use.
Fill jars with sliced peaches, almost all the way to the top. Make sure to include a pit or two in each one.
Using a ratio of 4 cups water to 1 cup sugar make a simple syrup. Boil water in large, heavy pot with sugar until sugar is dissolved. How much you need will depend on how many jars you are using. Plan on at least 2 cups of syrup for every 1 litre jar full with peaches.
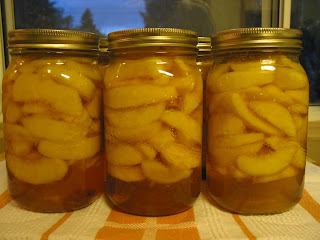
Fill the jars full of peaches with syrup, leaving an inch from the top empty.
Using tongs, place the lids on jars and seal with rings.
Place in canner with hot, almost boiling water. Bring to a boil. Process in a canner for 12-15 minutes, starting the timing once the water has come to a boil.
Remove and let rest on a thick cloth. You might hear popping over the next 24 hours as the jars seal. Refrigerate and use ones that don’t seal right away.
If you want an offical recipe, try
Bernardin for peaches and many other canning recipes.
Happy Tuesday.


 There were a couple more food adventures thrown in there. We drove down a very twisty road - from spring to winter - to pick up some aged Gouda and Balkan yoghurt at
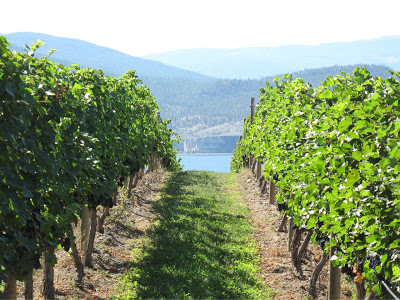
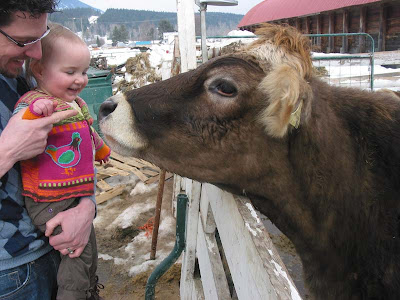
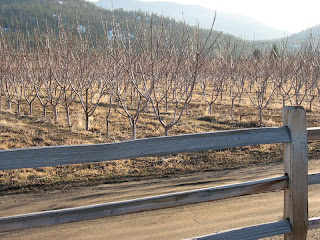 If you ever visit this neck of the woods you will be overwhelmed by vineyards, orchards, and the lake amidst the mountains. We spent our trip overwhelmed by the adventures of Grandpa and the Monster. It's all about the rocking chair.


