Stand Back


These are the pumpkins we carved on the weekend. And the costumes. The inherent laziness of my efforts at costumes for the kids aside, I'm here today to talk about something important. So begins my rant against helicopter parenting and nearly as bad, helicopter crafting.

I want to start my clarifying I am not a helicopter parent. My kids run wild at the park, too wild for many, many parents who either feel free to admonish me with looks or not so gentle reminders that my tiny 2 year old is hanging from the monkey bars or standing 20 feet up at the playground. My kids are allowed to scream, run, and explore without me following behind. My kids are encouraged and even pushed to try new things, ask questions, and challenge (even when that creates a challenge for us). My kids are learning that if they want something they have to work for it, or if they ask that they answer is quite possibly no and that is okay. My kids do get punished when they break rules, and yes, there are a number of basic rules to follow. Most importantly, my kids are allowed to be kids.

We all have our parenting styles/philosophies. I have friends who are close to being helicopter parents and they are still very good parents. I have friends even more lax than us, or more strict. I'm not judging anyone.

But this weekend I had to stand back and judge myself. We were carving pumpkins and making the girls' costumes. The Monster decided that she was going as a traffic light and her sister would be the car she would make stop. (Oh, that is definite fodder for therapy later in life.) Up first was the pumpkins.


First, there was the insistence on 5 pumpkins and no less. They were cheap and really they are the only decorations I do for Halloween, so I let her get that one. Next we had to decide what kid of face each one would have. The first one was for a surprised face. No problem. I carved an O for a mouth, eyebrows, and rather bad eyes. After that I surveyed the girls for their direction on the second one.

(See what I'm doing there? Giving them choices on things I don't give a damn about but will matter to them. All part of my parenting philosophy so I can hold that against them when it comes to a choice I actually care about.)

So there I am carving a mean face on pumpkin number 2 when The Monster discovers the Sharpie. She quickly proceeds to draw all over the pumpkin. Hair, another set of eyebrows, freckles, words, and random shapes. My instinct was to snap and give her hell for wrecking the pumpkin. In only a few seconds though, I realized that I was about to lose it over a pumpkin. A pumpkin with a life span of a few days on my front steps.

Why shouldn't she colour it with a Sharpie? Why shouldn't it take on its own life in her hands? She isn't allowed to use the knife, so what else is there for her in pumpkin carving other than facial directions?

Another Sharpie later, a very serious discussion about what can and cannot be coloured with said Sharpie, and I let them go to town on the pumpkins. And we were all happier when I stood back.

By the time we came to costumes I was feeling strong. No problem, I can stand back and let them decorate things. Yeah, not so easy. I fought every instinct to step in and help them paint Smilosaurus' car. Doesn't it need windows? Or complete coverage in one colour? So many times my hands reached out to take a brush. In the end I resorted to sitting on them when not adding paint to the palette. Was I happy with the car? It certainly wasn't what I wanted or expected, but they were happy in the process of creating and the little one was ecstatic to wear it. That makes me happy.


One final challenge came with the traffic light costume. Just felt glued, then sewn, to a yellow t-shirt. Nothing fancy, until the addition of LED lights. And, according to the Monster, not quite finished until she added some completely random marks with a black pen. I'll admit, there was a very sharp name-calling and a lot of internal frustration. Then she said she loved it and thought it was perfect now. Who am I to argue with that?

As parents we need to stand back some time to let our kids be kids, let the mess or the tantrum happen, or let them dress themselves even when they look like a hot mess. As crafters and artists we need to stand back some times to let the piece be or speak. As teachers we need to stand back and let the students' voices ring through. And some times we need to stand back and shut the hell up.

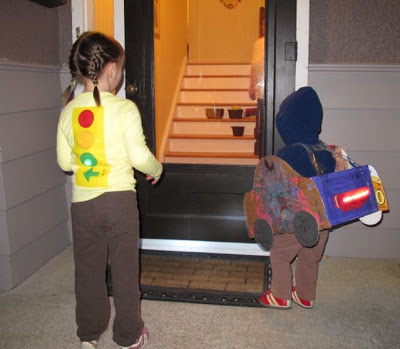
Go! And Stop

"Can I have some candy? I don't care, I'm going to pull down your underwear!"

"Trick or Treat. Smell my feet. Give me something good to eat. Not too big, not too small. Just the size of Montreal!"

These and the the screams of More Candy! More Candy! are echoing in my ear. The girls are off, speeding through the neighbourhod as fast as their costumes and legs will let them, trick-or-treating their hearts out. It may seem a little young at 2 and 4 to let them go. If you've got a problem with that, keep it to yourself.

Besides, who do you think gets all the candy?

Before I sent them out they were fed with a proper dinner. I'd love to say it was quick but, despite their impatience they still spent a half hour chatting and practicing their Halloween chants. This wasn't the night for a huge Sunday dinner. Roast, potatoes, and cake for dessert? Not going to hold the attention of my girls. Or frankly me, after a 10 day stint on single parenting.

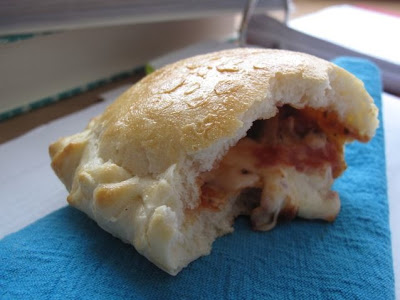
Instead, I pulled out a weekday favourite: calzones. With a puffy, light dough that comes together quickly I can make dinner in about 20 minutes of active effort. It only needs an hour to rise and about 10 minutes to bake. The hardest part is waiting for them to cool so you don't burn your tongue on the fillings.

The recipe was developed for an article on after-school snacks for What's Up Families. Since then it's become our go-to pizza crust recipe in addition to the calzones. For pizza, stretch out the dough, top with sauce, tomato marmalade, garlic oil, or pesto and all your favourite toppings.

Calzones
Makes 8 hearty calzones


Fillings
Tomato Sauce
Shredded Mozzarella Cheese
Toppings - peppers, ham, mushrooms, artichoke hearts, fresh tomatoes, onions, olives, pepperoni

1 egg, beaten

1. Preheat oven to 500 degrees F. One section at a time roll into a rectangle about 8 inches by 6 inches. Cut in half at the 4 inch mark.
2. Top each half with a tablespoon of tomato sauce, leaving a half inch without sauce around all the edges. Add a half cup of shredded cheese and toppings of choice.
3. Fold each calzone in half, pinching and rolling over the edges to seal. Brush each calzone with the beaten egg.
4. Bake for 10 minutes. Let cool completely before eating as fillings will be very, very hot.

Doug's Frog Shirt Quilt


Doug's Frog Shirt Quilt
Approximately Twin Sized
August 2004
Stack and Slash, Fusible Applique - Original Design

Considering that I shared my Dad's quilt (Roots) during the last Blogger's Quilt Festival it only seemed appropriate that I share my Father-in-Law's quilt this time around. Sadly, my Father-in-law, Doug, never actually saw this quilt. He was diagnosed with pancreatic cancer and 6 weeks later passed away.

As soon as he was diagnosed I pulled the fabric. It was all inspired by t-shirt he had. This pretty ugly batik t-shirt, known as the Frog Shirt. That t-shirt was, as far as I know, the only source of tension between he and I. My teasing was a bit much, but we got past it quickly. So, in homage to that shirt and him I took it as my inspiration.

The top was pieced with the Stack and Slash concept in rectangular blocks. I picked the black sashing for a few reasons. Number 1, the frog shirt was black. Number 2, it went well with the rest of the fabrics, setting them off nicely. And Number 3, it was kind of symbolic. Cancer can be a sentence - as it was for him - so it is rather like bars holding in the chaos of cancer in the blocks.

The frogs, of course, needed to be on there. Each frog represents his wife, my amazing Mother-in-Law, and their three kids. Even the grandkids, of which there were only two at the time, are given their place on the backs of the frogs.

The quilting was an all-over stipple with random fern and plant motifs added in. I used a Sulky variegated on my old 1960s Brother machine.

Sadly, I never got the chance to finish the quilt before he passed. Then the overwhelming world of grief took away my quilting desires. But in time for what would have been his birthday that year I finished the quilt and presented it to the family. Initially I'd hoped it could roam the family and provide some comfort where necessary, but it has always stayed with my Mother-in-Law. And there is nothing wrong with that.

Doug has been gone for over 6 years now and I still miss him terribly. He would have adored his new granddaughters and been proud of his son. He still lives on in his family and in the memories. Those never go away. Neither will the quilt, which I pet every time I visit my Mother-in-Law.

  • Amy's Creative Side - Blogger's Quilt Festival

Hot Cocoa for Brett

Not surprisingly, it snowed in Alberta this week. Saskatchewan too. (Hubby is snowed in there right now.) For all the grumbling of my mom and mother-in-law, it is actually expected. I remember more Halloween's with snow than without.

Snow means snowsuits, snow forts, snowball fights, wet mittens, and hot cocoa upon re-entry to the centrally heated house. Most kids these days are quite used to the package of hot chocolate, full of sugar and preservatives. Well, they don't know the last part, but they are used to the packaged taste.

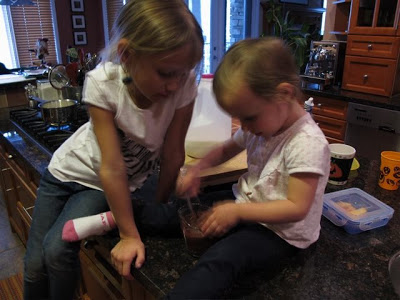
I was watching some of my nephews and niece yesterday. All five kids ventured into the snow as soon as school was out. When the four youngest came in I set to making them a little treat. It was all for them, I swear. My 6 year old niece and Smilosaurus were keen on helping. I hope my brother doesn't mind them sitting on the counter. But they were quite into the whole process. I'm writing this post so my niece has the recipe for cocoa, she was trying really hard to memorize it yesterday.

Hot Cocoa - The Basics
1 serving

1 cup milk
1 tbsp cocoa
1 tbsp sugar
1/2 tsp vanilla

1. Heat the milk in a pot on the stove (ask Mom or Dad to help if Auntie isn't around)
2. In a small bowl, stir together the cocoa and sugar. Add a few tablespoons of warm milk. Stir well to make a runny paste.
3. Stir the cocoa and sugar paste into the hot milk. Add vanilla. Serve with marshmallows.

If you want to make this a little fancy, try some garam masala, chai spices, peppermint extract, orange zest, or raspberry syrup. And definitely add marshmallows. Personally, I am a huge fan of these ones from Aimee.