
"quilts"

Christmas and Valentine's in One

Valentine's Day is a non-event in our house. Every few years Hubby will surprise me with flowers or a nice dinner. It is truly a surprise as he is quite vocal about his disdain for the Hallmark holiday. He has quite a bit of disdain for a forced pretense of romance. I say that's fine, if you are romantic at other times. Yeah, he isn't all that romantic. But he is a good husband and a wonderful man. I don't need flowers from him to show me that.
I did, however, buy myself a few treats yesterday...


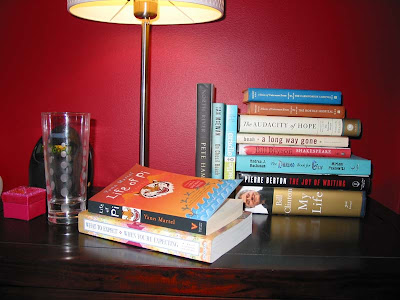
This is my nightstand. These are books I am currently reading, the ones I bought yesterday (standing up), ones in the queue, and the ones I've finished recently. Too much selection. It all depends on the mood I am in. Should I mention the dozen or so that are sitting in the nightstand too? At least if I end up on bed rest again I will have no shortage of books to keep me entertained.


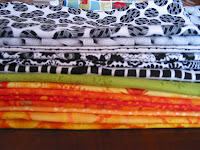
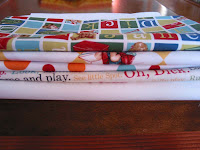
And I went out this morning and spent some of my Christmas gift certificates at the quilt store near me. The Dick and Jane fabric is intended for a bag for the Monster. She is really enjoying the books lately. And she needs a good tote to take her lunch and Hercules, the blanket, to and from daycare. The pile of brights and black and whites is for a baby quilt - for Version 2.0 to arrive in May. I have a fabulous idea and if I start now I might get something done.


Now, to live up to my name and maybe get the binding on a quilt while the Monster sleeps. The house is a mess, the dishes need to be done - nah, I'd rather sip tea and play wit fabric. Or I could sleep too...

Circle Tutorial

In case you hadn't noticed, I have a bit of a fixation with circles. In the last two years I’ve made 4 circle quilts. In that time I’ve figured out an easy, reliable way to make even circles – circles that are actually round, that are easy to appliqué, and that don’t have points or tucks.

To get to this point I’ve tried a number of methods: dryer sheets, cardboard templates, plastic templates, aluminum foil, and fusible appliqué. I was never satisfied with any of these. It was either difficult to keep the fabric in place when drawing up the circle (with cardboard and plastic templates), the circles had points or tucks (with all methods but fusible appliqué, determining the center of the circle wasn’t always easy, or you had to use a satin or decorative stitch to finish things off neatly (with fusible appliqué).

There is nothing wrong with any of these methods and I’ve heard that people have success with them, but I sure wasn’t one of them.
Here is my nearly full proof method for creating and attaching perfect circles. This method works for machine or hand appliqué.

Supplies:
Freezer paper
Compass (remember these from elementary school?)
Pen
Iron and ironing board
Fabric
Pins
Sewing machine or hand appliqué supplies (needles and thread)

Circle basics:
The diameter of the circle is the distance from one side to the other. This is how big your circle is.
The radius is half the diameter, or the distance from the center to any one point on the edge.
The circumference is measurement of the outside edge of the circle.

Creating the Circle

Determine the size of circle you want.

1. Using the compass, draw a circle the desired size on the rough side of the freezer paper. Make sure the point of the circle is noticeable or re-mark it with a pen.


2. Cut out the circle right on the drawn line. Take care to use long, even cuts in order to minimize any sharp edges or points on the drawn circle. This is your freezer paper template.
3. Place your circle fabric wrong side up on an ironing board. Ensuring that you have roughly a ½ inch seam allowance, iron the freezer paper smooth side down to the fabric.
4. Cut out the circle of fabric, with the freezer paper template as a guide, with roughly a ½ inch seam allowance.

I use my machine for the next step because it is faster, but this can also be easily done by hand. If you do this step by hand, try to take small basting stitches. The larger your stitch length, by hand, the greater the chance for points on the finished edge.
5. Sew a basting stitch about a ¼ inch from the edge of the freezer paper template all the way around the circle. Leave the ends of your thread a few inches long. Do not backstitch or sew over the ends, you want these free.
6. Gently tug on the loose ends of thread. Short tugs seem to work better. This will draw your fabric edges over the freezer paper template, creating a turned over edge. You may have to work the gather a little, but provided you don’t pull sharply or too hard the threads will hold and you will get a pretty smooth edge.

7. Steam iron the gathered edge. Some people may choose to use starch at this time, but I’ll admit I never have. A hot iron does a good job of holding the edge well.

If you are attaching the circle right away, the freezer paper template can be removed after the following step. If you are waiting to attach the circle, keep the freezer paper attached until ready to use.

Attaching the Circle

The following steps apply if you are attaching the circle in the center of a square block or precise design. If you are doing this as part of a relatively random design, then simply remove the freezer paper prior to appliqué, pin, and sew.

1. Place a pin through the center of the freezer paper template (fabric and template should still be attached). This provides an extra mark for the center of the circle.

2. Remove pin and freezer paper, taking care not to rip the paper. If pin mark is still visible in fabric, replace pin. If it is not visible, then place template over circle to mark center again. Pull template off, leaving the pin in place (it’s okay if the template rips at this time, it’s easy to make more).
3. Mark the center of your block or design (where the center of the circle will go.


4. Place the circle, with the pin still marking the center, directly over the marked spot. Line up the mark and center point, then complete pinning.
5. Appliqué as desired.

I use my machine to appliqué most of the time – a small blanket stitch in a coordinating thread. You could hand appliqué, use invisible thread, or do a decorative stitch. I would not recommend a satin stitch at this point – you have a seam allowance so there would be a lot of fabric under the stitching.

Circle Mama

Sometimes you just need to take the time for yourself. And sometimes you need to take the time to go to the dentist. I did both today. With a doctor's appointment, a date with dentist for a crown, and the impending childcare crisis I took the day off work. All those things dealt with (minus an appropriate daycare, still), I did sleep in a little, grab a workout, and finish a quilt.

I call this one 'Circle Mama'. It is my plan to use this as a class sample - once I convince a store to let me teach! I tried all manners of creating and attaching the circles, including templates, fusing, dryer sheets, aluminum foil and a hot iron, and on and on. There is a clear winner, in my mind. Expect a tutorial soon.

Finishing this was a good end to the weekend. Okay, it was a few days after the weekend and I did work those two days, but in my mind this was a mini weekend day. The real weekend was wonderful too. Hubby came home on Friday night from two weeks working up North. That meant I spent some valuable time by myself, sans Monster, on Saturday. After a family trip to the market for groceries I took a long walk in the cold, grabbed a pedicure, and did some junk store shopping. And of course I HAD to let my toes dry for an hour while I chatted and read at the nail shoppe. Sunday we ate blintzes for brunch and walked the dogs. It doesn't get any more domestic than that.

Now to end my day on the perfect note I think I will curl up with my book and a cup of hot cocoa with mini marshmallows.

Here It Is!

After five and a half years I finally finished this quilt. At least every few months in those five years my husband has asked when I was going to finish the quilt, "he likes". Well, Hubby, Here It Is!

I had the design for this quilt in my head ever since I read the Martha Stewart article about Denyse Schmidt, shortly after I started quilting. Out at the store one night I found the perfect fabric, and it sat for nearly a year. The first winter after we got married we lived in a tiny, tiny house. I wanted to get this quilt done for our tiny bed, in our tiny room. I got the top pieced, my sister-in-law's sister brought the backing fabric from an on-line order from Big Horn for me (back when the Canadian dollar was horrible), and then it sat. We moved, and it sat. I made probably ten quilts in the subsequent five years, and still it sat. Finally, this summer I took advantage of one of Hubby's rare days off. The Monster was off the boob so I rented space at the local shop and got it basted. It was quilted during more than a few naps, and I finished the binding last week.

And Hubby's reaction? Rather anti-climactic. He was just happy to have some extra warmth on a chilly night.