

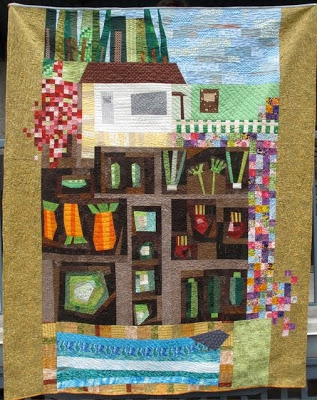
Roots
May 2010
Approximately Twin Sized
100% cotton, original design
Here it is, aptly named, my Dad's quilt: Roots. Roots for the garden growth that sustained my Baba and Dido as well as our family. Roots for the foundation of where we come from. Roots to acknowledge such an important part of our family legacy. Roots to impart growth the the family as the next generations arrive and thrive.
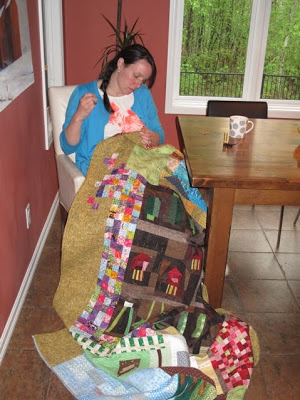
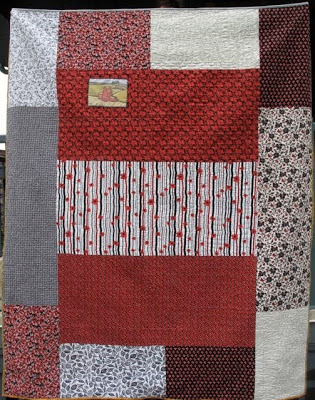
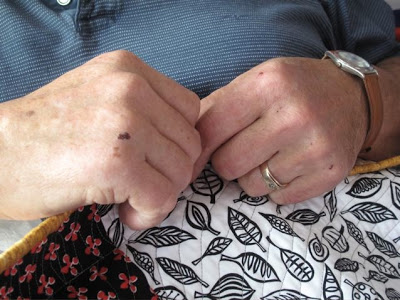
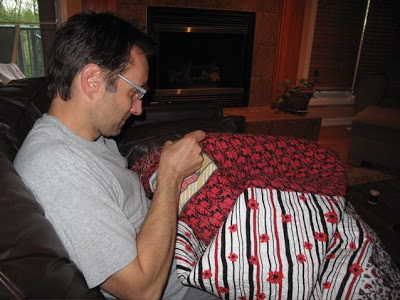 This was a true family project. My sister and sister-in-law and I pieced together the top, with a few helpful hands from my daughters and husband. Hubby and my brother watched the 6 kids so we could get that done, while my Mom kept the secret and took care of my sister's dog when she was away to get the top done. Then my brother and sister-in-law found the fabric for the back (so much Mark Lipinksi Krakow - how appropriate). They, with their kids, basted the quilt. I quilted it, again with input from Hubby and help from the girls. Here are my brother and I putting the finishing touches on the quilt. Me, the binding, and he, the label. (This picture entertains me so, the surgeon doing hand stitching.)
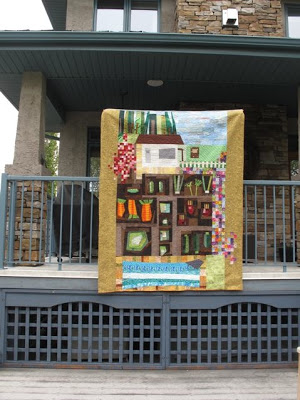 Here is a broader view of the quilt, off the back deck of my brother's house. A house my Dad built for them. My Dad is a builder, always has been. He is one of those guys that doesn't know how not to work, so he is always happy to be putting something together. Of late, he's been spending some time with crochet hooks instead of hammer and nail.
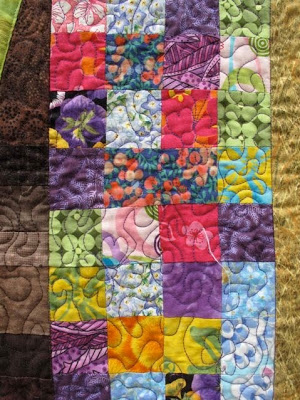 Now, some details. This is part of the flower patch. A 2 inch checkerboard, with free motion quilting. See those little flowers interspersed here and there?
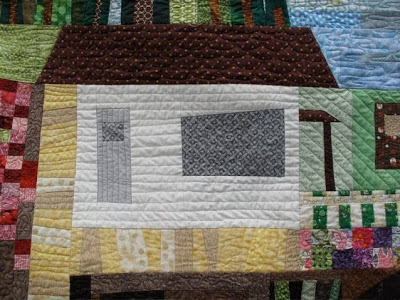 This is the house. Baba and Dido's house was this tiny house that my Dad himself help build, probably back in high school. It was probably less than 500 square feet. It consisted of a sitting room, an eat-in kitchen, one bedroom plus another sleeping area, and an entry/pantry. At some point my Dad added on another room, creating two bedrooms in total. And I still remember, back in the 80s, when the bathroom, and running water, was added.
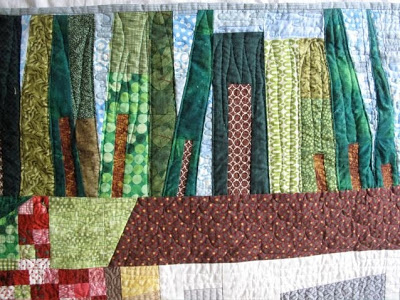
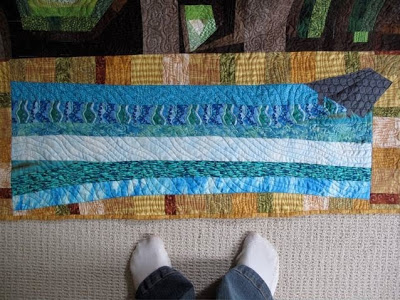 This Toe-Catcher photo shows the slough/dug out at the front of the property, complete with the little dock where we stood to gather water for the garden. Or where we caught frogs to freak out my Mom.
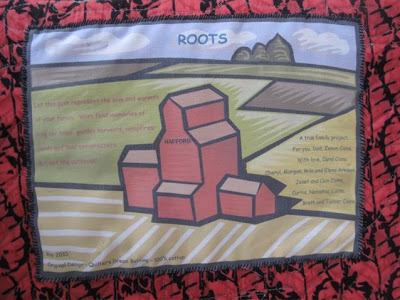 This is the label for the quilt. My brother is a label star. He found the grain elevator image. It was perfect because both my parents grew up across the street from the grain elevator. He played with the image, adding the town name and the necessary details about the quilt.
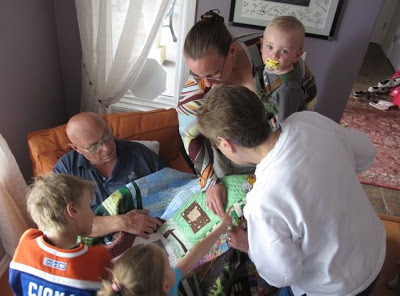
 And here we are sharing the quilt with Dad, at a family brunch. It was presented with little fuss, but we all spent a lot time pouring over the details. I didn't see any tears from my Dad, but that isn't surprising. He's a gruff, tough man. But he knew what it was right away and definitely appreciated it. I only hope that it keeps him warm for all his upcoming naps on the couch.

This was a true family project. My sister and sister-in-law and I pieced together the top, with a few helpful hands from my daughters and husband. Hubby and my brother watched the 6 kids so we could get that done, while my Mom kept the secret and took care of my sister's dog when she was away to get the top done. Then my brother and sister-in-law found the fabric for the back (so much Mark Lipinksi Krakow - how appropriate). They, with their kids, basted the quilt. I quilted it, again with input from Hubby and help from the girls. Here are my brother and I putting the finishing touches on the quilt. Me, the binding, and he, the label. (This picture entertains me so, the surgeon doing hand stitching.)Here is a broader view of the quilt, off the back deck of my brother's house. A house my Dad built for them. My Dad is a builder, always has been. He is one of those guys that doesn't know how not to work, so he is always happy to be putting something together. Of late, he's been spending some time with crochet hooks instead of hammer and nail. Now, some details. This is part of the flower patch. A 2 inch checkerboard, with free motion quilting. See those little flowers interspersed here and there?This is the house. Baba and Dido's house was this tiny house that my Dad himself help build, probably back in high school. It was probably less than 500 square feet. It consisted of a sitting room, an eat-in kitchen, one bedroom plus another sleeping area, and an entry/pantry. At some point my Dad added on another room, creating two bedrooms in total. And I still remember, back in the 80s, when the bathroom, and running water, was added.It was quite a shock to the system to visit the house - we were suburban kids. I hated using the outhouse, and our arrival meant sleeping in stuffy beds, listening to the drinking and yelling of Ukrainian visits. Even to this day, it shows me what one can do in a small house.
On two sides of the house was a boardwalk made of wood. A small forest was on the back side, and a small lawn on the front. Otherwise the house was surrounded by garden.
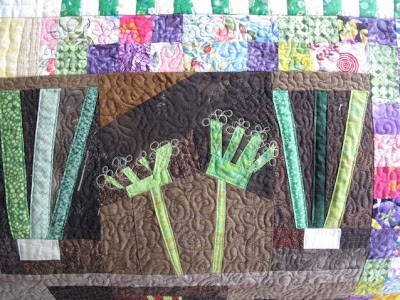 No Ukrainian garden would be complete without dill and onions! Each of the veggies in the garden was quilted individually, with some brown, tight stipple in between. In fact, looking at these close-ups, you will see that each section was quilted individually. I would say I used at least 20 different threads throughout the quilt. Time-consuming and frustrating at times, but worth it.
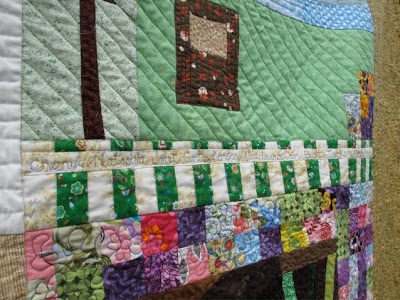
The white picket fence that led up to the house was a perfect spot to really personalize the quilt. I practiced my cursive writing and put the family's names on the fence. This frames the yard with the picnic table, complete with a box of drying onions on it.
This Toe-Catcher photo shows the slough/dug out at the front of the property, complete with the little dock where we stood to gather water for the garden. Or where we caught frogs to freak out my Mom.This is the label for the quilt. My brother is a label star. He found the grain elevator image. It was perfect because both my parents grew up across the street from the grain elevator. He played with the image, adding the town name and the necessary details about the quilt.And here we are sharing the quilt with Dad, at a family brunch. It was presented with little fuss, but we all spent a lot time pouring over the details. I didn't see any tears from my Dad, but that isn't surprising. He's a gruff, tough man. But he knew what it was right away and definitely appreciated it. I only hope that it keeps him warm for all his upcoming naps on the couch.(This quilt shared as part of the Spring 2010 Blogger's Quilt Festival.)


