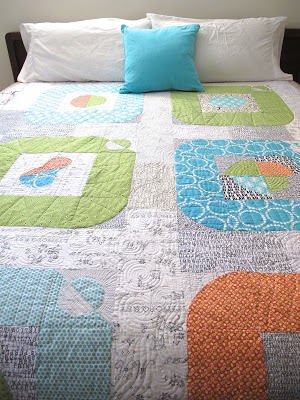
"quilts"

Big's Quilt - Finished and Well-Loved


Big's Quilt
60'' by 54''

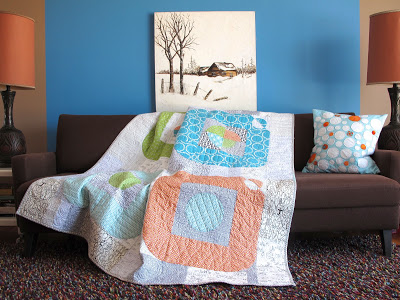
With very little fanfare in the house  - more like a giant smile and a tiny squeal - I finished the quilt for my Evil Genius. It came out of the washing machine, all toasty, and was immediately put to use for cuddles, then fort building, then as a veil, then baby wrapping, then sleep. Well loved right from the start.

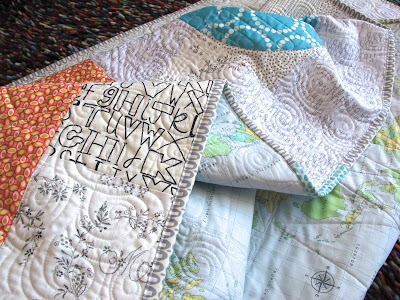
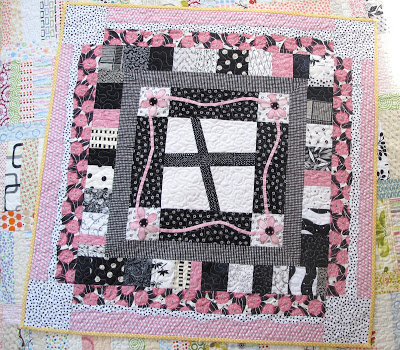
It's such a crazy mishmash of fabrics, all picked by her. She laid it out, then helped me sew it together by sitting on my lap and guiding pieces through the machine. Well, some pieces. Then she got bored and went back to watching Coraline. I was allowed to baste it without her, late at night, so her baby brother wouldn't get in the way. Then she picked thread for quilting - 6 different ones. No amount of convincing would lessen that amount so I accepted the challenge. Including that the front and back be different! (Oh tension woes! Don't look closely at the quilting.) She even drew me a sketch of the squiggly line she wanted for the quilting. That girl knows how to draw a meander. Finally, she picked her binding fabrics, a blend of purple with a bit of pink, of course. And she even sat with me for quite a bit as I hand stitched the binding down, pulling the needle.

Even I thought I was crazy when we started this project. Here is what I learned:

 - Let it evolve. If you get stuck on things having to get done only you will get frustrated. She could focus on the task, but making a quilt is a big project to a kid so it needs to happen at their pace.

 - Move fast. It was a lot of stop/go. When it was my turn to finish a task she was on me to get it done and get it done now.

 - Be okay if she loses interest. It sat for over a month on my design wall and I was a little bit sad that she'd lost interest. But when she came back to it her excitement had grown.

 - Let it go. Like most of us, the excitement was in the fabric selection and layout. I couldn't take that away from her so I let go of my conventions and perceptions. Would I have chosen that red fabric? Nope, but she loves them.

 - Limit the selection for backing fabric. I gave her stack of fabric I have in big yardage and told her to pick just one. Phew.

 - Do not use 6 different threads from 3 different manufacturers for the quilting. Just don't do it.

 - Be prepared for a blah reaction. Perhaps I'd built up her excitement for the quilt in my head, but a smile and just a tiny squeal were not what I expected when I handed her a warm quilt. But since I finished it a few weeks ago I see that it gets dragged around like her blankies, she wants it at night, and she plays with it. The quilt is not getting ignored and she loves to show it off. So yeah, I'd say she is indeed excited.

 - When you let her direct the photo shoot take, then delete, the photos where she drapes herself over the quilt in a way that no almost 5 year old should be seen. Don't tell her.

 - Smile a lot when you notice her outfits match her quilt.


Announcing My Craftsy Class - Inset and Applique Circles by Machine

Do you remember my necklace inspired quilt? It is now finished and I can share it with you. I can also share with you the rather exciting reason I was making the quilt. 

I am thrilled to announce that I am now a Craftsy instructor! Have you heard about Craftsy? The fastest growing craft community on-line is full of courses from top instructors on everything from cake decorating to knitting, from costumes to quilting. My class - Inset and Applique Circles by Machine - is now available. Sign up now with a 25% discount!

The Craftsy platform is quite cool. Once you purchase the class it is available to you at any time forever. The HD video quality is great. They've filmed so many close-ups so you don't miss a thing. And you can take the classes from the comfort of your home - no lugging a machine across town or missing out because you can't find a local store or babysitter.

One of the best parts about a Craftsy class is the interactive forum. You can ask instructors questions, participate in class discussions with other students, and share your projects. I will be there the whole time, encouraging and helping you along the way. Stuck on a particular technique? You can ask for help and share the problem and we'll make sure you get it sorted.

And that necklace inspired quilt? It is a free pattern that comes with the class! Incorporating all the techniques learned in the class you can make this bold sampler. I've made it here with prints in colours pulled from the necklace itself and a mix of text prints for the background.

I do hope you'll join me over at Craftsy!


Austin Circle Sampler
76' by 96''


I've got more that I want to share about my Craftsy experience. Look for that in the coming weeks. It has been an incredible experience so far. Now that the class  - Inset and Applique Circles by Machine - is available I'm looking forward to seeing circles pop up everywhere!

Inset & Applique Circles by Machine

How Do You Finish Your Quilt Bindings?


Okay, I've got a question about binding. In between finishing up my daughter's quilt and some surfing I've been thinking about binding a lot the past few days. Plus, it was a nice distraction from the real world.

Machine Binding
- Can finish on the front or the back.
- Very fast.
- Clean look, but with a very visible seam.
- Great for quilts that live primarily for trunk shows.

Hand binding
- I actually enjoy hand finishing.
- It feels like a very personal touch on a quilt.
- More or less no seam line on a finished edge.
- It does take some time.


Personally, I've tried a few methods for finishing binding. My preference is for hand-finishing, but I've got nothing against a completely machine bound quilt. I do machine binding on quilts that are not gifts - class samples, trunk show quilts, even some book quilts. Hey, when faced with a looming deadline a girl does what a girl has to do!

Let me be clear. I do not feel guilty about machine binding, nor do I judge anyone's method for binding.


One thing I have noticed, however, is that for those who hand finish, stitches seem really far apart. I see these perfectly flat binding edges that are stitched down. It's one thing to not see any stitches because the quilter is just that good. And there are many, many techniques for hand stitching a binding. But people, you need to put a stitch closer than every half inch! When we quilt we call those big stitches in the quilting itself "toe catchers". On a binding I would call that a disaster. That is the place a quilt wears the most and having large, maybe loose stitches is asking for a finger to pull it out at the first chance it gets caught.

I'm perfectly willing to admit that I'm rather anal about my own hand finishing  - having my stitches come in between 1/4'' and 1/8'' apart. So yes, this takes me some time. But I've also never had a binding come loose. This is my most common method for finishing, but I've used the ladder stitch and been pleased with the results. And I recently tried switching up my needle in placement - through the binding instead of the quilt back and liked the look and stability of that.


What about you? How do you finish your bindings?

Girlie Quilt


Girlie
38'' by 38''

Just a simple, pretty, girlie quilt.

It started as an improv block, waiting for a home and some inspiration. I sent it off to a guild member for the next go at a round robin. She asked if I wanted to keep it all black and white or if I wanted any specific colour. I gave her free reign, waiting for the surprise at the end. Once everyone else did their thing. Can't say I imagined baby pink!


When it came back to me I decided I couldn't let it linger  - I'm all about finishing these days! I went back and forth on some options and this is where I landed. I basted it and then it sat... One quiet Saturday with no kids in the house it got quilted. A basic stipple in Aurifil 50wt in white took me an hour. So, why did I wait so long?


But now it is done, bound in a sunny yellow for contrast and to coordinate with the backing. It sits packed by the door, ready to send off to a cousin and his adorable baby girl.

Not before my baby girl snuck in for a snuggle and photo op!