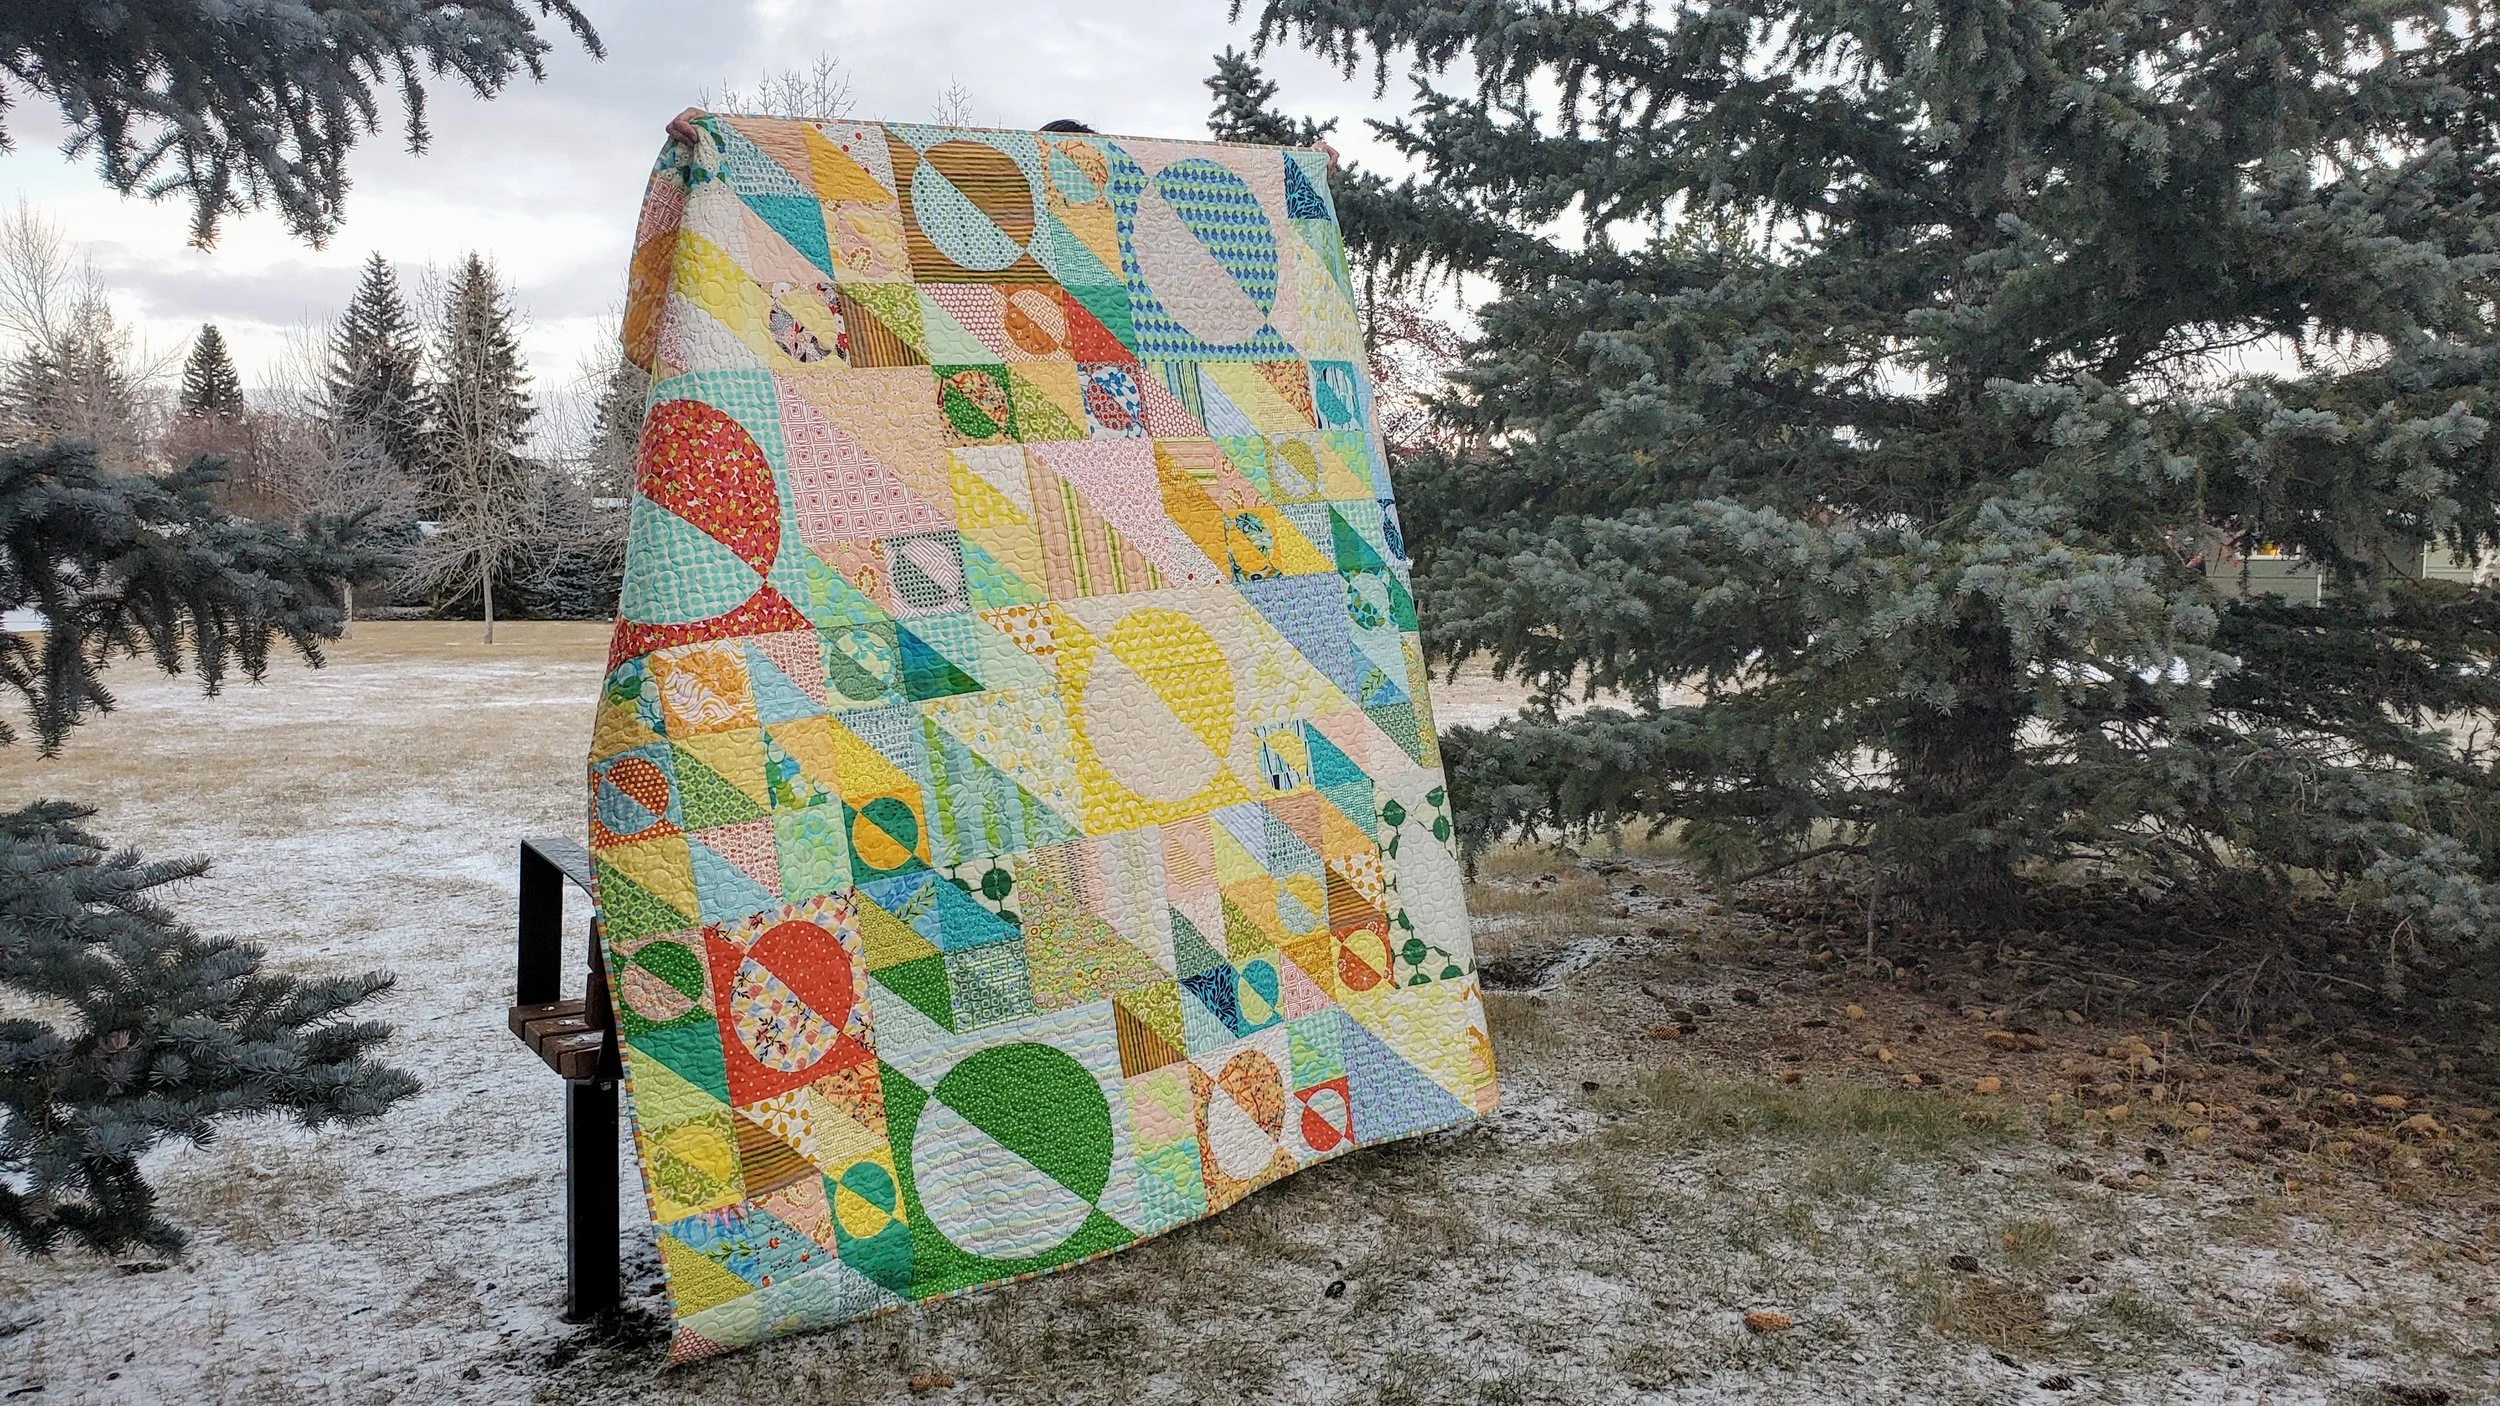
"craftsy"

Elodie - A Bold Quilt of Half Square Triangles and Circles

Elodie

84” x 84”

Elodie is a lady of optimism. Sure, she’s a realist, knowing that work is always required in life and love, but she chooses to seek the sunshine in every moment. It isn’t easy and, frankly, it doesn’t always work. Elodie wasn’t always this way. Not so long ago she stayed under the covers, under the quilts, as much as possible. The world felt like a lot too much. It all changed the day the sunbeam hit her. It had been gloomy outside and in. Like most gloomy people Elodie lay napping fitfully. Then the sun broke through the clouds and hit her square in the face. Without thinking about it she breathed, nestled, and relaxed like a cat curling up in the sunbeam. Her nap became restful and when she woke the clouds had broken. Elodie could see the sun again. She vowed then and there to seek it out. Tropical vacations or moving to the South of France not being an option, she looked for ways to bring the sunshine to where she was as much of the time. Being optimistic doesn’t automatically make the sadness go away, but stepping into the light is the right step for Elodie.

This particular quilt nearly did not make it. It started from a random block, a sample made for a class. That block ended up in the donate pile that never got donated. A random rediscovery and the right timing turned that one block into a quilt top.

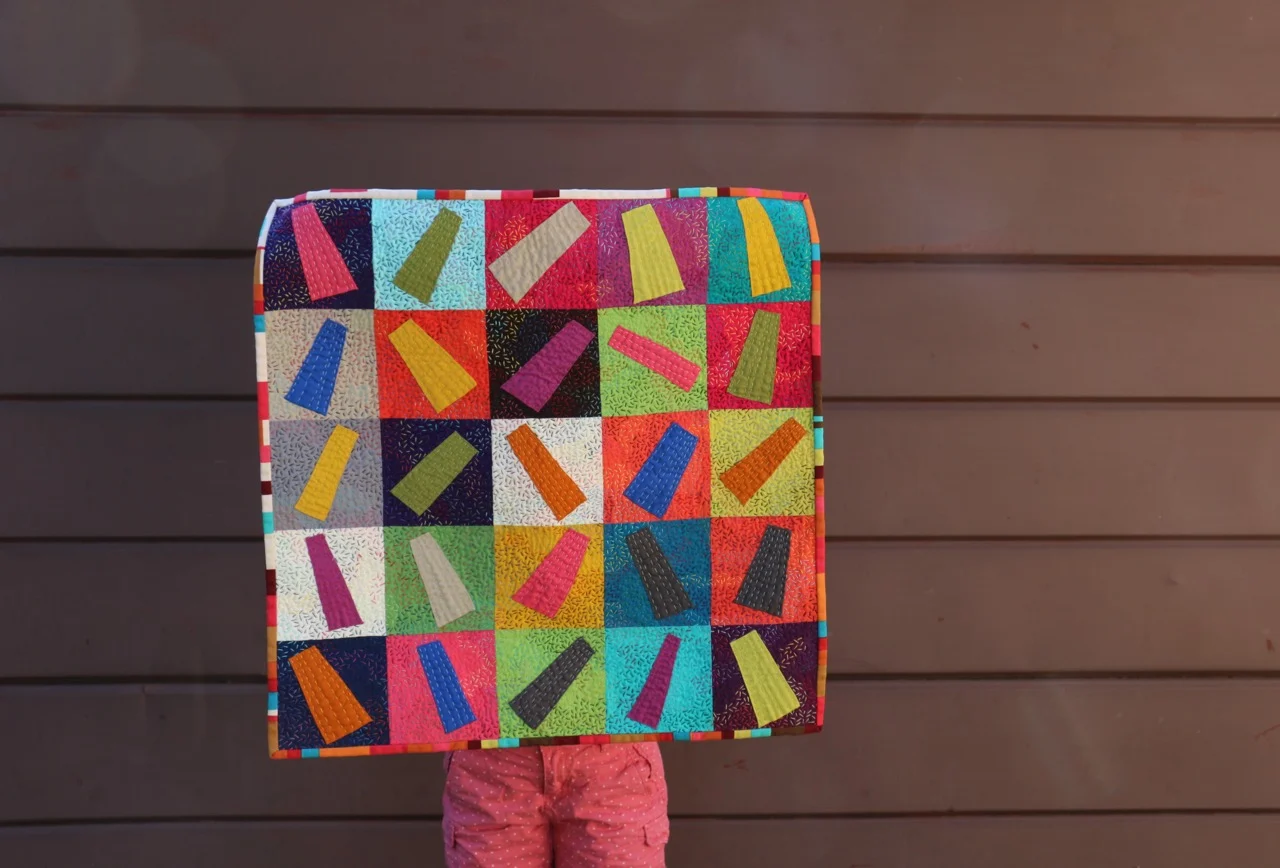
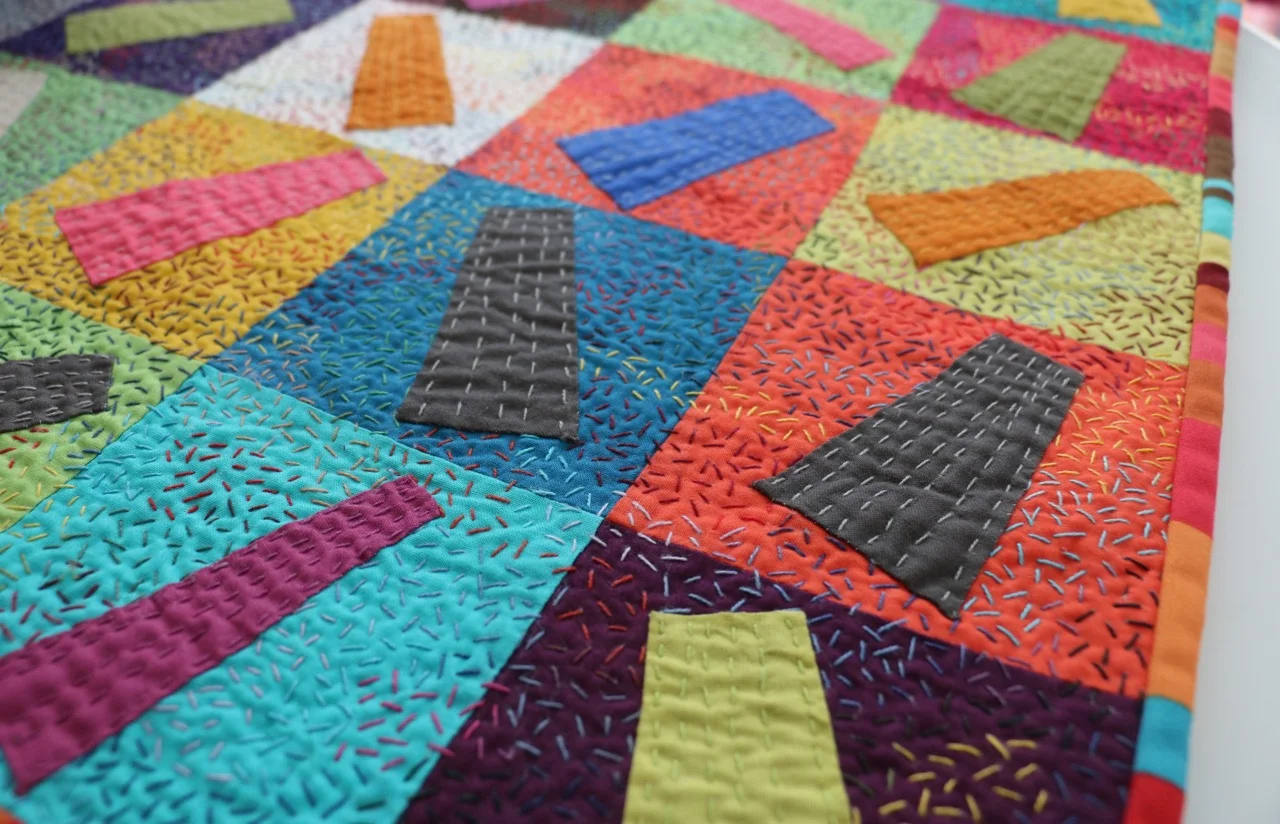
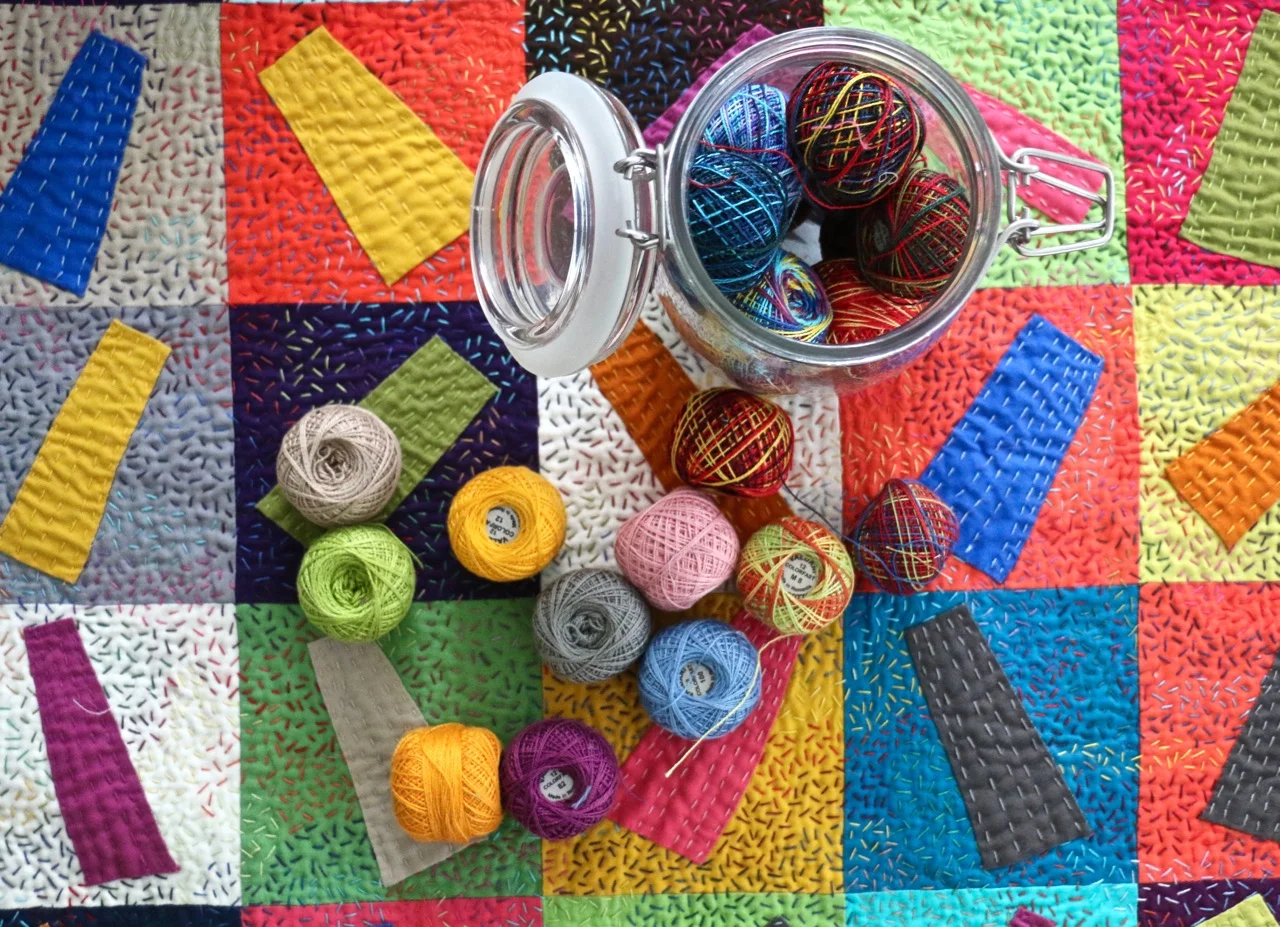
To make the blocks I shopped first in my scraps, using any piece in the colour story that was big enough. After that I went shopping in my stash. That makes this quilt both scraps and scrappy. (Ask me the difference in my trunk show Scraps Vs. Scrappy.)

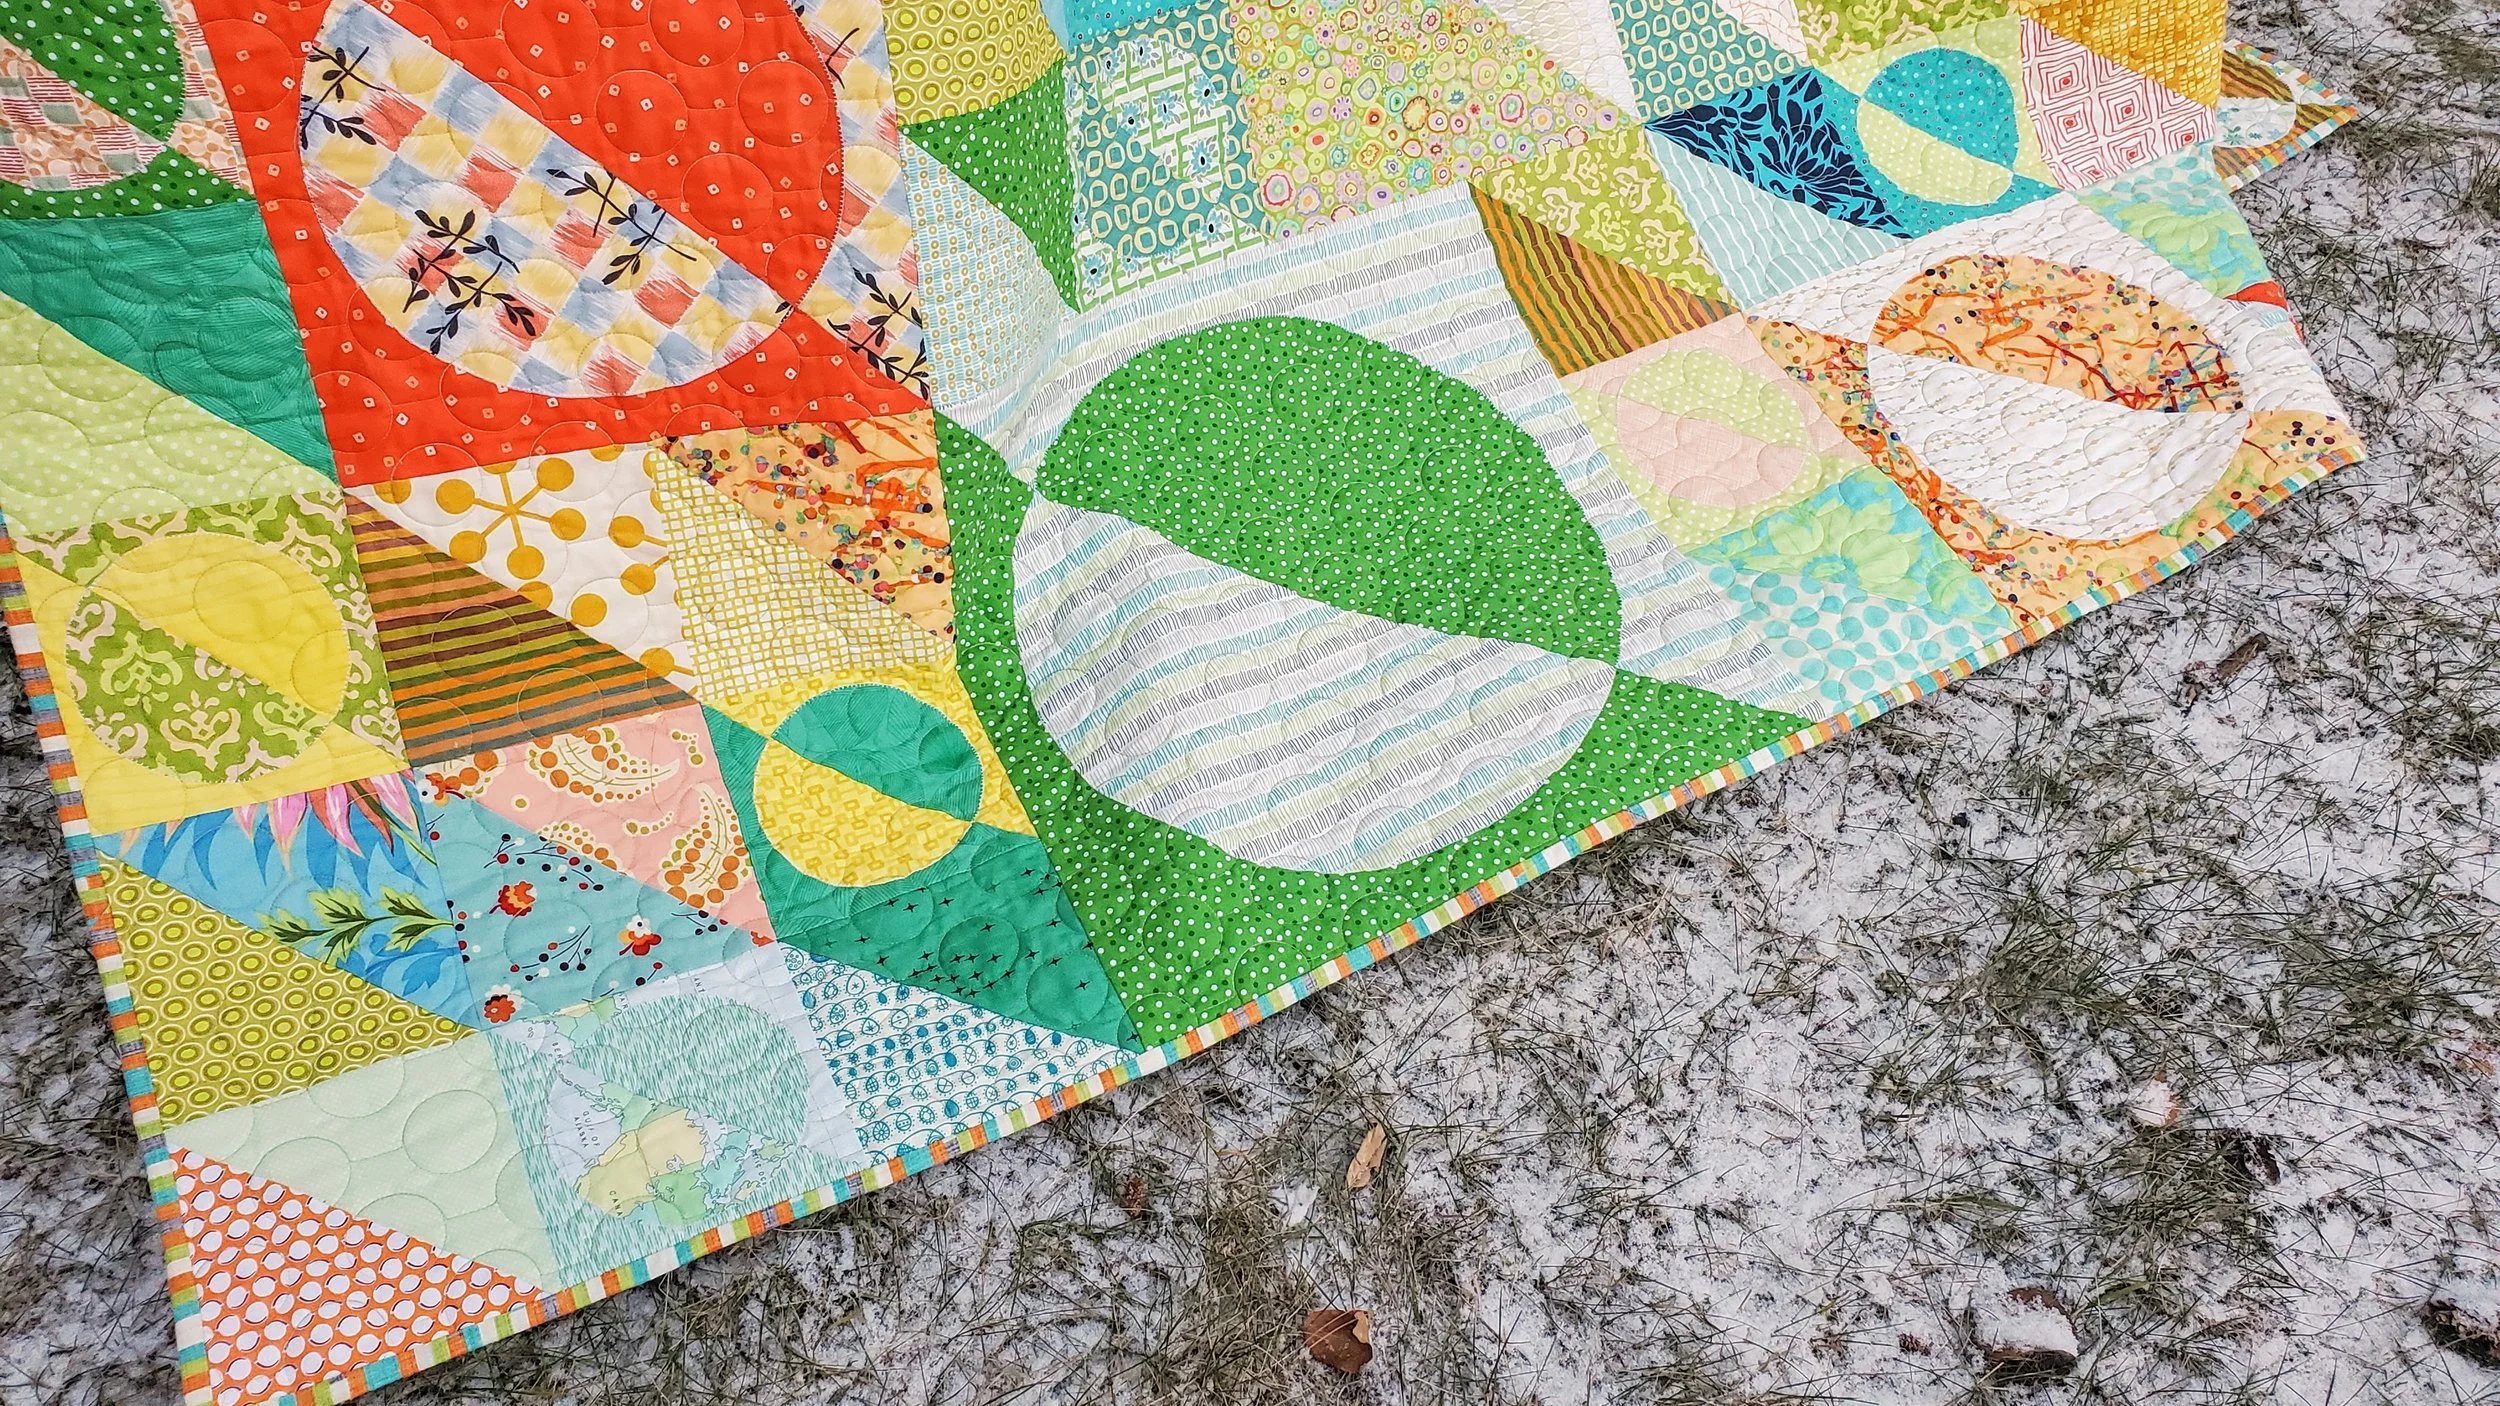
It took me quite a bit to take the blocks - some plain half square triangles and some of those turned into circles - and find a layout that felt cohesive. I made the blocks in a colour story or orange, yellow, green and blue in 3 different sizes": 6” 12: and 18”. Some have high contrast, some have low contrast. When it came time to get them all on the design wall the challenge was evident. I tried laying it out my value, by colour, by size, and many options in between. In the end I played with colour more than value (against my usual advice) and keeping a strong diagonal component in the design. I’m pretty happy with how it ended up. And the original block found a home in it.

The quilted was completed by Phillipa Gelinas. I chose this great circle panto to compliment the design of the quilt top. Elodie deserved a fast finish. Rather, she deserved to be welcomed and used quickly. Deserved/needed.

My original plan was hot pink binding and that was before I picked out the backing fabric! When it came down to it though it didn’t look right. We know I like a contrasting binding but it just wasn’t the right thing to do here. I found this fun strip in my stash that ended up being just perfect. Like it was meant to be. Perhaps like that sunbeam?

Why Not? - Improv Applique with Boundless Fabrics and Big Stitch Quilting

Improv Applique with Boundless Fabrics

Why Not?

22 1/2'' x 22 1/2''

An experiment. A lot of play. Something worth trying.

That's really how I started out on this quilt. I had a bundle of Craftsy's Boundless Fabrics and an idea in my head. That idea quickly became an obsession. Then another obsession with the hand quilting. Ask my family. "Still working on that quilt?" was a common question this past summer.

Boundless Fabrics from Craftsy

Now the quilt, with a technique tutorial, is in the latest issue of Modern Patchwork. The article includes a primer on how I do applique and an exploration of play. And bonus, it includes technique for the hand quilting. 

This won't be the last time I do improv applique or hand quilt. A beast was unleashed with this quilt!

Valdani Threads and Boundless Fabrics

For the quilting I used many variegated threads from Valdani. They are gorgeous hand dyed Perle cotton that I picked up at my local quilt shop. I could have bought all the colours, I settled for all the variegated and the coordinating colours for the wedges. I definitely need to do more hand quilting because that was quite the obsessive investment! Pretty sure that won't be a problem.

To learn more about what I did, check out the Winter 2017 Modern Patchwork. Oh, and check out that binding! A perfect discovery in my stash of an old Anna Maria Horner print, the one that looked like a stack of books, framed the finished piece. 

Stocking Stuffers for Quilters

10 Stocking Stuffers for Quilters

Tis the season! I've put together a list of some of my favourite small quilting items. Print off the list for the other shoppers in your family or for yourself. Whether you celebrate Christmas or not these are great, inexpensive treats for making quilting better, more fun, and easier.

  • Kwik Klip - A very handy tool when pin basting quilts. Yes, you could use an old teaspoon, but this is easier.
  • Sewing Machine Oil - It isn't something we often buy for ourselves but it is an integral part of machine maintenance. Make sure to buy the right one for your machine.
  • Seam roller - Instead of finger pressing or getting up that much more, buy a seam roller. Violet Craft is now selling them (a branded version of the one I've always used.) Perfect for improv piecing as well as both paper piecing (foundation and English). I couldn't sew without mine.
  • Hera marker - Personally, I am not a fan of most marking pencils when quilting. A Hera Marker leaves a crease rather than a mark. With good lighting it is easy to follow.
  • Chalk Pencil - All that being said about marking, this recent discovery made me very happy. I've used chalk to mark before but I really like this handy Bohin chalk pencil. A fine line. Downside, doesn't work on white.
  • Fabric Glue - Good old Elmer's Glue works great for glue basting and more, but there are good fabric glues out there that are even better. I like Liquid Stitch and Unique Stitch. While you are at it, pick up some of these glue tips. They are perfect!
  • Rotary Cutter Blades - A quilter can never have too many! Even though we all wait too long to change the blade. Make sure to pick up the right size and brand for the rotary cutter in the sewing room.
  • Small Olfa Scissors - While you can often get pretty little scissors at the check out counter in nearly any sewing store, spend a few more bucks to get these Olfa Precision Scissors. They cut fabric well but also work as snips. Perfect for handwork. And bonus, they seem to pass through TSA screening without any problem because the blade is less than 3'' (but not in Australia, ask me how I know).
  • Needle Threader - Anyone who does handwork knows what a pain it can be to thread and keep needles threading. They also know how quickly we go through needle threaders because the main mechanism is thing wire. You can never have too many around. This Clover one is my favourite
  • Thread Conditioner - I am a recent convert to this, after finishing two major handwork projects. Boy or boy, does it make life easier! Thread Heaven is the one I am using currently.
  • Enamel Pins - The pins are all the rage now, no matter the hobby or inclination. Check out the Sewist (Abby Glassenberg), No Regrets (Colette Patterns) and this Sewing Machine (City of Industry.
  • Gift certificate to an online class - this really takes up no room in the stocking! You can gift classes on Craftsy and buy them Creative Live. Until the 16th classes on Creative Live are 50% off. Then 40% until the 19th, and so on until Christmas. 

Shockingly, fabric isn't on this list. I know! But unless you know the recipient's preferences well it is best to skip buying them fabric. They may not like charm packs or that particular fabric designer. When in doubt, pick a gift certificate to their favourite local shop. In fact, try to pick up as much as possible in your local quilt shop so they can have a merry holiday season too.

Please note that I am not affiliated with any of the brands or products listed above, with the exception of the Crafty and Creative Live classes. Those are affiliate links. 

Improv Curves Within A Daily Practice

Improv Curves in Quilting, Top

My morning practice, is paying off in spades. It helps me focus and manage my emotions for the day. It acts in a very similar way to a meditation practice by centering me and filtering the noise. And on top of that - I finish quilt tops!

These blocks started as samples for teaching a class. One day I grabbed a stack of solids and just used them. Well then I really liked the accidental combination so I did some editing and adding. Over the course of a few classes more blocks were made. When I was pulling blocks for my daily practice I came across these. Perfect! It was quick to get the blocks done, it took much longer to figure out the best layout.

Quarter circles, like half square triangles, give you many, many, many layout options. Because I'd gone with an only somewhat controlled colour scheme I was trying layouts to give me order more than anything. Random is awesome, but sometimes it doesn't give you a good design. Because I'd included many colours, in both lights and darks, there was no clear cut way to get a successful design. For me, however, that's the fun. I LOVE the challenge of finding a good design.

If you follow me on Instagram you probably saw the many iterations for this quilt top. I wavered, I played, I experimented, I wavered some more. Finally I found my order by focusing on colour and the interconnecting of the one print in the quilt. This design may not be everyone's favourite, but I am in love.  

It's definitely going to be a fun one to quilt!

If you would like to know more about Improv Curves look for a class of mine near you (or book one) or check out my Inset and Applique Circles by Machine class on Craftsy, we cover it in one of the lessons.